Как написать сервер на python
Для создания сервера на языке Python, как и для клиента, также используется класс socket , однако общая работа будет несколько отличаться от работы с сокетом клиента. Рассмотрим определение и работу с сокетом сервера поэтапно.
Привязка сервера
Сервер прослушивает входящие подключения, некоторым образом обрабатывает их и отправляет ответ. Чтобы сервер начал свою работу, вначале нам надо определить для него адрес, по которому он будет прослушивать подключения. Для этого применяется метод bind()
Данный метод принимает адрес, по которому будет запущен сервер. По умолчанию адрес представляет кортеж из двух элементов:
Первый элемент — хост в виде строки. Это может быть, например, IP-адрес в виде «127.0.0.1» или название локального хоста. Второй параметр — числовой номер порта. Порт представляет 2-х байтное значение от 0 до 65535. Поскольку по одному и то же адресу (на одной и той же машине) может быть запущено несколько различных сетевых приложений, то порт позволяет разграничить эти приложения. Например:
Здесь сервер будет запускаться на порту 12345. Следует учитывать, что не все порты могут быть свободны. Но, как правило, занятых портов не так много.
В качестве адреса используем имя текущего хоста. Для его получения применяется функция socket.gethostname() (обычно это имя текущего компьютера).
Прослушивание подключений
После привязки сервера его надо запустить на прослушивание подключений. Для этого применяется метод listen()
Он принимает параметр backlog — максимальное количество входящих подключений в очереди, разрешенное для сокета. То есть, когда будут покдлючаться клиенты, они будут попадать в очередь и ждать, пока сервер не обработает текущего клиента. Если в очереди уже есть указанное количество клиентов, ожидающих обработки сервером, то все новые клиенты отклоняются. Например:
Получение и обработка клиента
Для получения входящих подключений применяется метод accept() . Этот метод возращает кортеж из двух элементов
Первый элемент — conn представляет еще один объект socket, через который сервер взаимодействует с клиентом. Второй элемент — address — адрес подключившегося клиента. Стоит отметить, что после завершения взаимодействия с клиентом сокет conn надо закрыть методом close()
Используя первый элемент кортежа — conn можно отправлять клиенту сообщения или наоборот получать данные. Для получения данных у сокета применяется метод socket.recv()
В качестве обязательного параметра он принимает максимальный размер буфера в байтах, которые могут быть получены за раз от другого сокета. Возвращаемое значение — набор байтов, полученых от другого сокета.
Для отправки данных применяется метод socket.send() , который в качестве параметра получает набор отправляемых данных.
Теперь посмотрим все на примере. Пусть в файле server.py будет определен сервер со следующим кодом:
Здесь сервер принимает клиента, выводит информацию о его подключении и отправляет клиенту в ответ строку «Hello Client!».
А в файле client.py определим следующий код клиента:
Поскольку у нас сервер и клиент будут запускать на одном и том же комптьютере, то для определения адреса сервера для подключения применяется функция socket.gethostname() и порт 12345 — так же как и в коде сервера. После соединения с сервером получаем от него данные и выводим на консоль.
Сначала запустим код сервера. А затем запустим код клиента. В результате сервер примет подключение, выведет информацию о нем на консоль и отправит клиенту сообщение:
В частности, здесь видим, что сервер и клиент запущены по адресу 192.168.0.102, причем клиент использует порт 61824.
А клиент получит от сервера сообщение и выведет его на консоль:
Обработка множества клиентов
В данном случае сервер обслуживает одного клиента и прекращает работу. Если мы хотим, чтобы сервер обрабатывал множество клиентов, то мы можем использовать бесконечный цикл:
В данном случае для примера с помощью встроенного модуля datetime и функции datetime.now().strftime() получаем текущее время в виде строки, которая затем отправляется клиенту. В итоге при запросе клиент будет получать текущее время.
Двунаправленная связь
В примерах выше связь была однонаправленная — сервер отправлял данные, а клиент получал их. Рассмотрим простейшую двунаправленную связь, когда и клиент и сервер и отправляют, и получают данные. Пусть сервер получает от клиента некоторую строку, инвертирует ее и отправляет обратно клиенту:
А клиент пусть определяет код для ввода строки с консоли и ее отправки на сервер:
socketserver — A framework for network servers
The socketserver module simplifies the task of writing network servers.
Availability : not Emscripten, not WASI.
This module does not work or is not available on WebAssembly platforms wasm32-emscripten and wasm32-wasi . See WebAssembly platforms for more information.
There are four basic concrete server classes:
class socketserver. TCPServer ( server_address , RequestHandlerClass , bind_and_activate = True ) 
This uses the internet TCP protocol, which provides for continuous streams of data between the client and server. If bind_and_activate is true, the constructor automatically attempts to invoke server_bind() and server_activate() . The other parameters are passed to the BaseServer base class.
class socketserver. UDPServer ( server_address , RequestHandlerClass , bind_and_activate = True ) 
This uses datagrams, which are discrete packets of information that may arrive out of order or be lost while in transit. The parameters are the same as for TCPServer .
class socketserver. UnixStreamServer ( server_address , RequestHandlerClass , bind_and_activate = True ) ¶ class socketserver. UnixDatagramServer ( server_address , RequestHandlerClass , bind_and_activate = True ) 
These more infrequently used classes are similar to the TCP and UDP classes, but use Unix domain sockets; they’re not available on non-Unix platforms. The parameters are the same as for TCPServer .
These four classes process requests synchronously; each request must be completed before the next request can be started. This isn’t suitable if each request takes a long time to complete, because it requires a lot of computation, or because it returns a lot of data which the client is slow to process. The solution is to create a separate process or thread to handle each request; the ForkingMixIn and ThreadingMixIn mix-in classes can be used to support asynchronous behaviour.
Creating a server requires several steps. First, you must create a request handler class by subclassing the BaseRequestHandler class and overriding its handle() method; this method will process incoming requests. Second, you must instantiate one of the server classes, passing it the server’s address and the request handler class. It is recommended to use the server in a with statement. Then call the handle_request() or serve_forever() method of the server object to process one or many requests. Finally, call server_close() to close the socket (unless you used a with statement).
When inheriting from ThreadingMixIn for threaded connection behavior, you should explicitly declare how you want your threads to behave on an abrupt shutdown. The ThreadingMixIn class defines an attribute daemon_threads, which indicates whether or not the server should wait for thread termination. You should set the flag explicitly if you would like threads to behave autonomously; the default is False , meaning that Python will not exit until all threads created by ThreadingMixIn have exited.
Server classes have the same external methods and attributes, no matter what network protocol they use.
Server Creation Notes
There are five classes in an inheritance diagram, four of which represent synchronous servers of four types:
Note that UnixDatagramServer derives from UDPServer , not from UnixStreamServer — the only difference between an IP and a Unix server is the address family.
class socketserver. ForkingMixIn ¶ class socketserver. ThreadingMixIn 
Forking and threading versions of each type of server can be created using these mix-in classes. For instance, ThreadingUDPServer is created as follows:
The mix-in class comes first, since it overrides a method defined in UDPServer . Setting the various attributes also changes the behavior of the underlying server mechanism.
ForkingMixIn and the Forking classes mentioned below are only available on POSIX platforms that support fork() .
socketserver.ForkingMixIn.server_close() waits until all child processes complete, except if socketserver.ForkingMixIn.block_on_close attribute is false.
socketserver.ThreadingMixIn.server_close() waits until all non-daemon threads complete, except if socketserver.ThreadingMixIn.block_on_close attribute is false. Use daemonic threads by setting ThreadingMixIn.daemon_threads to True to not wait until threads complete.
Changed in version 3.7: socketserver.ForkingMixIn.server_close() and socketserver.ThreadingMixIn.server_close() now waits until all child processes and non-daemonic threads complete. Add a new socketserver.ForkingMixIn.block_on_close class attribute to opt-in for the pre-3.7 behaviour.
These classes are pre-defined using the mix-in classes.
To implement a service, you must derive a class from BaseRequestHandler and redefine its handle() method. You can then run various versions of the service by combining one of the server classes with your request handler class. The request handler class must be different for datagram or stream services. This can be hidden by using the handler subclasses StreamRequestHandler or DatagramRequestHandler .
Of course, you still have to use your head! For instance, it makes no sense to use a forking server if the service contains state in memory that can be modified by different requests, since the modifications in the child process would never reach the initial state kept in the parent process and passed to each child. In this case, you can use a threading server, but you will probably have to use locks to protect the integrity of the shared data.
On the other hand, if you are building an HTTP server where all data is stored externally (for instance, in the file system), a synchronous class will essentially render the service “deaf” while one request is being handled – which may be for a very long time if a client is slow to receive all the data it has requested. Here a threading or forking server is appropriate.
In some cases, it may be appropriate to process part of a request synchronously, but to finish processing in a forked child depending on the request data. This can be implemented by using a synchronous server and doing an explicit fork in the request handler class handle() method.
Another approach to handling multiple simultaneous requests in an environment that supports neither threads nor fork() (or where these are too expensive or inappropriate for the service) is to maintain an explicit table of partially finished requests and to use selectors to decide which request to work on next (or whether to handle a new incoming request). This is particularly important for stream services where each client can potentially be connected for a long time (if threads or subprocesses cannot be used). See asyncore for another way to manage this.
Server Objects
This is the superclass of all Server objects in the module. It defines the interface, given below, but does not implement most of the methods, which is done in subclasses. The two parameters are stored in the respective server_address and RequestHandlerClass attributes.
Return an integer file descriptor for the socket on which the server is listening. This function is most commonly passed to selectors , to allow monitoring multiple servers in the same process.
Process a single request. This function calls the following methods in order: get_request() , verify_request() , and process_request() . If the user-provided handle() method of the handler class raises an exception, the server’s handle_error() method will be called. If no request is received within timeout seconds, handle_timeout() will be called and handle_request() will return.
serve_forever ( poll_interval = 0.5 ) 
Handle requests until an explicit shutdown() request. Poll for shutdown every poll_interval seconds. Ignores the timeout attribute. It also calls service_actions() , which may be used by a subclass or mixin to provide actions specific to a given service. For example, the ForkingMixIn class uses service_actions() to clean up zombie child processes.
Changed in version 3.3: Added service_actions call to the serve_forever method.
This is called in the serve_forever() loop. This method can be overridden by subclasses or mixin classes to perform actions specific to a given service, such as cleanup actions.
New in version 3.3.
Tell the serve_forever() loop to stop and wait until it does. shutdown() must be called while serve_forever() is running in a different thread otherwise it will deadlock.
Clean up the server. May be overridden.
The family of protocols to which the server’s socket belongs. Common examples are socket.AF_INET and socket.AF_UNIX .
The user-provided request handler class; an instance of this class is created for each request.
The address on which the server is listening. The format of addresses varies depending on the protocol family; see the documentation for the socket module for details. For internet protocols, this is a tuple containing a string giving the address, and an integer port number: (‘127.0.0.1’, 80) , for example.
The socket object on which the server will listen for incoming requests.
The server classes support the following class variables:
Whether the server will allow the reuse of an address. This defaults to False , and can be set in subclasses to change the policy.
The size of the request queue. If it takes a long time to process a single request, any requests that arrive while the server is busy are placed into a queue, up to request_queue_size requests. Once the queue is full, further requests from clients will get a “Connection denied” error. The default value is usually 5, but this can be overridden by subclasses.
The type of socket used by the server; socket.SOCK_STREAM and socket.SOCK_DGRAM are two common values.
Timeout duration, measured in seconds, or None if no timeout is desired. If handle_request() receives no incoming requests within the timeout period, the handle_timeout() method is called.
There are various server methods that can be overridden by subclasses of base server classes like TCPServer ; these methods aren’t useful to external users of the server object.
finish_request ( request , client_address ) 
Actually processes the request by instantiating RequestHandlerClass and calling its handle() method.
Must accept a request from the socket, and return a 2-tuple containing the new socket object to be used to communicate with the client, and the client’s address.
handle_error ( request , client_address ) 
This function is called if the handle() method of a RequestHandlerClass instance raises an exception. The default action is to print the traceback to standard error and continue handling further requests.
Changed in version 3.6: Now only called for exceptions derived from the Exception class.
This function is called when the timeout attribute has been set to a value other than None and the timeout period has passed with no requests being received. The default action for forking servers is to collect the status of any child processes that have exited, while in threading servers this method does nothing.
process_request ( request , client_address ) 
Calls finish_request() to create an instance of the RequestHandlerClass . If desired, this function can create a new process or thread to handle the request; the ForkingMixIn and ThreadingMixIn classes do this.
Called by the server’s constructor to activate the server. The default behavior for a TCP server just invokes listen() on the server’s socket. May be overridden.
Called by the server’s constructor to bind the socket to the desired address. May be overridden.
verify_request ( request , client_address ) 
Must return a Boolean value; if the value is True , the request will be processed, and if it’s False , the request will be denied. This function can be overridden to implement access controls for a server. The default implementation always returns True .
Changed in version 3.6: Support for the context manager protocol was added. Exiting the context manager is equivalent to calling server_close() .
Request Handler Objects
This is the superclass of all request handler objects. It defines the interface, given below. A concrete request handler subclass must define a new handle() method, and can override any of the other methods. A new instance of the subclass is created for each request.
Called before the handle() method to perform any initialization actions required. The default implementation does nothing.
This function must do all the work required to service a request. The default implementation does nothing. Several instance attributes are available to it; the request is available as self.request ; the client address as self.client_address ; and the server instance as self.server , in case it needs access to per-server information.
The type of self.request is different for datagram or stream services. For stream services, self.request is a socket object; for datagram services, self.request is a pair of string and socket.
Called after the handle() method to perform any clean-up actions required. The default implementation does nothing. If setup() raises an exception, this function will not be called.
class socketserver. StreamRequestHandler ¶ class socketserver. DatagramRequestHandler 
These BaseRequestHandler subclasses override the setup() and finish() methods, and provide self.rfile and self.wfile attributes. The self.rfile and self.wfile attributes can be read or written, respectively, to get the request data or return data to the client. The rfile attributes support the io.BufferedIOBase readable interface, and wfile attributes support the io.BufferedIOBase writable interface.
Changed in version 3.6: StreamRequestHandler.wfile also supports the io.BufferedIOBase writable interface.
Examples
socketserver.TCPServer Example
This is the server side:
An alternative request handler class that makes use of streams (file-like objects that simplify communication by providing the standard file interface):
The difference is that the readline() call in the second handler will call recv() multiple times until it encounters a newline character, while the single recv() call in the first handler will just return what has been sent from the client in one sendall() call.
Build Web Server From Scratch With Python.

If you are reading an article with this kind of title so maybe your are involved in the world of Web Development and have at least an idea of how web works, if not you can get an overview of it in this article .
The first thing that might come to your head is “Why to create a Web Server from scratch? What inventing the wheel again for?”
A famous thinker used to say: I hear and I forget; I see and I remember; I do and I understand.
I believe to become a better developer you must get a better understanding of the underlying software systems you use on a daily basis and that includes programming languages, compilers and interpreters, databases and operating systems, web servers and web frameworks. And, to get a better and deeper understanding of those systems you must re-build them from scratch, brick by brick, wall by wall.
I hope at this point you’re convinced that it’s a good idea to start re-building different software systems to learn how they work.
But, What is a Web Server then?
It is basically a networking server that sits on a physical server (yeah, a server on a server lol) and waits for a client to send a request. When it receives a request, it generates a response and sends it back to the client. The communication between a client and a server happens using HTTP protocol. A client can be your browser or any other software that speaks HTTP.
Before the client can send a HTTP request though, it first needs to establish a TCP connection with the Web server. Then it sends an HTTP request over the TCP connection to the server and waits for the server to send an HTTP response back.
To establish the TCP connection we will so-called sockets:
Here we made a socket instance and passed it two parameters. The first parameter is AF_INET and the second one is SOCK_STREAM. AF_INET refers to the address family ipv4. The SOCK_STREAM means connection oriented TCP protocol.
Then we set the socket option to SOL_SOCKET to manipulate options at the sockets API level. With this done now we can bind the host and port before start to listen from them.
The socket must be bound to an address and listening for connections. For that we use the socket.accept() property, The return value is a pair (conn, address) where conn is a new socket object usable to send and receive data on the connection, and address is the address bound to the socket on the other end of the connection.
To receive the data from the socket we use the socket.recv() method, The return value is a bytes object representing the data received. The maximum amount of data to be received at once is specified by its argument. Decode to utf-8 can help us to avoid problems with the data received.
Then we set the response and send it using the sendall method and close the connection.
Now let’s try it…
The entire code would be:
If you execute this program and check in your browser you should get something like this:
You can also simulate a web browser running the Web server fire up a telnet session on the command line specifying a host to connect to localhost and the port to connect to 8888 and then press Enter:
At this point you’ve established a TCP connection with the server running on your local host and ready to send and receive HTTP messages. In the picture below you can see a standard procedure a server has to go through to be able to accept new TCP connections.
Conclusion
And that’s the basic model of how a Web server works. To sum it up: The Web server creates a listening socket and starts accepting new connections in a loop. The client initiates a TCP connection and, after successfully establishing it, the client sends an HTTP request to the server and the server responds with an HTTP response that gets displayed to the user. To establish a TCP connection both clients and servers use sockets.
Пишем простой сервер на Python
Ну, начнем как и везде с определений, берите тетрадь и ручку сейчас начнется нудятина. Чтобы мы cмогли написать свой сервер, нужно для начала понимать как он вообще работает, ловите определение:
Сервер – это программное обеспечение, которое ожидает запросов клиентов и обслуживает или обрабатывает их соответственно.
Если объяснять это своими словами, представьте фургон с хот-догами(сервер), проголодавшись, вы(клиент) подходите и говорите повару, что вы хотите заказать(запрос), после чего повар обрабатывает, что вы ему сказали и начинает готовить, в конечном итоге вы получаете свой хот-дог(результат) и сытый радуетесь жизни. Для наглядности посмотри схему.

Околопрактика
Для написания сервера мы будем использовать Python и модуль Socket.
Socket позволяет нам общаться с сервером с помощью сокетов. Весь код я постараюсь пояснять, дабы ты мой дорогой читатель все понял. В конце статьи будет готовый код.
Создайте два файла в одной директории:
socket_server.py
socket_client.py
Практика
Пишем код для серверной части, так что открывайте файл socket_server.py.
Начнем с импорта модуля и создания TCP-сокета:
Далее весь код будет с комментариями:
Добавим вечный цикл, который будет считывать данные с клиентской части, и отправлять их обратно.
Переходим к клиентской части, весь код теперь пишем в файле socket_client.py.
Начало у клиентской части такое-же как и у серверной.
Далее подключимся к нашему серверу и отправим сообщение «Hello. Habr!».
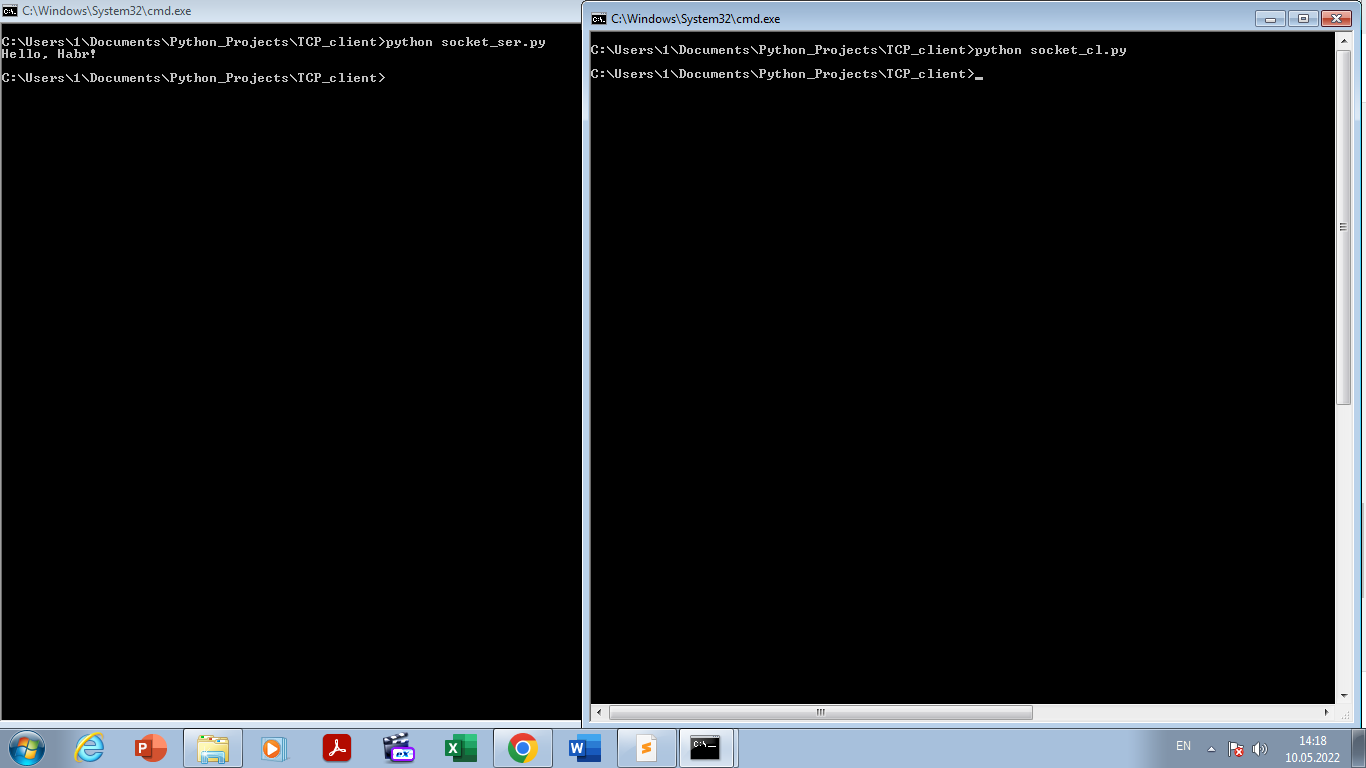
Слева сервер, справа клиент
Заключение
Вот мы с вами и написали свой первый сервер, рад был стараться для вас, ниже будет готовый код.