12 Links
12.1 Introduction to links and anchors
HTML offers many of the conventional publishing idioms for rich text and structured documents, but what separates it from most other markup languages is its features for hypertext and interactive documents. This section introduces the link (or hyperlink, or Web link), the basic hypertext construct. A link is a connection from one Web resource to another. Although a simple concept, the link has been one of the primary forces driving the success of the Web.
A has two ends — called — and a direction. The link starts at the «source» anchor and points to the «destination» anchor, which may be any Web resource (e.g., an image, a video clip, a sound bite, a program, an HTML document, an element within an HTML document, etc.).
12.1.1 Visiting a linked resource
The default behavior associated with a link is the retrieval of another Web resource. This behavior is commonly and implicitly obtained by selecting the link (e.g., by clicking, through keyboard input, etc.).
The following HTML excerpt contains two links, one whose destination anchor is an HTML document named «chapter2.html» and the other whose destination anchor is a GIF image in the file «forest.gif»:
By activating these links (by clicking with the mouse, through keyboard input, voice commands, etc.), users may visit these resources. Note that the href attribute in each source anchor specifies the address of the destination anchor with a URI.
The destination anchor of a link may be an element within an HTML document. The destination anchor must be given an anchor name and any URI addressing this anchor must include the name as its fragment identifier .
Destination anchors in HTML documents may be specified either by the A element (naming it with the name attribute), or by any other element (naming with the id attribute).
Thus, for example, an author might create a table of contents whose entries link to header elements H2 , H3 , etc., in the same document. Using the A element to create destination anchors, we would write:
We may achieve the same effect by making the header elements themselves the anchors:
12.1.2 Other link relationships
By far the most common use of a link is to retrieve another Web resource, as illustrated in the previous examples. However, authors may insert links in their documents that express other relationships between resources than simply «activate this link to visit that related resource». Links that express other types of relationships have one or more link types specified in their source anchor.
The roles of a link defined by A or LINK are specified via the rel and rev attributes.
For instance, links defined by the LINK element may describe the position of a document within a series of documents. In the following excerpt, links within the document entitled «Chapter 5» point to the previous and next chapters:
The link type of the first link is «prev» and that of the second is «next» (two of several recognized link types). Links specified by LINK are not rendered with the document’s contents, although user agents may render them in other ways (e.g., as navigation tools).
Even if they are not used for navigation, these links may be interpreted in interesting ways. For example, a user agent that prints a series of HTML documents as a single document may use this link information as the basis of forming a coherent linear document. Further information is given below on using links for the benefit of search engines.
12.1.3 Specifying anchors and links
Although several HTML elements and attributes create links to other resources (e.g., the IMG element, the FORM element, etc.), this chapter discusses links and anchors created by the LINK and A elements. The LINK element may only appear in the head of a document. The A element may only appear in the body.
When the A element’s href attribute is set, the element defines a source anchor for a link that may be activated by the user to retrieve a Web resource. The source anchor is the location of the A instance and the destination anchor is the Web resource.
The retrieved resource may be handled by the user agent in several ways: by opening a new HTML document in the same user agent window, opening a new HTML document in a different window, starting a new program to handle the resource, etc. Since the A element has content (text, images, etc.), user agents may render this content in such a way as to indicate the presence of a link (e.g., by underlining the content).
When the name or id attributes of the A element are set, the element defines an anchor that may be the destination of other links.
Authors may set the name and href attributes simultaneously in the same A instance.
The LINK element defines a relationship between the current document and another resource. Although LINK has no content, the relationships it defines may be rendered by some user agents.
12.1.4 Link titles
The title attribute may be set for both A and LINK to add information about the nature of a link. This information may be spoken by a user agent, rendered as a tool tip, cause a change in cursor image, etc.
Thus, we may augment a previous example by supplying a title for each link:
12.1.5 Internationalization and links
Since links may point to documents encoded with different character encodings, the A and LINK elements support the charset attribute. This attribute allows authors to advise user agents about the encoding of data at the other end of the link.
The hreflang attribute provides user agents with information about the language of a resource at the end of a link, just as the lang attribute provides information about the language of an element’s content or attribute values.
Armed with this additional knowledge, user agents should be able to avoid presenting «garbage» to the user. Instead, they may either locate resources necessary for the correct presentation of the document or, if they cannot locate the resources, they should at least warn the user that the document will be unreadable and explain the cause.
12.2 The A element
Start tag: required, End tag: required
name = cdata [CS] This attribute names the current anchor so that it may be the destination of another link. The value of this attribute must be a unique anchor name. The scope of this name is the current document. Note that this attribute shares the same name space as the id attribute. href = uri [CT] This attribute specifies the location of a Web resource, thus defining a link between the current element (the source anchor) and the destination anchor defined by this attribute. hreflang = langcode [CI] This attribute specifies the base language of the resource designated by href and may only be used when href is specified. type = content-type [CI] This attribute gives an advisory hint as to the content type of the content available at the link target address. It allows user agents to opt to use a fallback mechanism rather than fetch the content if they are advised that they will get content in a content type they do not support. Authors who use this attribute take responsibility to manage the risk that it may become inconsistent with the content available at the link target address. For the current list of registered content types, please consult [MIMETYPES]. rel = link-types [CI] This attribute describes the relationship from the current document to the anchor specified by the href attribute. The value of this attribute is a space-separated list of link types. rev = link-types [CI] This attribute is used to describe a reverse link from the anchor specified by the href attribute to the current document. The value of this attribute is a space-separated list of link types. charset = charset [CI] This attribute specifies the character encoding of the resource designated by the link. Please consult the section on character encodings for more details.
Attributes defined elsewhere
- id , class (document-wide identifiers)
- lang (language information), dir (text direction)
- title (element title)
- style (inline style information )
- shape and coords (image maps)
- onfocus , onblur , onclick , ondblclick , onmousedown , onmouseup , onmouseover , onmousemove , onmouseout , onkeypress , onkeydown , onkeyup (intrinsic events )
- target (target frame information)
- tabindex (tabbing navigation)
- accesskey (access keys)
Each A element defines an anchor
- The A element’s content defines the position of the anchor.
- The name attribute names the anchor so that it may be the destination of zero or more links (see also anchors with id ).
- The href attribute makes this anchor the source anchor of exactly one link.
Authors may also create an A element that specifies no anchors, i.e., that doesn’t specify href , name , or id . Values for these attributes may be set at a later time through scripts.
In the example that follows, the A element defines a link. The source anchor is the text «W3C Web site» and the destination anchor is «http://www.w3.org/»:
This link designates the home page of the World Wide Web Consortium. When a user activates this link in a user agent, the user agent will retrieve the resource, in this case, an HTML document.
User agents generally render links in such a way as to make them obvious to users (underlining, reverse video, etc.). The exact rendering depends on the user agent. Rendering may vary according to whether the user has already visited the link or not. A possible visual rendering of the previous link might be:
To tell user agents explicitly what the character encoding of the destination page is, set the charset attribute:
Suppose we define an anchor named «anchor-one» in the file «one.html».
This creates an anchor around the text «This is the location of anchor one.». Usually, the contents of A are not rendered in any special way when A defines an anchor only.
Having defined the anchor, we may link to it from the same or another document. URIs that designate anchors contain a «#» character followed by the anchor name (the fragment identifier). Here are some examples of such URIs:
- An absolute URI: http://www.mycompany.com/one.html#anchor-one
- A relative URI: ./one.html#anchor-one or one.html#anchor-one
- When the link is defined in the same document: #anchor-one
Thus, a link defined in the file «two.html» in the same directory as «one.html» would refer to the anchor as follows:
The A element in the following example specifies a link (with href ) and creates a named anchor (with name ) simultaneously:
This example contains a link to a different type of Web resource (a PNG image). Activating the link should cause the image resource to be retrieved from the Web (and possibly displayed if the system has been configured to do so).
Note. User agents should be able to find anchors created by empty A elements, but some fail to do so. For example, some user agents may not find the «empty-anchor» in the following HTML fragment:
12.2.1 Syntax of anchor names
An anchor name is the value of either the name or id attribute when used in the context of anchors. Anchor names must observe the following rules:
- Uniqueness: Anchor names must be unique within a document. Anchor names that differ only in case may not appear in the same document.
- String matching: Comparisons between fragment identifiers and anchor names must be done by exact (case-sensitive) match.
Thus, the following example is correct with respect to string matching and must be considered a match by user agents:
ILLEGAL EXAMPLE:
The following example is illegal with respect to uniqueness since the two names are the same except for case:
Although the following excerpt is legal HTML, the behavior of the user agent is not defined; some user agents may (incorrectly) consider this a match and others may not.
12.2.2 Nested links are illegal
Links and anchors defined by the A element must not be nested; an A element must not contain any other A elements.
Since the DTD defines the LINK element to be empty, LINK elements may not be nested either.
12.2.3 Anchors with the id attribute
The id attribute may be used to create an anchor at the start tag of any element (including the A element).
This example illustrates the use of the id attribute to position an anchor in an H2 element. The anchor is linked to via the A element.
The following example names a destination anchor with the id attribute:
The id and name attributes share the same name space. This means that they cannot both define an anchor with the same name in the same document. It is permissible to use both attributes to specify an element’s unique identifier for the following elements: A , APPLET , FORM , FRAME , IFRAME , IMG , and MAP . When both attributes are used on a single element, their values must be identical.
ILLEGAL EXAMPLE:
The following excerpt is illegal HTML since these attributes declare the same name twice in the same document.
The following example illustrates that id and name must be the same when both appear in an element’s start tag:
Because of its specification in the HTML DTD, the name attribute may contain character references . Thus, the value Dürst is a valid name attribute value, as is Dürst . The id attribute, on the other hand, may not contain character references.
Use id or name ? Authors should consider the following issues when deciding whether to use id or name for an anchor name:
- The id attribute can act as more than just an anchor name (e.g., style sheet selector, processing identifier, etc.).
- Some older user agents don’t support anchors created with the id attribute.
- The name attribute allows richer anchor names (with entities).
12.2.4 Unavailable and unidentifiable resources
A reference to an unavailable or unidentifiable resource is an error. Although user agents may vary in how they handle such an error, we recommend the following behavior:
- If a user agent cannot locate a linked resource, it should alert the user.
- If a user agent cannot identify the type of a linked resource, it should still attempt to process it. It should alert the user and may allow the user to intervene and identify the document type.
12.3 Document relationships: the LINK element
Start tag: required, End tag: forbidden
Attributes defined elsewhere
- id , class (document-wide identifiers)
- lang (language information), dir (text direction)
- title (element title)
- style (inline style information )
- onclick , ondblclick , onmousedown , onmouseup , onmouseover , onmousemove , onmouseout , onkeypress , onkeydown , onkeyup (intrinsic events )
- href , hreflang , type , rel , rev (links and anchors)
- target (target frame information)
- media (header style information)
- charset (character encodings)
This element defines a link. Unlike A , it may only appear in the HEAD section of a document, although it may appear any number of times. Although LINK has no content, it conveys relationship information that may be rendered by user agents in a variety of ways (e.g., a tool-bar with a drop-down menu of links).
This example illustrates how several LINK definitions may appear in the HEAD section of a document. The current document is «Chapter2.html». The rel attribute specifies the relationship of the linked document with the current document. The values «Index», «Next», and «Prev» are explained in the section on link types.
12.3.1 Forward and reverse links
The rel and rev attributes play complementary roles — the rel attribute specifies a forward link and the rev attribute specifies a reverse link.
Consider two documents A and B.
Has exactly the same meaning as:
Both attributes may be specified simultaneously.
12.3.2 Links and external style sheets
When the LINK element links an external style sheet to a document, the type attribute specifies the style sheet language and the media attribute specifies the intended rendering medium or media. User agents may save time by retrieving from the network only those style sheets that apply to the current device.
Media types are further discussed in the section on style sheets.
12.3.3 Links and search engines
Authors may use the LINK element to provide a variety of information to search engines, including:
- Links to alternate versions of a document, written in another human language.
- Links to alternate versions of a document, designed for different media, for instance a version especially suited for printing.
- Links to the starting page of a collection of documents.
The examples below illustrate how language information, media types, and link types may be combined to improve document handling by search engines.
In the following example, we use the hreflang attribute to tell search engines where to find Dutch, Portuguese, and Arabic versions of a document. Note the use of the charset attribute for the Arabic manual. Note also the use of the lang attribute to indicate that the value of the title attribute for the LINK element designating the French manual is in French.
In the following example, we tell search engines where to find the printed version of a manual.
In the following example, we tell search engines where to find the front page of a collection of documents.
Further information is given in the notes in the appendix on helping search engines index your Web site.
12.4 Path information: the BASE element
Start tag: required, End tag: forbidden
href = uri [CT] This attribute specifies an absolute URI that acts as the base URI for resolving relative URIs.
Attributes defined elsewhere
In HTML, links and references to external images, applets, form-processing programs, style sheets, etc. are always specified by a URI. Relative URIs are resolved according to a base URI, which may come from a variety of sources. The BASE element allows authors to specify a document’s base URI explicitly.
When present, the BASE element must appear in the HEAD section of an HTML document, before any element that refers to an external source. The path information specified by the BASE element only affects URIs in the document where the element appears.
For example, given the following BASE declaration and A declaration:
the relative URI «../cages/birds.gif» would resolve to:
12.4.1 Resolving relative URIs
User agents must calculate the base URI for resolving relative URIs according to [RFC1808], section 3. The following describes how [RFC1808] applies specifically to HTML.
User agents must calculate the base URI according to the following precedences (highest priority to lowest):
- The base URI is set by the BASE element.
- The base URI is given by meta data discovered during a protocol interaction, such as an HTTP header (see [RFC2616]).
- By default, the base URI is that of the current document. Not all HTML documents have a base URI (e.g., a valid HTML document may appear in an email and may not be designated by a URI). Such HTML documents are considered erroneous if they contain relative URIs and rely on a default base URI.
Additionally, the OBJECT and APPLET elements define attributes that take precedence over the value set by the BASE element. Please consult the definitions of these elements for more information about URI issues specific to them.
Note. For versions of HTTP that define a Link header, user agents should handle these headers exactly as LINK elements in the document. HTTP 1.1 as defined by [RFC2616] does not include a Link header field (refer to section 19.6.3).
HTML Button Link Code Examples – How to Make HTML Hyperlinks Using the HREF Attribute on Tags

In this article, we are going to explore three different ways you can make an HTML button act like a link.
These are the methods we’ll go over:
- Styling a link to look like a button
- Using the action and formaction attributes in a form
- Using the JavaScript onclick event
But first, let’s take a look at the wrong approach.
Why doesn’t this approach with the a element work?
The code snippet below leads to the freeCodeCamp website when it is clicked.
However, this is not valid HTML.
This is considered bad practice because it makes it unclear as to the user’s intent.
Links are supposed to navigate the user to another part of the webpage or an external site. And buttons are supposed to perform a specific action like submitting a form.
When you nest one inside the other, it makes it confusing as to what action you want performed. That is why it is best to not nest a button inside an anchor tag.
How to style a link to look like a button with CSS
This first approach does not use the button at all. We can style an anchor tag to look like a button using CSS.
This is the default HTML styling for an anchor tag.

We can add a class to the anchor tag and then use that class selector to style the element.
If you wanted the link to open up a new page, you can add the target=»_blank» attribute like this:
Then, we can add a background color and change the font color like this:
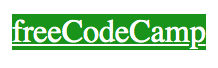
The next step would be to add some padding around the text:
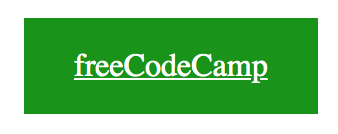
Lastly, we can use the text-decoration property to remove the underline from the text:
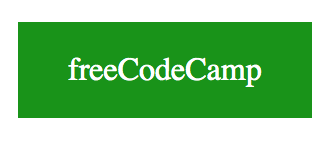
Now we have an anchor tag that looks like a button.
We can also make this «button» be a little more interactive by changing the background color depending on the state of the link.
We could get more intricate with the design, but this is just to show you the basics of styling a link like a button.
You could also choose to use a CSS library like Bootstrap.
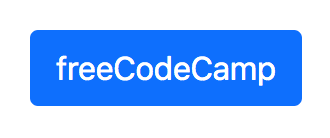
If your project already includes Bootstrap, then you can use the built-in button styles. But I would not import Bootstrap just to style one link.
What are the issues with this approach?
There is some debate whether it is good practice to style links as buttons. Some will argue that links should always look like links and buttons should look like buttons.
In the web book titled Resilient Web Design, Jeremy Keith states that
Why did I bother to bring up this debate?
My goal is not to make you choose one side of the debate over another. I just want you to be aware of this ongoing discussion.
How to use the action and formaction attributes to make a button in a form
How to use the action attribute
Another alternative would be to nest the button inside a form and use the action attribute.
This would be the default button style.
We could use the same styles as earlier, but we would have to add the cursor pointer and set the border to none, like this:
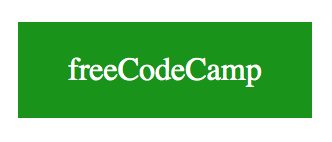
How to use the formaction attribute
Similar to the previous approach, we can create a form and use the formaction attribute.
You can only use the formaction attribute with inputs and buttons that have type=»image» or type=»submit» .
Is this semantically correct?
While this appears to be a working solution, there is a question if this is semantically correct.
We are using the form tags but this does not function like a real form. The purpose of a form is to collect and submit user data.
But we are using the submit button to navigate the user to another page.
When it comes to semantics, this is a not a good way to use the form tags.
Side effects for using the action and formaction attributes
When you click on the button, something interesting happens with the URL. The URL now has a question mark at the end of it.
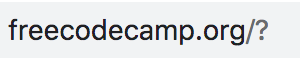
The reason for this change is because the form is using the GET method. You could switch to the POST method, but there might be cases where that is not ideal either.
While this approach is valid HTML, it does come with this unintended side effect.
How to use the JavaScript onclick event to make a button
In the previous approaches, we have looked at HTML and CSS solutions. But we can also use JavaScript to achieve the same result.
The location.href represents the location of a specific URL. In this case, Window.location.href will return https://www.freecodecamp.org/.
Drawbacks to this approach
While this solution does work, there are some potential issues to consider.
If the user has decided to disable JavaScript in their browser, then clearly this solution would not work. Unfortunately, that could lead to a poor user experience.
Conclusion
The goal of this article was to show you three different ways you can make buttons act like links.
The first approach was to design a link to look like a button. We also looked into the debate whether it is a good idea to change the appearance of links to look like another element.
The second approach used the form and formaction attributes. But we also learned that this approach has some side effects with the URL and is not semantically correct.
The third approach used the JavaScript onclick event and the Window.location.href. But we also learned that this approach might not work if the user decides to disable JavaScript in their browser.
As a developer, it is really important to look at the pros and cons of a particular approach before incorporating it into your project.
Учебник HTML для начинающих. Блочная верстка
В этом уроке вы познакомитесь с ссылками. Они позволяют создавать переходы между страницами сайта либо внутри одной страницы. Также с их помощью можно переходить на другие сайты.
Как же создать ссылку?
Как и всегда, при кодировании HTML, для этой цели используется тэг. Это простой тэг — он состоит из одного элемента «a» и одного атрибута href=»». Внутри атрибута прописывается адрес, куда ведет ссылка — href=»/».
Полностью сылка выглядит следующим образом:
В браузере она будет выглядеть так:
Если нажать на ссылку в окне браузера вы попадете на сайт web-lesson.ru.
Переход между собственными страницами
Для начала необходимо создать и сохранить в папке «Мой сайт» несколько собственных документов. Назовите их index1.html, index2.html, index3.html (или как-либо иначе). Затем в первом документе поместим ссылку:
Вам нет нужды указывать адрес URL. Вы просто указываете название файла, а браузер ищет его в той же папке, где находится первый файл.
Если внутри вашей папки «Мой сайт» создать другую папку с названием, к примеру, «Подпапка», и разместить там документ index3.html, то ссылка приобретет следующий вид:
В обратную сторону ссылка со страницы index3 из «Подпапки» на index1 будет выглядеть так:
Сочетание «../» указывает на папку, расположенную на один уровень выше от данной позиции файла, с которого делается ссылка. Следуя этой логике, вы можете также указать на два уровня выше «../../» или более.
Конечно, всегда можно указать полный адрес файла (URL):
Переходы внутри страницы
Естественно можно создавать ссылки для перехода между элементами одной страницы. Это может потребоваться, например, для перехода между оглавлением и текстом. Все, что для этого необходимо, — использовать атрибут id и символ «#».
Атрибут id — это идентификатор. Он применяется для маркировки элемента, на который вы хотите сделать переход. Например:
Теперь можно создать ссылку на этот элемент с помощью знака «#» в атрибуте ссылки. Знак «#» сообщает браузеру, что это переход на той же самой странице. После «#» должен следовать id тэга, на который выполняется переход. Например:
Самое важное о ссылках в HTML

Для добавления ссылки в HTML документ, используют тег a (anсhor) вместе с атрибутом href. В данном атрибуте прописывается адрес, ведущий на внешний ресурс или внутреннюю страницу сайта. При клике на ссылку, пользователь будет перенаправлен по указанному адресу.
Цвет ссылки
По умолчанию браузеры отображают ссылки подчеркнутыми и синего цвета, а посещенные ссылки окрашивают в фиолетовый цвет.
<a href=»https://myrusakov.ru/»>Как создать свой сайт</a>
Абсолютная ссылка
Абсолютная ссылка указывает полный путь до HTML страницы или до файла. На практике их используют, когда нужно сослаться на внешний ресурс.
Относительная ссылка
Относительные ссылки, как правило используют в пределах одного сайта и указывают путь от корня сайта или от текущего документа.
Ссылка на файл
Кроме основной задачи (переадресации), с помощью ссылки запускается механизм на скачивание файлов. В атрибуте href указывается путь до файла и атрибут download. Наличие данного атрибута, предлагает браузеру не переходить по адресу, а скачать файл, указанный в адресе ссылки.
<a href=»file.doc» download>Ссылка скачать файл</a>
Открытие ссылки
По умолчанию ссылка открывается (осуществляется переход пользователя) на другую страницу или сайт в том же окне браузера. Открытие ссылки в текущем окне в пределах одного сайта не является проблемой. Но все меняется, если мы имеем дело с ссылкой на внешний ресурс. Пользователь уходит по ссылке на другой сайт и не всегда потом может вернуться назад. Поэтому удобнее, когда внешняя ссылка открывается в новом окне. Для этого существует атрибут target. С помощью него можно указать, как будет открываться страница, на которую осуществляется переход. Значение _blank у атрибута target открывает страницу в новой вкладке.
<a href=»https://myrusakov.ru/» target=»_blank»>Myrusakov.ru</a>
Ссылка на телефон
Одно нажатие по ссылке на телефон сработает (произойдет вызов номера) при заходе на сайт с мобильного телефона. Пользователю не нужно копировать или куда-то записывать номер телефона. Достаточно в атрибуте tel прописать номер телефона в международном формате.
Ссылка на почту
Кликнув по ссылке на адрес электронной почты, в браузере откроется программа для отправки писем с адресом получателя.
Ссылка якорь
Ссылка якорь нужна для навигации в пределах одной страницы. Обычно якоря используют на длинных одностраничниках и размещают в верхней панели навигации. Пользователь кликает на пункт меню и поисходит автоматический скролл до выбранной секции.
Пользователь кликает на ссылку-якорь в навигационной панели.
и его перебрасывает в footer.
Как кнопку сделать ссылкой?
Тег button не может быть ссылкой, если он не находится внутри формы. Кроме того расположение ссылки как внутри тега button, так и снаружи не валидно.
Так что же делать? Отказаться от тега button и стилизовать класс, как у обычной ссылки.
<a href=»url» >Кнопка со ссылкой</a>
.btn <
display: inline-block; /* Строчно-блочный элемент */
background: #d81b6b; /* Красный цвет фона */
color: #fff; /* Белый цвет текста */
>
Активная ссылка
Ссылка, на которую нажал пользователь, является активной. Чтобы как-то её выделить среди остальных ссылок, можно в CSS стилях задать ей другой цвет через псевдокласс active.
Ссылка при наведении
Чтобы изменить внешний вид ссылки (как правило цвет), при наведении на неё курсора, следует задать ей псевдокласс hover.
Ссылка на изображение
Если поместить изображение внутри ссылки, то оно само станет ссылкой.
В сайтостроении, как и в большинстве темах, теория не работает без практики. Лучше всего смотреть, как делают верстку профессионалы и повторять за ними. Мой видеокурс «Вёрстка сайта с нуля 2.0» нацелен именно на такой формат обучения.

Копирование материалов разрешается только с указанием автора (Михаил Русаков) и индексируемой прямой ссылкой на сайт (http://myrusakov.ru)!
Добавляйтесь ко мне в друзья ВКонтакте: http://vk.com/myrusakov.
Если Вы хотите дать оценку мне и моей работе, то напишите её в моей группе: http://vk.com/rusakovmy.
Если Вы не хотите пропустить новые материалы на сайте,
то Вы можете подписаться на обновления: Подписаться на обновления
Если у Вас остались какие-либо вопросы, либо у Вас есть желание высказаться по поводу этой статьи, то Вы можете оставить свой комментарий внизу страницы.
Порекомендуйте эту статью друзьям:
Если Вам понравился сайт, то разместите ссылку на него (у себя на сайте, на форуме, в контакте):
Она выглядит вот так:
Комментарии ( 0 ):
Для добавления комментариев надо войти в систему.
Если Вы ещё не зарегистрированы на сайте, то сначала зарегистрируйтесь.