Подготовка проекта CSS и HTML с помощью Visual Studio Code
Эта серия мануалов покажет вам, как создать и настроить веб-сайт с помощью CSS, языка таблиц стилей, используемого для управления внешним видом сайтов. Вы можете выполнить все мануалы по порядку, чтобы создать тестовый веб-сайт и познакомиться с CSS, или вразброс использовать описанные здесь методы для оптимизации других проектов CSS.
Для работы с CSS вам нужно иметь базовые знания по HTML, стандартному языку разметки, который используется для отображения документов в браузере. Если ранее вы не работали с HTML, рекомендуем предварительно изучить первые десять руководств серии Создание веб-сайта с помощью HTML.
В этом мануале вы узнаете, как создать все папки и файлы, необходимые для сборки вашего тестового веб-сайта CSS.
С помощью редактора кода вы создадите каталог проекта, каталог и файл для кода CSS, файл для кода HTML и папку для изображений. В этой серии мануалов используется Visual Studio Code, редактор кода, свободно доступный для Mac, Windows или Linux, но вы можете использовать редактор кода, который вам нравится больше. Обратите внимание: если вы используете другой редактор, вам нужно будет откорректировать некоторые инструкции мануалов.
Создание файлов и папок HTML и CSS
Запустив текстовый редактор, откройте новую папку для нашего проекта и назовите ее css-practice. Мы будем использовать эту папку для хранения всех файлов и папок, созданных в ходе выполнения этой серии мануалов.
Чтобы создать новую папку проекта в редакторе Visual Studio Code, перейдите к пункту File в верхнем меню и выберите Add Folder to Workspace. В новом окне нажмите кнопку New Folder и создайте новую папку по имени css-practice.
Затем создайте новую папку внутри css-practice и назовите ее css. Внутри этой папки откройте новый файл и сохраните его как styles.css – это файл, который вы будете использовать для хранения правил стилей CSS. Если вы используете Visual Studio Code, вы можете создать новую папку, щелкнув правой кнопкой мыши (в Windows) или нажав CTRL+левая кнопка мыши (на Mac) в папке css-practice, затем выберите New File и создайте папку css. Затем кликните правой кнопкой мыши (в Windows) или нажмите CTRL+левая кнопка (в Mac) в папке css, выберите New File и создайте файл styles.css.
Сохраните файл и оставьте его открытым.
Вам также необходимо создать файл для добавления контента HTML – текста, изображений и HTML-элементов, которые будут отображаться в браузере. В каталоге проекта css-practice откройте еще один новый файл и сохраните его как index.html (так же, как вы создали файл styles.css ранее). Обязательно сохраните этот файл index.html в папке css-practice, а не в папке css.
Затем вам нужно добавить в файл index.html строку кода, которая скажет браузеру использовать файл styles.css в качестве таблицы стилей сайта. Для этого вам понадобится HTML-тег <link> и ссылка на файл styles.css. Добавьте следующий фрагмент кода в свой HTML-документ:
<link rel=»stylesheet» href=»css/styles.css»>
Благодаря этому фрагменту кода браузер будет интерпретировать HTML-код в соответствии с таблицей стилей, расположенной в css/styles.css. На протяжении всей этой серии мануалов будьте внимательны, чтобы случайно не удалить эту строку при изменении кода в файле index.html. Сохраните файл index.html и оставьте его открытым.
Теперь создайте дополнительную папку внутри css-practice и назовите ее images. В этой папке вы сохраните все изображения, которые будете использовать при выполнении этой серии мануалов.
Теперь у вас должна быть папка проекта css-practice, содержащая папки и файлы, необходимые для нашего сайта CSS:
- Папка по имени css содержит файл styles.css.
- Пустая папка images.
- Файл index.html
Если вы используете Visual Studio Code, ваш редактор должен теперь отображать следующее дерево файлов:
Обратите внимание, что имена файлов включают расширения (.html и .css), которые указывают на тип их содержимого. В следующих мануалах этой серии мы добавим контент в эти файлы.
Отладка и устранение неполадок CSS и HTML
При работе с HTML и CSS важна точность. Даже лишний пробел или неправильно введенный символ могут помешать вашему коду работать должным образом.
Если ваш код HTML или CSS не отображается в браузере так, как вы ожидаете, убедитесь, что вы написали код в точности так, как показано в мануале. В целом мы рекомендуем вам вводить код в файлы вручную – так он лучше запоминается, но иногда полезно скопировать и вставить его, чтобы убедиться, что в не мнет ошибки.
Ошибки HTML и CSS могут быть вызваны несколькими причинами. Для начала проверьте свои правила разметки и CSS на наличие лишних или недостающих пробелов, неправильно записанных тегов, а также лишних знаков пунктуации или символов. Вам также следует убедиться, что вы случайно не поставили фигурные или книжные кавычки (“ или “), которые часто используются текстовыми редакторами. Фигурные кавычки предназначены для чтения текста человеком и вызовут ошибку в коде, поскольку они не распознаются браузерами как кавычки. Вводя кавычки прямо в редакторе кода, вы можете быть уверены, что используете правильный тип.
Каждый раз, когда вы вносите в код изменения, обязательно сохраняйте файл перед его перезагрузкой в браузере, чтобы проверить результаты.
Краткое примечание по автоматической поддержке HTML
Некоторые редакторы кода (к ним относится и Visual Studio Code который мы используем в этой серии) предоставляют автоматическую поддержку написания HTML. В Visual Studio Code эта поддержка подразумевает умные подсказки и автозавершение кода. Эта функция бывает полезной, но будьте с ней осторожны: если вы не привыкли работать с ней, вы можете сгенерировать дополнительный код, который вызовет ошибки. Если эти подсказки вас отвлекают, вы можете отключить их в настройках редактора кода.
Заключение
Теперь вы готовы приступить к разработке вашего тестового сайта. В следующем мануале мы покажем, как использовать правила CSS для управления стилем и макетом HTML-страниц.
Building HTML templates visually in visual studio code
Hello, devs do you find it hard to build web pages within a short period? Are you still using the boring process of writing Html & CSS code to develop a fully responsive and UI-friendly web page? Do you spend hours just to make a single web page responsive and mobile-friendly? There is good news! In the article, I will demonstrate how you can easily build a fully customizable product landing page within 5 minutes that too using a vs code extension named speedwapp the best part you don’t need to type the full code and follow the boring process. There is no such prerequisite for this article a simple knowledge of HTML & CSS is appreciated just make sure that you have visual studio code installed on your computer and if not you can download it from here.
A bit about speedwapp vs code extension
Speedwapp is an amazing website builder that allows you to build beautiful landing pages directly from their website or you can your their free vs code extension which will demonstrate here.
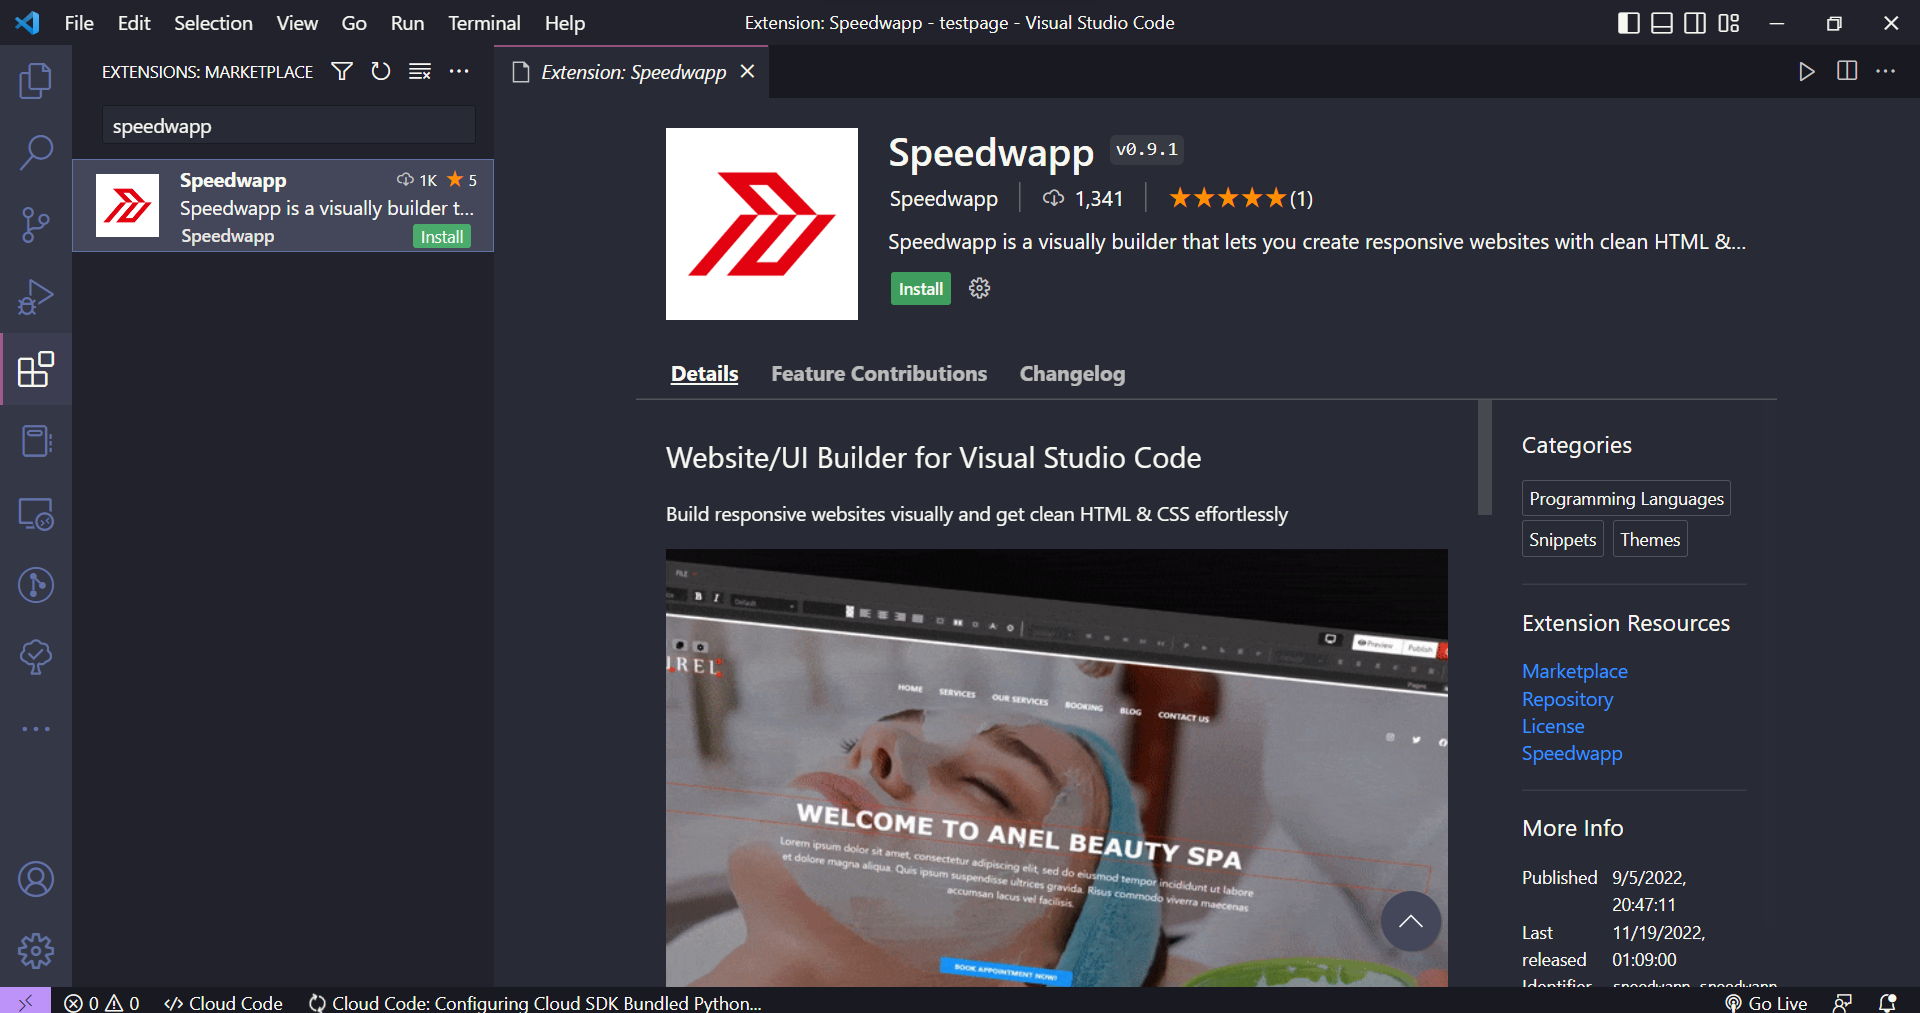
Adding the seedwapp extension to your vscode
Quickly open the visual studio code editor on your computer and navigate to the extensions section. If you are using a windows machine press ctrl+shift+x . Now in the search bar search for speedwapp and click on the install button
Once you have installed the extension you will be prompted to a login page so put your credentials there or you can also sign up if you don’t have an account.
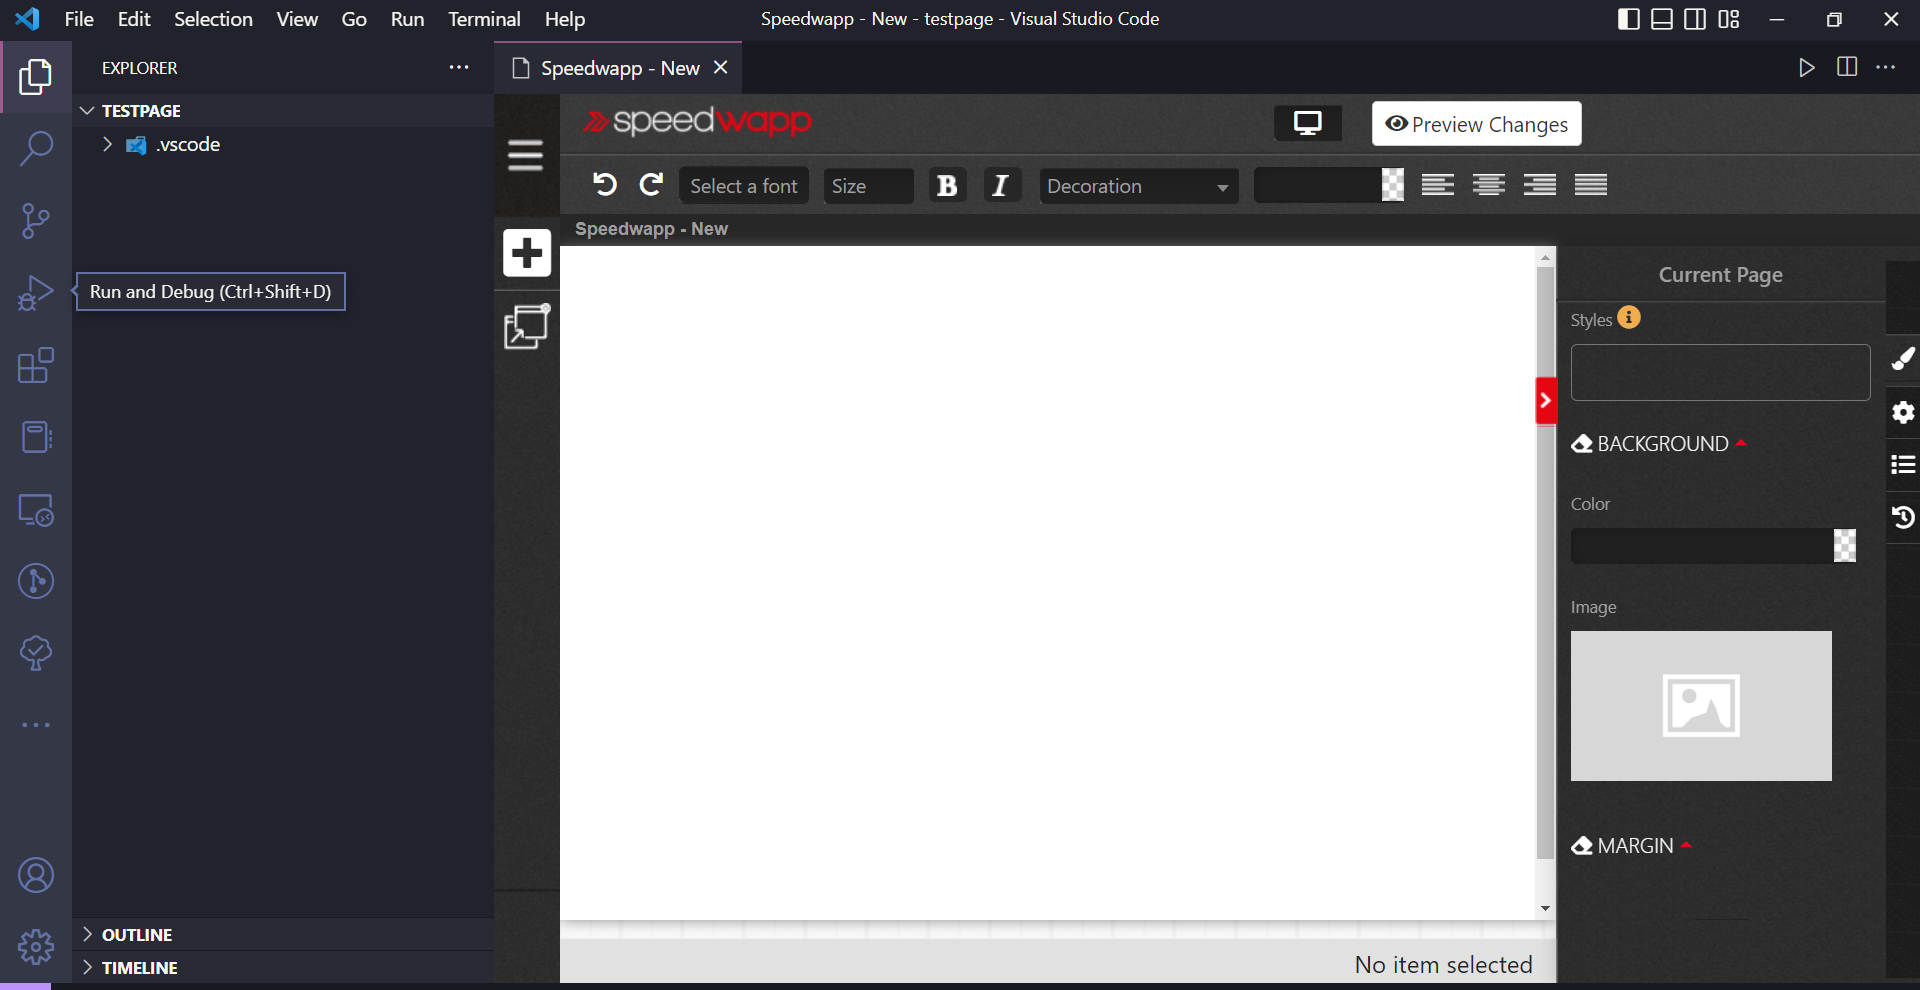
Now press Ctrl+K N or Cmd+K N to create a new page using speedwapp
click on the + symbol to add pre-defined templates or html code blocks to your page. I will be using a pre-defined template and then gonna edit it on my own
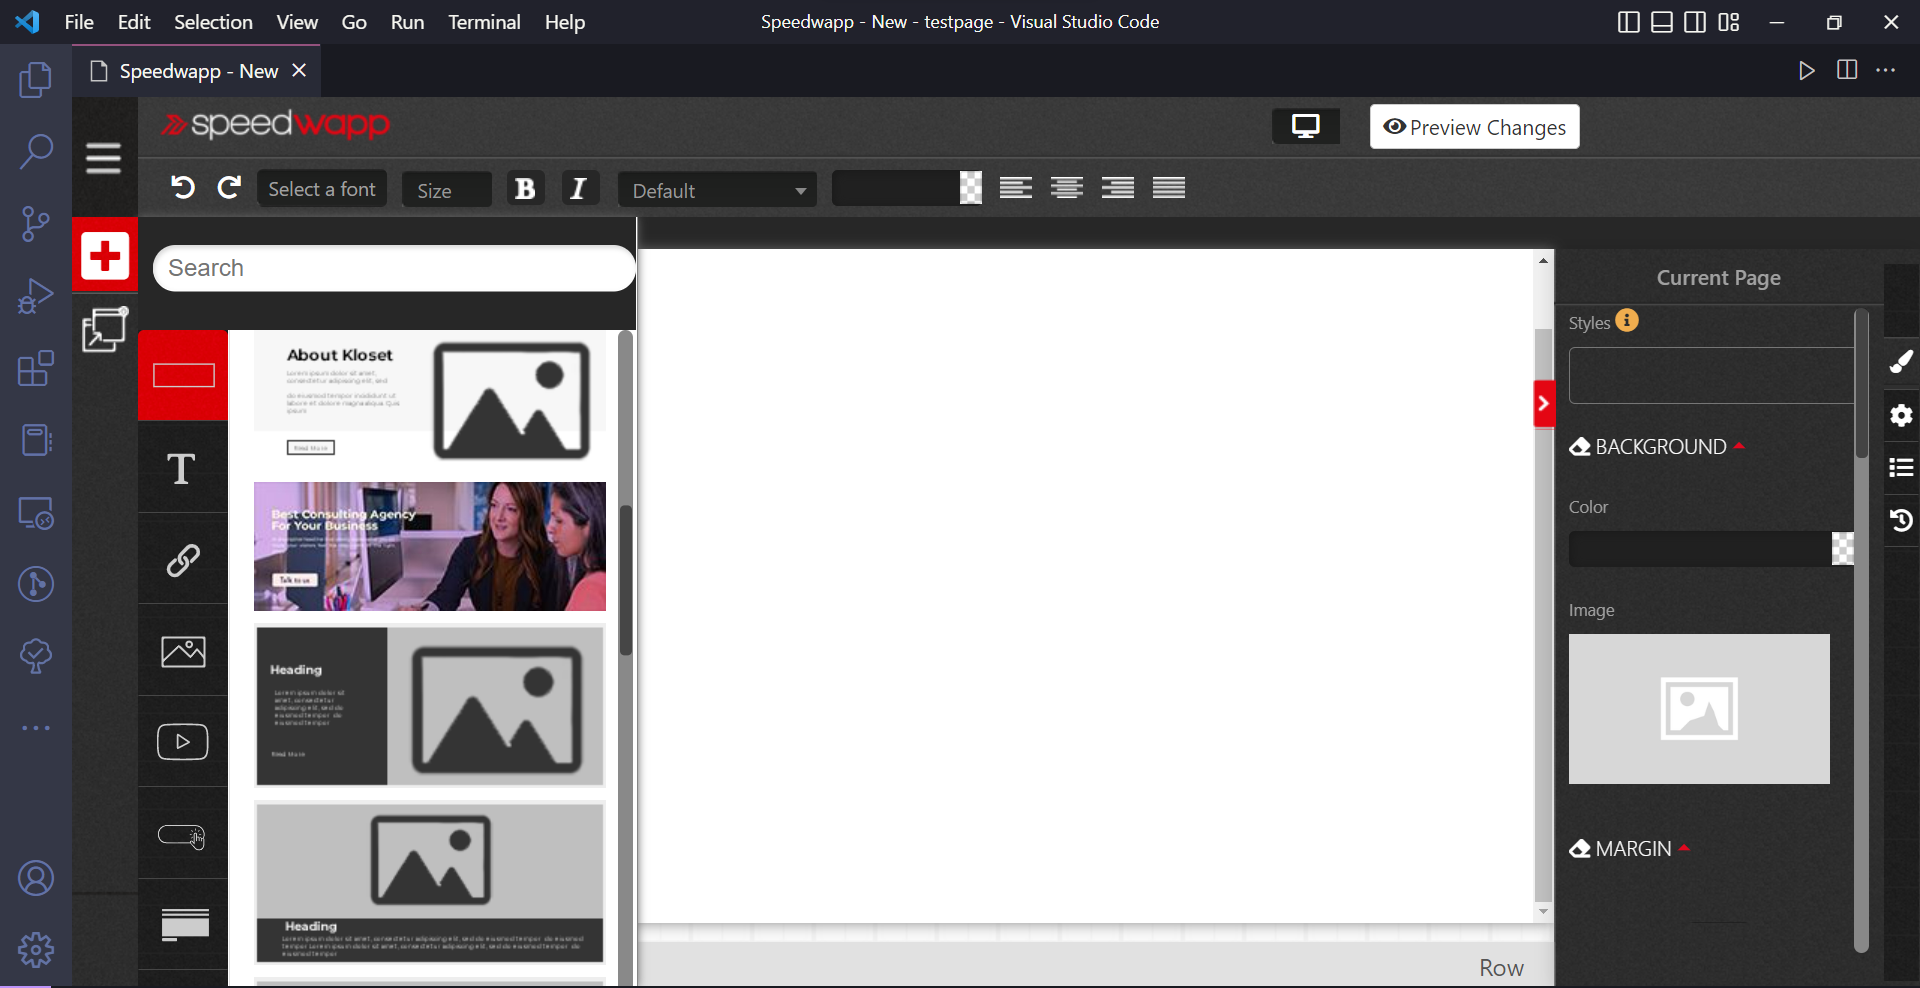
It looks a bit like this after I have imported one. Now let’s add a few more sections and then we will edit it.
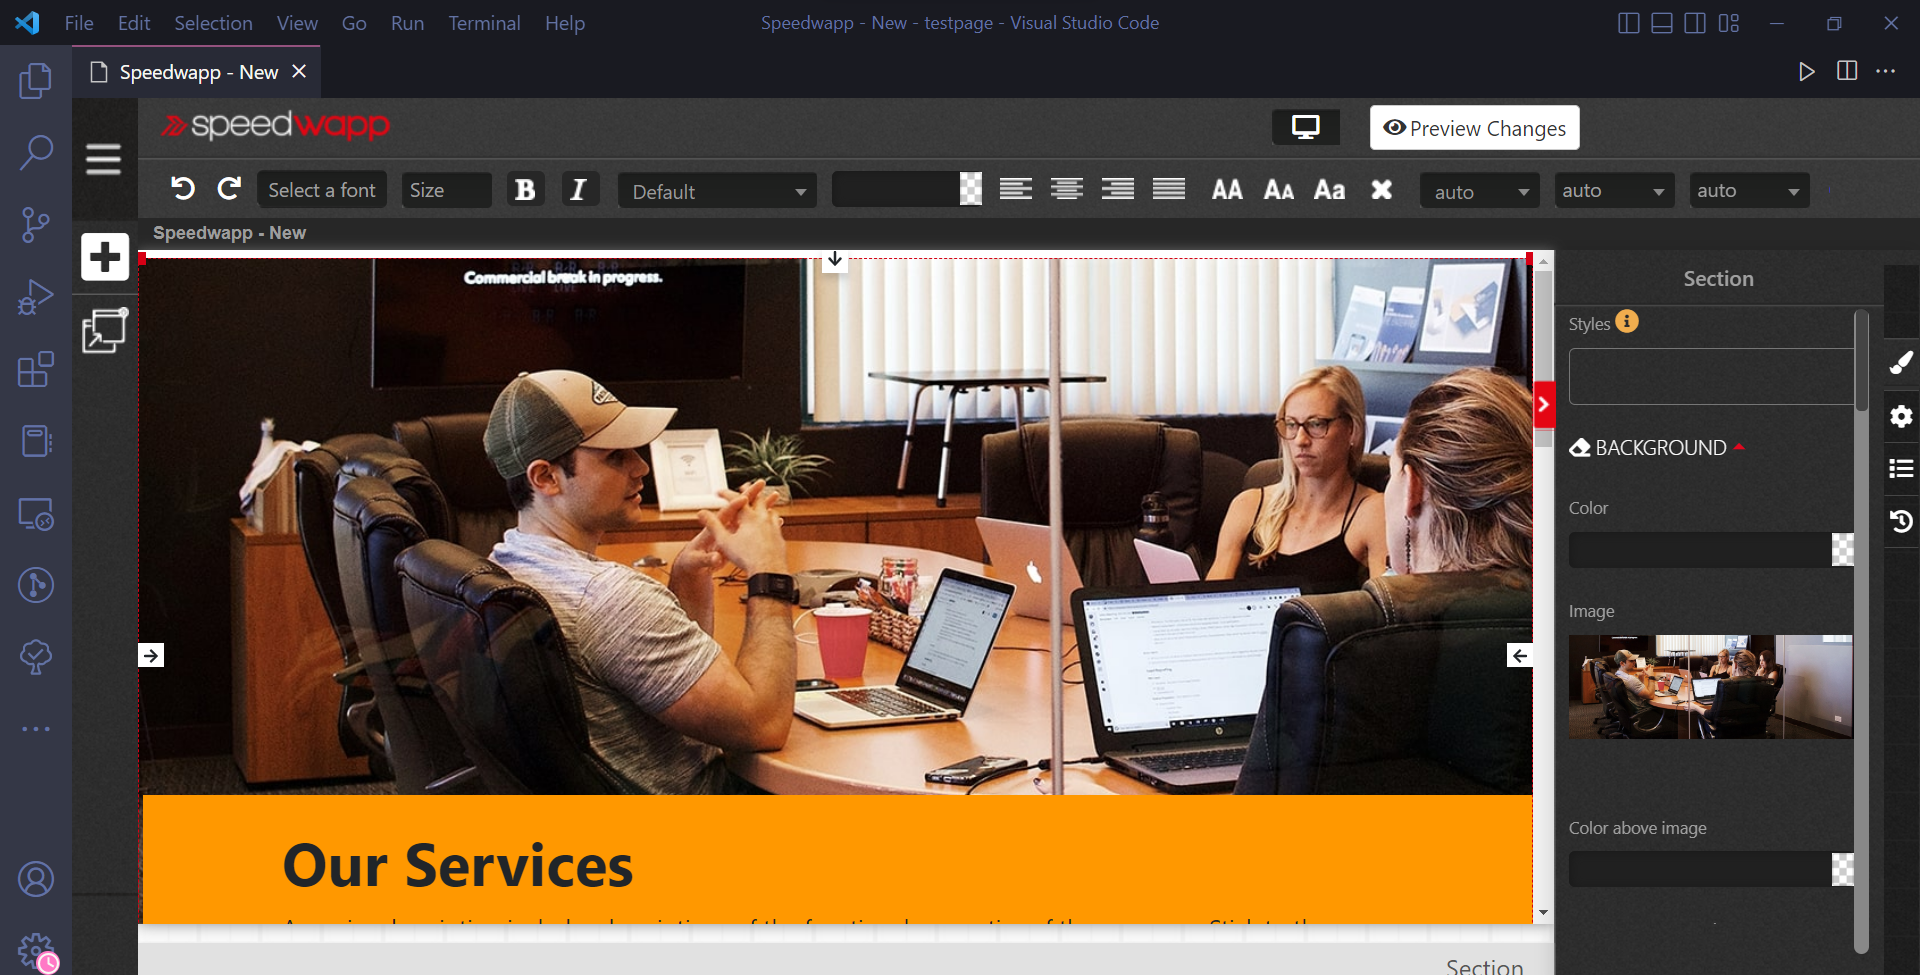
There in the bottom, you will see a small plus sign to add a new component so click on that and add a few more just like shown in the image below
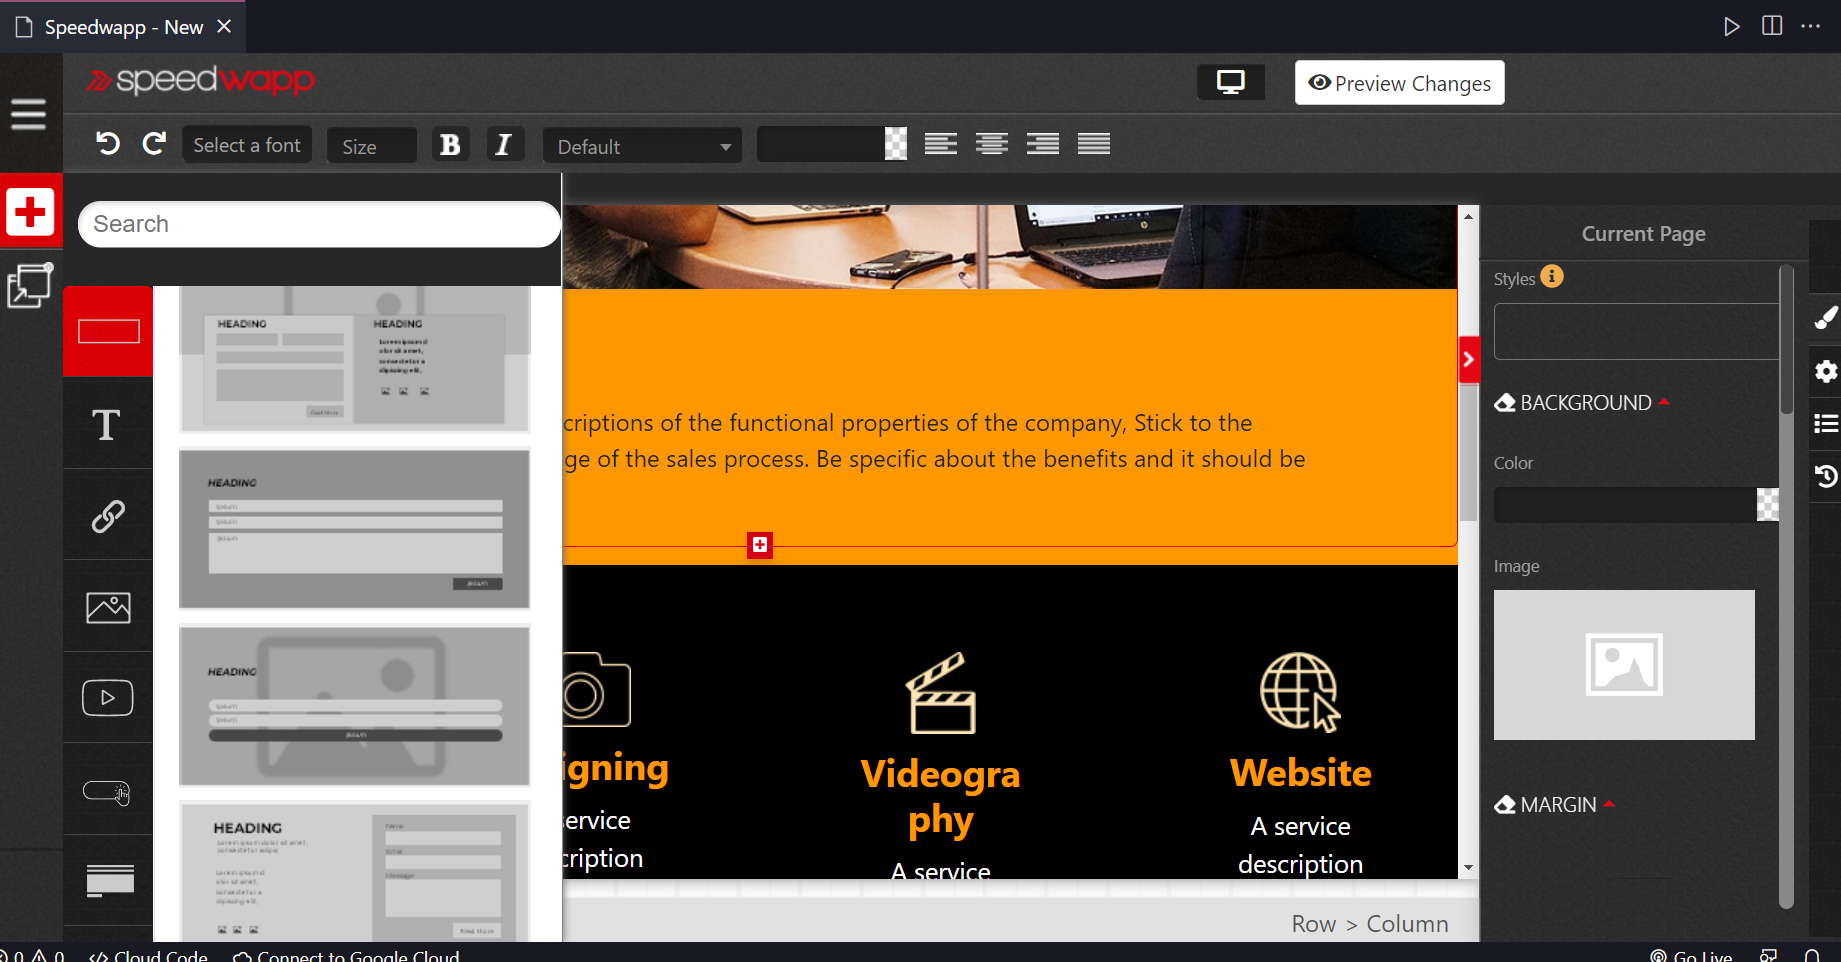
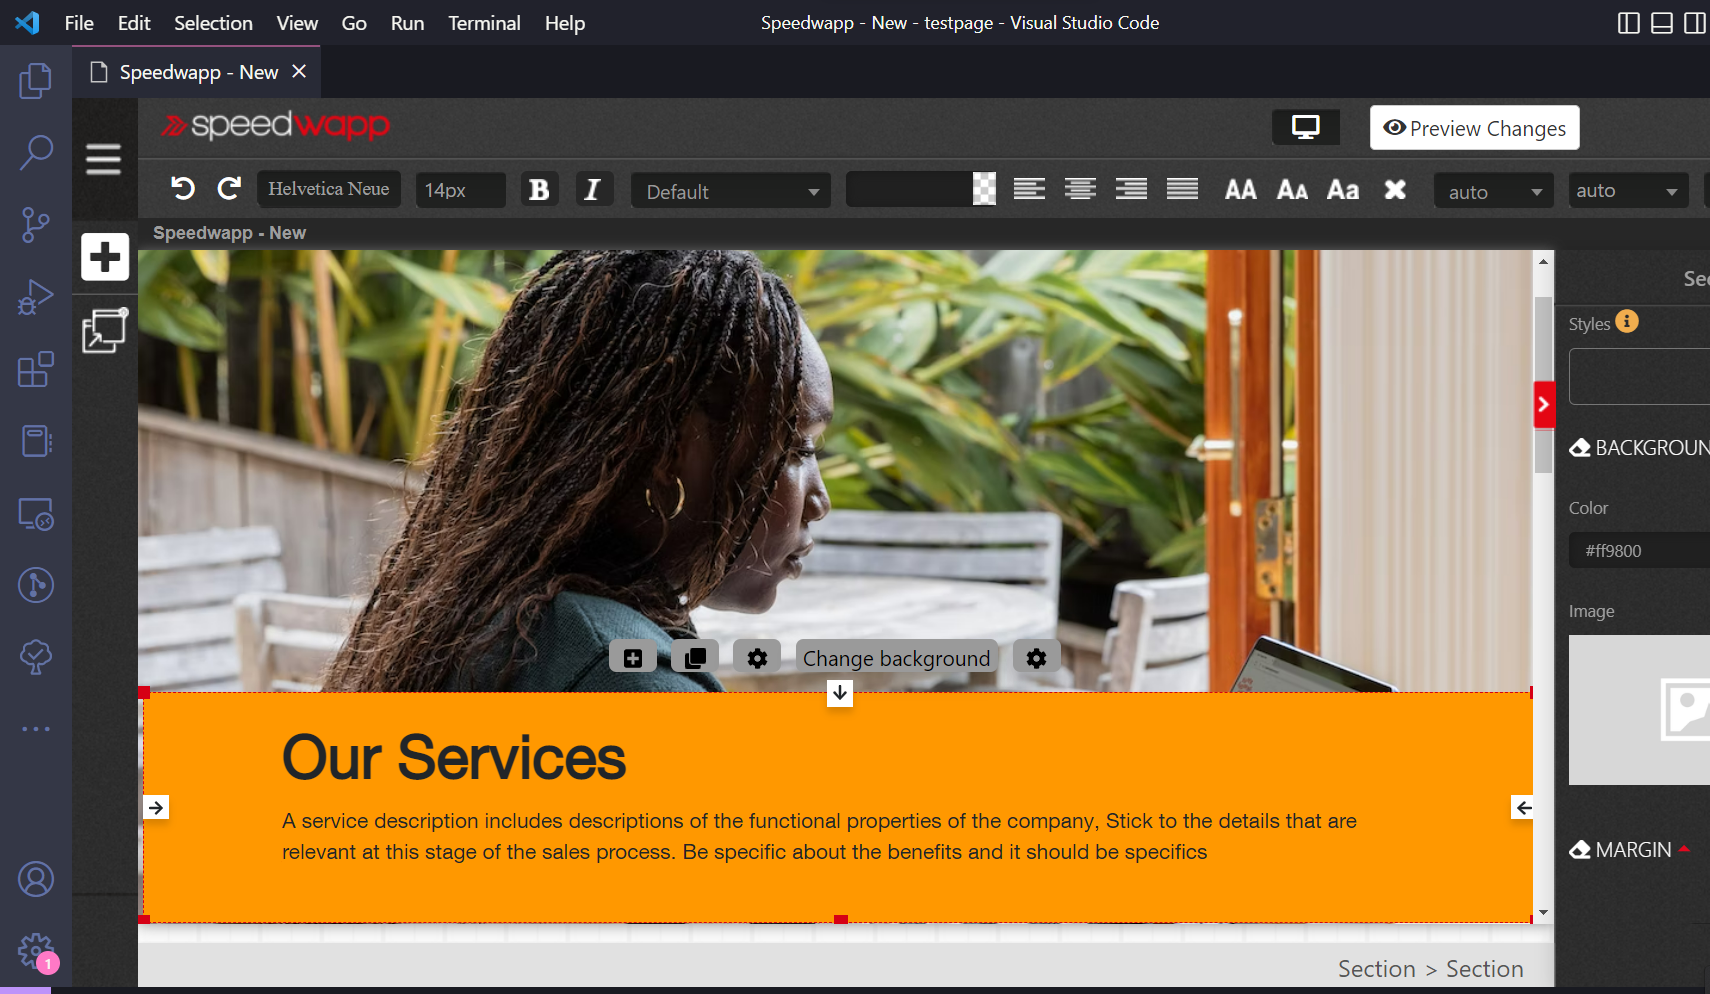
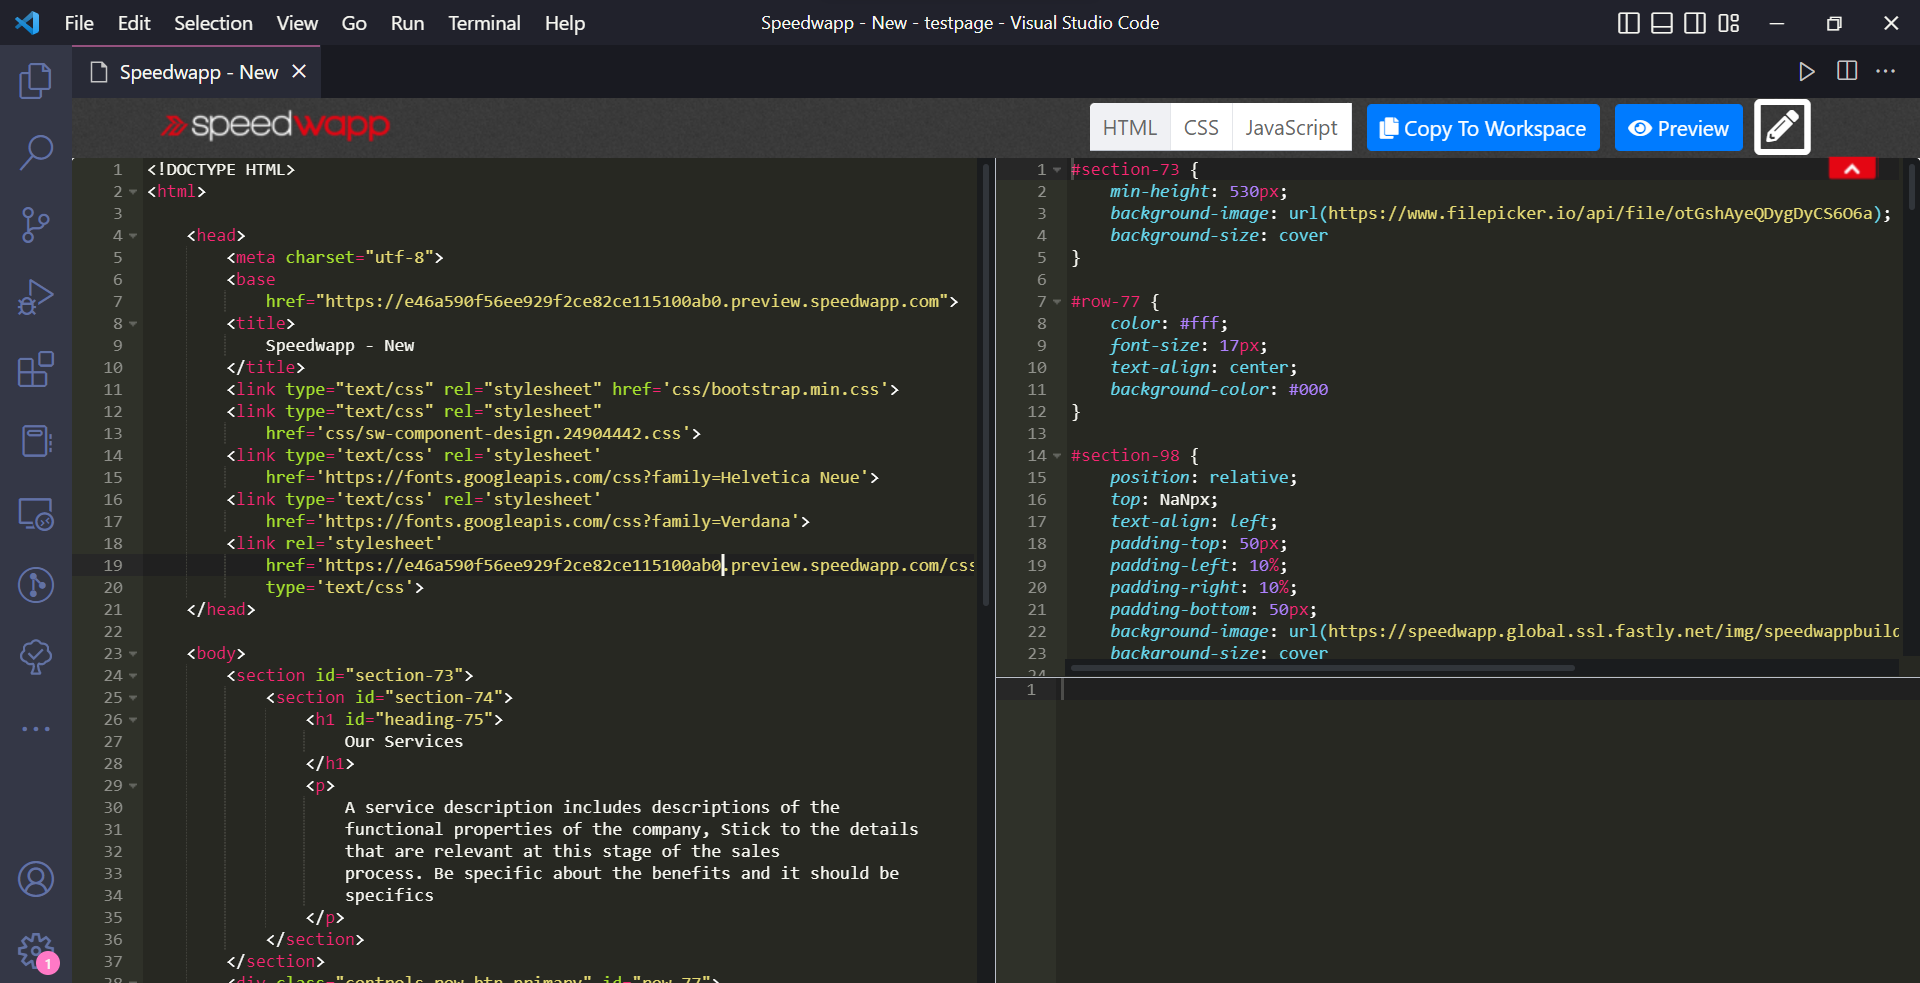
Now let’s edit it. So first, I want to change the background image of the first component and to do so click on the image you will see a panel on the left and there you can update it
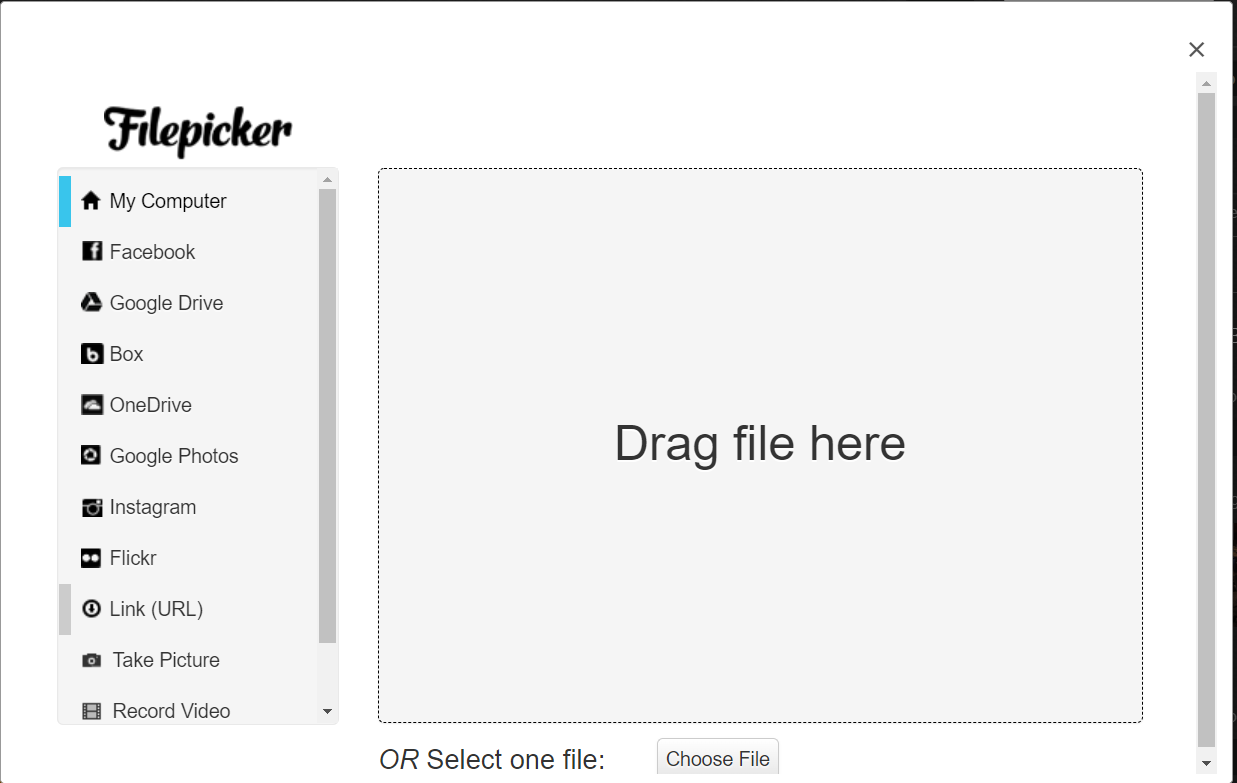
Now we got a pop-up like this and I will be using the image links so head over to unsplash and pick an image of your choice then copy the image URL and paste it into the link section and click on upload.

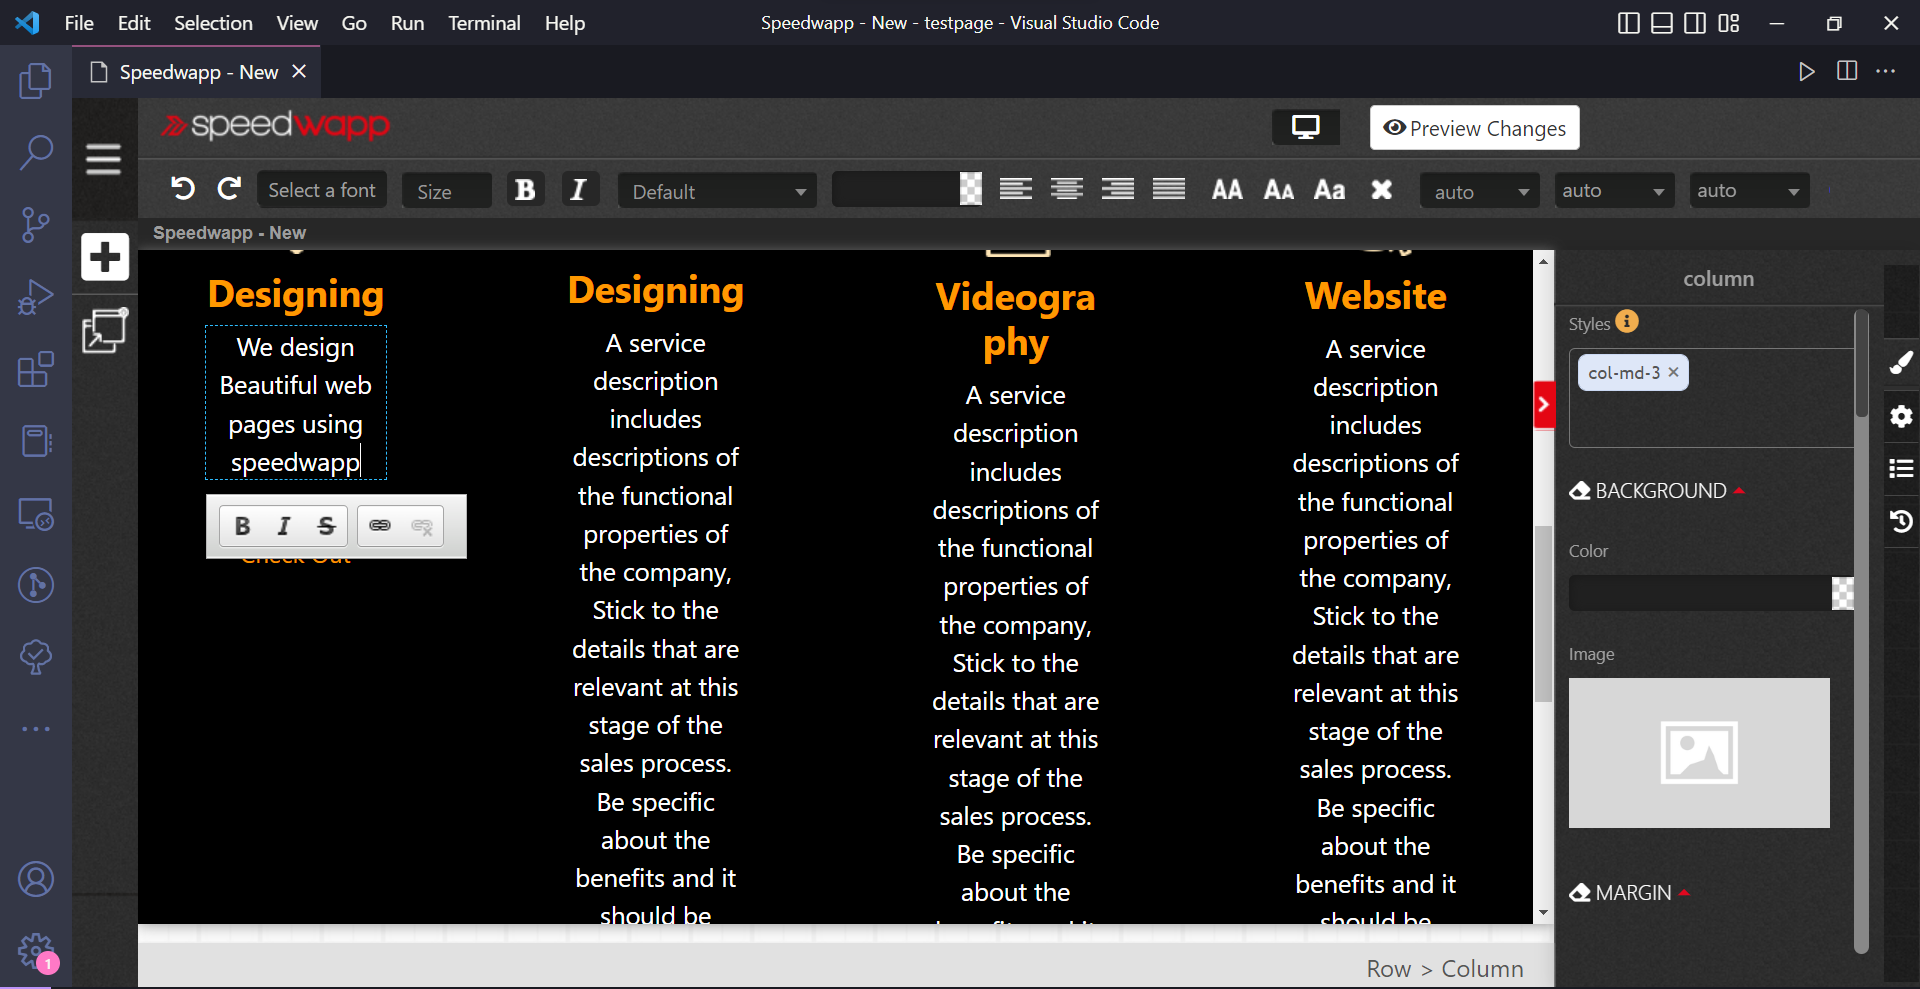
Now I want to change the font style and size of the services paragraph so click on that component and in the above you will see an option to select a font and size once you enter the values where the changes will be live.
Now let’s say I want to edit the content of the below section so click on the text and write whatever you want
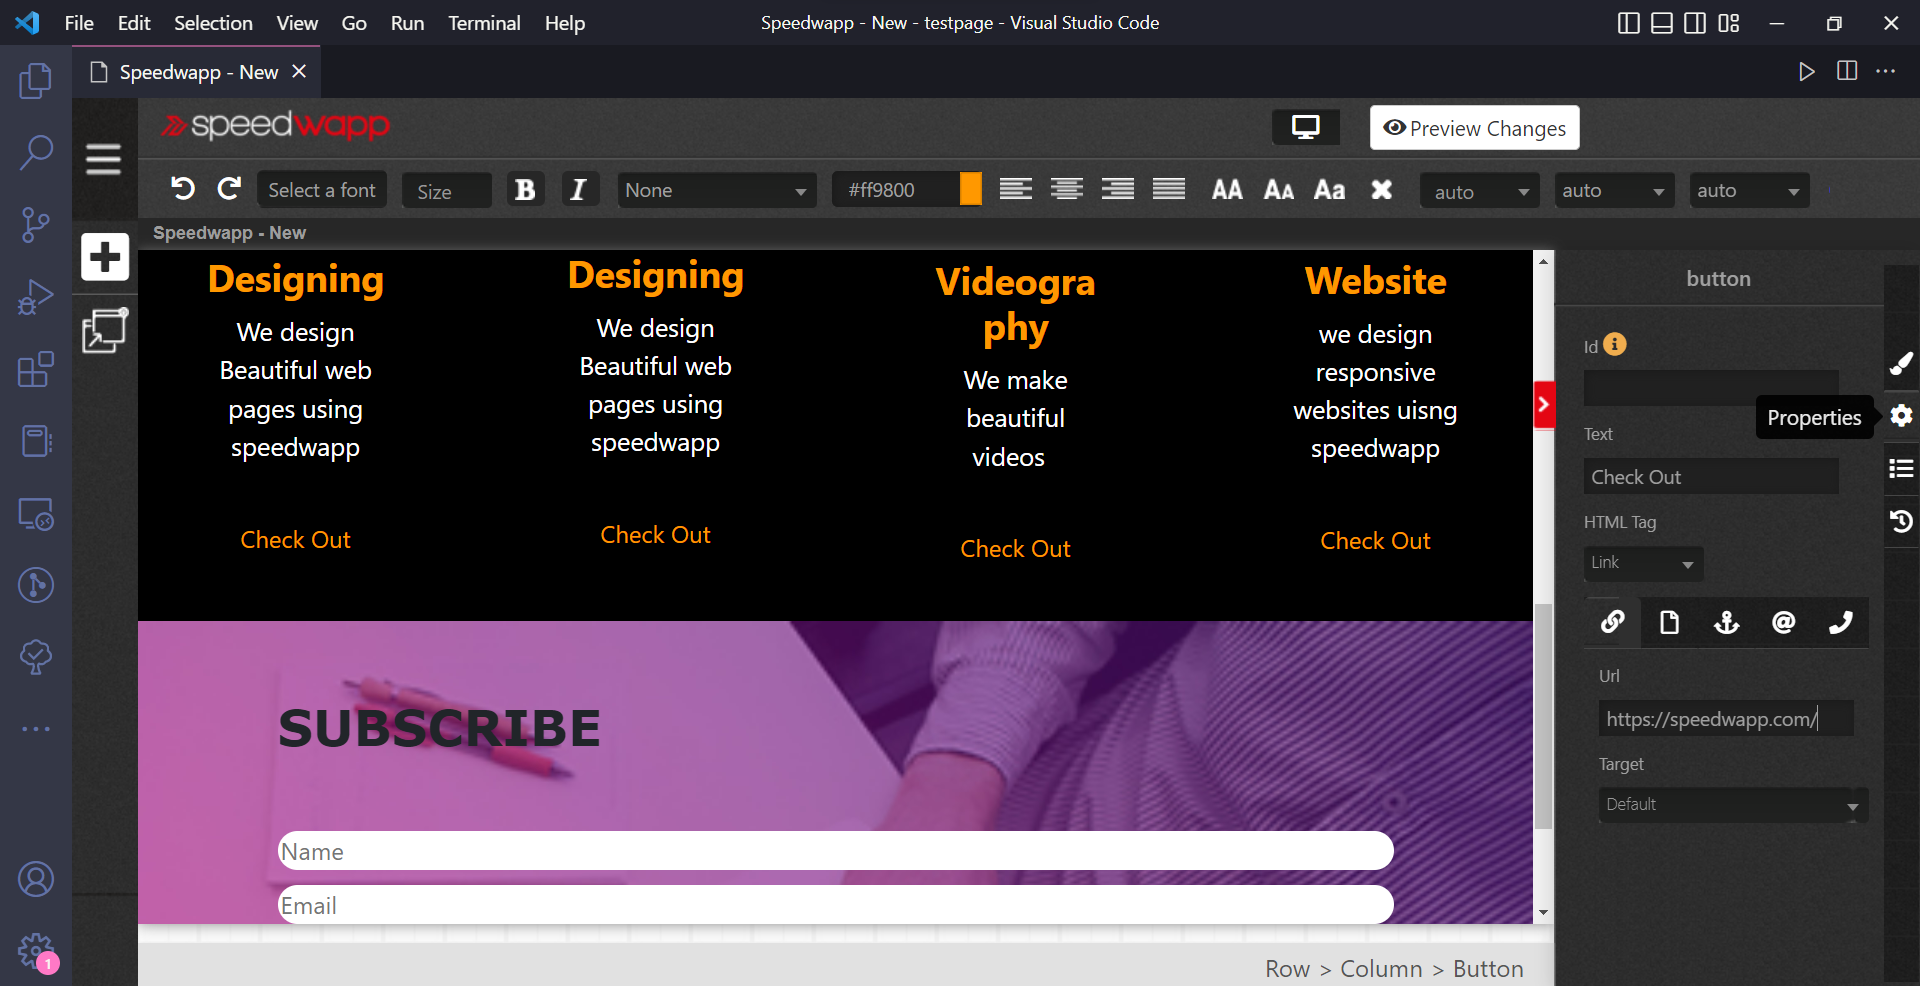
Now let’s add links to these checkout buttons so click on them and in the right side panel click on the properties and there select Link under the HTML tag section and finally, paste your links there
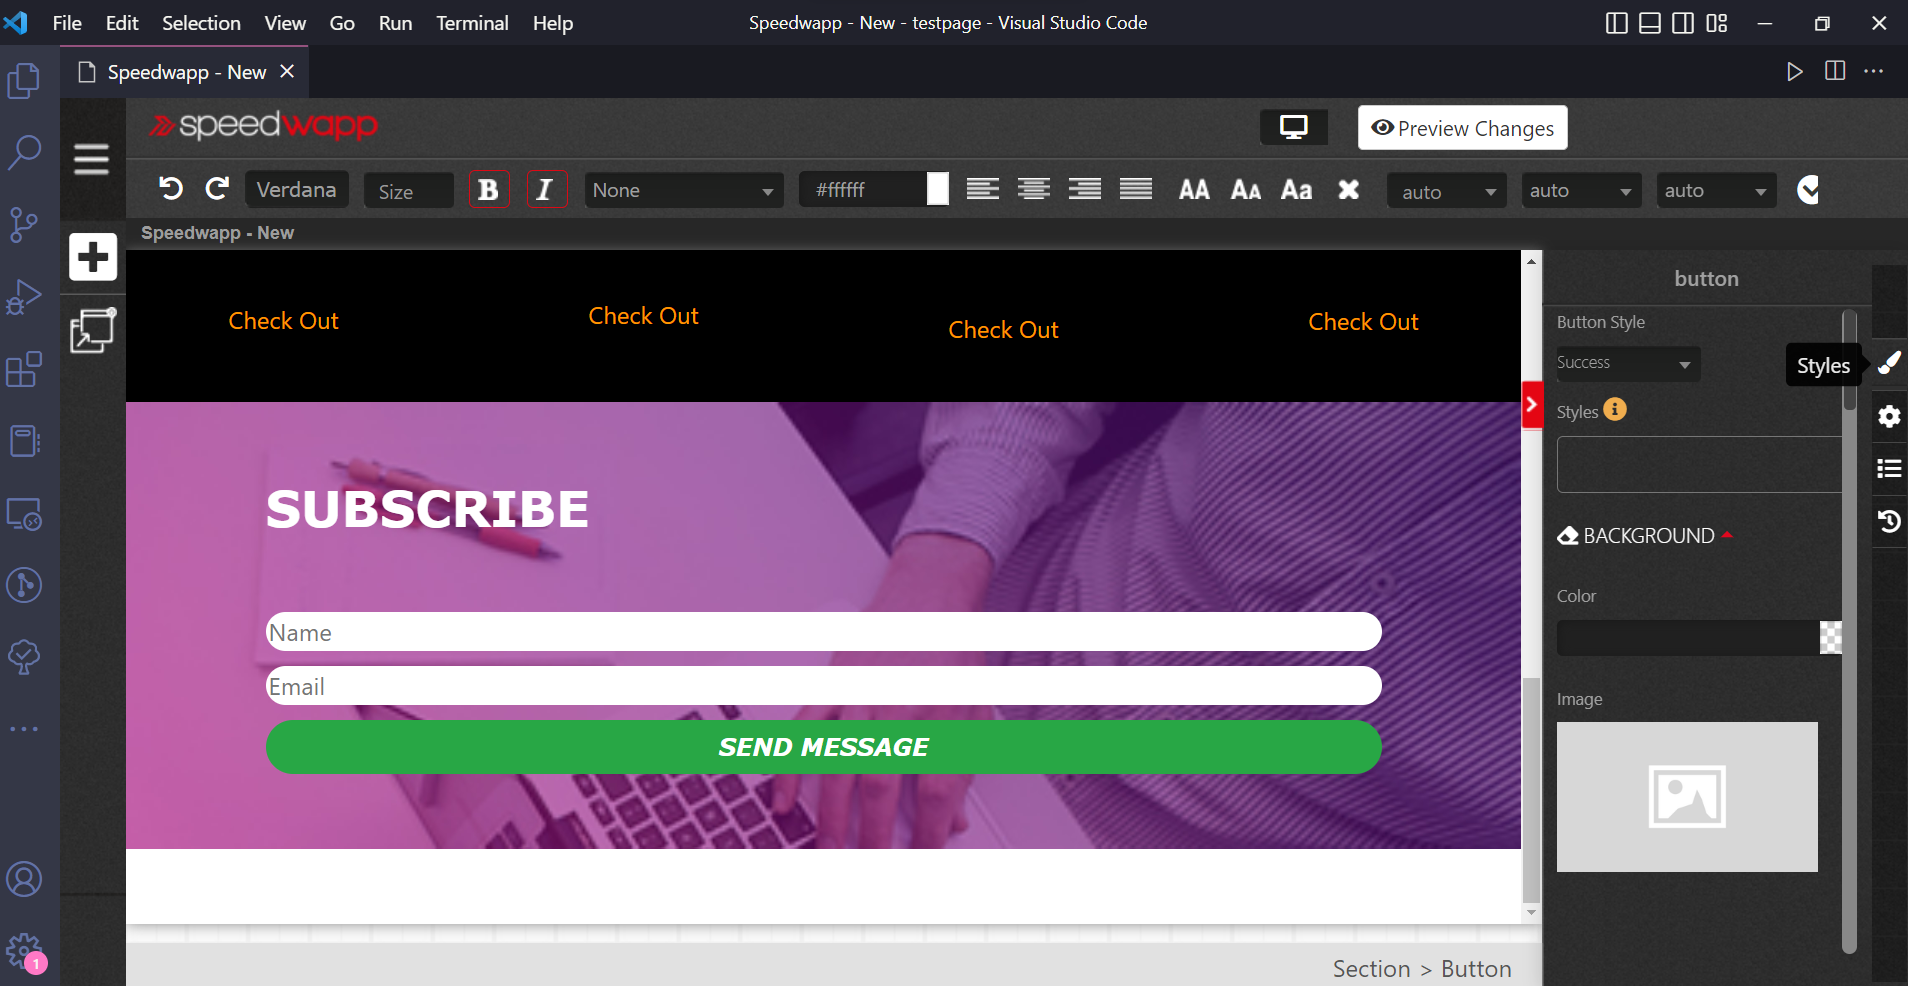
Now let’s edit the last section I want the button colour to be green so will click on that and side on styles on the left and there will change the button style to success.
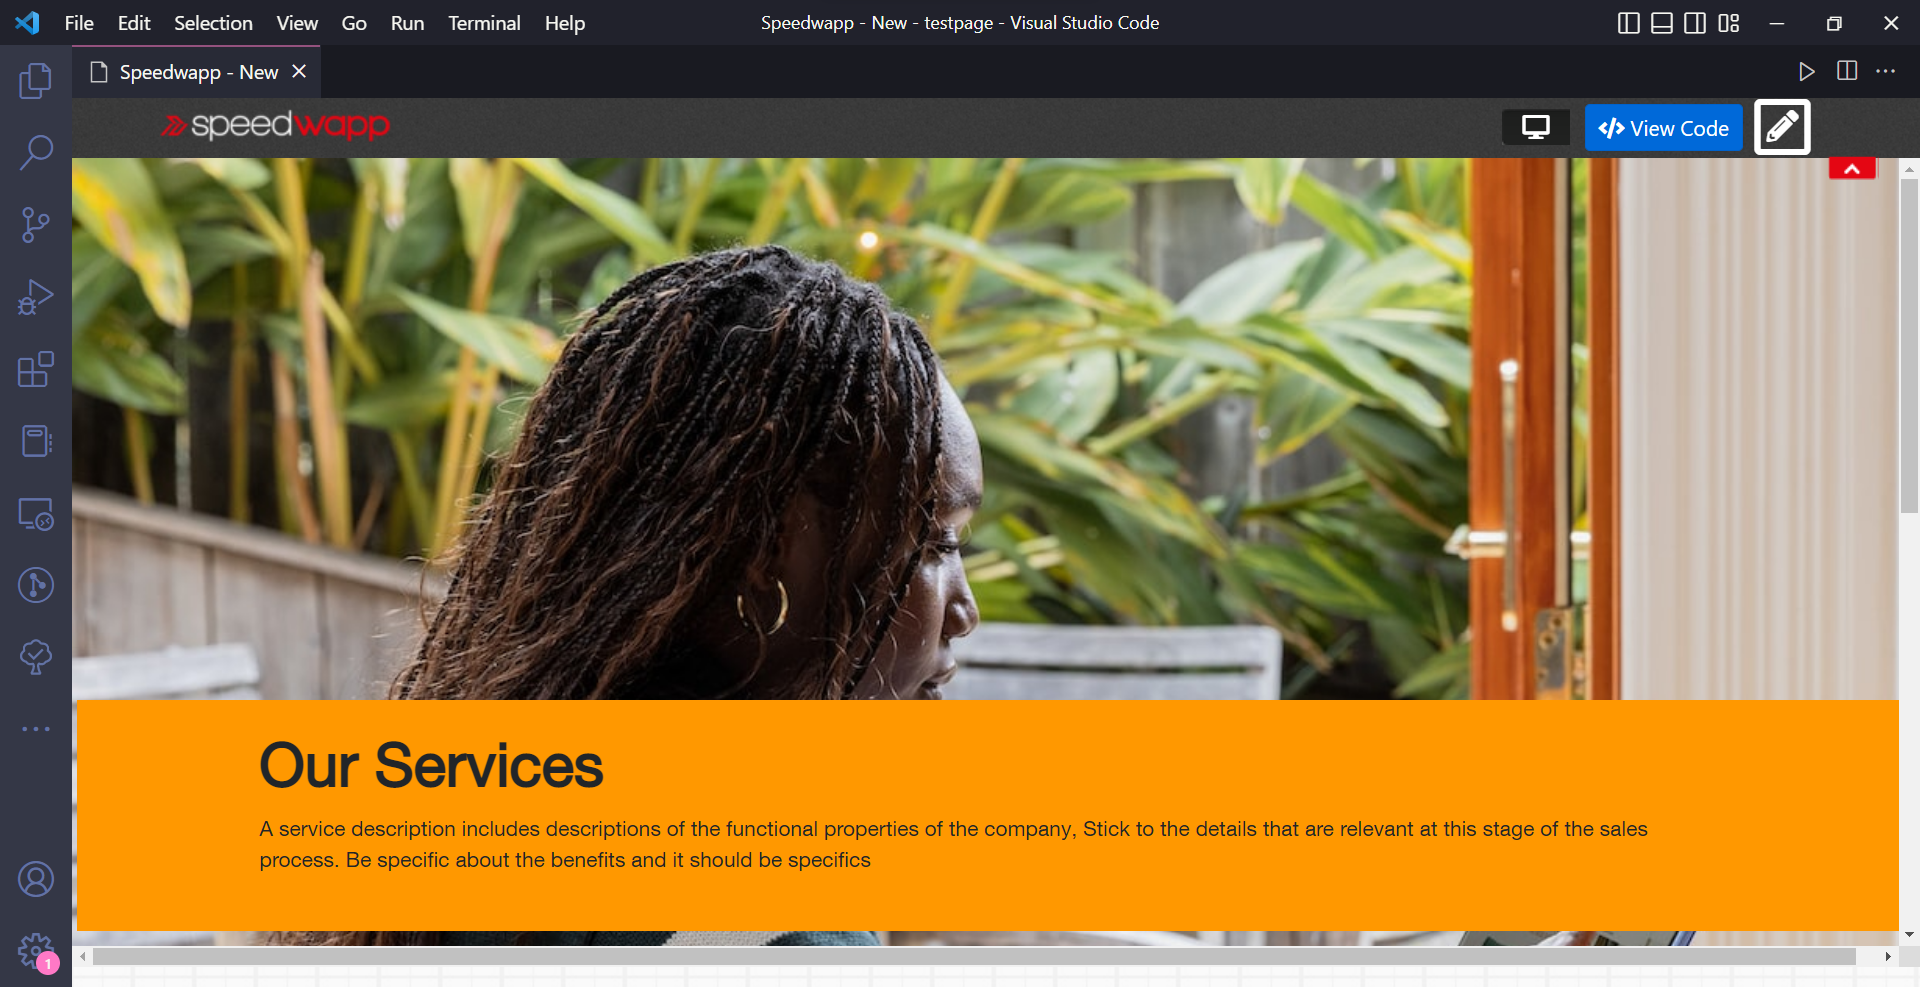
So finally our landing page is ready now let’s deploy it to netlify.
Exporting code & customizations
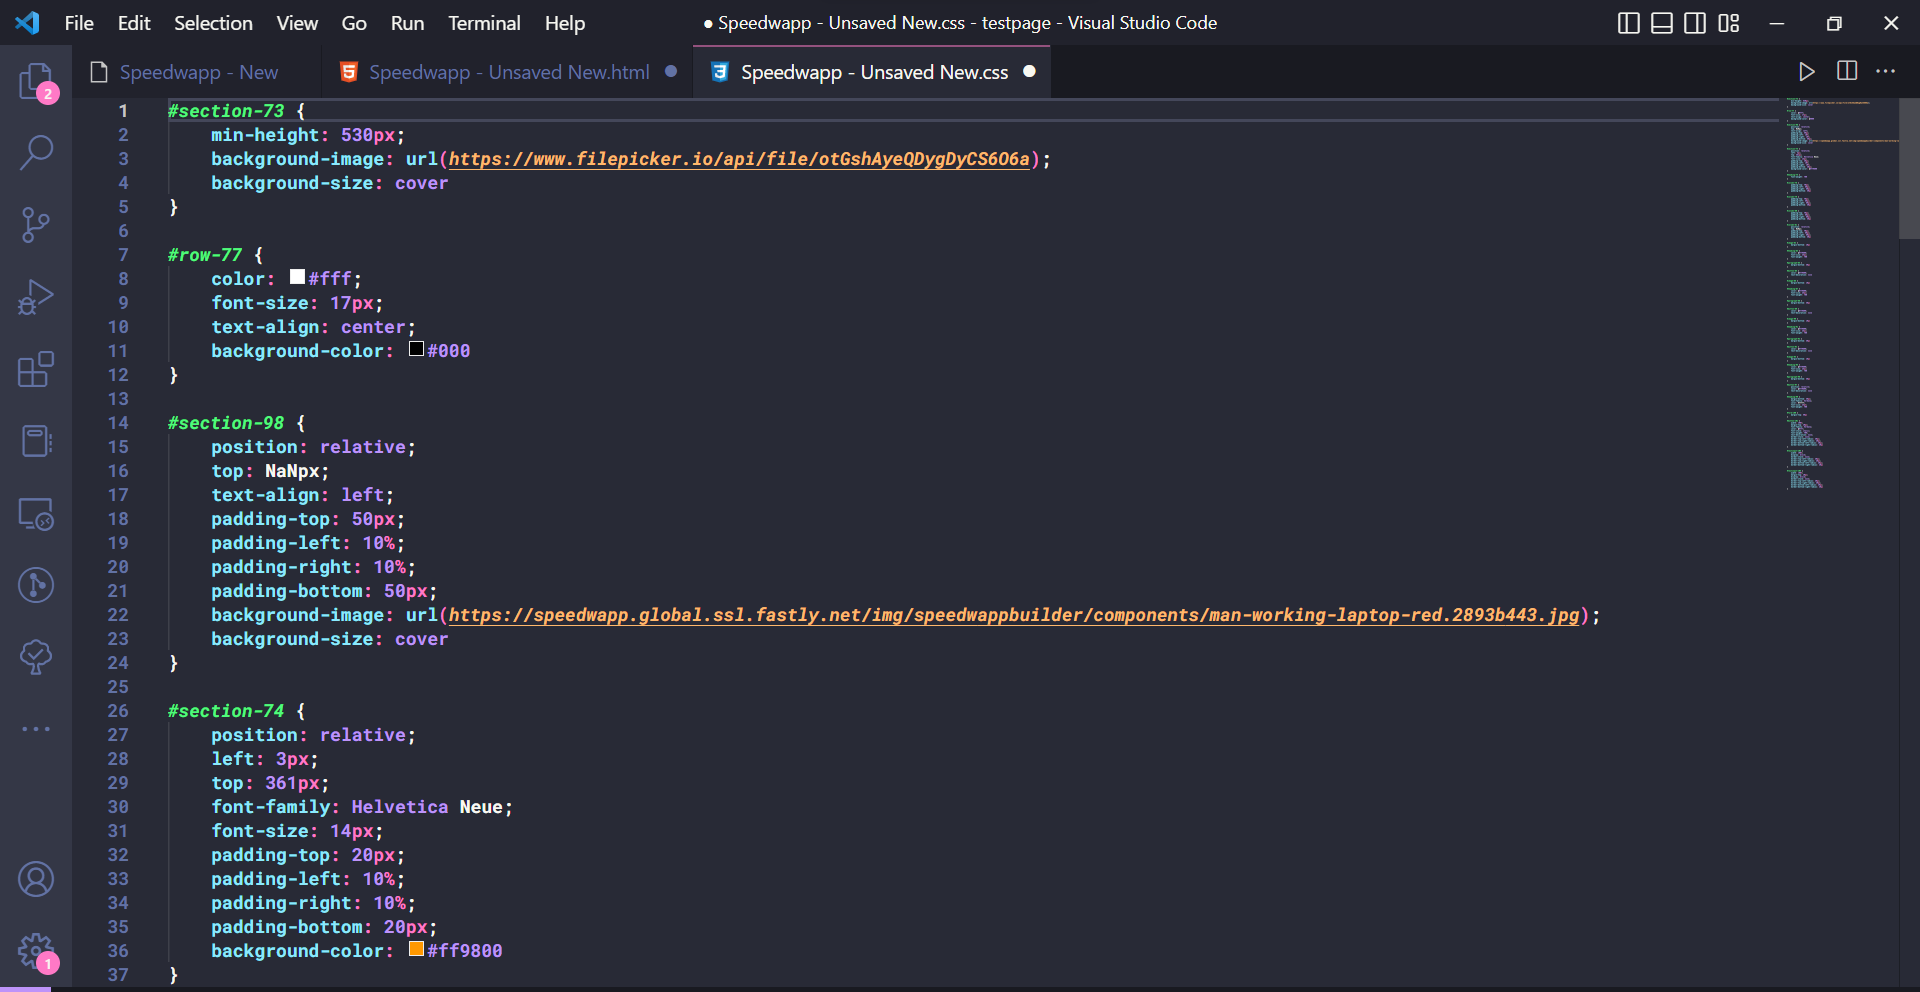
Click on preview changes at the top and then click on view code
Here you will see the full code of the beautiful webpage which we just made using speedwapp vs code extension. Now click on copy to workspace
Now you will see the automatically generated code files
Now move the code to a new folder and upload it to a GitHub repository
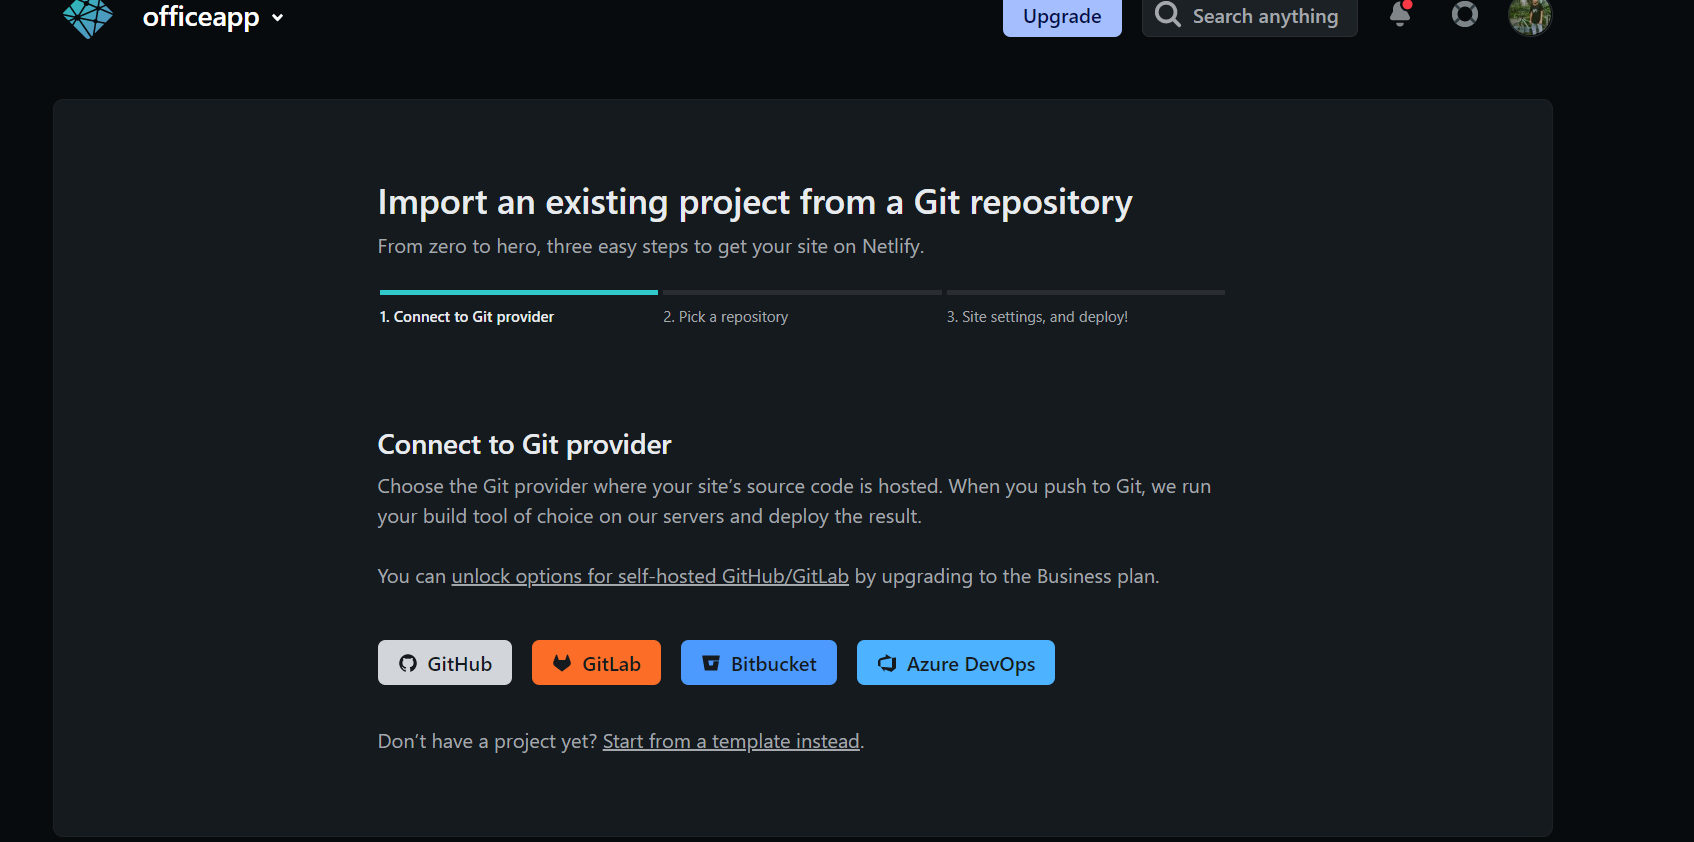
Once you are done uploading the code head over to your netlify dashboard and click on add a site select the existing project and choose GitHub provider
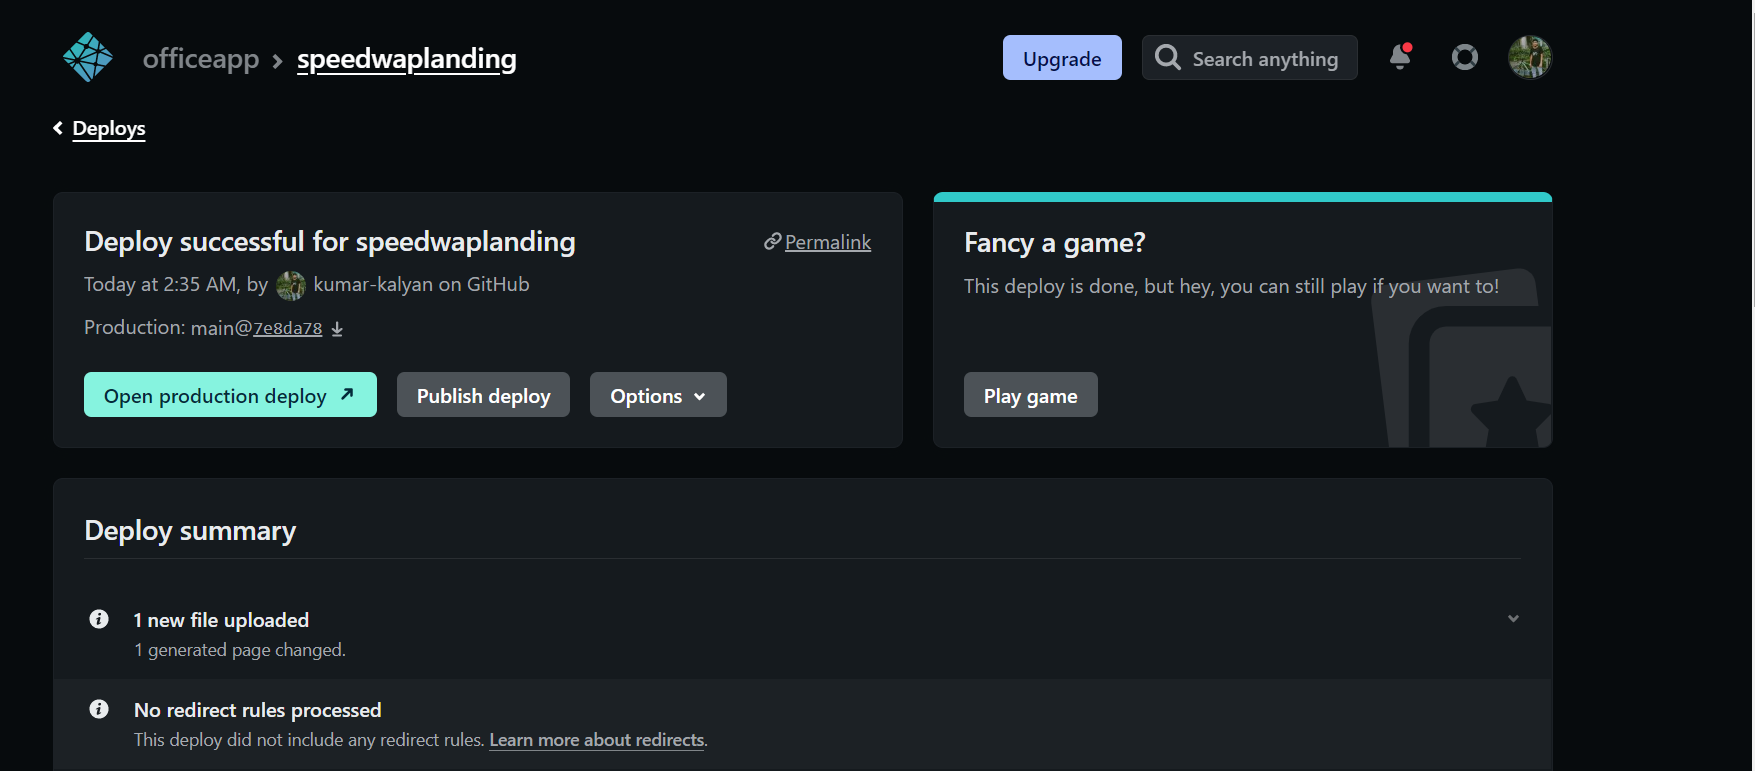
Now select your repository and click on deploy site
Conclusion
Congratulations you have successfully learned to build beautiful and responsive landing pages directly from vs code without writing much code. Feel free to reach me for any queries or simply visit speedwapp website and make sure to share this article with your peers and let me know how much you loved this new tool
How to have a basic html structure?
I saw there is a method to load the HTML sample in VS Code.
But I don’t know what is the shortcut of it. 
![]()
6 Answers 6
! + Enter would do the work for you.
![]()
type ! at the beginning and hit enter it will generate the basic HTML Structure i do it all the time
![]()
press CTRL+! and then press Tab or press ctrl + space
![]()
it will generate this code:
! + Enter will give you the basic HTML structure.
-
The Overflow Blog
Related
Hot Network Questions
Subscribe to RSS
To subscribe to this RSS feed, copy and paste this URL into your RSS reader.
Site design / logo © 2023 Stack Exchange Inc; user contributions licensed under CC BY-SA . rev 2023.5.24.43458
By clicking “Accept all cookies”, you agree Stack Exchange can store cookies on your device and disclose information in accordance with our Cookie Policy.
How To Set Up Your HTML Project With VS Code
To explore HTML in practice and begin building an HTML website, we’ll need to set up a new project using a text editor. This tutorial series uses Visual Studio Code, a free code editor available for Mac, Windows, or Linux, but you may use whichever code editor you prefer.
After opening your preferred text editor, open up a new project folder and name it html-practice . We’ll use this folder to store all the files and folders we create in the course of this tutorial series.
To create a new project folder in Visual Studio Code, navigate to the “File” menu item in the top menu and select “Add Folder to Workspace.” In the new window, click the “New Folder” button and create a new folder called html-practice as illustrated in the gif below:
Next, create a new file called index.html inside the html-practice folder. We’ll use this file through the tutorial series to experiment with HTML. If you are using Visual Studio Code, you can create a new file by using Right Click (on Windows) or CTRL + Left Click (on Mac) on the html-practice folder, selecting “New File”, and creating the file index.html as illustrated in the gif below:
You now have a project folder and file for exploring HTML. We’ll return to this file in the tutorials ahead.
Debugging and Troubleshooting CSS and HTML
Before we get started with our HTML exercises, be aware that precision is important when writing HTML. Even an extra space or mistyped character can keep your code from working as expected.
If your HTML code is not rendering in the browser as intended, make sure you have written the code exactly. To troubleshoot errors, check for extra or missing spaces, missing or misspelled tags, and missing or incorrect punctuation or characters. Each time you change your code, make sure to save your file before reloading it in the browser to check your results.
A Quick Note on Automatic HTML Support Features
Some code editors—such as the Visual Studio Code editor that we’re using in this series—provide automatic support for writing HTML code. For Visual Studio Code, that support includes smart suggestions and auto completions. While this support is often useful, be aware that you might generate extra code that will create errors if you’re not used to working with these support features. If you find these features distracting, you can turn them off in the code editor’s preferences.
We are now ready to begin learning how the CSS language works. In the next tutorial, we’ll begin exploring how CSS rules are used to control the style and layout of HTML content on a webpage.
Thanks for learning with the DigitalOcean Community. Check out our offerings for compute, storage, networking, and managed databases.
Tutorial Series: How To Build a Website with HTML
This tutorial series will guide you through creating and further customizing this website using HTML, the standard markup language used to display documents in a web browser. No prior coding experience is necessary but we recommend you start at the beginning of the series if you wish to recreate the demonstration website.
At the end of this series, you should have a website ready to deploy to the cloud and a basic familiarity with HTML. Knowing how to write HTML will provide a strong foundation for learning additional front-end web development skills, such as CSS and JavaScript.