Создаем таблицу на html-странице
Здравствуйте, уважаемые читатели блога! Частенько на web-страницы, кроме текста и картинок, возникает необходимость вывести различные данные в виде таблиц. Да это и понятно, таблица — удобнейший способ представления большого количества сведений. Поэтому возникает вопрос «Как же вставлять таблицы в html?». В этой статье я отвечу вам на этот вопрос и приведу вам множество примеров различных html таблиц.
Как создать таблицу используя HTML
HTML-таблицы создаются в четыре шага.
1. На первом шаге в html-коде с помощью парного тега <table> указываем браузеру, что в web-страницу вставлена таблица: <table></table>. Элемент table является блочным элементом web-страницы. Следовательно таблица всегда выводится с новой строки с отступами по вертикали от соседних элементов, поэтому нет необходимости помещать ее в абзац.
2. На втором шаге формируем строки таблицы, помещая парные теги <tr> внутрь <table>. Каждый элемент <tr> создает отдельную строку:
3. Далее, на третьем шаге формируем ячейки таблицы с помощью парных тегов <td> и <th>, которые помещаются внутрь элемента <tr>. Тег <td> создает обычную ячейку, а <th> ячейку заголовка, т.е. шапку соответствующего столбца:
4. Ну и на последнем шаге помещаем внутрь элементов <th> и <tr> содержимое ячеек. HTML-код вставки таблицы на веб-страницу выглядит примерно так:
В открывающий тег table я добавил атрибут border и присвоил ему значение 1 для того, чтобы на странице в браузере были видны границы ячеек. По умолчанию этот атрибут равен 0. Результат:
| Столбец 1 | Столбец 2 | Столбец 3 |
|---|---|---|
| Ячейка 1-1 | Ячейка 1-2 | Ячейка 1-3 |
| Ячейка 2-1 | Ячейка 2-2 | Ячейка 2-3 |
Более тонко настроить отображение границ помогут каскадные таблицы стилей. С помощью свойства CSS border можно изменить толщину и цвет рамок, а также изменить тип границ.
Текст, который необходимо поместить внутрь ячеек, заключать в блочные теги необязательно, но, если текст большой, его можно разбить на абзацы, применив тег <p>. Если понадобиться как-то оформить вставляемый текст, то можно использовать теги оформления.
Кроме текста мы можем помещать в ячейки картинки с помощью тега <img>:
<td><img src=»https://webcodius.ru/html_i_css/image.jpg» alt=»картинка в ячейке»></td>
В качестве содержимого ячейки может даже выступать другая таблица. В этом случае создание вложенной таблицы ничем не отличается от создания обычной таблицы. Просто между тегами <td> и </td> вставляются теги <table> и </table>, и в нее вставляются строки и ячейки.
При создании таблиц необходимо учитывать некоторые правила:
- для создания таблицы используется только тег <table>;
- тег <tr> может находиться только внутри тега <table>;
- теги <td> и <th> могут находиться только внутри тега <tr>, любое другое содержимое тега <tr> игнорируется браузером;
- содержимое таблицы(текст или картинки) может находиться только в тегах <td> и <th>;
- ячейки таблицы должны иметь хоть какое-то содержимое, иначе браузер может их вообще не отобразить, если же какая-то ячейка должна быть пустой, то в нее обычно помещают неразрывный пробел (HTML-литерал );
- таблица относится к блочным элементам web-страницы;
- размеры таблицы и ее ячеек зависят от содержимого, т.е. таблица растягивается по ширине и высоте так, чтобы все уместилось;
- между границами отдельных ячеек и между границей каждой ячейки и ее содержимым делается небольшой отступ;
- текст ячеек заголовка(элемент th) выводится полужирным шрифтом и выравнивается по центру;
- границы вокруг таблицы и ее ячеек по умолчанию не рисуются.
Заголовок таблицы
Далее рассмотрим дополнительные секции таблиц html. На практике они используются редко, но иногда могут пригодиться.
Начнем с парного тега <caption>, который задает таблице заголовок. Текст заголовка помещается внутрь этого тега, а тот должен находится внутри тега <table>. Причем без разницы в каком месте html-кода таблицы поместить тег <caption>, браузер все равно отобразит заголовок над таблицей и выровняет по ее центру. Но обычно тег <caption> помещают сразу после открывающего тега <table>:
| Ячейка 1.1 | Ячейка 1.2 |
| Ячейка 2.1 | Ячейка 2.2 |
Секции таблицы
Таблицу html можно логически разбить на части — секции. Всего существует три вида секций:
- секция заголовка, в которую помещают ячейки заголовка, которые формируют шапку таблицы;
- секция тела, в которой располагают ячейки с основными данными;
- секция завершения, в которую помещают ячейки с итоговыми данными.
Секция заголовка таблицы формируется с помощью парного тега <thead>. Причем допустимо использовать не более одного элемента <thead> в пределах одной таблицы, и он должен идти в html коде сразу после тега <table>.
Секцию тела создают парным тегом <tbody>. Одна html таблица может содержать несколько секций тела, что позволяет создавать структурные блоки к которым могут применяться единые стили оформления.
Секция завершения формируется парным тегом <tfoot> и в пределах одного контейнера <table> может быть только одна.
Все эти парные теги должны содержать теги <tr>, которые формируют строки, относящиеся к соответствующим секциям:
Объединение ячеек таблицы
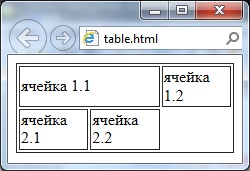
Осталось рассказать о самой важной возможности таблиц — объединении ячеек. Для объединения нескольких ячеек в одну используются атрибуты colspan и rowspan тегов <td> и <th>. Атрибут colspan задает количество ячеек объединенных по горизонтали, а rowspan — по вертикали:
| 1.1 | 1.2-1.3 | |
| 2.1 | 2.2 | 2.3 |
| 3.1-4.1 | 3.2 | 3.3 |
| 4.2 | 4.3 | |
При объединении ячеек важно проверить количество ячеек в каждой строке, чтобы не было ошибок. Так, конструкция <td colspan=»2″> заменяет две ячейки, поэтому в следующей строке должно быть два тега <td>, либо такая же конструкция! Если число ячеек во всех строках не будет совпадать, то появятся пустые лишние ячейки.
Пример неправильного html-кода при объединении ячеек:
И результат отображения в браузере:
Т.е. если проанализировать html-код, то вы заметите, что в первой строке задано три ячейки, две из которых объединены с помощью атрибута colspan, а во второй строке добавлено только две ячейки. По этому во второй строке возникает третья пустая ячейка.
Атрибуты тега <table>
В этом посте мы уже столкнулись с одним атрибутом тега <table>. С атрибутом border, который задает толщину рамки в пикселях. По умолчанию он равен 0 и следовательно ячейки по умолчанию отображаются без рамки.
Кроме атрибута border есть еще несколько важных атрибутов поддерживаемых тегом <table>. Давайте их рассмотрим.
Атрибут align — задает выравнивание таблицы на странице. Может принимать значения left, center, right, которые задают выравнивание соответственно по левому краю, по центру и по правому краю. По умолчанию равен left.
Атрибут background, который задает фоновый рисунок к таблице. В качестве значения принимает адрес файла с изображением.
bgcolor — устанавливает цвет фона таблицы. Можно использовать совместно с атрибутом background.
Атрибут bordercolor задает цвет рамки таблицы.
Cellpadding — определяет расстояние между границей ячейки и ее содержимым. Позволяет улучшить читабельность таблицы. В качестве значения может быть любое положительное число.
Cellspacing — задает расстояние между внешними границами ячеек.
На этом рассказывать о том как вставить таблицу в html страницу я закончу, только подведу итоги:
- для вставки таблицы используются теги <table> — обозначение таблицы, <tr> — добавление строки и <td> — вставка ячейки;
- таблица представляет из себя блочные элемент web-страницы;
- в качестве содержимого ячеек может быть не только текст, но и картинки и другие таблицы;
- таблица может содержать три вида секций: секция заголовка — <thead>, секция завершения <tfoot> и секция тела — <tbody>;
- для объединения ячеек используем атрибуты тега <td> colspan и rowspan.
На этом все, в следующем посте я расскажу о средствах навигации на html-сайте. Чтобы не пропустить этот пост подписывайтесь на обновления моего блога! Все, до новых встреч!
HTML Tables
HTML tables allow web developers to arrange data into rows and columns.
Example
| Company | Contact | Country |
|---|---|---|
| Alfreds Futterkiste | Maria Anders | Germany |
| Centro comercial Moctezuma | Francisco Chang | Mexico |
| Ernst Handel | Roland Mendel | Austria |
| Island Trading | Helen Bennett | UK |
| Laughing Bacchus Winecellars | Yoshi Tannamuri | Canada |
| Magazzini Alimentari Riuniti | Giovanni Rovelli | Italy |
Define an HTML Table
A table in HTML consists of table cells inside rows and columns.
Example
A simple HTML table:
Table Cells
Each table cell is defined by a <td> and a </td> tag.
td stands for table data.
Everything between <td> and </td> are the content of the table cell.
Example
Note: A table cell can contain all sorts of HTML elements: text, images, lists, links, other tables, etc.
Table Rows
Each table row starts with a <tr> and ends with a </tr> tag.
tr stands for table row.
Example
You can have as many rows as you like in a table; just make sure that the number of cells are the same in each row.
Note: There are times when a row can have less or more cells than another. You will learn about that in a later chapter.
Table Headers
Sometimes you want your cells to be table header cells. In those cases use the <th> tag instead of the <td> tag:
th stands for table header.
Example
Let the first row be table header cells:
By default, the text in <th> elements are bold and centered, but you can change that with CSS.
HTML Exercises
HTML Table Tags
| Tag | Description |
|---|---|
| <table> | Defines a table |
| <th> | Defines a header cell in a table |
| <tr> | Defines a row in a table |
| <td> | Defines a cell in a table |
| <caption> | Defines a table caption |
| <colgroup> | Specifies a group of one or more columns in a table for formatting |
| <col> | Specifies column properties for each column within a <colgroup> element |
| <thead> | Groups the header content in a table |
| <tbody> | Groups the body content in a table |
| <tfoot> | Groups the footer content in a table |
For a complete list of all available HTML tags, visit our HTML Tag Reference.
HTML Tables – Table Tutorial with Example Code

Hillary Nyakundi
When you’re building a project that needs to represent data visually, you will need a good way to display the information so it’s easy to read and understand.
Now, depending on the type of data, you can select between different representation methods using HTML elements.
In most cases, tables are more convenient to display large amounts of structured data nicely. That’s why, in this article, we are going to learn how to use tables in HTML and then how to style them.
Here’s an Interactive Scrim about HTML Tables
But, first things first – what is a table in HTML?
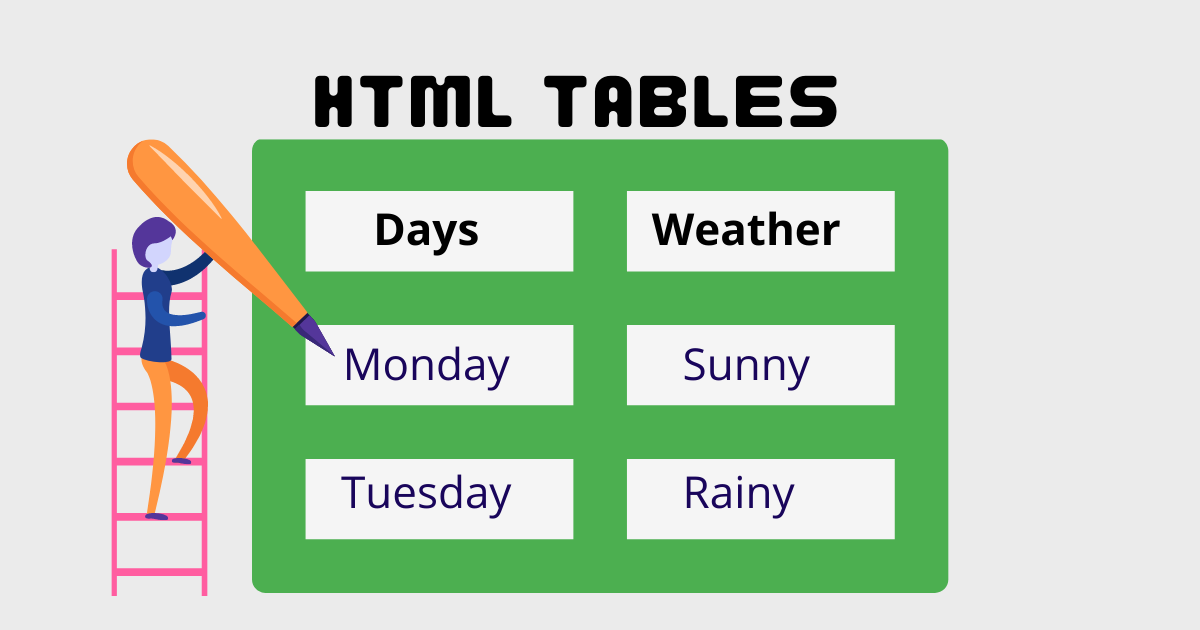
What is a Table in HTML?
A table is a representation of data arranged in rows and columns. Really, it’s more like a spreadsheet. In HTML, with the help of tables, you can arrange data like images, text, links and so on into rows and columns of cells.
The use of tables in the web has become more popular recently because of the amazing HTML table tags that make it easier to create and design them.
To create a table in HTML you will need to use tags. The most important one is the <table> tag which is the main container of the table. It shows where the table will begin and where it ends.
Common HTML Table tags
Other tags include:
- <tr> — represents rows
- <td> — used to create data cells
- <th> — used to add table headings
- <caption> — used to insert captions
- <thead> — adds a separate header to the table
- <tbody> — shows the main body of the table
- <tfoot> — creates a separate footer for the table
HTML Table Syntax:
| Cell 1 | Cell 2 | Cell 3 |
| Cell 4 | Cell 5 | Cell 6 |
Now that you have an understanding of what an HTML table is all about and how you can create it, let’s go ahead and see how we can make use of these tags to create tables with more features.
How to Add a Table Heading in HTML
The <th> is used to add headings to tables. In basic designs the table heading will always take the top row, meaning we will have the <th> declared in our first table row followed by the actual data in the table. By default the text passed in the Heading is centered and Bold.
An example with use of <th>
| First Name | Last Name | Email Address |
|---|---|---|
| Hillary | Nyakundi | tables@mail.com |
| Lary | Mak | developer@mail.com |
From the example above, we are able to tell what column contains which information. This is made possible with the use of <th> tag.
How to Add a Caption to a Table
The main use of adding a caption to table is to provide a description about the data represented in the table. The caption can either be placed at the top of the table or the bottom and by default it will always be centered.
To insert a caption into a table, use the <caption> tag.
Caption Syntax
An example with use of <caption>
| Sites | Youtube Channels | Mobile Appss |
|---|---|---|
| Freecode Camp | Freecode Camp | Enki |
| W3Schools | Academind | Programming Hero |
| Khan Academy | The Coding Train | Solo learn |
How to Use the Scope Attribute in HTML Tables
The scope attribute is used to define whether a specific header is intended for either a column, row, or a group of both. I know the definition might be challenging to understand but hold on – with the help of an example you will better understand it.
The main purpose of the scope element is to show the target data so that the user does not have to rely on assumptions. The attribute is declared in the header cell <th> , and it takes the values col , row , colgroup and rowgroup .
The values col and row indicated that the header cell is providing inforamation for either the rows or columns respectively.
Scope Syntax
An Example with use of <scope>
| Semester | Grade | |
|---|---|---|
| 1 | Jan — April | Credit |
| 2 | May — August | Pass |
| 2 | September — December | Distinction |
What the scope attribute has done, is that it shows whether a header cell belongs to either the column, row, or a group of both.
In this case the headers belong to the column because it’s what we set in the code. You can play around by changing the attribute to see the different behaviors.
How to Use Cell Spanning in an HTML Table
Perhaps you have come across cells that stretch across two or more columns or rows in a table. That’s called cell spanning.
If you worked in programs like MS office or Excel you have probably used the function by highlighting the cells and clicking the command, and voilà! You have it.
The same features can be applied in an HTML table by using two cell attributes, colspan for horizontal spanning and rowspan for vertical spanning. The two attributes are assigned numbers greater that zero which shows the number of cells you wish to span.
An Example with use of span
| Name | Subject | Marks |
|---|---|---|
| Hillary | Advanced Web | 75 |
| Operating Syatem | 60 | |
| Lary | Advanced Web | 80 |
| Operating Syatem | 75 | |
| Total Average: 72.5 | ||
In the example above, we have a cell spanning of 2 cells in the rows and 3 cells in the column as indicated. We have managed to apply the span both vertically and horizontally.
When using the attributes colspan and rowspan , make sure to declare the values assigned correclty to avoid overlapping of cells.
How to Add a Table Header, Body, & Footer in HTML Tables
Just like how a website or any other document has three main sections – the header, body, and footer – so does a table.
In a table they are divided by using attributes namely:
- <thead> — provides a separate haeder for the table
- <tbody> — conatins main content of the table
- <tfoot> — creates a separete footer for the table
An Example with use of <thead> , <tbody> & <tfoot>
| October | November | ||
|---|---|---|---|
| Sales | Profit | Sales | Profit |
| $200,00 | $50,00 | $300,000 | $70,000 |
| November was more produstive | |||
In the above example, the header is represented by the name of the months, the part with the figures of both sales and profit represents the table body, and finally the part with the statement represents the footer of our table.
Another important thing to note is that a table can have more than one body part. In a scenario like this each body groups the rows that are related together.
How to Style HTML Tables using CSS
Even though tables are widely used today, it is very rare to find one that has not been styled. Most of them use different forms of styles, whether that’s colors, fonts, highlighting important values and so on.
Styling helps make the tables appear proffesional and appealing to the eyes. Afterall you wouldn’t want your reader to stare at data divided by only a sinle line.
Unlike styling with other languages or tools, in HTML you will need to get an extra file with a .css extension created where you will add your styles and link it to your HTML file.
Below, attached is a code playground with an example of a styled table. Feel free to play around with it to see how different styling will affect the display.
The code playground above, we have created a table and styled it using some of the attributes we covered in the article.
We styled it using a CSS file, where we have added the color and border to our table to make it more readable and beautiful. The table also has a fixed header so you can scroll through the large amount of data and still see the header of a particular column.
So, we have seen what a table is, we’ve created a few of them, and even gone a step ahead and applied styling.
But having the knowledge and not knowing how to apply it won’t be of any help. So that being said, where or when do you need to make use of tables in your design?
When to Use a Table
There are many situations where tables might come in handy when developing your projects:
- You can use tables when you want to compare and contrast data with shared characteristics like the differences between A and B or scores of team X to those of Y.
- You can also use one if you want to give an overview of numerical data. A good example of this is when you are trying to represent marks of students or even the scores of teams like the EPL table.
- And a table can help readers quickly find specific information laid out in a clear way. For example if you are going through a long list of name a table can be used to sub devide the list which make it easy for readers.
Wrap Up
Tables are a great way to represent tabular data, and you can create them using basic HTML elements like <table> , <tr> , <td> .
And you can also add some styling to make them look good and present the data clearly with the help of a CSS file.
Before we wrap up, let’s do one more task:
Create a table using what we learned to summarize what we have covered in the article today. After that compare your design with my pinned code playground below: