W3.CSS Navigation Tabs
It is the most populous city in the United Kingdom, with a metropolitan area of over 9 million inhabitants.
Paris
Paris is the capital of France.
The Paris area is one of the largest population centers in Europe, with more than 12 million inhabitants.
Tokyo
Tokyo is the capital of Japan.
It is the center of the Greater Tokyo Area, and the most populous metropolitan area in the world.
Tabbed Navigation
Tabbed navigation is a way to navigate around a website.
Normally, tabbed navigation uses navigation buttons (tabs) arranged together with the selected tab highlighted.
This example uses elements with the same class name ("city" in our example) , and changes the style between display:none and display:block to hide and display different content:
Example
And some clickable buttons to open the tabbed content:
Example
And a JavaScript to do the job:
Example
JavaScript Explained
The openCity() function is called when the user clicks on one of the buttons in the menu.
The function hides all elements with the class name "city" (display="none"), and displays the element with the given city name (display="block");
Closable Tabs
London
London is the capital city of England.
Paris
Paris is the capital of France.
Tokyo
Tokyo is the capital of Japan.
To close a tab, add onclick="this.parentElement.style.display=’none’" to an element inside the tab container:
Example
Active/Current Tab
To highlight the current tab/page the user is on, use JavaScript and add a color class to the active link. In the example below, we have added a "tablink" class to each link. That way, it is easy to get all links that is associated with tabs, and give the current tab link a "w3-red" class, to highlight it:
Example
Vertical Tabs
Example
Animated Tab Content
Use any of the w3-animate-classes to fade, zoom or slide in tab content:
Example
Tabbed Image Gallery
Click on an image:


×

×

×

×
Example
<div w3-display-container">
<img src="img_nature_wide.jpg" alt="Nature" style="width:100%">
<span onclick="this.parentElement.style.display=’none’" class="w3-display-topright">×</span>
<div class="w3-display-bottomleft w3-container">Nature</div>
</div>
Tabs in a Grid
Using tabs in a third column layout. Note that we add a bottom border to the active tab, instead of a background color:
Как сделать таб в html
Tabs are elements that help you organize and navigate multiple documents in a single container. They can be used for switching between items in the container.
Basics
There are two pieces to a tabbed interface: the tabs themselves, and the content for each tab. The tabs are an element with the class .tabs , and each item has the class .tabs-title . Each tab contains a link to a tab. The href of each link should match the ID of a tab.
The tab content container has the class .tabs-content , while each section has the class .tabs-panel . Each content pane also has a unique ID, which is targeted by a link in the tabstrip.
Put it all together, and we get this:
Check me out! I'm a super cool Tab panel with text content!

Check me out! I'm a super cool Tab panel with text content!

Check me out! I'm a super cool Tab panel with text content!

Vertical Tabs
Add the .vertical class to a tabstrip to stack tabs vertically. You can also place the tabstrip and the tab contents in a grid to make them sit side-by-side.
Check me out! I’m a super cool Tab panel with text content!
Check me out! I’m a super cool Tab panel with text content!
Check me out! I’m a super cool Tab panel with text content!
Collapsing Tabs
Add the attribute data-active-collapse="true" to a tabstrip to collapse active tabs.
Lorem ipsum dolor sit amet, consectetur adipisicing elit, sed do eiusmod tempor incididunt ut labore et dolore magna aliqua.
Vivamus hendrerit arcu sed erat molestie vehicula. Sed auctor neque eu tellus rhoncus ut eleifend nibh porttitor. Ut in nulla enim. Phasellus molestie magna non est bibendum non venenatis nisl tempor. Suspendisse dictum feugiat nisl ut dapibus.

Lorem ipsum dolor sit amet, consectetur adipisicing elit, sed do eiusmod tempor incididunt ut labore et dolore magna aliqua.
Tabs and URLs
Browser history
When the data-deep-link option is set to true , the current state of the tabset is recorded by adding a hash with the tab panel ID to the browser URL when a tab opens. By default, tabs replace the browser history (using history.replaceState() ). Modify this behavior by using attribute data-update-history="true" to append to the browser history (using history.pushState() ). In the latter case the browser back button will track each click that opens a tab panel.
By using deep linking (see below), the open state of a page's tabset may be shared by copy-pasting the browser URL.
Deep linking
Add the attribute data-deep-link="true" to a tabstrip to:
- modify the browser history when a tab is clicked
- allow users to open a particular tab at page load with a hash-appended URL
Lorem ipsum dolor sit amet, consectetur adipisicing elit, sed do eiusmod tempor incididunt ut labore et dolore magna aliqua.
Vivamus hendrerit arcu sed erat molestie vehicula. Sed auctor neque eu tellus rhoncus ut eleifend nibh porttitor. Ut in nulla enim. Phasellus molestie magna non est bibendum non venenatis nisl tempor. Suspendisse dictum feugiat nisl ut dapibus.
Lorem ipsum dolor sit amet, consectetur adipisicing elit, sed do eiusmod tempor incididunt ut labore et dolore magna aliqua.
For example, http://example.com/#panel3d will open the third tab panel at page load. This example will open a new browser tab and scroll you to the open tab.
When linking directly to a tab panel, it might not be obvious that the content appears within a tab panel. An additional attribute data-deep-link-smudge rolls the page up slightly after deep linking (to a horizontal tabset) so that the tabstrip is at the top of the viewport.
Sass Reference
Variables
The default styles of this component can be customized using these Sass variables in your project’s settings file.
Default margin of the tab bar.
Default background color of a tab bar.
Font color of tab item.
Active background color of a tab bar.
Active font color of tab item.
Font size of tab items.
Default background color on hover for items in a Menu.
Default padding of a tab item.
Maximum number of expand-n classes to include in the CSS.
Default background color of tab content.
Default border color of tab content.
Default text color of tab content.
Default padding for tab content.
Mixins
We use these mixins to build the final CSS output of this component. You can use the mixins yourself to build your own class structure out of our components.
tabs-container
Adds styles for a tab container. Apply this to a <ul> .
tabs-container-vertical
Augments a tab container to have vertical tabs. Use this in conjunction with tabs-container() .
tabs-title
Adds styles for the links within a tab container. Apply this to the <li> elements inside a tab container.
tabs-content
Adds styles for the wrapper that surrounds a tab group's content panes.
tabs-content-vertical
Augments a tab content container to have a vertical style, by shifting the border around. Use this in conjunction with tabs-content() .
tabs-panel
Adds styles for an individual tab content panel within the tab content container.
JavaScript Reference
Initializing
The file foundation.tabs.js must be included in your JavaScript to use this plugin, along with foundation.core.js . This plugin also requires these utility libraries:
- foundation.util.keyboard.js
- foundation.util.timerAndImageLoader.js
Foundation.Tabs
Creates a new instance of tabs.
Fires these events: Tabs#event:init
| Name | Type | Description |
|---|---|---|
| element | jQuery | jQuery object to make into tabs. |
| options | Object | Overrides to the default plugin settings. |
Plugin Options
Use these options to customize an instance of Tabs. Plugin options can be set as individual data attributes, one combined data-options attribute, or as an object passed to the plugin’s constructor. Learn more about how JavaScript plugins are initialized.
| Name | Type | Default | Description |
|---|---|---|---|
| data-deep-link | boolean | false | Allows the window to scroll to content of pane specified by hash anchor |
| data-deep-link-smudge | boolean | false | Adjust the deep link scroll to make sure the top of the tab panel is visible |
| data-deep-link-smudge-delay | number | 300 | Animation time (ms) for the deep link adjustment |
| data-update-history | boolean | false | Update the browser history with the open tab |
| data-auto-focus | boolean | false | Allows the window to scroll to content of active pane on load if set to true. Not recommended if more than one tab panel per page. |
| data-wrap-on-keys | boolean | true | Allows keyboard input to ‘wrap’ around the tab links. |
| data-match-height | boolean | false | Allows the tab content panes to match heights if set to true. |
| data-active-collapse | boolean | false | Allows active tabs to collapse when clicked. |
| data-link-class | string | tabs-title | Class applied to `li`’s in tab link list. |
| data-link-active-class | string | is-active | Class applied to the active `li` in tab link list. |
| data-panel-class | string | tabs-panel | Class applied to the content containers. |
| data-panel-active-class | string | is-active | Class applied to the active content container. |
Events
These events will fire from any element with a Tabs plugin attached.
| Name | Description |
|---|---|
| deeplink.zf.tabs | Fires when the zplugin has deeplinked at pageload |
| collapse.zf.tabs | Fires when the zplugin has successfully collapsed tabs. |
| change.zf.tabs | Fires when the plugin has successfully changed tabs. |
Methods
_handleTabChange
Opens the tab $targetContent defined by $target . Collapses active tab.
Fires these events: Tabs#event:change
| Name | Type | Description |
|---|---|---|
| $target | jQuery | Tab to open. |
| historyHandled | boolean | browser has already handled a history update |
_openTab
Opens the tab $targetContent defined by $target .
| Name | Type | Description |
|---|---|---|
| $target | jQuery | Tab to Open. |
_collapseTab
Collapses $targetContent defined by $target .
| Name | Type | Description |
|---|---|---|
| $target | jQuery | Tab to Open. |
selectTab
Public method for selecting a content pane to display.
| Name | Type | Description |
|---|---|---|
| elem | jQuery | jQuery object or string of the id of the pane to display. |
| historyHandled | boolean | browser has already handled a history update |
destroy
Destroys an instance of an tabs.
Fires these events: Tabs#event:destroyed
Building Blocks
Building Blocks is a ZURB-curated resource with useful code snippets that use Foundation components. Here are a few for this component:
These are placeholder items. If you have ideas for building blocks for this component, we’re taking ideas on GitHub.
Табы (вкладки) для сайта на CSS и JavaScript – 3 способа
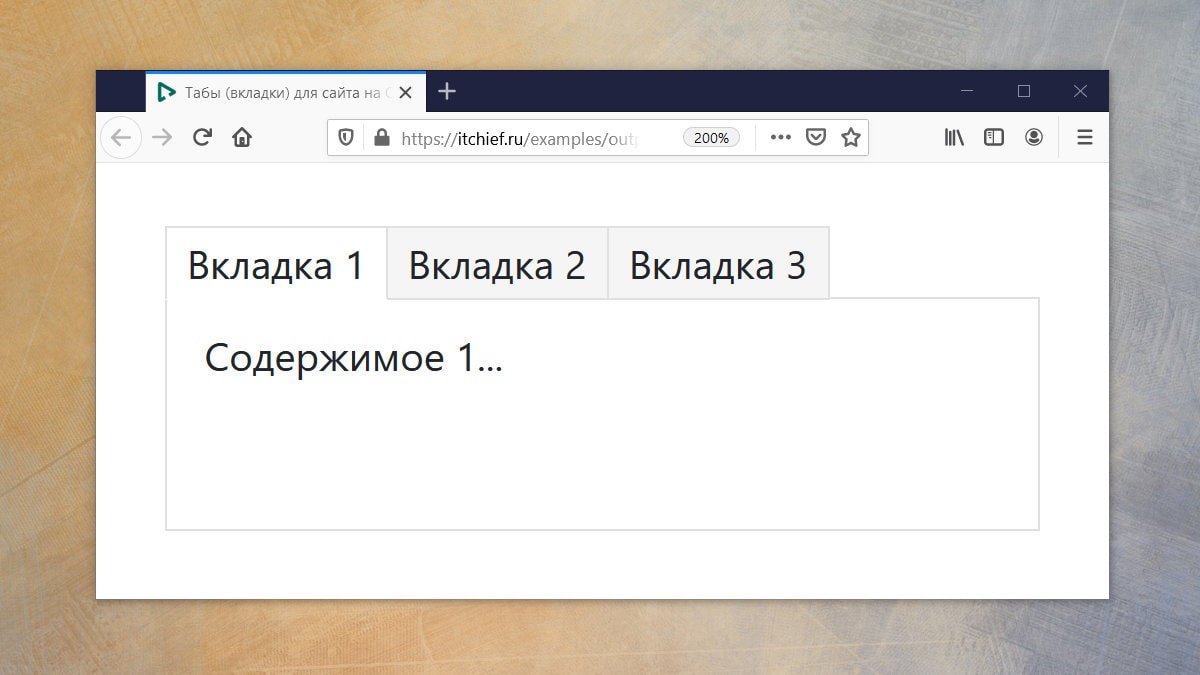
В этой статье рассмотрим примеры вкладок для сайта, выполненных как с использованием только CSS, так и с применением JavaScript.
Что такое табы
На странице очень часто бывает необходимо вывести большое количество информации.
Для того чтобы эту информацию не отображать всю сразу, её можно разделить на отдельные части, а затем выводить в определённый момент времени только одну порцию этих данных.
Табы (вкладки) – это как раз и есть тот элемент интерфейса, который позволяет пользователю переключаться между контентом, разбитым на несколько секций.
В вебе табы – это просто набор ссылок или других HTML элементов, которые визуально обычно оформляют в виде вкладок или группы кнопок. При нажатии ни них они включают видимость одного какого-то блока с контентом и скрывают другие.
Табы предназначены для экономии места и более удобного представления информации на сайте (по названию вкладки можно определить какой контент отобразится на странице, если нажать на неё).
Вкладки на чистом CSS
Рассмотрим несколько способов создания табов на CSS.
Первый способ построен на радиокнопках ( input с type=»radio» ) и CSS селекторе checked.
HTML и CSS код таба:
В этом варианте радиокнопки связаны с определённым label . Связь элемента label с input выполнена через атрибут for . Это действие необходимо для того, чтобы можно было скрыть элементы input , а управление ими (установку checked ) выполнять через клики по элементам label .
Стилизация выбранного элемента label в этом примере выполнена с использованием селектора input[type=»radio»]:checked+label . Этот селектор выбирает элемент label , который расположен сразу же после элемента input[type=»radio»] , находящимся в состоянии checked .
Отображение и скрытие контента, связанного с вкладками, выполняется очень просто. По умолчанию элементы, содержащие контент, не отображаются. Показ того или иного элемента с контентом осуществляется только в том случае, если селектор в следующем правиле позволяет выбрать его:
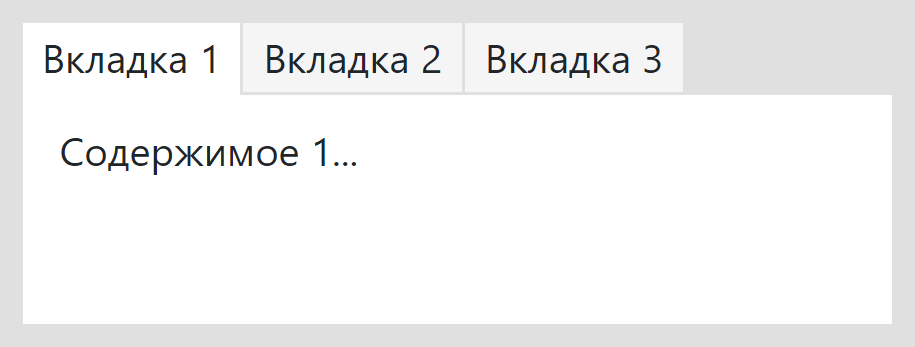
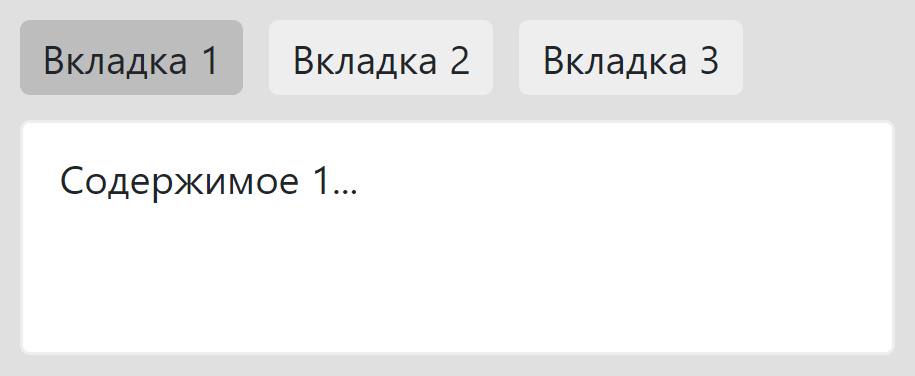
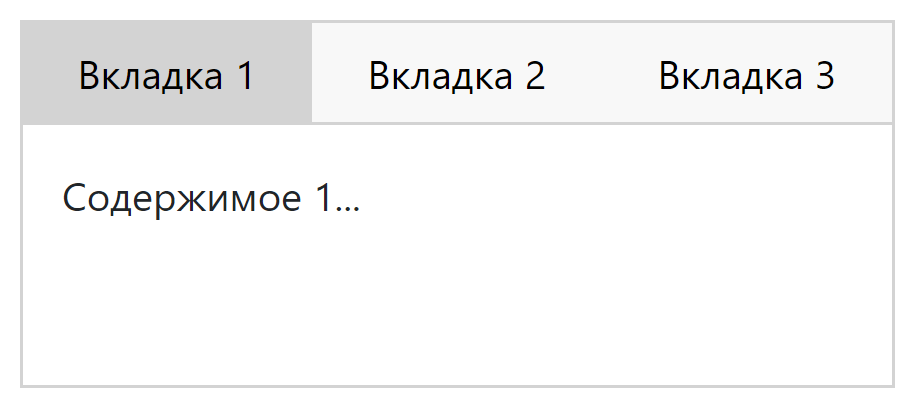
Отобразить вкладки можно по-разному. В следующем примере они визуально отображаются как кнопки .
CSS код для создания адаптивных вкладок в виде кнопок:
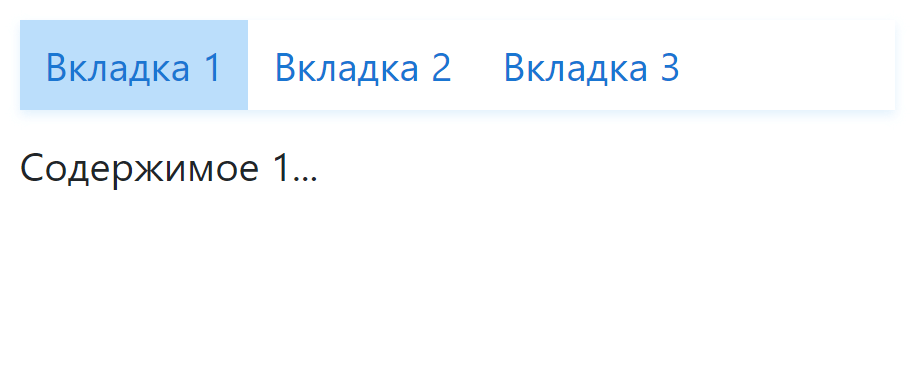
В этом примере вкладки визуально представлены в виде хэштегов :

Второй способ основывается на использовании псевдокласса :target.
Пример HTML и CSS кода для создания адаптивных вкладок, механизм работы которых организован через :target :
Логика этих табов основана на следующих моментах. Первый момент заключается в добавлении хэша к URL-адресу страницы при нажатии на ссылку (вкладку). Второй – это стилизация элементов, выбор которых осуществляется в зависимости от хэша в URL-адресе. Выбрать элемент, идентификатор которого соответствует хэшу в URL-адресе в CSS можно выполнить посредством псевдокласса :target. С помощью него мы можем написать селектор не только для получения элемента, на который он указывает, но и для выбора других элементов, которые каким-то определённым образом связаны с ним.
Например, выбрать вкладку, которая должна быть активной для элемента на который указывает :target можно так:
В зависимости от дизайна проекта табы можно визуально представить так, как вам это нужно.
Например, чтобы сделать вкладки вертикальными их код можно изменить на следующий:
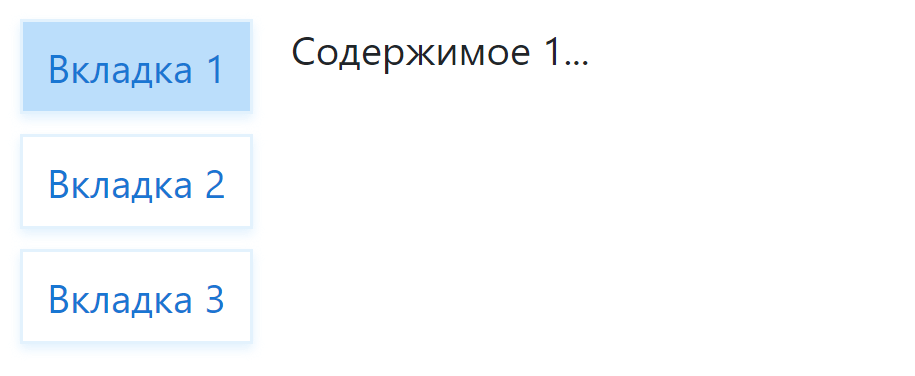
При этом табы отображаются вертикально только на больших экранах, а на маленьких (мобильных) они отображаются горизонтально. Адаптивность табов в коде реализуется с помощью медиа-запросов.
Табы с использованием JavaScript
Сейчас разберём как можно создать табы на чистом JavaScript (без использования jQuery и каких-либо других библиотек).
Способ реализации на JavaScript может потребоваться для решения задач, которые просто невозможно решить на CSS. Например, когда нужно загружать контент динамически (через AJAX) в момент открытия вкладки.
JavaScript (с использованием классов):
Инициализация табов на странице осуществляется посредством создания нового объекта типа ItcTabs и передаче ему в качестве аргумента CSS-селектор или DOM-элемент которой необходимо инициализировать как табы.
Если в качестве аргумента указать селектор класса, то в качестве табов будет инициализирован только первый элемент.
Для того чтобы на странице инициализировать несколько вкладок, можно использовать следующий код:
Кроме этого, результат вызова new ItcTabs() можно сохранить в переменную, а затем использовать её для программного переключения вкладок.
Краткое описание исходного кода JavaScript
Исходный JavaScript построен на основе класса ItcTabs .
- this._elTabs — это DOM-элемент, содержимое которого нужно инициализировать в качестве табов;
- this._elButtons — элементы, которые представляют собой вкладки;
- this._elPanes — элементы, содержащие контент, который необходимо переключать с помощью вкладок.
Установка обработчика для события click осуществляется в методе _events() . Данный метод вызывается в конструкторе.
Для отображения определённого контента в зависимости от нажатой вкладки выполняется с помощью метода show() . Элемент, на который нажали передаём в качестве аргумента:
Метод showByIndex(index) предназначен для перехода на вкладку по её индексу.
Примеры
1. Пример, в котором данные о последней открытой вкладки таба будем сохранять в LocalStorage, а затем использовать эту информацию при открытии страницы для переключения на неё:
2. Пример синхронизации вкладок на разных открытых страницах, относящихся к одному источнику (через LocalStorage):
3. Пример, в котором показано как на одной странице можно вывести несколько табов с сохранением их состояний (активных вкладок) в LocalSorage:
4. Табы, содержащие видео с YouTube. При переходе на другую вкладку будет приостанавливаться воспроизведение текущего видео.
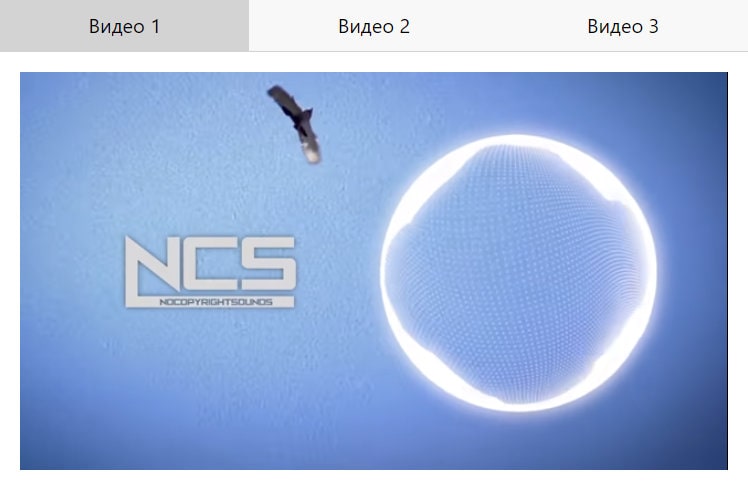
В элементах .player атрибут data-video-id определяет videoId ролика, а data-width и data-height — ширину и высоту iframe .
Загрузку API IFrame Player будем выполнять асинхронно. Для этого напишем следующий код:
Создание <iframe> и проигрывателя YouTube будем выполнять после загрузки кода API посредством функции onYouTubeIframeAPIReady :
How do I make a tabbed view in HTML?
When clicking on tab A, show content for tab A. Click on tab B, show content for tab B, and so on.
What’s the most simple and compatible way of constructing a HTML snippet?
I don’t mean to use any libraries here, so none of jQuery or any other libraries.
![]()
9 Answers 9
If you want to roll your own tab control, you could do something like this:
![]()
Here is a list of different types of tabs plus tutorials on how to build them
TabTastic is a good guide — it is accessible, and (when JavaScript is not available) fails very gracefully.
![]()
If you want to implement your own tab view, just do it like this:
![]()
Take a look at an example such as this (courtesy of a Google search for ‘tabbed view javascript’).
You can obviously use this with a little customisation, but it’s instructive to take it apart and determine what it’s doing. It’s basically enabling or disabling <div> using the display style and setting it to block or none
If «simple and compatible» are your only two criteria, I’d suggest the jQuery UI Tabs plugin. Cross-browser, and a cinch to implement.
Depending on your ambitions, it could simply be a matter of an unordered list and a number of <div> s (tab contents). Then a simple JavaScript could — by means of getElementById() — set the display property for all the <div> s: none for all except the current.
Alternatively, you could have a look at this.
Edit: Not the only one linking to the jQuery site, it seems 🙂
The jQuery tabs widget works completely on the browser side — content for all tabs are sent on every request, or you could write JavaScript code that uses Ajax to load the tab contents dynamically.
But it might not be appropriate for your use. Consider if you need to control the tabs server-side (that is, a click on a tab sends a new page request to the server — the server constructs HTML that has the visual appearance of tabs).