Ссылки в HTML
Данная статья написана командой Vertex Academy. Это одна из статей из нашего Самоучителя по HTML&CSS. Надеемся, что данная статья Вам будет полезна. Приятного прочтения!
Ссылки это то, что делает Всемирную паутину такой, какой мы её знаем. Они позволяют путешествовать с одного сайта на другой, т.е. сёрфить. Ссылки, как ягодка за ягодкой при сборе земляники, манят нас, влекут за собой. и не дают уснуть вовремя ��
Ссылки бывают разные, но чаще всего встречаются такие:
- с одного сайта на другой
- с одной страницы на другую в рамках того же сайта
- в пределах одной страницы — с одной её части на другую
- ссылки, которые запускают почтовую программу и позволяют отправить письмо на определенный адрес.

Ссылка создаётся с помощью тега <a> (от англ. Anchor, якорь). Чтобы указать адрес, куда перенаправляется пользователь, используется атрибут href . Сам адрес пишется в кавычках. Между тегами <a></a> указывается текст ссылки. Желательно, чтобы он объяснял пользователю куда он перейдет, а не просто гласил типа «Жми сюда».
При клике на любое из слов, помещенных внутри элемента <a></a> пользователь переходит по указанной ссылке.
По умолчанию, когда вы наводите на ссылку, указатель мыши превращается в руку с тычущим пальчиком, а цвет ссылки меняется.
Абсолютные и относительные ссылки
Давайте представим, что к вашему соседу пришел курьер и спрашивает, где найти вашу квартиру. Сосед может начать издалека: «планета Земля, материк Евразия, страна Украина, город Киев, улица Мечникова, дом 16, квартира 41». А может просто сказать «да вот его квартира, слева от меня». В первом случае сосед дал курьеру (браузеру) абсолютную ссылку, а во втором — относительную.
Абсолютные ссылки используются для перехода на другой сайт. Они соответствуют требованиям обозначения URL-адреса , т.е. содержат протокол передачи данных (например http:// ), доменное имя сайта и путь к конкретной странице сайта. Если путь не указан, то по умолчанию откроется главная страница. В примере выше указана абсолютная ссылка, ведущая на главную страницу сайта.
Относительные ссылки используются для перехода в рамках одного сайта (со страницы на страницу или с одного места в другое). Особенно это удобно, если вы только создаёте свой сайт и еще не опубликовали его. Если вы создавали свою первую веб-страницу вместе с нами, самое время создать вторую и посмотреть как работают относительные ссылки ��
Ссылка на документ в той же папке
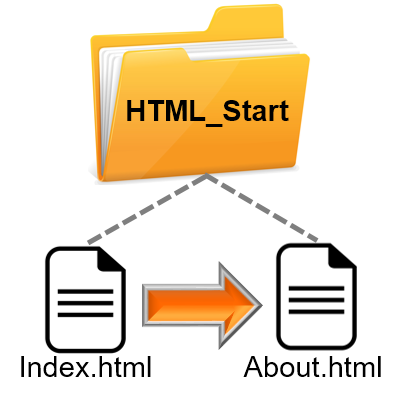 Итак, давайте создадим в той же папке HTML_Start (это наша корневая папка) еще один html документ с любым названием, например about.html
HTML Link Code — How to Insert a Link to a Website with HREF
![]()
We get to a point when building websites and we want a page to lead or go to another page. Its no news that most websites have the “about us”, “contact us” options on their webpage.
So how do we go about this? how do we link a page to another page? how do we navigate through pages on our websites?
The <a></a> in html helps in doing this using the HREF attribute.
We might be confused at some point , what then is adding link to your head tag? It also uses HREF attribute after all?
They are two different things and they are added differently.
The external links we add to our head tags works solely on the body.
For example, adding the bootstrap CDN and the google font link
You can’t access these links on your website. They cannot be seen on your website, you only see the effects on the content in the body.
How then will I add a link to my website?
Like I said earlier, the use of <a> and </a> tags is used to add a link to a website. The <a> tag indicates where the hyperlink starts and the </a> tag indicates where it ends. Whatever text gets added inside these tags, will work as a hyperlink.
You will notice from the code snippet that the <a> tag is inside the body tags. It goes in the body tags where it can be seen and clicked.
But <a>Click me</a> is not yet a “link” if the href attribute is not added.
The href attribute is the most important attribute of the hyperlink. It indicates the link’s destination.
Now! We have created a hyperlink. The “click me” can now be clicked and it will go straight to Freecodecamp page.
The target Attribute
By default, the linked page will be displayed in the current browser window. To change this, you must specify another target for the link.
The target attribute specifies where to open the linked page.
The target attribute can have one of the following values:
- _self — Default. Opens the page in the same window/tab as it was clicked.
- _blank — Opens the page in a new window or tab.
- _top — Opens the document in the full body of the window.
This code snippet will open freecodecamp.org in a new tab.
To open all links in the document in a new tab, without having to write the target attribute for all the links in your website, you can use `<base>` element
This also applies to all target attribute values, like _top value.
Link to an Email Address
You have to use mailto: inside the href attribute to create a link that opens the user’s email (to let them send a new email)
Link to a Telephone Number
You have to use tel: inside the href attribute to create a link that opens the user's phone boot to call (to let them give a call to the number)
HTML Bookmark Link
Html Bookmark is helpful, if you have a long page that you want to allow the users to quickly navigate to different sections in the same web page or you can navigate to targeted location of the other web page.
First, use the id attribute to create a bookmark:
Next step, you need to create a link that the user can click on to jump to the bookmark.
For example, you can check out the following code to see the result of a bookmark link.
It can also be done in a different way.
The second step still remains the same, but the first step changes.
You can use the named attribute to create a bookmark.
The href attribute is the most important attribute of the hyperlink. It indicates the link’s destination.
I hope the article was helpful and you have gotten a handful of how to add a link to your website using the HREF attribute.