Model Tuning (Part 1 — Train/Test Split)
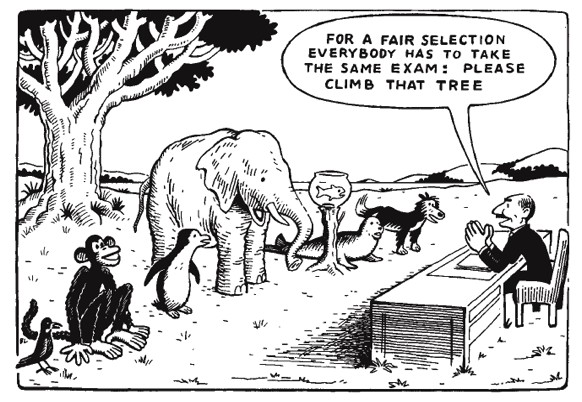
Building a model is simple but assessing your model and tuning it require care and proper technique. Unfortunately, this is a place where novice modelers make disastrous mistakes. So while this topic is not as exciting as say deep learning, it is nonetheless extraordinarily important. You really must know this inside and out.
Let’s motivate the discussion with a real-world example.
The UCI Machine Learning Repository contains many wonderful datasets that you can download and experiment on. Datasets usually come with a description. Furthermore, the datasets are grouped according to a number of attributes like Classification, Regression, Clustering, Time Series, or Text. It really is a great resource to hone your modeling skills.
Anyway, for the purposes of this demonstration, we’ll use the Forest Fires dataset.
The task is this: Predict the area burned by forest fires in the northeast region of Portugal by using meteorological and other data.
A bit of information about the features:
- X — x-axis spatial coordinate within the Montesinho park map: 1 to 9
- Y — y-axis spatial coordinate within the Montesinho park map: 2 to 9
- month — month of the year: ‘jan’ to ‘dec’
- day — day of the week: ‘mon’ to ‘sun’
- FFMC — FFMC index from the FWI system: 18.7 to 96.20
- DMC — DMC index from the FWI system: 1.1 to 291.3
- DC — DC index from the FWI system: 7.9 to 860.6
- ISI — ISI index from the FWI system: 0.0 to 56.10
- temp — temperature in Celsius degrees: 2.2 to 33.30
- RH — relative humidity in %: 15.0 to 100
- wind — wind speed in km/h: 0.40 to 9.40
- rain — outside rain in mm/m2 : 0.0 to 6.4
- area — the burned area of the forest (in ha): 0.00 to 1090.84
Ok, let’s get the data, clean it up, and then build a linear regression model.
Get Data
The output looks like this:
Right away we’re confronted with a problem. The columns month and day are coded as text, not numbers. This is a problem for our linear regression model that only understands numbers. We need to convert those categorical features. There are many ways to do this but for the purposes of linear regression we are going to do something called one-hot encoding. What this does is it takes a single categorical feature like day, which consists of Sunday, Monday, and so on, and splits it into numerous indicator features. Specifically, a column will be created for each day of the week in this example. So one column will parse into seven.
You may be wondering how many columns result from one-hot encoding. It’s simply the number of categories within a feature.
Technical note: You can one-hot encode multiple categorical features. Just keep in mind that your data matrix can expand in width very quickly using this approach. That may or not be a problem for you depending on a number of factors like which machine learning algorithm you plan to use, memory constraints, and so on.
Clean Data
Pandas has a very nice method called get_dummies that will one-hot encode the categorical features for us automatically. It’ll even delete the original feature, which is a nice touch. Here we go!
We can look at the columns by typing df.columns . The result looks like:
Something should worry you very much at this point. If it doesn’t, go back and look at the columns again. Think it through before I give you the answer. There’s a crucial problem we need to address. Can you spot it?
Spoiler Alert: I’m going to tell you what’s wrong. I hope you spotted it yourself.
Think about what’s happening for the day of week indicator features. We have a column for each day of the week. They can only take values of 0 or 1, indicating if a fire occurred on that given day. The features are mutually exclusive meaning there can only be a 1 in one of the columns. All the rest have to be 0 because it’s impossible for the same day to be both Monday and Thursday, for example.
Ok, so what’s the problem?
Think about the coding. Common convention states a week starts on Sunday. So we have features for Sunday through Saturday. But I don’t need an indicator feature for Saturday. That’s already encoded implicity when Sunday=0, Monday=0, Tuesday=0, Wednesday=0, Thursday=0, and Friday=0. If you’re up on your Statistics, you realize that adding the Saturday column causes multicollinearity, which is a no-no for linear regression. Therefore, we must drop one column of each one-hot encoded feature. In this case we need to drop one column from month and one from day — it doesn’t matter which specific month and which specific day we choose. Then we’ll be in good shape. We do that with this bit of code: df.drop(labels=[‘month_dec’, ‘day_sat’], axis=1, inplace=True)
It’s always worthwhile to check the range of values for each feature. That’s as simple as df.max() — df.min() .
Some of the variables have relatively high variance, like DMC and DC, whereas others are constrained between 0 and 1, like day of week. Linear regression can adapt to this variance by adjusting the magnitude of its coefficients, but it’s really good practice to scale your data first.
Technical note: To scale your data means to set the range of each variable to be roughly the same (e.g. all features are bounded by values between 0 and 1). Normalization and standardization are common methods to scale data but there are others as well. Know that if you leverage Regularization or Gradient Descent, you must scale your data.
We won’t scale the data here. You’ll understand why shortly.
For now let’s pretend we’re in good shape. On to the modeling.
Fit Model
How’d we do?
Let’s look at R^2 and Root Mean Squared Error (RMSE) to see how our model performed.
Which returns, respectively:
Interpretation
Right away we can see the R^2 is abysmal. It’s really not too surprising because if you look at the documentation on UCI you’ll notice that the target variable is highly skewed with several high leverage points. This is worthy of investigation and could yield substantial performance gains. Review SSE, SST, and R^2 if you’re unclear as to why.
The RMSE is a measure of how far off on average our model is from ground truth. I’m using the term average loosely here because it’s really the average square root of the squared residuals. Yikes, that’s a mouthful. Said another way, it’s one way to measure the magnitude of errors, though it’s not the only one. Mean Absolute Error (MAE) is another. The two measures will give you different answers, so you should ponder on that.
But here’s the thing: our model is rubbish no matter what. We could have had an R^2 approaching 1 or an RMSE close to 0 but that’s totally and completely meaningless in the real-world. We have no idea how this model would generalize to data it hasn’t seen. We merely have a measure of how well it’s doing on the data it sees. This is a major problem for predictive analytics. You can have what seems like an incredible model but then you unleash it in the wild and it performs poorly. Understanding why this is the case is absolutely essential.
Why This Model Sucks
In the most extreme case, I can create a model that is really a lookup table. You give me an input and I give you the output. Another way to say this is take a model and let it memorize the data it can see. The result: an R^2 of 1 and an RMSE of 0.
Clearly, nobody thinks that’s a great model. The point of building a model is to predict something interesting. You can’t do that with a lookup table. Yet, that’s exactly how we tried to assess our linear regression model above — give it some data and then see how well it does predicting that SAME data. That’s why it’s rubbish. DON’T EVER DO THIS.
What we’ve done is look at something called in-sample error (ISE) or training error. It is a useful metric but only tells half the story.
Out-of-Sample Error
The other half of the story is something called out-of-sample error, which I’ll denote henceforth as OSE or test error. Simply put, OSE or test error is how well the model performs on data it’s never seen.
But where do we get this data?
Easy, holdout some data at the beginning. Don’t let the model see it during the modeling phase. Once you’re happy with your model, make predictions on the unseen data and see how well it performs. This gives you an indication as to how well your model will do in the wild.
This process we just discussed is called train/test split. You determine how much data to holdout at the beginning, split the data into a training dataset and a test dataset, model on the training set, and then calculate training error and test error.
sklearn.model_selection .train_test_split
Split arrays or matrices into random train and test subsets.
Quick utility that wraps input validation, next(ShuffleSplit().split(X, y)) , and application to input data into a single call for splitting (and optionally subsampling) data into a one-liner.
Read more in the User Guide .
Parameters : *arrays sequence of indexables with same length / shape[0]
Allowed inputs are lists, numpy arrays, scipy-sparse matrices or pandas dataframes.
test_size float or int, default=None
If float, should be between 0.0 and 1.0 and represent the proportion of the dataset to include in the test split. If int, represents the absolute number of test samples. If None, the value is set to the complement of the train size. If train_size is also None, it will be set to 0.25.
train_size float or int, default=None
If float, should be between 0.0 and 1.0 and represent the proportion of the dataset to include in the train split. If int, represents the absolute number of train samples. If None, the value is automatically set to the complement of the test size.
random_state int, RandomState instance or None, default=None
Controls the shuffling applied to the data before applying the split. Pass an int for reproducible output across multiple function calls. See Glossary .
shuffle bool, default=True
Whether or not to shuffle the data before splitting. If shuffle=False then stratify must be None.
stratify array-like, default=None
If not None, data is split in a stratified fashion, using this as the class labels. Read more in the User Guide .
Train test split python что это
In this article, we will discuss how to split a dataset using scikit-learns’ train_test_split().
sklearn.model_selection.train_test_split() function:
The train_test_split() method is used to split our data into train and test sets. First, we need to divide our data into features (X) and labels (y). The dataframe gets divided into X_train, X_test, y_train, and y_test. X_train and y_train sets are used for training and fitting the model. The X_test and y_test sets are used for testing the model if it’s predicting the right outputs/labels. we can explicitly test the size of the train and test sets. It is suggested to keep our train sets larger than the test sets.
- Train set: The training dataset is a set of data that was utilized to fit the model. The dataset on which the model is trained. This data is seen and learned by the model.
- Test set: The test dataset is a subset of the training dataset that is utilized to give an accurate evaluation of a final model fit.
- validation set: A validation dataset is a sample of data from your model’s training set that is used to estimate model performance while tuning the model’s hyperparameters.
- underfitting: A data model that is under-fitted has a high error rate on both the training set and unobserved data because it is unable to effectively represent the relationship between the input and output variables.
- overfitting: when a statistical model matches its training data exactly but the algorithm’s goal is lost because it is unable to accurately execute against unseen data is called overfitting
Syntax: sklearn.model_selection.train_test_split(*arrays, test_size=None, train_size=None, random_state=None, shuffle=True, stratify=None
Parameters:
- *arrays: sequence of indexables. Lists, numpy arrays, scipy-sparse matrices, and pandas dataframes are all valid inputs.
- test_size: int or float, by default None. If float, it should be between 0.0 and 1.0 and represent the percentage of the dataset to test split. If int is used, it refers to the total number of test samples. If the value is None, the complement of the train size is used. It will be set to 0.25 if train size is also None.
- train_size: int or float, by default None.
- random_state : int,by default None. Controls how the data is shuffled before the split is implemented. For repeatable output across several function calls, pass an int.
- shuffle: boolean object , by default True. Whether or not the data should be shuffled before splitting. Stratify must be None if shuffle=False.
- stratify: array-like object , by default it is None. If None is selected, the data is stratified using these as class labels.
Steps to split the dataset:
Step 1: Import the necessary packages or modules:
In this step, we are importing the necessary packages or modules into the working python environment.
Train and Test Data Split

The first step that you should do as soon as you receive data is to split your data set into two. Most commonly the ratio is 80:20.
This is done so that we or our model don't see a particular set of data and is kept aside for testing our trained model. And the larger set is always used for training and the latter for testing.
What happens when we don't Split the dataset?
Then we will have to do the testing on the same dataset on which we have trained the model. Although this will give us high accuracy when we do the testing it is not a good model. This can mean that our model is overfitted and may perform poorly for any previously unseen data.
Overfitting is a case when the model represents the data a little too accurately. The below figure explains overfitting.
Now we have understood the need to split the data let's see how can we do this.
Using Python
Here we are going to use python to implement a function that will do this split for us.
First, we need a data set. We will create a sample data frame using pandas.
Now we can write a function that will take data and split ratio as parameters and return two data sets one for testing and one for training. To do this we will use NumPy.
In this method, we are creating an array of shuffled indices for the length of the data set. This is done so that the data doesn't represent a pattern if it is sorted over a particular feature. Then we get the length of the test data size.
We use these variables to get indices of train and test data and return data sets for test and train.
But in this approach, we are going to run into a problem. If we call this function multiple times we will always get a different data set for test and trains we are using np.random to generate the shuffled indices.
This will lead to the very problem that we are trying to eliminate in the long run our entire data set will be exposed to the model and we will not have any data that is not seen by the model.
So to eliminate this and get the same shuffled indices every time we can set a seed for np.random. and this will create the same shuffled indices every time. The seed will take an integer value and the will generate same shuffled indices as long as the seed value is the same.
So we will add a parameter called random_seed and pass that to np.random.seed() in the split_train_test method.
This method will now always return the same data sets even if it is called multiple times as long as the seed value is same.
Now, this data splitting is needed for every ML model that we will create so to make our task easier scikit-learn has some inbuilt methods that will take care of this splitting for us.
Split data using scikit-learn.
In sklearn.model_selection we have a train_test_split method that we can use to split data into training and testing sets.
Below is the implementation
Here we are passing all the same values that we used in the above function that we created.
Now sometimes we have a feature that we want to split evenly into training and testing data.
For example, I have taken a dataset ( Bostan housing Dataset ) where I have a feature called “CHAS” which contains two values 0 and 1.
I have copied the data in a housing data frame and now I can print the value counts for the “CHAS” feature.
Here we have 367 data points with a value of 0 and 27 data points with a value of 1. This is a ratio of
13.6 for the 0 and 1 distribution in the dataset.
Now after analyzing this data we decide that this feature needs to be split evenly in training and test data.
We can do this using scikit-learn’s StratifiedShuffleSplit
Here we can see the train set has a ratio of
13.3 and the test set has a ratio of
14.8 for the 0 and 1 distribution. so the data have split almost equally considering the ‘CHAS’ feature.
This is a very short introduction to how you can split training and test data for your ML model.
Thanks for the read do leave comments if you have any inputs.
ENJOY YOUR CODING!