How to install modules with PIP (and fix it when it fails)
![]()
This is part of a series discussing everything required to get an all-encompassing grasp of the Python programming language in as short a time as possible. Whether you are a beginner or an expert, I intend for you to learn something new.
PIP is a powerful tool that everyone should know how to use. But everyone has also at some point been in the position where Python’s PIP has given them trouble and they have been lost as to how to proceed. I have picked up a number of methods of troubleshooting PIP that have been very successful for me.
How to use PIP
Installing modules to python is painfully easy. Simply open up your terminal:
- Windows — Command Prompt (CMD)
- MacOS — Terminal
- Linux — Terminal (it depends…)
Now in your command line, type:
Sometimes, in MacOS and Linux, you may need to instead type:
(This will not work in Windows no matter how hard you try.)
Now if none of that works, that means you have a problem. So let’s try and fix that.
Troubleshooting PIP
Basic Stuff
When you are frustrated it is sometimes easy to forget to double check things. First make sure that you have installed Python. Assuming that, the first thing to do is to check if the module exists. The main way to do this is to go to PyPi and search for your package. If nothing comes up, make sure to do a quick google search to see if you are searching by the correct name. StackOverflow is your friend.
If you do find the module you need simply copy the command from the page and paste it into your terminal and away you may go.
If this still does not work, try one last thing before you continue onto the rest of the steps. Try typing:
This may work if you have multiple versions of python installed, one of them being Python3.
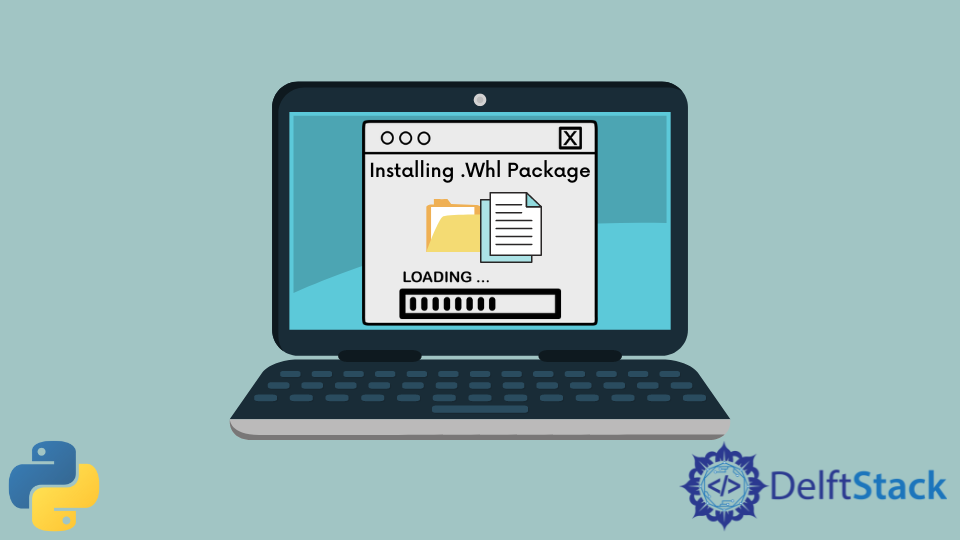
One special case you may find yourself in is that the python module used to exist and, for whatever reason, no longer is part of PIP. In this case there is but one solution I have found. This is to try and find a .whl or wheel package for the python module. I will be covering installing those kinds of files later in the article.
Trying to fix PIP
You can try upgrading pip with:
or you could just try and install pip from scratch by doing the following.
Copy the code from get-pip.py or save the file from the link. Then simply run the file with python. This should install pip for you and get it working. Make sure to try using pip3 if needed.
Conclusive solution
If all else fails, this has been a reliable way to get pip working on your python install. I would like to preface this with the fact that this shouldn’t be used consistently and I personally recommend simply reinstalling python after uninstalling all the current installations. The solution is to simply attempt one of the following commands:
This runs pip through python shell and is almost guaranteed to work. If this still does not work you should definitely uninstall all traces of Python before reinstalling Python3 from the Python website.
Using Python Libraries
The plethora of libraries is a key feature of using python in the sciences. In this post, I advize on finding and installing libraries, as well as the libraries I use on a regular basis.
Finding New Libraries
When looking for code, I first turn to the Python Package Index (PyPI) for packages. If I don’t find what I want there, I search the publicly available repositories tagged with ‘Python’ on GitHub to see if someone has also worked on the same problem but has not released python modules on a package manager.
conda is alternative package management system aimed at data scientists. I have stopped using it as it had too few packages.
Installing libraries
There are two ways to install python libraries: either building from source or downloading a .whl file (called wheels), which often include a compiled binary. ‘Building’ in this context is a bit of a misnomer: python is an interpreted library thus the installation procedure is merely copying some python source code to your python dist-packages or lib folders. However, certain packages, especially those that do intensive numerical calculations, have sections written in C or FORTRAN that need to be compiled. Some python packages release wheels on PyPI, some release wheels outside of PyPI, some python packages on PyPI link to code on github or some other online repository and will automatically download this source and compile and copy files it when it is installed from the package manager, and some packages can only be installed by downloading the source code and compiling.
Installing from PyPI
Read the PyPI package description website to make sure that your operating system and python version are supported by this package. If it is, then open a terminal on Linux, or a command prompt on Windows, and type:
If Windows complains that it can’t find pip, one of two things may have happened: either pip was not installed when python was installed, in which case it can be installed by running the installation MSI file with scripts selected for installation, or the C:/Python34/Scripts path has not been added to the path environment variable.
pip can also install several libraries at once, by specifying each library on a new line in a file (typically called requirements.txt). This file can then be called using:
Many python projects will have a requirements.txt file in the main directory.
You can download and install .whl packages with:
You can upgrade an existing package using:
You can check which version of a library you have installed using:
You can uninstall libraries using the command:
Installing from github repositories
If a module is unavailable as a *.whl or as a package on PyPI, do not despair! It is often possible to install from source.
Assuming the code you want to install has a setup.py file, you can do one of two things: install the repository using pip, or running the setup script.
To install using pip, run (using my pyOmniDriver library as an example):
This method is not preferable, as pip will copy the code and generated egg-info to a directory called src/package, not to the python lib or dist-packages folders, and if this directory is deleted, you will need to re-install the module. The alternate method is to clone the source code, then run the setup file:
When installed this way, source code and builds are copied to the python lib or dist-packages folders and deleting the folder with the cloned repository will not remove the module from the operating system.
Problems on Windows
Installing and using python libraries that depend on the Basic Linear Algebra Subprograms (BLAS) specification are a little tricky on Windows, as the Microsoft visual studio compilers have a hard time compiling them without some changes to configuration. There is work towards using open-source compilers and open-source implementations of BLAS, however, not all libraries have implemented this yet (for example, NumPy and SciPy). On Windows, pip installing NumPy will download a .whl compiled with open-blas; SciPy does not yet have a corresponding library. Attempting to install SciPy will result in the error:
Christoph Golke maintains a collection of compiled .whl files for windows python libraries, all built on the Intel Math Kernel Library (MKL) and the Microsoft Visual C++ compiler. I would strongly recommend downloading and installing these packages instead of messing around with the Visual Studio compilers on your own. However, if you install the MKL version of libraries that depend on NumPy while your NumPy package has been installed from PyPI and uses open-blas, you will get the same error as above.
If this happens, uninstall NumPy, then install NumPy from the whl’s:
Make sure the .whl’s you download match the python version number and system architecture of your system. You can check these versions by looking at the lines that are printed when python starts up. If you attempt to install an incompatible whl, you will get the error message:
If you still get this error message when your python version and system architecture are the same, upgrade pip:
Libraries for Experimental Quantum Optics
Here’s a short introduction to many useful libraries for doing quantum optics research.
Simulating Data
NumPy mimics the array manipulations data syntax introduced in MATLAB. Although its primary functionality is in speeding up numerical operations, I hardly ever call these directly, and instead use NumPy for its array initialization functions. Most other scientifically useful libraries, such as QuTIP, SciPy and pandas are built on top of NumPy objects and operations.
QuTIP is the quantum toolbox in python. Though a lot of the functionality is aimed simulating and analyzing more complex quantum systems with long-term time evolution and coupled system, it is still useful for creating entangled photon states using nonlinear optics, applying wave-plates and calculating the probability amplitudes after squashing the states down to classical measurements.
PyZZDE a python interface to Zemax. Useful for automating optical analysis, for example, optimizing coupling by iteratively moving elements around in the optical system.
DEAP DEAP stands for Distributed Evolutionary Algorithms in Python and is a versatile library for creating and running genetic programs in python.
Gathering Data
pyserial allows for writing and reading to serial ports from Windows and Linux. It also provides some helper functionality for inspecting available serial ports.
InstrumentKit is a library that abstracts away the communication protocols to scientific instruments, as well as handling the common and known bugs in these devices.
PyOmniDriver is my library for communicating with Ocean Optics spectrometers.
PyHighFinesse is my library for communicating with Angstrom/High Finesse spectrometers.
RPi.GPIO is a library for communicating with the raspberry pi’s GPIO port, which is allows the raspberry pi to be used as a cheap and simple data acquisition device.
Analyzing Data
pandas provides a data storage object called a DataFrame, which is accessed like R’s DataFrame. When stored in a DataFrame, data can be easily sliced on a query — i.e., pick out all spectrometer intensities where the oven temperature was 34 degrees C between the ranges of 800 to 815 nm, then manipulated as a NumPy matrix or array, printed in a human-readable format, or written to a comma separated file.
scipy.signal can be useful in analyzing spectrums and oscilloscope traces, however many of these libraries are overkill. The same task can often be accomplished in a more transparent and effective fashion using curve-fitting.
scipy.stats contains methods for fitting data to several probability distributions that can arise from experimental data, for example, gaussians, poissonians, chi-squared and log-normal, as well as multi-variate analysis.
scipy.optimize contains methods for performing simple numerical optimizations, such as curve-fitting and root-finding. Though not as sophisticated as some other machine-learning algorithms, when applied correctly it is powerful enough.
Visualizing Data
matplotlib is a versatile 2-d plotter. If data can be drawn as a collection of 2-d shapes, it can be created programmatically using matplotlib. Matplotlib has methods for simple scatter-plots and bar charts, but its versatility comes from its artist layer, which allows any two-dimensional shape or annotation to be added to the plot. Another key feature is that care has been put into making the default style and color schemes attractive in the latest version.
svgwrite allows scalable vector graphics to be created from within python. Useful for creating iterative experimental schematics that can be scaled for any resolution (for example, when printing in an article pdf) or viewed in a web browser.
PySide is a python implementation of Qt, a robust cross-platform graphical user interface library. PySide is particularly useful as it has a license that allows it to be used for commercial applications. One drawback is that it is not yet compatible with python 3.5.
PyQtGraph allows plots to be embedded in Qt applications. Although it is possible to render matplotlib graphs in Qt GUI’s, they do not respond well to multi-threaded programs. PyQtGraph, on the other hand, is based on Qt and thus can be used in a Qt thread. Responsive experimental GUI’s require threading, thus responsive experimental graphs require PyQtGraph. It is not as versatile or as attractive as matplotlib, but adequate for real-time GUI’s.
If there is a library you find useful not included in the above, let me know!
Как установить Python пакет .Whl файл
Наиболее популярным способом установки нового пакета или библиотеки Python является использование pip или easy_install , как это описано в разделе Python tutorial installation section. Но иногда вы не можете использовать эти инструменты из-за некоторых ограничений, таких как ограниченный доступ в Интернет. Здесь мы покажем вам, как установить новый пакет Python с файлом .whl.
pip уже установлена
Если pip или pip.exe не распознан, установите его с помощью pip учебника по установке. Или вы можете проверить, находится ли он в каталоге скриптов Python, но путь к скриптам не находится в системной переменной. Тогда вы можете просто добавить путь к скриптам Python в системную переменную PATH .
Здесь, C:\Python\Scripts следует обновить в вашем собственном каталоге установки Python.
Загрузите файл .whl
Вы можете скачать неофициальный бинарный файл windows для пакетов расширения Python с этого надёжного сайта UCI https://www.lfd.uci.edu/
Установите файл .whl
Например, если Вы скачали pycairo-1.16.3-cp27-cp27m-win32.whl в папку C:\Downloads\ . Используйте команду ниже, чтобы установить файл пакета whl .
Как установить whl файл python
In this article, we are going to see how we can install a Python Package with a .whl file.
Users must have Python 3.x (any version like 3.9,3.10 etc) installed on their device and may download any .whl file of their choice prior to following this article. The user should also need to verify that pip is already installed too.
What is a wheel file?
It is a built-package format for Python. A wheel could be a ZIP-format archive with a specially formatted name and therefore the .whl extension. it’s designed to contain all the files for a PEP 376 compatible, install in such a way that is very close to the on-disk format. several packages are properly put in with solely the “Unpack” step (simply extracting the file onto sys.path), and therefore the unpacked archive preserves enough info to “Spread” (copy information and scripts to their final locations) at any later time.
Method 1: Using Powershell + pip + cd (change directory command).
Step 1: First, we need to download our desired .whl file from the official PyPi website (pypi.org), open the website and click on browse projects.
Step 2: After clicking browse projects click on the Python 3 compatible projects
Step 3: After clicking Python 3 compatible projects, search for the desired package of user’s choice. In this tutorial I will be downloading and installing the PyAudio package so I will download that (user might download any other package, the process of installation is same).
Step 4: After searching and finding the package user wants, the user needs to click on that package, and on the left there would be a section called Download files (under Navigation), click on that and the user will see .whl file of different versions of the package. Here the user needs to be very careful about the Python version they have installed on their device and the type of OS is installed in their machine (32 or 64-bit). For Windows and AMD 64-bit, the same file will work on both, if the user has 32-bit installed then download the file which has win32 in its name.
Just click on the specific package and it will be downloaded.
The first version is the latest one which supports Python 3.11 and will run on Windows and AMD 64-bit machines, the second one also supports Python 3.11 but will work on Windows 32-bit machines. Then the third and the fourth support Python 3.10 64bit and 32bit machines etc.
Step 5: Now open Windows Powershell in Administrator mode, then change the directory using the cd command to where the downloaded file is located.
Step 6: Now as we are now in the folder where it has been downloaded, run the following command in Powershell.