How to install PyQt5 in PyCharm
PyQt5 is a toolkit for creating Python GUI applications. As a cross-platform toolkit, PyQt can run on all major operating systems (Unix, Windows (Mac).
This article describes how to install Python + PyCharm + PyQt5.
With PyQt5, the GUI is designed in two ways:
- directly using the code to design the interface
- using QtDesigner to visualize the design, and then convert the resulting .ui file into a .py file.
Install Python + PyCharm + PyQt5.
Step 1. Install Python.
Visit the official website at https://www.python.org/ to download and install your target Python version.
Install PyQt5
Enter the cmd interface. Run the command and wait a moment.
The command is executed and PyQt5 is installed.
Test if pqyt5 is actually installed
Create a new file, example.py, and enter the following code.
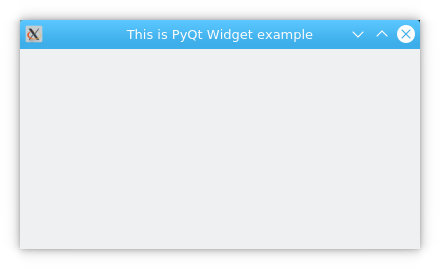
After running, the following screen will pop up, indicating that PyQt is working normally.
3. Install PyCharm.
Visit the official website http://www.jetbrains.com/pycharm/
Choose download and install Community version.
PyCharm Basic Configuration.
Step 1 Create a new project
Step 2 Set the default PyCharm parser.
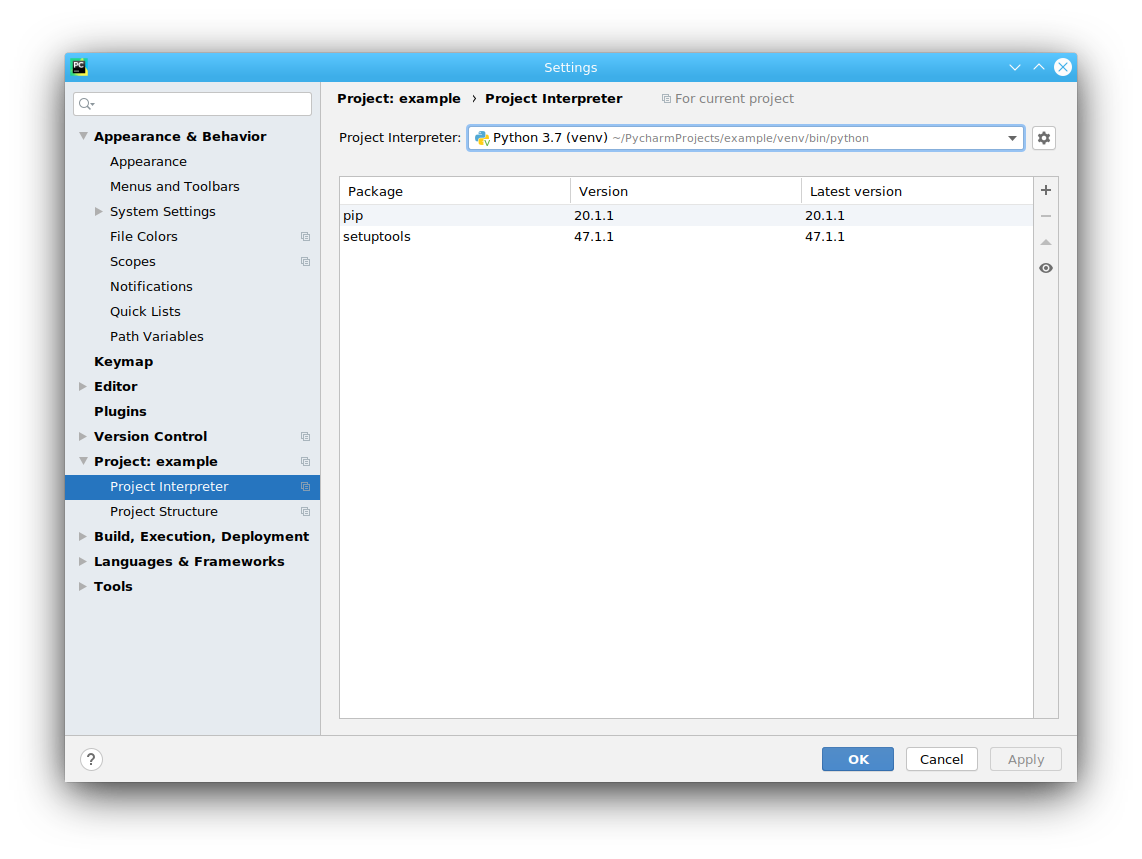
Select File | Settings | Project: first | Project Interpreter, set Project Interpreter to The version of python you are using
Step 3 Adding third-party libraries
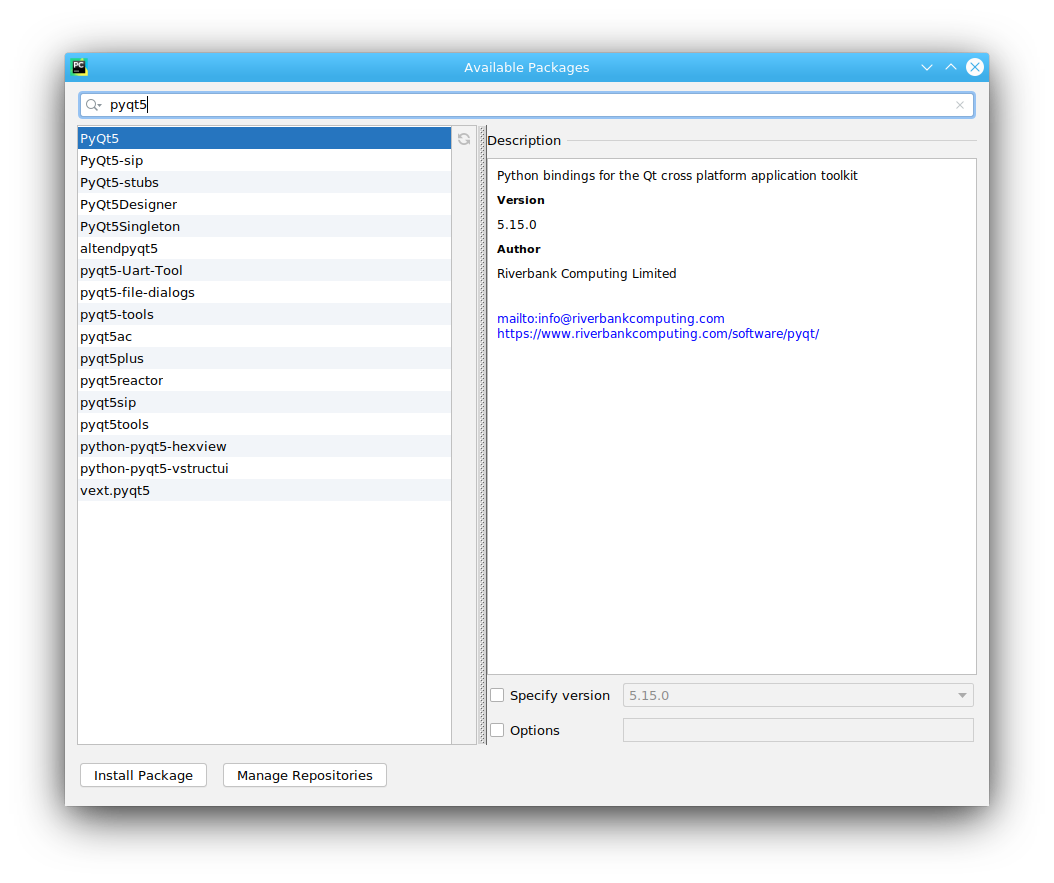
Stay in the Project Interpreter interface, click on the +, find and install pyqt5. pyqt5-sip, pyqt5-tools. After successful installation, the interface should look like this.
Step 4 Configuring QtDesigner
Install designer
You can start designer directly from PyCharm. Make sure designer is installed first. Designer is not installed with the pip installation.
On Fedora Linux you can do this:
Ubuntu Linux users can do thiS:
You can also do this:
Once qt5-designer is installed, you can configure it in PyCharm.
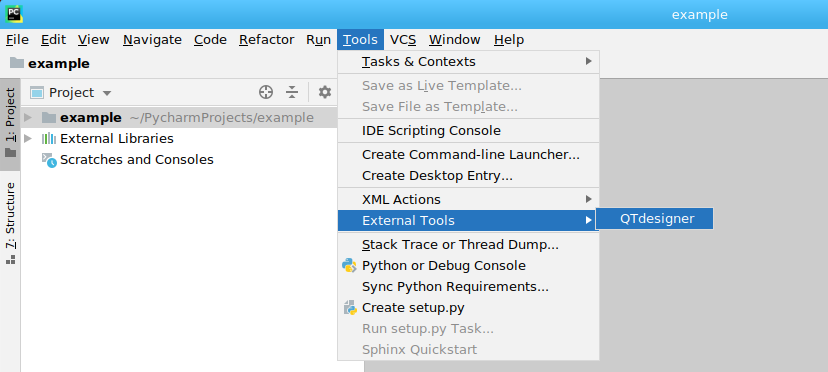
PyCharm select File | Settings | Tools | PyCharm. External Tools, click + New Tools, Create QTdesigner and PyUIC tools
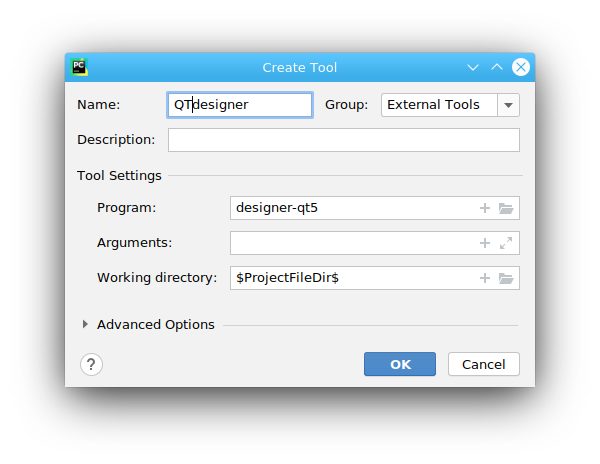
Configure two key parameters.
Program: the path to your own designer .
Windows users can link to designer.exe , for example C:\\xxxx\AppData\Local\Programs\Python\Python35-32\\Lib\site-packages\pyqt5-tools\designer.exe
Fedora Linux users can link designer-qt5
Ubuntu users can set it to /usr/lib/x86_64-linux-gnu/qt5/bin/designer
- Working directory: $ProjectFileDir$
Step 5: Configure PyUIC
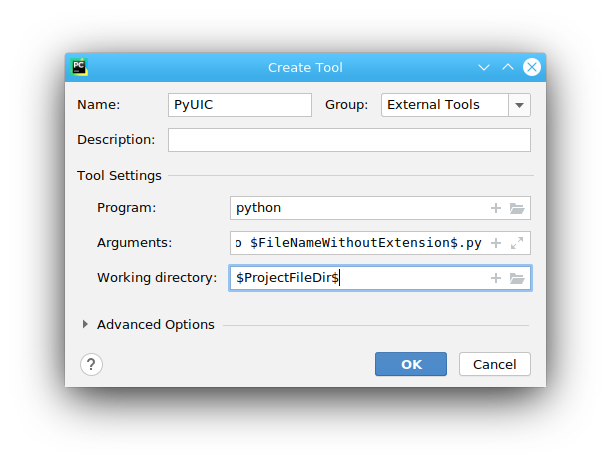
Configure three key parameters.
- Program: Your own python.exe path For example, C:\\xxxx\AppData\\Local\Programs\Python\Python35-32\python .
- Arguments: -m PyQt5.uic.pyuic $FileName$ -o $FileNameWithoutExtension$.py
- Working directory: $ProjectFileDir$
Test PyQt installation
From code
Now that everything is setup, it’s time to test if everything is setup correctly.
Create a GUI interface using the code below (or any PyQt code).
Select Run->Run first. You should see a PyQt window popup.
QTDesigner
Use QTDesigner to generate a GUI interface and convert it to a .py file using PyUIC.
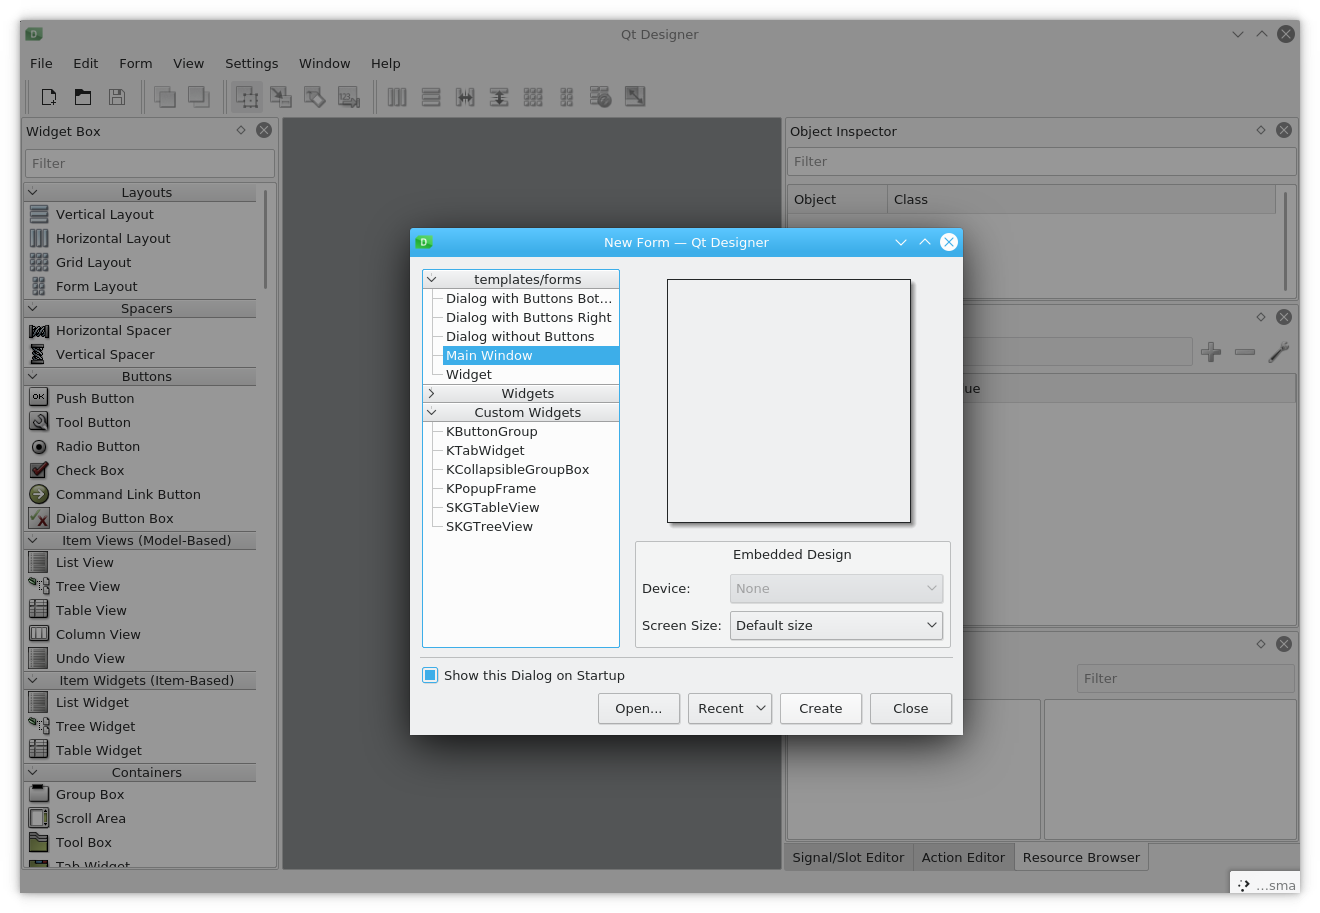
In the QT Designer interface, a GUI creation interface will pop up for the first time, click on create to automatically generate a GUI interface.
Save the interface as Untitled.ui file.
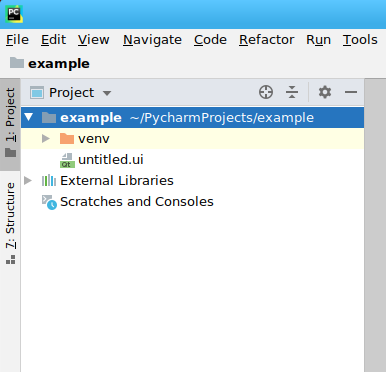
Back to the PyCharm project interface, there is an extra .ui file under the project list.
Install pyqt
PyQt is often not installed by default. The PyQt module can be used to create desktop applications with Python. In this article you’ll learn how to install the PyQt module.
Desktop applications made with PyQt are cross platform, they will work on Microsoft Windows, Apple Mac OS X and Linux computers (including Raspberry Pi).
How to install PyQt5 on Windows?
To install PyQt on Windows there are a few steps you need to take.
First use the installer from the qt-project website, from qt to install PyQt.
Next you want to install a Python version 3.3 or newer. Check the box to add all of the PyQt5 extras. It’s not necessary to compile everything from source, you can install all the required packages with the installer.
On Python >= 3.6, you can also try this command:
It should work without problems.
How to install PyQt5 on Mac OS X?
On Apple Mac OS X installation is a bit simpler. The first step to take is to install the Mac OS X binary. This installs the PyQt GUI library.
But to use it from Python, you also need Python module. This is where the tool brew comes in.
You can use brew to install pyqt (in the terminal):
How to install PyQt5 on Linux?
Python is often installed by default on Linux (in nearly all of the distributions including Ubuntu). But you want to make sure to use Python 3, because of all the features and ease of use. You can verify that you have the newest Python version with the command:
On Ubuntu Linux they sometimes include two versions of python, python3 and python . In that case use Python 3.
Once you have Python ready, the next step is to install PyQt.
This isn’t hard to do if you have some Linux experience. You can install PyQt your software package manager. Which package manager to use depends on which Linux distribution you are using.
Qt for Python Quick start
Before you can install Qt for Python, first you must install the following software:
-
Python 2.7 or 3.5+ (we recommend 3.5+),
-
We recommend using a virtual environment, such as venv or virtualenv
Creating and activating an environment
You can do this by running the following on a terminal:
Installation
Now you are ready to install the Qt for Python packages using pip . From the terminal, run the following command:
Test your Installation
Now that you have Qt for Python installed, you can test your setup by running the following Python constructs to print version information:
Create a Simple Application
Your Qt for Python setup is ready. You can explore it further by developing a simple application that prints “Hello World” in several languages. The following instructions will guide you through the development process:
Create a new file named hello_world.py , and add the following imports to it.:
The PySide2 Python module provides access to the Qt APIs as its submodule. In this case, you are importing the QtCore , QtWidgets , and QtGui submodules.
Define a class named MyWidget , which extends QWidget and includes a QPushButton and QLabel.:
The MyWidget class has the magic member function that randomly chooses an item from the hello list. When you click the button, the magic function is called.
Now, add a main function where you instantiate MyWidget and show it.:
Run your example. Try clicking the button at the bottom to see which greeting you get.
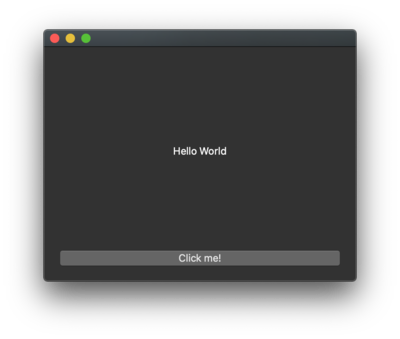
© 2022 The Qt Company Ltd. Documentation contributions included herein are the copyrights of their respective owners. The documentation provided herein is licensed under the terms of the GNU Free Documentation License version 1.3 as published by the Free Software Foundation. Qt and respective logos are trademarks of The Qt Company Ltd. in Finland and/or other countries worldwide. All other trademarks are property of their respective owners.
How to install PyQt
PyQt is excellent for using for Python interfaces, as it is flexible, and allows you access to a wide array of functionalities.
But to get access to all its advantages, you must first install it correctly. Thus, let’s see down below how to install PyQt and get the best programming functionalities from this framework.
PyQt is a GUI framework for Python, it requires basic Python knowledge.
1 Setup
First of all, you will have to install Python, depending on your operating system. You can opt from distinct software, but the most popular ones are Windows and Linux.
Qt in Python comes in a package named PyQt. PyQt includes everything you need to start using GUIs in Qt Designer via Python.
On Linux (Ubuntu)
For other platforms, use the website. You can download PyQt from their official page and opt for the Qt Designer package, too. Depending on your options, you will have to complete the installation process, as mentioned in the PyQt website.

2 Check the PyQt package you installed
As soon as the installation process is finished, you should be able to identify inside Python’s directory a folder named PyQt.
Here, you will discover library files for Python, along with executables and scripts.
The next step is to verify if Python has access to the PyQt package, and you can do so by opening a line in your command terminal.
You can also try a hello world script to see if PyQt works correctly.
3 Starting GUI in Python with PyQt
At this point, you will have to create a GUI and load it into Python (with designer).
After this, you will have to convert via PyQt, code in Python, and execute accordingly.
4 Creating custom settings to GUI events
After creating the interface, you will have to create a building software, or a part bridging GUI to the business approach.
Thus, you will need to design a Python script accordingly to the features you will want to have included in your finite product.
5 Setting up your GUI in Qt Designer
When you access Qt Designer, you should receive a dialog box prompting you to open a New Form. Opt for Dialog with Bottom or the default option and press the create button.

6 Creating buttons or widgets
In the Qt Designer window, you will find a setting named Widget Box. You can drag from there any type of widget you desire and adapt them depending on your project.
Keep in mind that the default functionality comes with two necessary buttons, OK and Cancel. Those can be modified by clicking on them and changing their settings in the Property Editor.
From this point on, you can mix and match a wide array of functionality related to Python and PyQt. It is a versatile method of coding, as it allows you to use several characteristics available with this framework.

You can use this cross-platform on Windows by installing Python, and adding all the PyQt extras. For this software, it is not required to compile everything.
For Mac OS, you will need the Mac OS X binary, which will allow you to install PyQt on your terminal.
For Linux, you will discover that Python is installed by default. Therefore, you will only need to install PyQt software, package manager.