Install IntelliJ IDEA
IntelliJ IDEA is a cross-platform IDE that provides consistent experience on the Windows, macOS, and Linux operating systems.
IntelliJ IDEA is available in the following editions:
Community Edition is free and open-source, licensed under Apache 2.0. It provides all the basic features for JVM and Android development.
IntelliJ IDEA Ultimate is commercial, distributed with a 30-day trial period. It provides additional tools and features for web and enterprise development. For pricing information, see Subscription options & Pricing.
For more information about the editions, see the comparison matrix.
System requirements
2 GB of free RAM
8 GB of total system RAM
Multi-core CPU. IntelliJ IDEA supports multithreading for different operations and processes making it faster the more CPU cores it can use.
SSD drive with at least 5 GB of free space
Officially released 64-bit versions of the following:
Microsoft Windows 10 1809 or later
Windows Server 2019 or later
macOS 10.15 or later
Any Linux distribution that supports Gnome, KDE , or Unity DE.
IntelliJ IDEA is not available for the Linux distributions that do not include GLIBC 2.27 or later.
Pre-release versions are not supported.
Latest 64-bit version of Windows, macOS, or Linux (for example, Debian, Ubuntu, or RHEL)
You do not need to install Java to run IntelliJ IDEA because JetBrains Runtime is bundled with the IDE (based on JRE 17). However, to develop Java applications, a standalone JDK is required.
Older Linux distributions (before Ubuntu 18.04 and CentOS 8) don’t support the required JCEF version starting from IntelliJ IDEA version 2022.1. This means that components relying on the embedded browser will not work, for example, the Markdown HTML preview and the interactive debugger console.
Install using the Toolbox App
The JetBrains Toolbox App is the recommended tool to install JetBrains products. Use it to install and manage different products or several versions of the same product, including Early Access Program (EAP) and Nightly releases, update and roll back when necessary, and easily remove any tool. The Toolbox App maintains a list of all your projects to quickly open any project in the right IDE and version.
Install the Toolbox App
Download the installer .exe from the Toolbox App web page.
Run the installer and follow the wizard steps.
After you run the Toolbox App, click its icon in the notification area and select which product you want to install.
To install a specific version, click and select Available versions .
Log in to your JetBrains Account from the Toolbox App, and it will automatically activate the available licenses for any IDE that you install.
Install the Toolbox App
Download the disk image .dmg from the Toolbox App web page.
There are separate disk images for Intel and Apple Silicon processors.
Mount the image and drag the JetBrains Toolbox app to the Applications folder.
After you run the Toolbox App, click its icon in the main menu and select which product you want to install.
To install a specific version, click and select Available versions .
Log in to your JetBrains Account from the Toolbox App, and it will automatically activate the available licenses for any IDE that you install.
Install the Toolbox App
Download the tarball .tar.gz from the Toolbox App web page.
Extract the tarball to a directory that supports file execution.
For example, if the downloaded version is 1.17.7391, you can extract it to the recommended /opt directory using the following command:
Execute the jetbrains-toolbox binary from the extracted directory to run the Toolbox App.
After you run the Toolbox App for the first time, it will automatically add the Toolbox App icon to the main menu.
Select the product that you want to install.
To install a specific version, click and select Available versions .
Log in to your JetBrains Account from the Toolbox App, and it will automatically activate the available licenses for any IDE that you install.
If you installed IntelliJ IDEA via the Toolbox App, you can find the installation directory in the app: open the settings of the IDE instance in the Toolbox App, expand Configuration and look for the Install location field.
Standalone installation
Install IntelliJ IDEA manually to manage the location of every instance and all the configuration files. For example, if you have a policy that requires specific install locations.
There is a separate installer for ARM64 processors.
Run the installer and follow the wizard steps.
On the Installation Options step, you can configure the following:
Create a desktop shortcut for launching IntelliJ IDEA.
Add the directory with IntelliJ IDEA command-line launchers to the PATH environment variable to be able to run them from any working directory in the Command Prompt.
Add the Open Folder as Project action to the system context menu (when you right-click a folder).
Associate specific file extensions with IntelliJ IDEA to open them with a double-click.
To run IntelliJ IDEA, find it in the Windows Start menu or use the desktop shortcut. You can also run the launcher batch script or executable in the installation directory under bin .
Extract the archive to the desired folder.
To run IntelliJ IDEA, use the launcher batch script or executable in the extracted directory under bin .
There are separate disk images for Intel and Apple Silicon processors.
Mount the image and drag the IntelliJ IDEA app to the Applications folder.
Run the IntelliJ IDEA app from the Applications directory, Launchpad, or Spotlight.
There is a separate tarball for ARM64 processors.
Extract the tarball to a directory that supports file execution.
For example, to extract it to the recommended /opt directory, run the following command for IntelliJ IDEA Ultimate:
For IntelliJ IDEA Community, run:
Do not extract the tarball over an existing installation to avoid conflicts. Always extract it to a clean directory.
Execute the idea.sh script from the extracted directory to run IntelliJ IDEA.
To create a desktop entry, do one of the following:
On the Welcome screen, click Configure | Create Desktop Entry
From the main menu, click Tools | Create Desktop Entry
When you run IntelliJ IDEA for the first time, you can take several steps to complete the installation, customize your instance, and start working with the IDE.
For information about the location of the default IDE directories with user-specific files, see Directories used by the IDE.
Silent installation on Windows
Silent installation is performed without any user interface. It can be used by network administrators to install IntelliJ IDEA on a number of machines and avoid interrupting other users.
To perform silent install, run the installer with the following switches:
/S : Enable silent install
/CONFIG : Specify the path to the silent configuration file
/D : Specify the path to the installation directory
This parameter must be the last in the command line, and it should not contain any quotes even if the path contains blank spaces.
To check for issues during the installation process, add the /LOG switch with the log file path and name between the /S and /D parameters. The installer will generate the specified log file. For example:
Silent configuration file
You can download the default silent configuration file for IntelliJ IDEA at https://download.jetbrains.com/idea/silent.config
The silent configuration file defines the options for installing IntelliJ IDEA. With the default options, silent installation is performed only for the current user: mode=user . If you want to install IntelliJ IDEA for all users, change the value of the installation mode option to mode=admin and run the installer as an administrator.
The default silent configuration file is unique for each JetBrains product. You can modify it to enable or disable various installation options as necessary.
It is possible to perform silent installation without the configuration file. In this case, omit the /CONFIG switch and run the installer as an administrator. Without the silent configuration file, the installer will ignore all additional options: it will not create desktop shortcuts, add associations, or update the PATH variable. However, it will still create a shortcut in the Start menu under JetBrains .
Install as a snap package on Linux
You can install IntelliJ IDEA as a self-contained snap package. Since snaps update automatically, your IntelliJ IDEA installation will always be up-to-date.
To use snaps, install and run the snapd service as described in the installation guide.
On Ubuntu 16.04 LTS and later, this service is pre-installed.
IntelliJ IDEA is distributed via two channels:
The stable channel includes only stable versions. To install the latest stable release of IntelliJ IDEA, run the following command:
The —classic option is required because the IntelliJ IDEA snap requires full access to the system, like a traditionally packaged application.
The edge channel includes EAP builds. To install the latest EAP build of IntelliJ IDEA, run the following command:
When the snap is installed, you can launch it by running the intellij-idea-community , intellij-idea-ultimate , or intellij-idea-educational command.
To list all installed snaps, you can run sudo snap list . For information about other snap commands, see the Snapcraft documentation.
How to Install IntelliJ IDEA on Ubuntu 22.04 | 20.04
Welcome to the world of IntelliJ IDEA, a feature-rich and powerful Integrated Development Environment (IDE) designed for developers who aspire to create top-quality applications with ease and efficiency. Developed by JetBrains, IntelliJ IDEA supports a wide range of programming languages, including Java, Kotlin, Scala, and Groovy, making it the IDE of choice for countless developers worldwide.
What sets IntelliJ IDEA apart from other IDEs is its intelligent coding assistance that truly understands your code. With smart code completion, on-the-fly error detection, and quick-fix suggestions, IntelliJ IDEA empowers developers to write cleaner, more efficient code. It also offers a suite of features such as:
- Code Refactoring: Streamline your code with IntelliJ IDEA’s advanced refactoring tools, helping you to optimize your codebase and make it easier to maintain.
- Built-in Version Control: IntelliJ IDEA offers seamless integration with popular version control systems like Git, SVN, and Mercurial, allowing you to manage your project changes with ease.
- Debugger: Debug your applications effortlessly with IntelliJ IDEA’s built-in debugger, which provides advanced breakpoint management, expression evaluation, and other essential debugging features.
- Code Navigation: Navigate through your code quickly and efficiently using IntelliJ IDEA’s powerful search, go-to, and structural navigation tools.
- Plugins: Enhance your development experience by choosing from a vast selection of plugins in the IntelliJ IDEA plugin repository, covering everything from code quality analysis to UI frameworks.
Ready to get started with IntelliJ IDEA? This guide will walk you through the installation process on Ubuntu 22.04 Jammy Jellyfish or Ubuntu 20.04 Focal Fossa, covering several methods to ensure you find the one that suits your needs:
- LaunchPAD PPA: Install IntelliJ IDEA Community or Ultimate editions using a LaunchPAD Personal Package Archive.
- Snapcraft: Choose from Community, Ultimate, or Education editions when installing IntelliJ IDEA with Snapcraft.
- Flatpak and Flathub: Opt for the Community or Ultimate editions while installing IntelliJ IDEA using Flatpak and Flathub.
With these comprehensive installation options, you’ll be well on your way to experiencing the powerful features and benefits of IntelliJ IDEA.
Table of Contents
Section 1: Install IntelliJ IDEA with APT
Step 1: Update Ubuntu
Before starting the installation process, it’s crucial to update your Ubuntu system. This ensures that all existing packages are up-to-date and helps avoid any conflicts during IntelliJ IDEA installation:
Step 2: Install Necessary Packages
In this step, you will install the software-properties-common and apt-transport-https packages, which are required for adding a Personal Package Archive (PPA) to your system.
Step 3: Import IntelliJ IDEA PPA
The recommended PPA for installing IntelliJ IDEA is provided by Marcel Kapfer, which contains the latest Community and Ultimate editions. To import this PPA into your Ubuntu system, execute the following command in your terminal:
Step 4: Update the Package List
After adding the PPA to your system, you need to update the package list to reflect the newly imported PPA. Run the following command to accomplish this:
Now you’re ready to install the desired version of IntelliJ IDEA—either the Community or Ultimate edition.
Step 5: Install IntelliJ IDEA
Choose the appropriate command below to install the edition of IntelliJ IDEA that suits your needs:
Install IntelliJ IDEA – Community Edition:
Install IntelliJ IDEA – Ultimate Edition:
Section 2: Install IntelliJ IDEA with Snapcraft
Step 1: Verify Snapcraft Installation
The second method to install IntelliJ IDEA is by using the Snapcraft package manager. Snapcraft comes pre-installed on most Ubuntu desktop systems unless it has been removed previously. It’s important to note that Flatpak may have faster updates for this package compared to Snapcraft, with new releases available a few weeks earlier.
Step 2: Enable Classic Snap Support
Some packages in Snapcraft come in “classic” mode, which requires additional configuration. To enable classic snap support and ensure the best compatibility, create a symbolic link by running the following command:
Step 3: Install Core Files
To avoid any conflicts during the installation process, install the necessary core files using the command below:
Step 4: Install IntelliJ IDEA
Now you’re ready to install the desired version of IntelliJ IDEA—either the Community, Ultimate, or Educational edition. Choose the appropriate command below to install the edition that suits your needs:
Install IntelliJ IDEA – Community Edition:
Install IntelliJ IDEA – Ultimate Edition:
Install IntelliJ IDEA – Educational Edition:
Snapcraft offers an additional option, IntelliJ IDEA Educational Edition, which is unavailable through the PPA or Flatpak methods.
Section 3: Install IntelliJ IDEA with Flatpak and Flathub
This section will explore an alternative method to install IntelliJ IDEA using the Flatpak package manager. Flatpak is similar to Snapcraft, offering a universal packaging format for Linux applications. It provides benefits such as easier updates, better sandboxing, and app isolation, making it an excellent choice for installing IntelliJ IDEA.
Step 1: Enable Flathub
Before installing IntelliJ IDEA through Flatpak, you must enable the Flathub repository, a primary source for Flatpak applications. To enable Flathub, execute the following command in your terminal:
Note: If your system does not have Flatpak installed, please refer to our own guide on How to Install Flatpak on Ubuntu for step-by-step instructions on installing the most recent supported version of Flatpak.
This command adds the Flathub repository to your Flatpak configuration, ensuring you have access to a wide variety of applications, including IntelliJ IDEA.
Step 2: Install IntelliJ IDEA
With Flathub enabled, you can now install IntelliJ IDEA using the flatpak install command. Run the following command in your terminal:
Install IntelliJ IDEA – Community Edition:
Install IntelliJ IDEA – Ultimate Edition:
These commands install the desired edition of IntelliJ IDEA from the Flathub repository, providing you with the latest version of the application.
Section 4: Launching IntelliJ IDEA
In this section, we will discuss two methods to launch IntelliJ IDEA: using the command-line interface (CLI) and the graphical user interface (GUI). We will cover launching IntelliJ IDEA installed via apt, Snapcraft, and Flatpak.
Method 1: Launch IntelliJ IDEA via CLI
To launch IntelliJ IDEA from the command line, depending on the installation method and version you have installed, follow the instructions below:
Apt Method
Community Edition:
Ultimate Edition:
Snapcraft Method
Community Edition:
Ultimate Edition:
Educational Edition:
Flatpak Method
Community Edition:
Ultimate Edition:
Method 2: Launch IntelliJ IDEA via GUI
To launch IntelliJ IDEA using the graphical user interface, follow these steps:
- Open the Activities menu.
- Click on Show Applications.
- Locate IntelliJ IDEA (the version you installed).
- Click on the IntelliJ IDEA icon to launch the application.
If you use IntelliJ IDEA frequently, you can create a shortcut for easier access. To do this, right-click on the IntelliJ IDEA icon in the applications menu and select Add to Favorites. This will place the application icon on the favorites bar, making it readily accessible whenever you need it.
Example of IntelliJ IDEA application icons on UBuntu Linux:

Section 5: Tips for Getting Started with IntelliJ IDEA on Ubuntu Linux
In this section, we will share some tips and tricks to help you get started with IntelliJ IDEA Community Edition on Ubuntu Linux. These tips will guide you in setting up your development environment efficiently, making the most of the features IntelliJ IDEA offers, and customizing it to suit your preferences. While these tips are tailored for the Community Edition, some may also apply to the Ultimate Edition, which offers additional functionality and features.
General Tips
Take Advantage of Built-in Tutorials
IntelliJ IDEA provides built-in tutorials that help you learn its features and functionality. To access these tutorials, go to the Welcome to IntelliJ IDEA screen and select Learn IntelliJ IDEA. Here, you’ll find a range of tutorials, from beginner to advanced levels, that will help you get familiar with the IDE.
Optimize Memory Settings
To ensure optimal performance, it’s important to adjust the memory settings for IntelliJ IDEA. You can customize the maximum heap size and other memory-related settings by editing the vmoptions file. To access this file, go to Help > Edit Custom VM Options. For example, to increase the maximum heap size to 4 GB, add or update the following line:
Enable Autosave
IntelliJ IDEA offers an autosave feature that automatically saves your changes as you work. This feature is enabled by default, but you can customize its settings by going to File > Settings > Appearance & Behavior > System Settings.
Customizations
Customize the User Interface
IntelliJ IDEA allows you to customize its user interface to match your preferences. You can change the theme, font, and keymap by going to File > Settings > Appearance & Behavior.
Install Plugins
Extend the functionality of IntelliJ IDEA by installing plugins. Some popular plugins include Key Promoter X, CodeWithMe, and Lombok. To access the plugins marketplace, go to File > Settings > Plugins.
Configure Code Style
You can configure the code style settings for different programming languages by going to File > Settings > Editor > Code Style. Here, you can customize settings such as indentation, wrapping, and alignment for each language.
Other Tips
Use the Terminal
IntelliJ IDEA has a built-in terminal that allows you to execute commands directly from the IDE. You can open the terminal by clicking on the Terminal tab at the bottom of the IDE window or by pressing Alt + F12 .
Navigate Your Code Quickly
Make use of IntelliJ IDEA’s code navigation features to quickly move between files, classes, and methods. Some useful shortcuts include Ctrl + N (search for a class), Ctrl + Shift + N (search for a file), and Ctrl + Alt + Shift + N (search for a method).
Use Local History
IntelliJ IDEA maintains a local history of your changes, which can be a lifesaver in case of accidental deletions or modifications. To access your local history, right-click on a file or folder in the Project Tool Window and select Local History > Show History.
These tips should help you get started with IntelliJ IDEA on Ubuntu Linux and enhance your overall development experience. While the Community Edition offers a great set of features, upgrading to the Ultimate Edition unlocks additional tools and capabilities that can further boost your productivity.
Example of IntelliJ IDEA UI once launched on Ubuntu Linux:

Section 6: Additional IntelliJ IDEA Commands with Ubuntu Linux
Updating IntelliJ IDEA on Ubuntu Linux
IntelliJ IDEA updates automatically along with your system packages if you are a desktop user using the APT package manager. However, you can manually check for updates using the following terminal command:
For Snapcraft users, you can update all your snap packages using the following command:
If you have installed IntelliJ IDEA using Flatpak, you can update all your Flatpak packages with this command:
Uninstalling IntelliJ IDEA on Ubuntu Linux
If you decide to remove IntelliJ IDEA from your system, use the appropriate command based on your installation method.
APT Remove Method
IntelliJ IDEA Community Edition:
IntelliJ IDEA Ultimate Edition:
Don’t forget to remove the PPA repository, as it’s no longer needed. Use the —remove flag to remove the repository:
Snapcraft Remove Method
IntelliJ IDEA Community Edition:
IntelliJ IDEA Ultimate Edition:
IntelliJ IDEA Educational Edition:
Flatpak Remove Method
To remove IntelliJ IDEA installed via Flatpak, run the following command:
IntelliJ IDEA Community Edition:
IntelliJ IDEA Ultimate Edition:
Closing Thoughts on Installing IntelliJ IDEA on Ubuntu Linux
In this article, we’ve covered various methods for installing IntelliJ IDEA on Ubuntu Linux, including the APT, Snapcraft, and Flatpak methods for both Community and Ultimate editions. Following the steps outlined, you can ensure a smooth and efficient installation process that best suits your needs. Remember to explore the tips and additional resources provided to get the most out of IntelliJ IDEA and enhance your overall experience with this powerful IDE.
Additional Resources and Links
To further expand your knowledge and make the most out of IntelliJ IDEA, we have compiled a list of official resources that can provide valuable insights and guidance:
Как установить IntelliJ IDEA в Linux
IntelliJ IDEA — это интегрированная среда разработки (IDE) на Java, созданная компанией JetBrains.
IntelliJ IDEA выпускается в следующих вариациях:
- IntelliJ IDEA Community Edition (бесплатная версия)
- IntelliJ IDEA Ultimate Edition (платная версия с дополнительными функциями)
- IntelliJ IDEA Educational (это та же Ultimate Edition, но бесплатная для студентов и преподавателей)
Установка IntelliJ IDEA
Способ 1. Установка IntelliJ IDEA из Центра программного обеспечения (Рекомендуется для Ubuntu)
Все варианты IntelliJ IDEA доступны в Центре программного обеспечения:
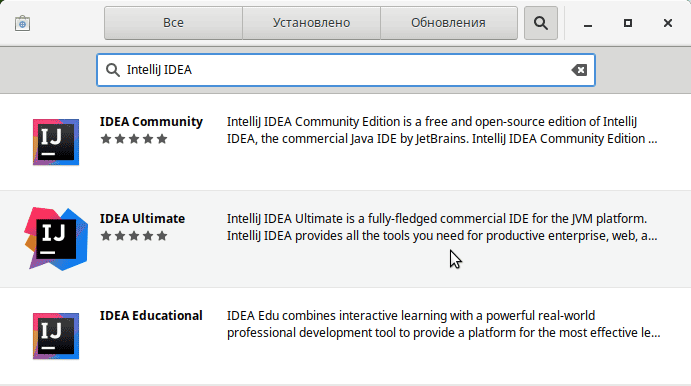
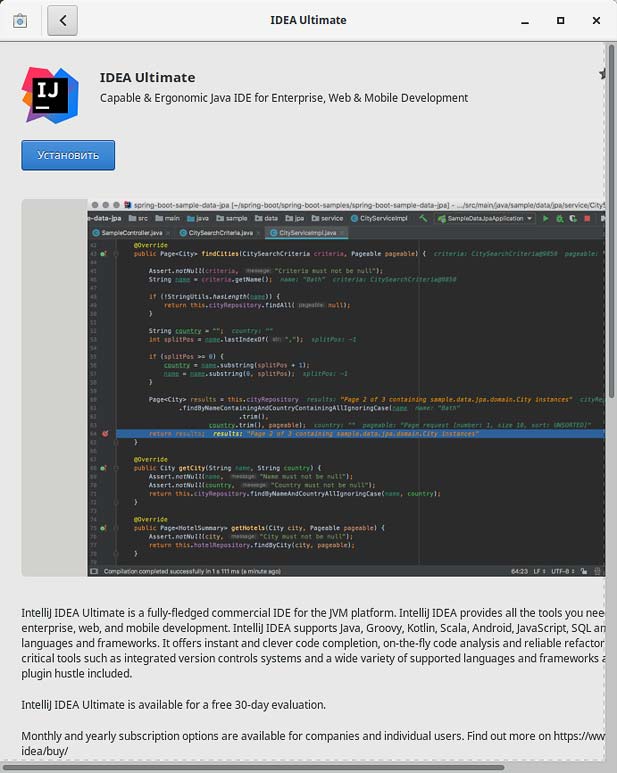
В следующем окне нажмите на кнопку «Установить»

Способ 2. Установка IntelliJ IDEA в Linux с помощью пакетов Snap
Пакеты Snap поддерживаются всеми основными дистрибутивами Linux.
Для версии Community Edition:
Для версии Ultimate Edition:
Для версии Educational:
Способ 3. Установка IntelliJ IDEA с использованием PPA (для Ubuntu)
Данный PPA разработан и поддерживается Марселем Капфером и доступен для Ubuntu 18.04, 16.04, 18.10, 19.04, а также все дистрибутивы Linux на их основе. Но через этот PPA можно установить только версию Ultimate Edition.
Для удаления IntelliJ IDEA Community Edition, установленную таким образом, воспользуйтесь командами:
Установка IntelliJ IDEA на Ubuntu 20.04
IntelliJ IDEA — это интегрированная среда разработки программного обеспечения, написанная на языке программирования Java. Программа разработана компанией JetBrains. Первая версия IntelliJ IDEA появилась ещё в 2001 году и очень быстро завоевала популярность среди программистов.
Сейчас среда поддерживает большое количество интересных функций, включая подсветку синтаксиса, отладчик, Git-инструменты и т. д. IntelliJ IDEA позволяет программировать не только на Java, но также на JavaScript, CoffeeScript, HTML, CSS, YAML, MSXML, Python, Ruby, Scala, PHP, C и C++. С полным перечнем языков можно ознакомиться на официальном сайте разработчиков. В этой инструкции мы рассмотрим, как выполняется установка IntelliJ IDEA Ubuntu 20.04.
Системные требования JetBrains Intellij IDEA
Минимальные системные требования:
- Процессор — 64-битный;
- RAM — 2 Гб;
- Свободное место на диске — 2,5 Гб (и 1 Гб для кэширования);
- Минимальное разрешение экрана — 1024 x 768;
- JDK 1.6 и выше (для разработки на Java).
Рекомендованные системные требования:
- Процессор — 64-битный;
- RAM — 8 Гб;
- Свободное место на диске — 5 Гб;
- Минимальное разрешение экрана — 1920 x 1080;
- JDK 1.6 и выше (для разработки на Java).
Чем отличается Community от Ultimate
IntelliJ IDEA распространяется в виде двух версий. Community Edition— бесплатная версия с открытым исходным кодом под лицензией Apache 2.0. Свободная версия имеет всю базовую функциональность, поддержку Java и других языков, а также интеграцию с системами управления версиями. Может использоваться для разработки Android-приложений. Вторая версия — Ultimate Edition, среди прочего, поддерживает Java EE и построение UML-диаграмм. С полным списком всех возможностей Ultimate-версии можно ознакомиться на официальном сайте.
Установка IntelliJ IDEA в Ubuntu 20.04
1. Установка из snap-пакета
Откройте терминал и выполните следующую команду для установки свободной редакции (Community Edition):
sudo snap install intellij-idea-community —classic —edge
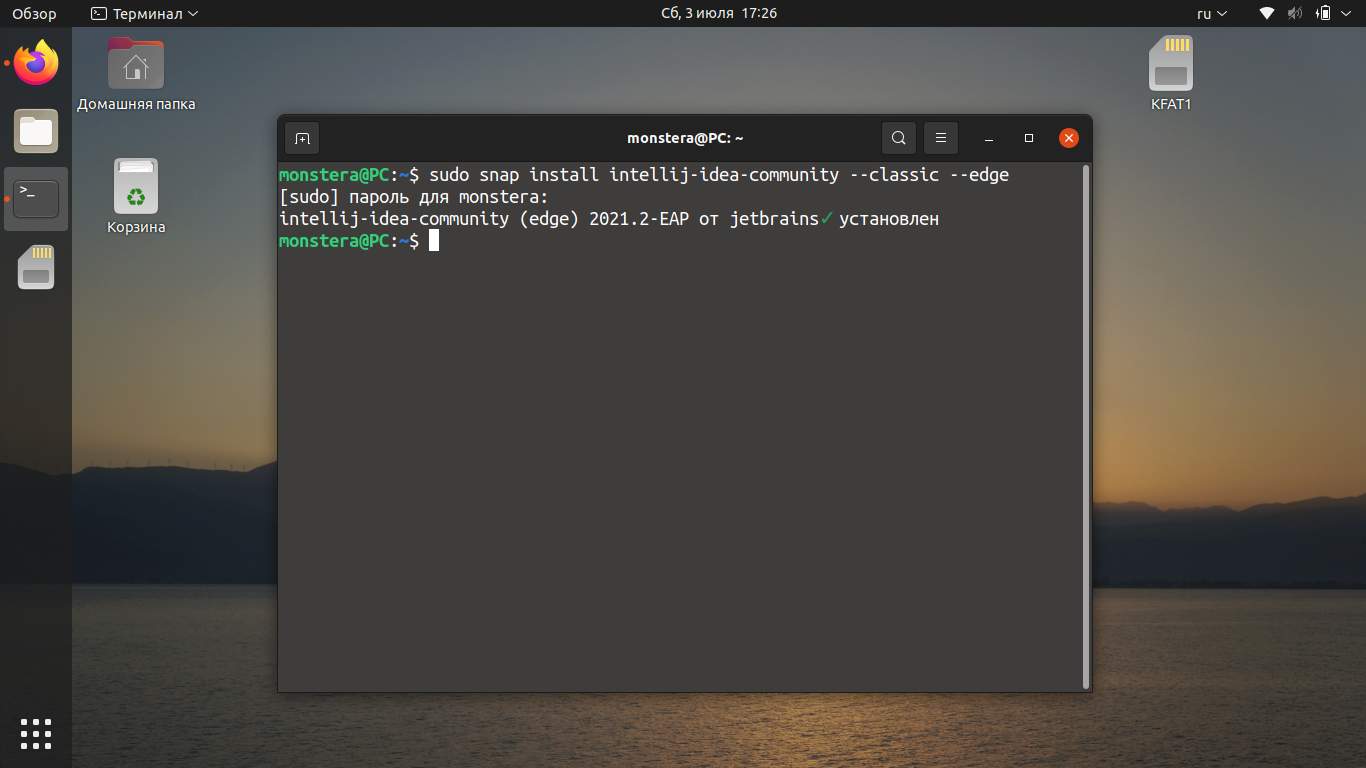
Для установки платной редакции (Ultimate Edition) необходимо выполнить команду:
sudo snap install intellij-idea-ultimate —classic —edge
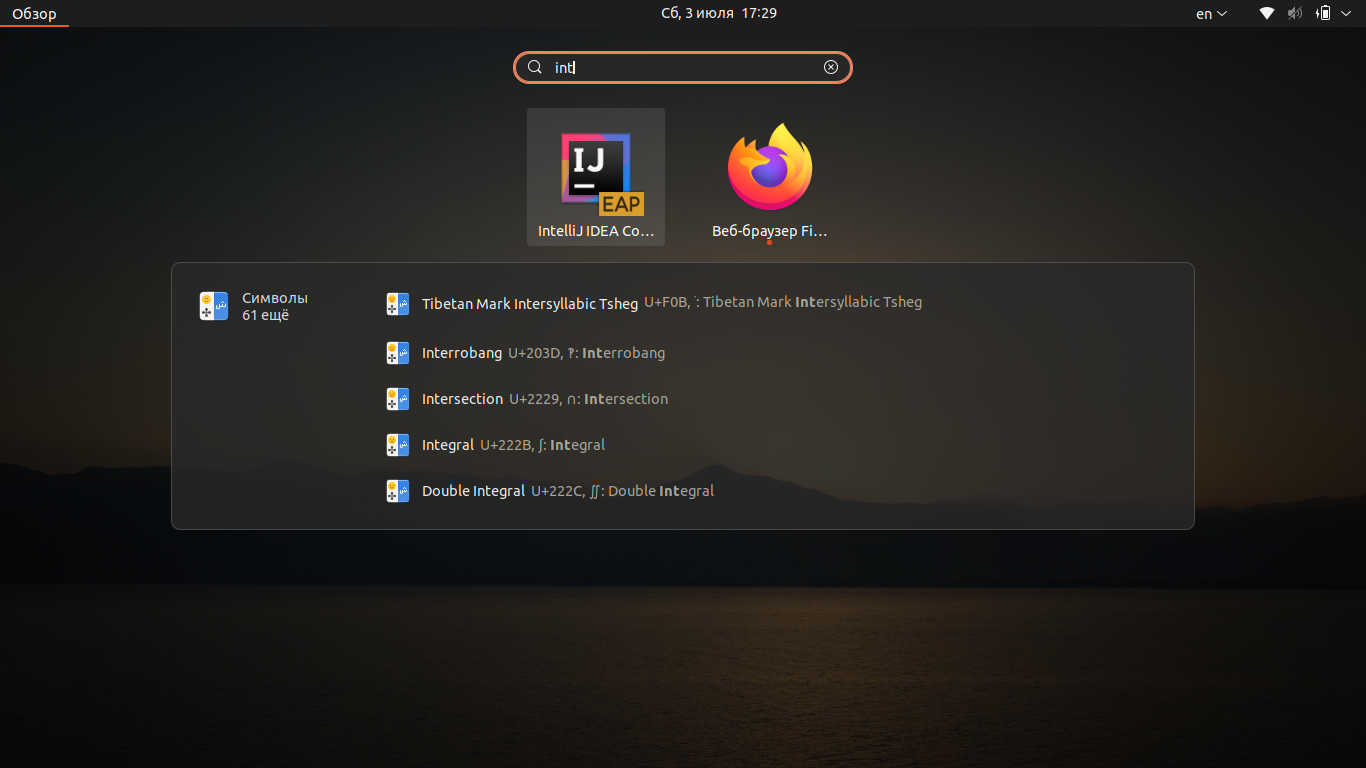
После завершения загрузки пакета программа будет доступна из главного меню:
2. Установка из центра приложений
Запустите центр приложений Ubuntu и введите в поиске название программы:
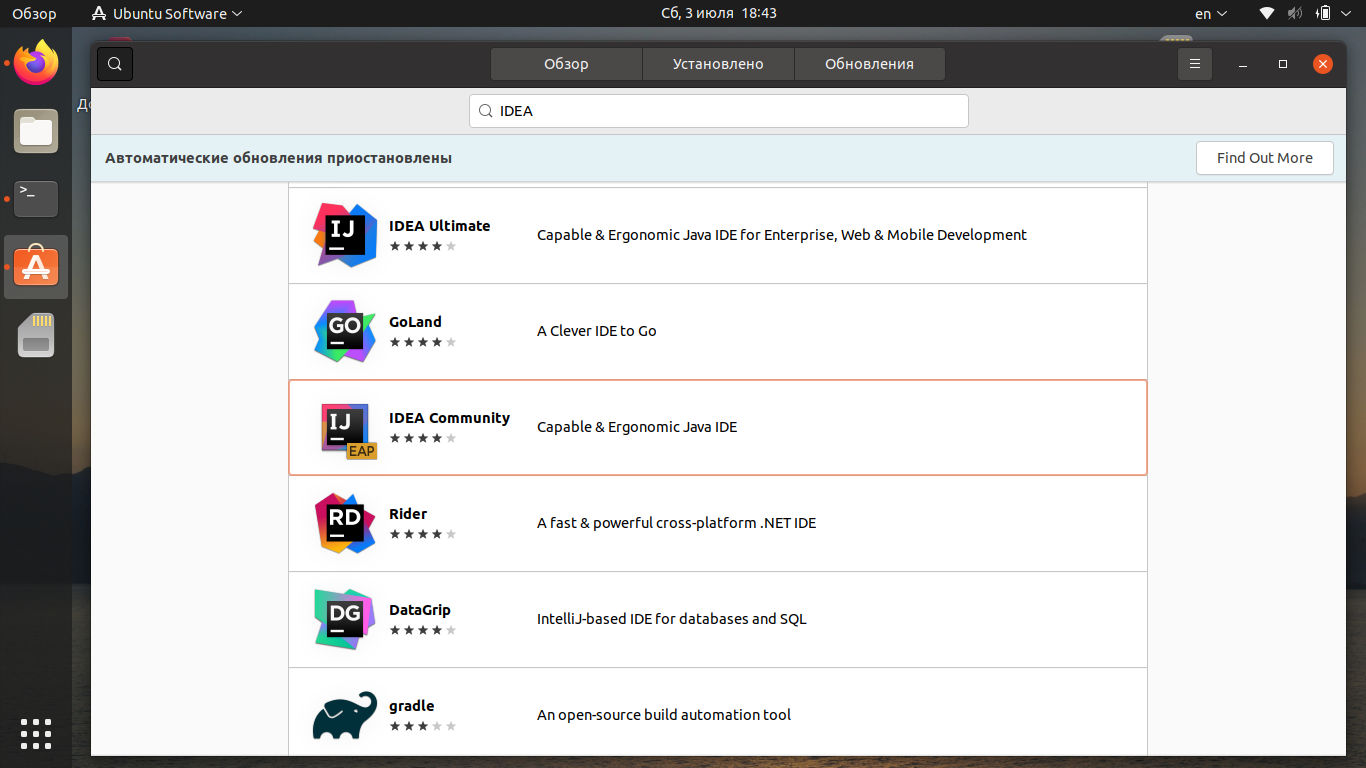
Выберите нужную версию, например IDEA Community, и нажмите на кнопку Установить.
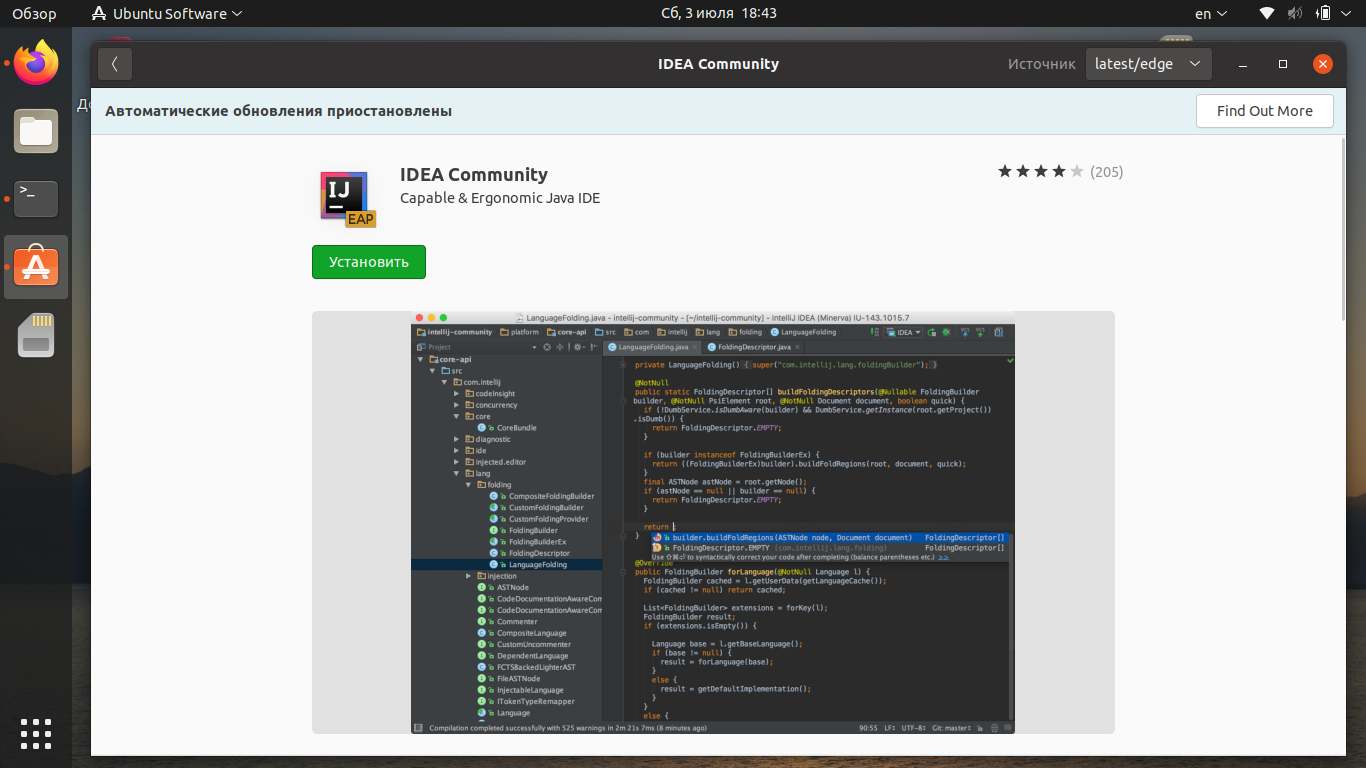
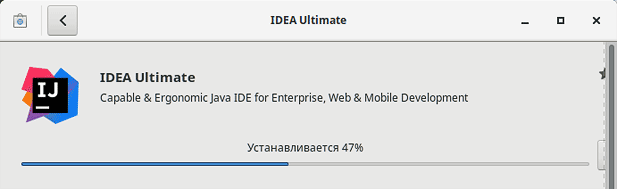
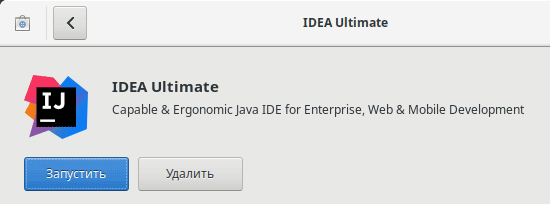
Дождитесь, пока установка будет завершена.
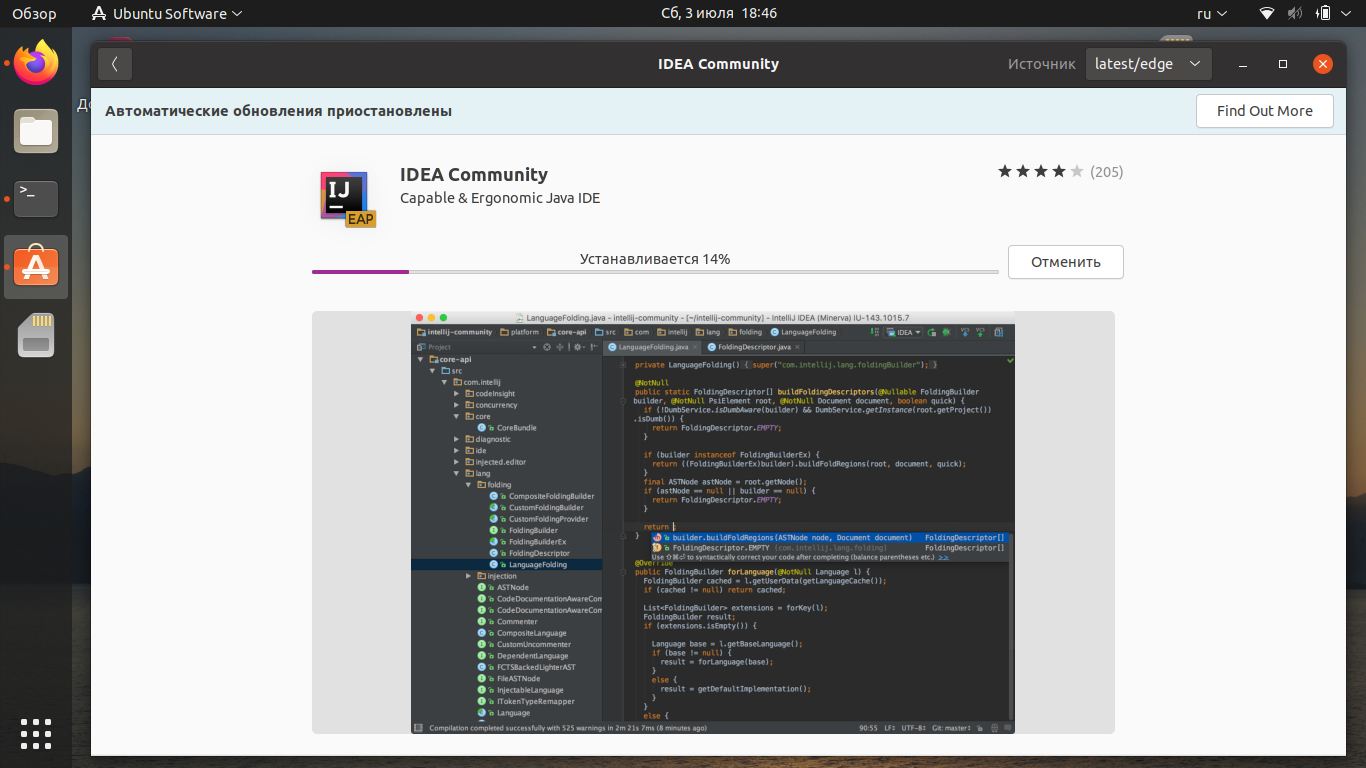
Дождитесь пока установка Intellij IDEA на Ubuntu завершится. Время установки зависит от скорости вашего интернет-соединения. Весь процесс обычно занимает от 10 до 30 минут. По окончании загрузки запустите приложение.
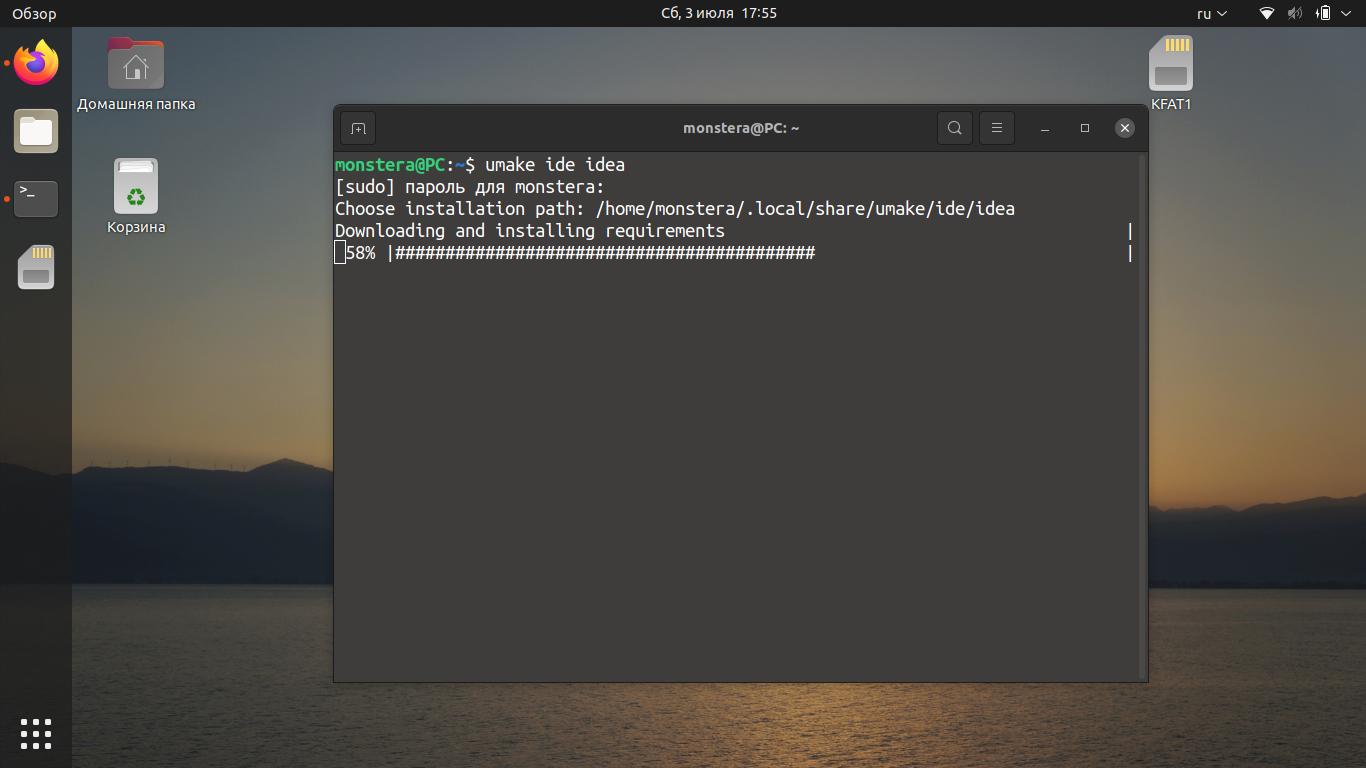
3. Установка в Ubuntu Make
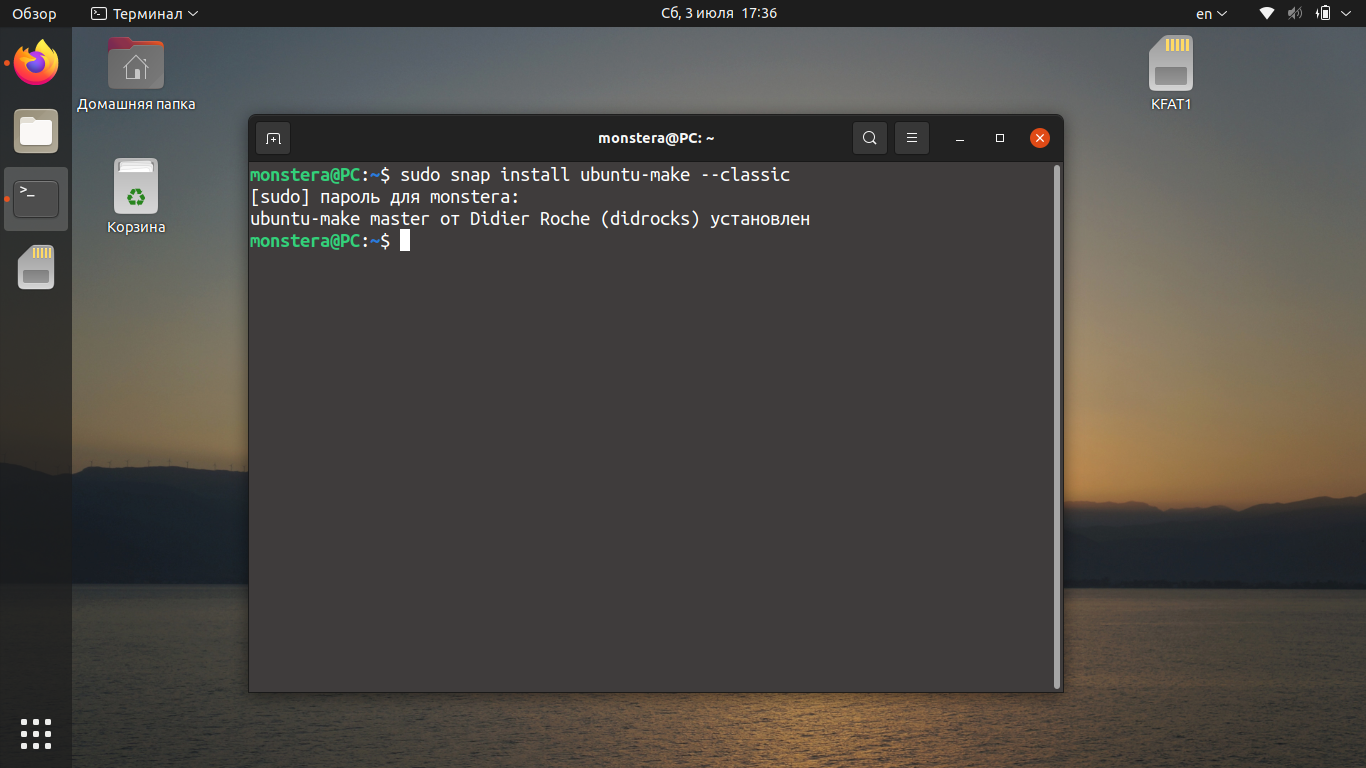
Ubuntu Make — это утилита командной строки для Ubuntu, которая позволяет устанавливать различные инструменты для разработки и среды программирования, такие как Eclipse, PyCharm, Ubuntu SDK, Android Studio и другие. IntelliJ IDEA тоже поддерживается.
Сначала нужно установить Ubuntu Make. Сделать это можно с помощью snap-пакета. Для установки необходимо выполнить команду:
sudo snap install ubuntu-make —classic
После завершения установки Ubuntu Make, чтобы установить IntelliJ IDEA, выполните следующую команду:
Затем выберите путь для скачивания файлов и нажмите клавишу ввода.
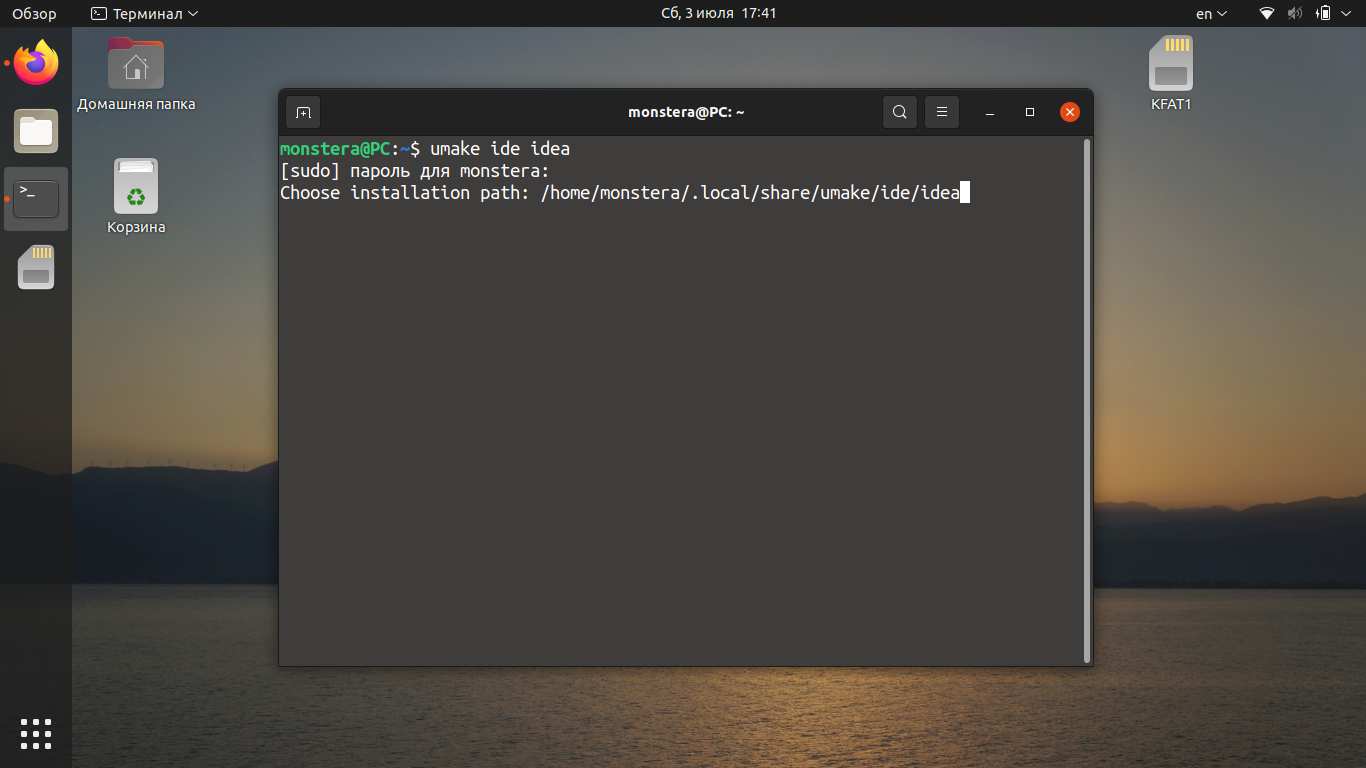
Дождитесь, пока установка будет завершена.
4. Установка с официального сайта
IntelliJ IDEA можно загрузить с официального сайта разработчиков. Это позволит скачать самую последнюю версию, доступную на данный момент. Однако, чтобы обновить среду разработки, придётся снова скачивать установочный файл и инсталлировать его повторно. Чтобы скачать IntelliJ IDEA, откройте официальный сайт и перейдите на вкладку Linux. Затем выберите подходящую версию (Ultimate или Community) и нажмите кнопку Скачать.

/Downloads/ideaIC-2021.1.3.tar.gz -C /opt/
После этого создайте ссылку на исполняемый файл программы командой:
sudo ln -s /opt/ideaIC-2021.1.3/bin/webstorm.sh /usr/local/bin/IntelliJIDEA
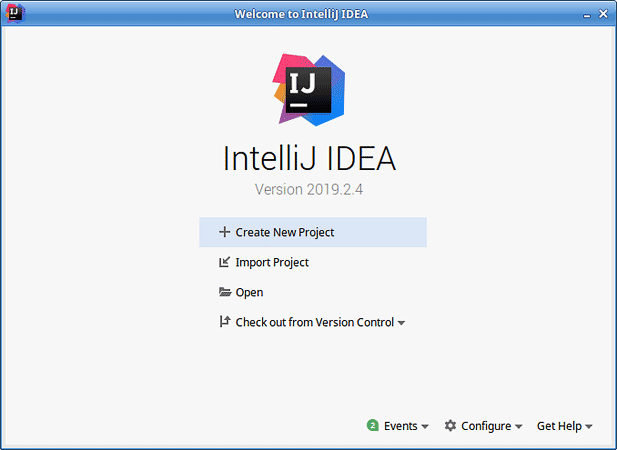
После установка будет завершена и вы можете запустить среду разработки. Однако первый раз вам придется запускать её из терминала:
А уже в самой программе можно создать ярлык. Для этого откройте меню Tools и кликните по Generate Desktop Entry. Дальше можно будет запускать программу как обычно из главного меню.
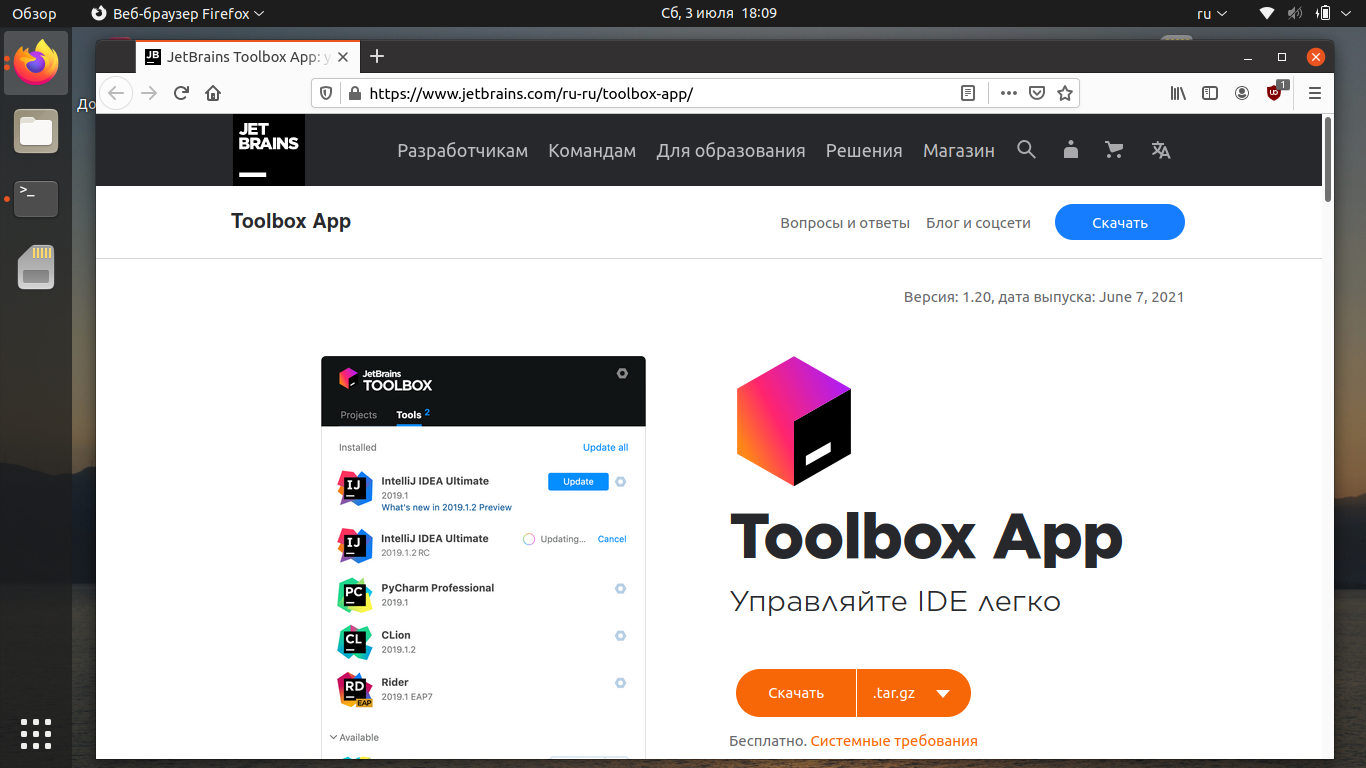
5. Установка в JetBrains Toolbox
JetBrains Toolbox — это официальный инструмент для установки пакетного обновления IntelliJ IDEA и других продуктов JetBrains. Загрузить JetBrains Toolbox можно на официальном сайте разработчиков.
После этого перейдите в директорию, куда был скачан архив. Например, если это папка Загрузки, выполните команду:
Затем разархивируйте архив:
tar -xzvf jetbrains-toolbox-1.20.8804.tar.gz
Перейдите в созданную директорию:
Запустите менеджер пакетов с помощью команды:
На момент написания статьи последняя версия Toolbox была 1.20.8804. Если вы будете использовать более позднюю версию менеджера пакетов, учитывайте это.
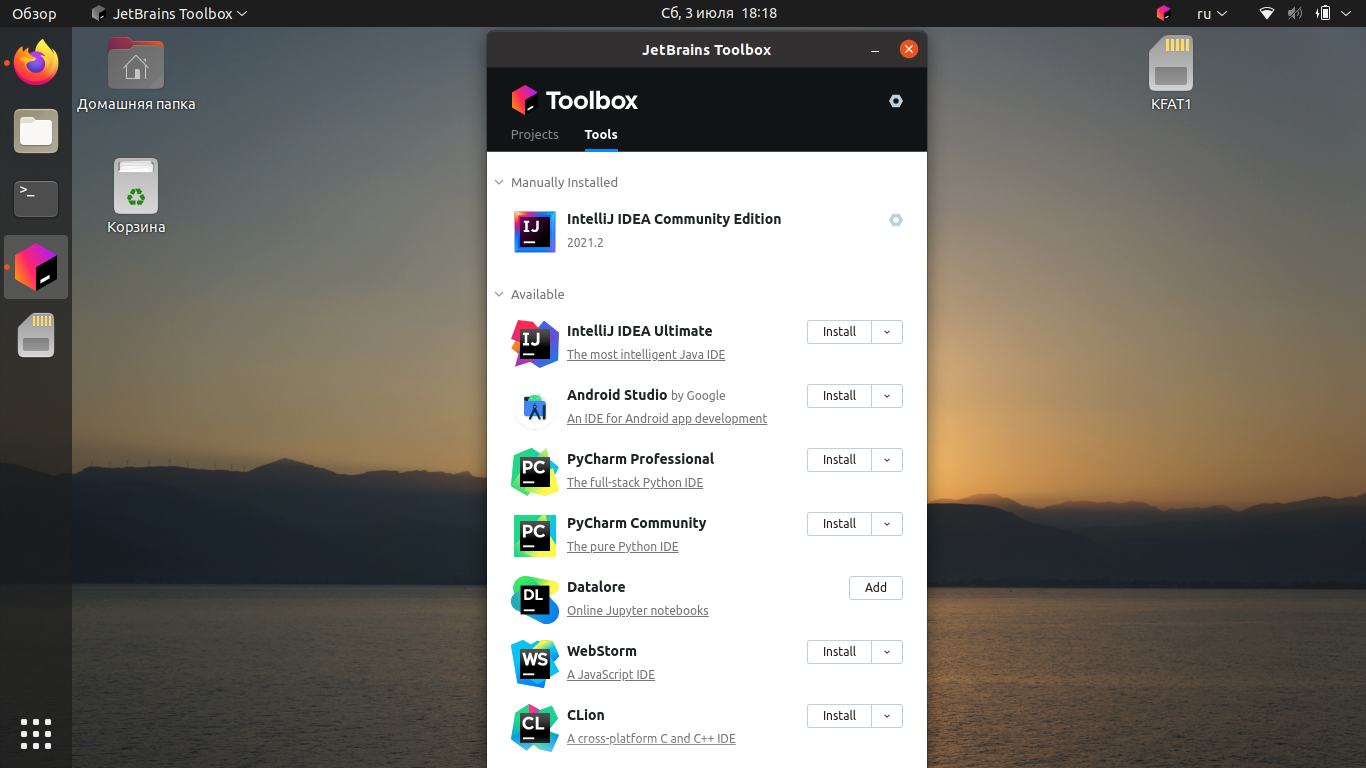
После запуска Toolbox найдите IntelliJ IDEA в списке и нажмите кнопку Install:
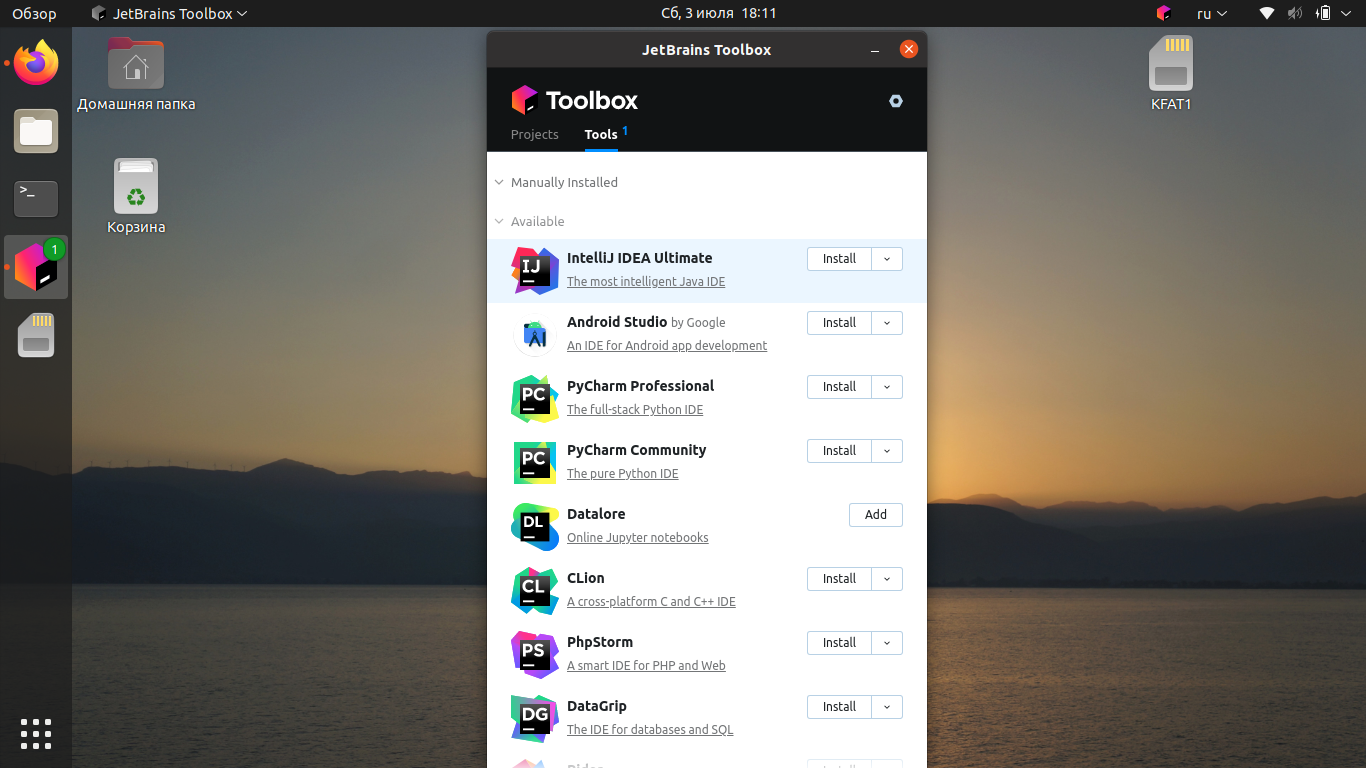
Дождитесь, пока программа будет установлена на компьютер. Запускать, настраивать и удалять программу можно прямо из главного меню Toolbox.
Удаление IntelliJ IDEA
Если вы устанавливали IntelliJ IDEA с использованием snap-пакета или через центр приложений Ubuntu, её можно удалить командой (для платной Ultimate-версии):
sudo snap remove intellij-idea-ultimate
Для удаления бесплатной Community-версии используйте команду:
sudo snap remove intellij-idea-community
Если же среда разработки была загружена с официального сайта, достаточно удалить распакованную папку вручную или с помощью команды в терминале:
sudo rm -Rf /opt/IntelliJIDEA*
Если IntelliJ IDEA была установлена при помощи JetBrains Toolbox, откройте его, найдите в перечне IntelliJ IDEA и нажмите на значок шестерёнки, который находится справа от названия программы. В раскрывшимся списке выберите Удалить. Теперь вы знаете как удалить intellij idea на ubuntu.
Выводы
В этой статье мы рассмотрели, как установить IntelliJ IDEA на Ubuntu 20.04. Как было показано, установить эту среду интегрированной разработки можно несколькими способами. Если у вас остались вопросы, задавайте их в комментариях.
Обнаружили ошибку в тексте? Сообщите мне об этом. Выделите текст с ошибкой и нажмите Ctrl+Enter.