Setup FTP Server with VSFTPD on Ubuntu 20.04
FTP (File Transfer Protocol) is a standard network protocol used to transfer files to and from a remote network. There are several open-source FTP servers available for Linux. The most known and widely used are PureFTPd , ProFTPD , and vsftpd . We’ll be installing vsftpd (Very Secure Ftp Daemon), a stable, secure, and fast FTP server. We will also show you how to configure the server to restrict users to their home directory and encrypt the entire transmission with SSL/TLS.
Although FTP is a very popular protocol, for more secure and faster data transfers, you should use SCP or SFTP .
Installing vsftpd on Ubuntu 20.04
The vsftpd package is available in the Ubuntu repositories. To install it, execute the following commands:
The ftp service will automatically start once the installation process is complete. To verify it, print the service status:
The output should show that the vsftpd service is active and running:
Configuring vsftpd
The vsftpd server configuration is stored in the /etc/vsftpd.conf file.
Most of the server settings are well documented inside the file. For all available options, visit the vsftpd documentation page.
In the following sections, we will go over some important settings needed to configure a secure vsftpd installation.
Start by opening the vsftpd configuration file:
1. FTP access
We’ll allow access to the FTP server only to the local users. Search for the anonymous_enable and local_enable directives in /etc/vsftpd.conf and verify your configuration match to lines below:
2. Enabling uploads
Locate and uncomment the write_enable directive to allow filesystem changes, such as uploading and removing files:
3. Chroot jail
To prevent local FTP users to access files outside of their home directories, uncomment the lne starting with chroot_local_user:
By default, for security reasons, when chroot is enabled, vsftpd will refuse to upload files if the directory that the users are locked in is writable.
Use one of the solutions below to allow uploads when chroot is enabled:
- Method 1. — The recommended option is to keep the chroot feature enabled and configure FTP directories. In this example, we will create an ftp directory inside the user home, which will serve as the chroot and a writable uploads directory for uploading files:
- Method 2. — Another option is to enable the allow_writeable_chroot directive:
Use this option only if you must grant writable access to your user to its home directory.
4. Passive FTP Connections
By default, vsftpd uses active mode. To use passive mode, set the minimum and maximum range of ports:
You can use any port for passive FTP connections. When the passive mode is enabled, the FTP client opens a connection to the server on a random port in the range you have chosen.
5. Limiting User Login
You can configure vsftpd to permit only certain users to log in. To do so, add the following lines at the end of the file:
When this option is enabled, you need to explicitly specify which users can log in by adding the user names to the /etc/vsftpd.user_list file (one user per line).
6. Securing Transmissions with SSL/TLS
To encrypt the FTP transmissions with SSL/TLS, you’ll need to have an SSL certificate and configure the FTP server to use it.
You can use an existing SSL certificate signed by a trusted Certificate Authority or create a self-signed certificate. If you have a domain or subdomain pointing to the FTP server’s IP address, you can quickly generate a free Let’s Encrypt SSL certificate. We will generate a 2048-bit private key and self-signed SSL certificate that will be valid for ten years:
Both the private key and the certificate will be saved in the same file.
Once the SSL certificate is created open the vsftpd configuration file:
Find the rsa_cert_file and rsa_private_key_file directives, change their values to the pam file path and set the ssl_enable directive to YES:
If not specified otherwise, the FTP server will use only TLS to make secure connections.
Restart the vsftpd Service
Once you are done editing, the vsftpd configuration file (excluding comments) should look something like this:
Save the file and restart the vsftpd service for changes to take effect:
Opening the Firewall
If you are running a UFW firewall , you’ll need to allow FTP traffic.
To open port 21 (FTP command port), port 20 (FTP data port), and 30000-31000 (Passive ports range), run the following commands:
FTP Server
File Transfer Protocol (FTP) is a TCP protocol for downloading files between computers. In the past, it has also been used for uploading but, as that method does not use encryption, user credentials as well as data transferred in the clear and are easily intercepted. So if you are here looking for a way to upload and download files securely, see the OpenSSH documentation instead.
FTP works on a client/server model. The server component is called an FTP daemon. It continuously listens for FTP requests from remote clients. When a request is received, it manages the login and sets up the connection. For the duration of the session it executes any of commands sent by the FTP client.
Access to an FTP server can be managed in two ways:
In the Anonymous mode, remote clients can access the FTP server by using the default user account called “anonymous” or “ftp” and sending an email address as the password. In the Authenticated mode a user must have an account and a password. This latter choice is very insecure and should not be used except in special circumstances. If you are looking to transfer files securely see SFTP in the section on OpenSSH-Server. User access to the FTP server directories and files is dependent on the permissions defined for the account used at login. As a general rule, the FTP daemon will hide the root directory of the FTP server and change it to the FTP Home directory. This hides the rest of the file system from remote sessions.
vsftpd — FTP Server Installation
vsftpd is an FTP daemon available in Ubuntu. It is easy to install, set up, and maintain. To install vsftpd you can run the following command:
Anonymous FTP Configuration
By default vsftpd is not configured to allow anonymous download. If you wish to enable anonymous download edit /etc/vsftpd.conf by changing:
During installation a ftp user is created with a home directory of /srv/ftp . This is the default FTP directory.
If you wish to change this location, to /srv/files/ftp for example, simply create a directory in another location and change the ftp user’s home directory:
After making the change restart vsftpd:
Finally, copy any files and directories you would like to make available through anonymous FTP to /srv/files/ftp , or /srv/ftp if you wish to use the default.
User Authenticated FTP Configuration
By default vsftpd is configured to authenticate system users and allow them to download files. If you want users to be able to upload files, edit /etc/vsftpd.conf :
Now restart vsftpd:
Now when system users login to FTP they will start in their home directories where they can download, upload, create directories, etc.
Similarly, by default, anonymous users are not allowed to upload files to FTP server. To change this setting, you should uncomment the following line, and restart vsftpd:
Warning
Enabling anonymous FTP upload can be an extreme security risk. It is best to not enable anonymous upload on servers accessed directly from the Internet.
The configuration file consists of many configuration parameters. The information about each parameter is available in the configuration file. Alternatively, you can refer to the man page, man 5 vsftpd.conf for details of each parameter.
Securing FTP
There are options in /etc/vsftpd.conf to help make vsftpd more secure. For example users can be limited to their home directories by uncommenting:
You can also limit a specific list of users to just their home directories:
After uncommenting the above options, create a /etc/vsftpd.chroot_list containing a list of users one per line. Then restart vsftpd:
Also, the /etc/ftpusers file is a list of users that are disallowed FTP access. The default list includes root, daemon, nobody, etc. To disable FTP access for additional users simply add them to the list.
FTP can also be encrypted using FTPS. Different from SFTP, FTPS is FTP over Secure Socket Layer (SSL). SFTP is a FTP like session over an encrypted SSH connection. A major difference is that users of SFTP need to have a shell account on the system, instead of a nologin shell. Providing all users with a shell may not be ideal for some environments, such as a shared web host. However, it is possible to restrict such accounts to only SFTP and disable shell interaction.
To configure FTPS, edit /etc/vsftpd.conf and at the bottom add:
Also, notice the certificate and key related options:
By default these options are set to the certificate and key provided by the ssl-cert package. In a production environment these should be replaced with a certificate and key generated for the specific host. For more information on certificates see Security — Certificates.
Now restart vsftpd, and non-anonymous users will be forced to use FTPS:
To allow users with a shell of /usr/sbin/nologin access to FTP, but have no shell access, edit /etc/shells adding the nologin shell:
This is necessary because, by default vsftpd uses PAM for authentication, and the /etc/pam.d/vsftpd configuration file contains:
The shells PAM module restricts access to shells listed in the /etc/shells file.
Most popular FTP clients can be configured to connect using FTPS. The lftp command line FTP client has the ability to use FTPS as well.
Создание FTP-сервера в Linux

Передача файлов в сети осуществляется благодаря правильно настроенному FTP-серверу. Такой протокол работает с применением TCP по архитектуре клиент-сервер и задействует различные сетевые соединения для обеспечения передачи команд между подключенными узлами. Пользователи, которые подключились к определенному хостингу, сталкиваются с надобностью настройки личного FTP-сервера по требованиям компании, предоставляющей услуги обеспечения работы сайта или другого обеспечения. Далее мы продемонстрируем, как создается такой сервер в Linux на примере одной из утилит.
Создаем FTP-сервер в Linux
Сегодня мы будем использовать инструмент под названием VSftpd. Преимущества такого FTP-сервера в том, что он по умолчанию работает на многих ОС, обслуживает официальные репозитории различных дистрибутивов Linux и относительно просто настраивается для корректного функционирования. К слову, на ядре Линукс официально применяется именно этот FTP, и многие хостинги рекомендуют ставить VSftpd. Поэтому давайте обратим внимание на пошаговый процесс инсталляции и настройки необходимых компонентов.
Шаг 1: Установка VSftpd
По умолчанию всех нужных библиотек VSftpd в дистрибутивах не имеется, поэтому их нужно вручную загрузить через консоль. Осуществляется это следующим образом:
-
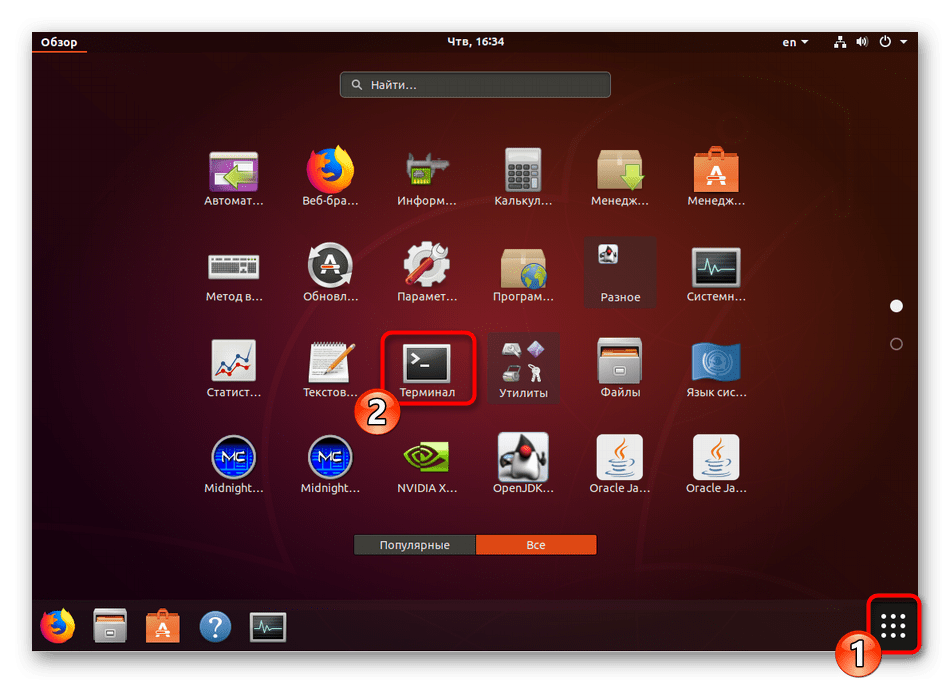
Откройте «Терминал» любым удобным методом, например, через меню.
Обращаем внимание обладателей CentOS, которые задействуют выделенный виртуальный сервер от любого хостинга. Вам потребуется произвести обновление модуля ядра ОС, поскольку без этой процедуры во время инсталляции отобразится критическая ошибка. Последовательно вводите такие команды:
yum update
rpm -Uvh http://www.elrepo.org/elrepo-release-7.0-2.el7.elrepo.noarch.rpm
yum install yum-plugin-fastestmirror
wget http://mirrors.neterra.net/elrepo/kernel/el7/x86_64/RPMS/kernel-ml-3.15.6-1.el7.elrepo.x86_64.rpm
yum install kernel-ml-3.15.6-1.el7.elrepo.x86_64.rpm
wget http://mirrors.neterra.net/elrepo/kernel/el7/x86_64/RPMS/kernel-ml-devel-3.15.6-1.el7.elrepo.x86_64.rpm
yum install kernel-ml-devel-3.15.6-1.el7.elrepo.x86_64.rpm
wget http://mirrors.neterra.net/elrepo/kernel/el7/x86_64/RPMS/kernel-ml-doc-3.15.6-1.el7.elrepo.noarch.rpm
yum install kernel-ml-doc-3.15.6-1.el7.elrepo.noarch.rpm
wget http://mirrors.neterra.net/elrepo/kernel/el7/x86_64/RPMS/kernel-ml-headers-3.15.6-1.el7.elrepo.x86_64.rpm
yum install kernel-ml-headers-3.15.6-1.el7.elrepo.x86_64.rpm
wget http://mirrors.neterra.net/elrepo/kernel/el7/x86_64/RPMS/kernel-ml-tools-3.15.6-1.el7.elrepo.x86_64.rpm
wget http://mirrors.neterra.net/elrepo/kernel/el7/x86_64/RPMS/kernel-ml-tools-libs-3.15.6-1.el7.elrepo.x86_64.rpm
yum install kernel-ml-tools-libs-3.15.6-1.el7.elrepo.x86_64.rpm
yum install kernel-ml-tools-3.15.6-1.el7.elrepo.x86_64.rpm
wget http://mirrors.neterra.net/elrepo/kernel/el7/x86_64/RPMS/kernel-ml-tools-libs-devel-3.15.6-1.el7.elrepo.x86_64.rpm
yum install kernel-ml-tools-libs-devel-3.15.6-1.el7.elrepo.x86_64.rpm
wget http://mirrors.neterra.net/elrepo/kernel/el7/x86_64/RPMS/perf-3.15.6-1.el7.elrepo.x86_64.rpm
yum install perf-3.15.6-1.el7.elrepo.x86_64.rpm
wget http://mirrors.neterra.net/elrepo/kernel/el7/x86_64/RPMS/python-perf-3.15.6-1.el7.elrepo.x86_64.rpm
yum install python-perf-3.15.6-1.el7.elrepo.x86_64.rpm
yum —enablerepo=elrepo-kernel install kernel-ml
После окончания всей этой процедуры запустите любым удобным образом конфигурационный файл /boot/grub/grub.conf . Измените его содержимое таким образом, чтобы в итоге следующие параметры имели соответствующие значения:
default=0
timeout=5
title vmlinuz-4.0.4-1.el7.elrepo.x86_64
root (hd0,0)
kernel /boot/vmlinuz-4.0.4-1.el7.elrepo.x86_64 console=hvc0 xencons=tty0 root=/dev/xvda1 ro
initrd /boot/initramfs-4.0.4-1.el7.elrepo.x86_64.img
Далее вам останется только перезагрузить выделенный сервер и переходить к непосредственной инсталляции FTP-сервера на компьютер.
Шаг 2: Первоначальная настройка FTP-сервера
Вместе с программой на компьютер был загружен ее конфигурационный файл, отталкиваясь от которого и происходить функционирование FTP-сервера. Все настройки выполняются сугубо индивидуально по рекомендациям хостинга или собственным предпочтениям. Мы лишь можем показать, как открывается этот файл и каким параметрам обязательно следует уделить внимание.
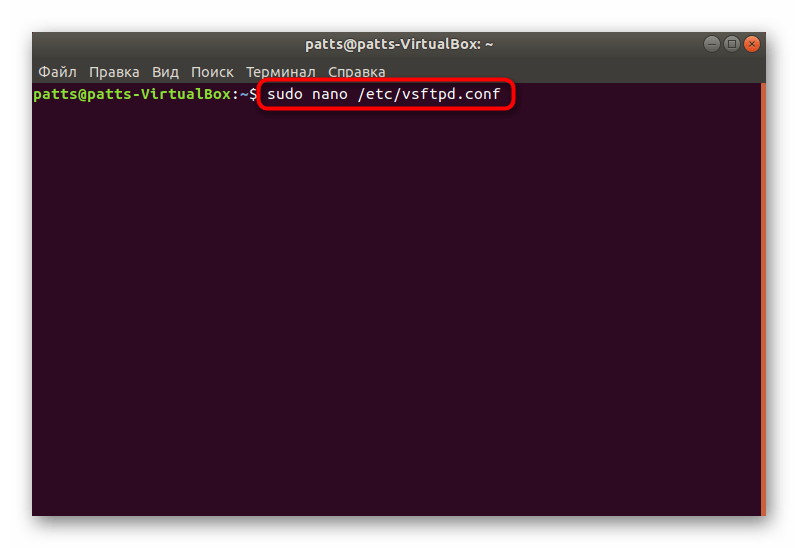
- В операционных системах Debian или Ubuntu конфигурационный файл запускается так: sudo nano /etc/vsftpd.conf . В CentOS и Fedora он находится по пути /etc/vsftpd/vsftpd.conf , а в Gentoo — /etc/vsftpd/vsftpd.conf.example .
- В консоли или текстовом редакторе отобразится сам файл. Здесь обратите внимание на указанные ниже пункты. В вашем конфигурационном файле они должны иметь такие же значения.
Шаг 3: Добавление пользователя с расширенными правами
Если вы собираетесь работать с FTP-сервером не через свою основную учетную запись или хотите предоставить доступ другим юзерам, созданные профили обязательно должны иметь права суперпользователя, чтобы при обращении к утилите VSftpd не возникало ошибок с отказом в доступе.
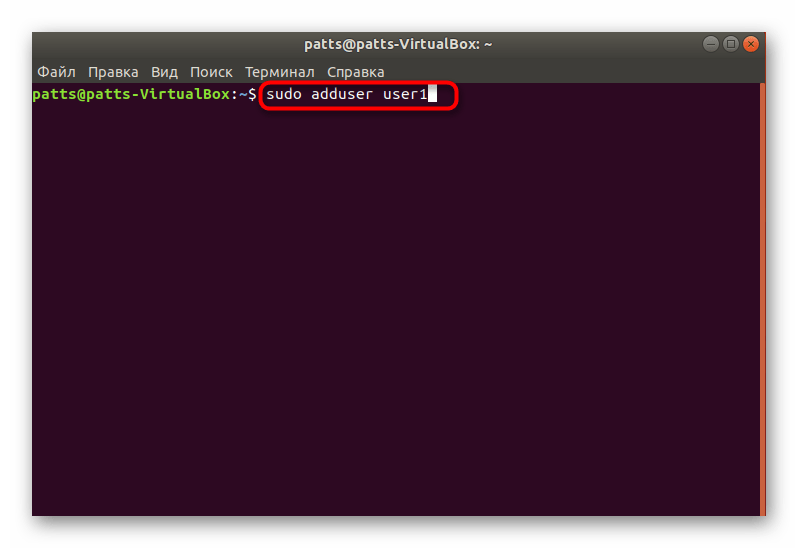
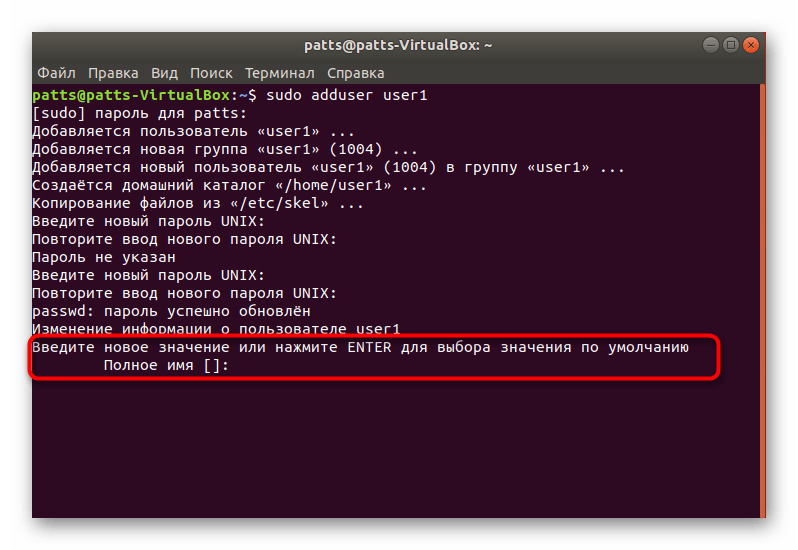
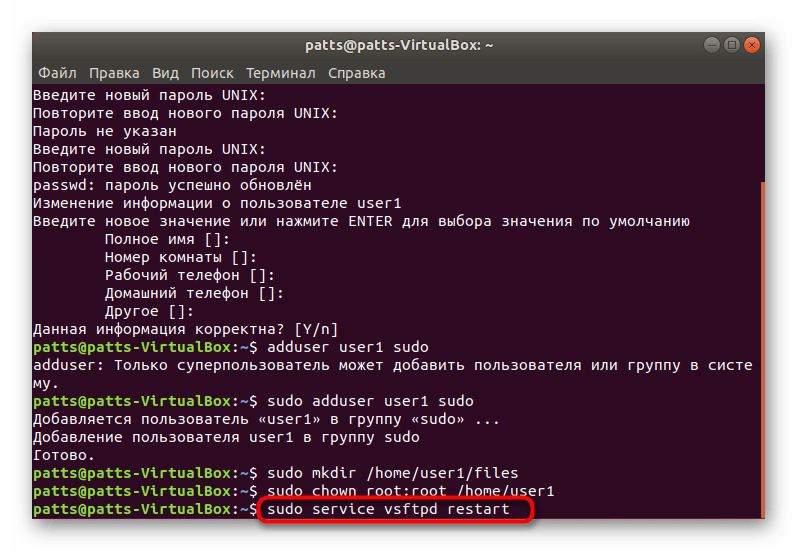
- Запустите «Терминал» и введите команду sudo adduser user1 , где user1 — имя новой учетной записи.
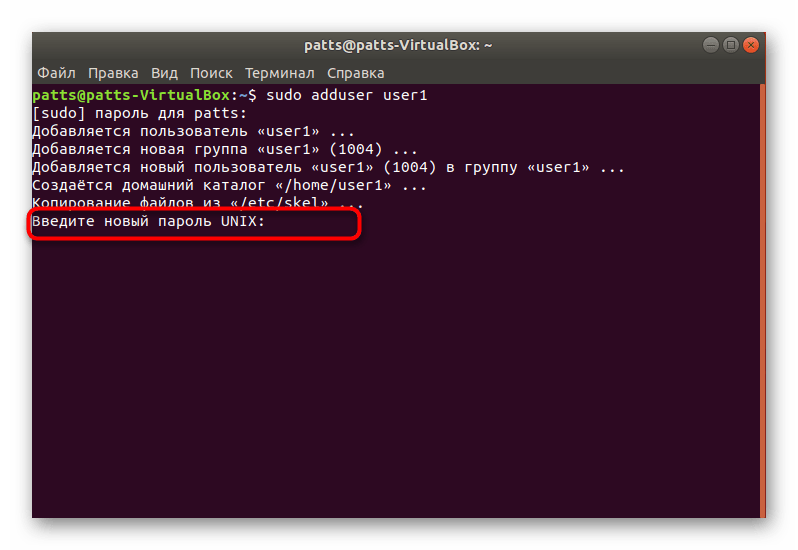
- Задайте для него пароль, после чего подтвердите его. Кроме этого, настоятельно рекомендуем запомнить домашний каталог учетной записи, в дальнейшем может понадобиться обращение к нему через консоль.
- Заполните основную информацию — полное имя, номер комнаты, номера телефонов и прочую информацию, если требуется.
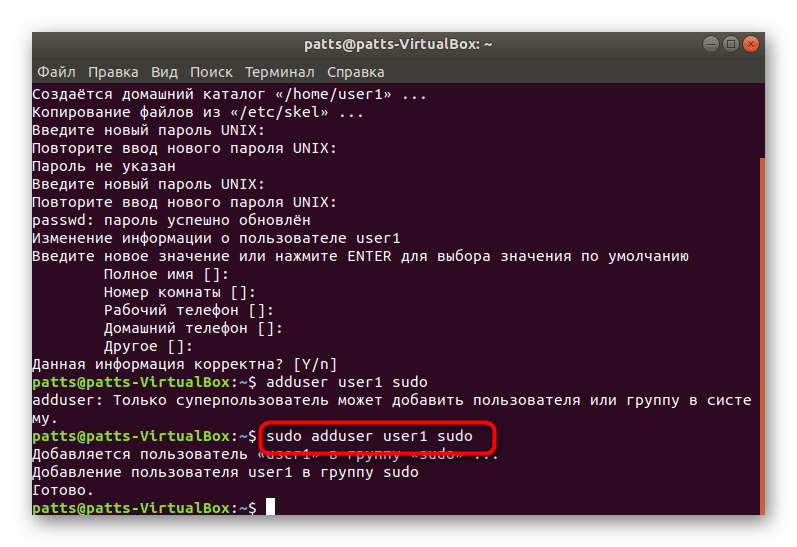
- После этого присвойте пользователю расширенные права путем ввода команды sudo adduser user1 sudo .
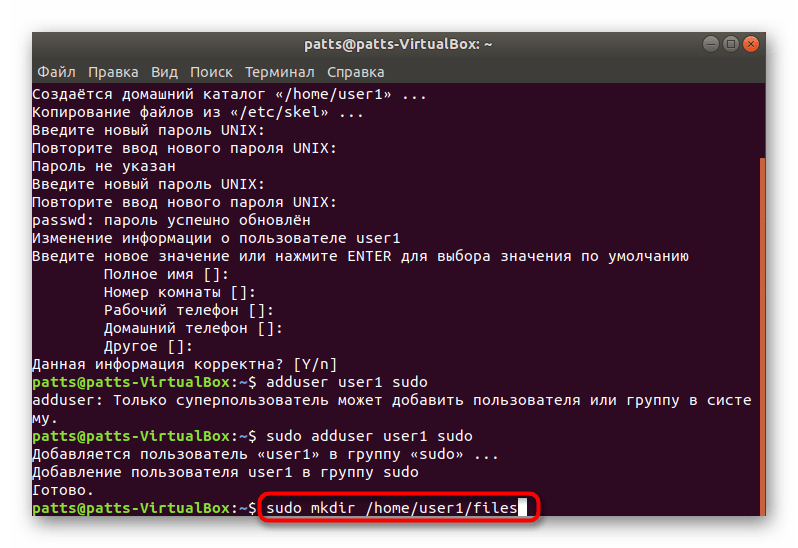
- Создайте для юзера отдельную директорию под хранение его файлов через sudo mkdir /home/user1/files .
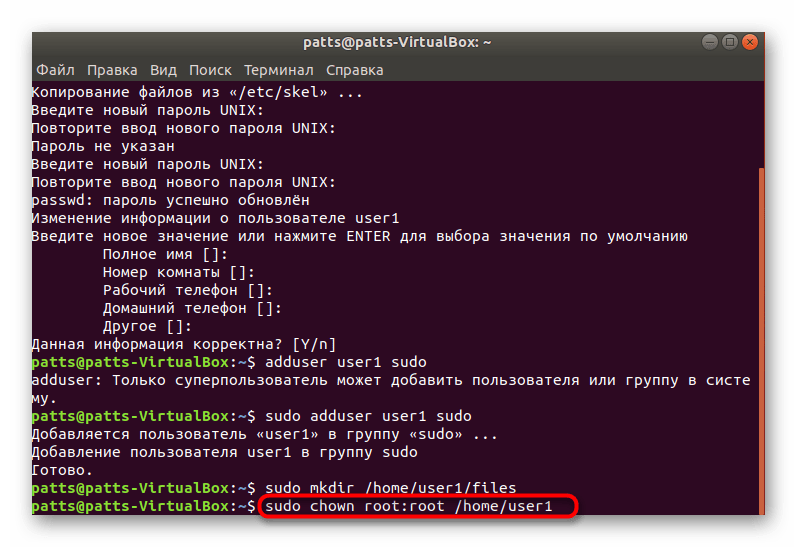
- Далее переместитесь в свою домашнюю папку через cd /home и там сделайте нового пользователя владельцем своей директории, введя chown root:root /home/user1 .
- Перезапустите сервер после осуществления всех изменений sudo service vsftpd restart . Только в дистрибутиве Gentoo утилита перезагружается через /etc/init.d/vsftpd restart .
Теперь вы можете производить все необходимые действия на FTP-сервере от лица нового юзера, который обладает расширенными правами доступа.
Шаг 4: Настройка Firewall (Только для Ubuntu)
Пользователи других дистрибутивов могут смело пропускать этот шаг, поскольку настройка портов нигде больше не требуется, только в Ubuntu. По умолчанию Firewall настроен таким образом, что не пропустит входящий трафик из нужных нам адресов, поэтому потребуется разрешить его прохождение вручную.
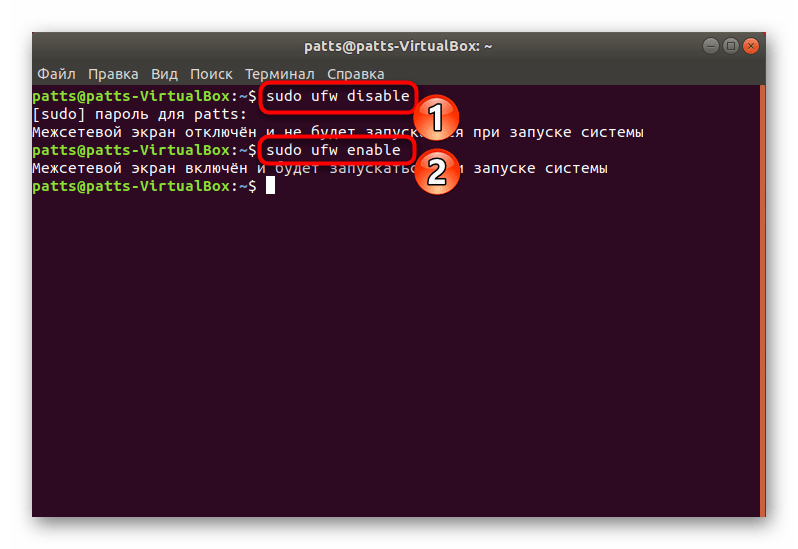
- В консоли поочередно активируйте команды sudo ufw disable и sudo ufw enable , чтобы перезапустить Firewall.
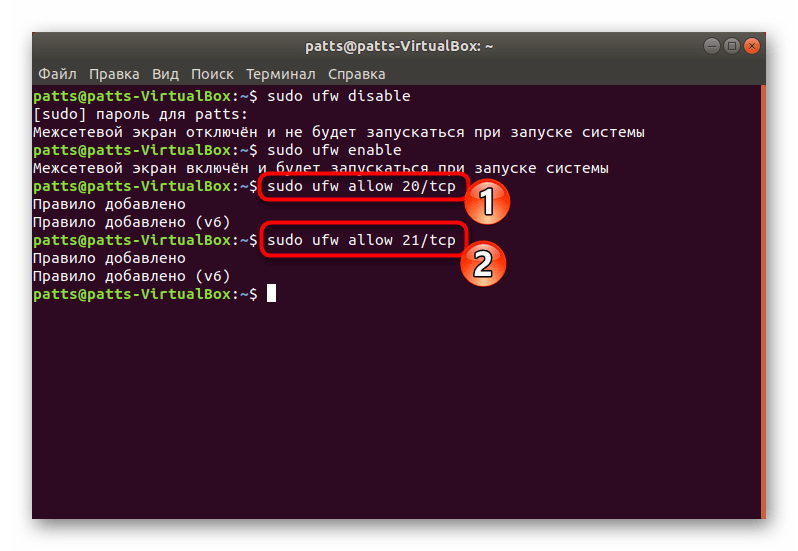
- Добавьте правила входящих соединений, используя sudo ufw allow 20/tcp и sudo ufw allow 21/tcp .
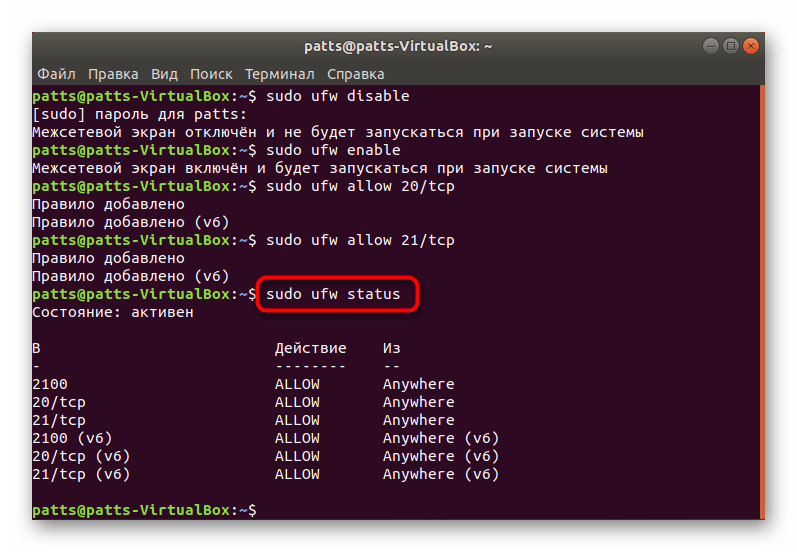
- Проверьте, были ли применены введенные правила, просмотрев статус фаервола sudo ufw status .
Отдельно хочется отметить несколько полезных команд:
| Команды | Описание |
|---|---|
| /etc/init.d/vsftpd start | Анализ конфигурационного файла |
| service vsftpd start | |
| netstat -tanp | grep LISTEN | Проверка корректности установки FTP-сервера |
| man vsftpd | Вызов официальной документации VSftpd для поиска необходимой информации касаемо работы утилиты |
| service vsftpd restart | Перезагрузка сервера |
| /etc/init.d/vsftpd restart |
Что касается получения доступа к FTP-серверу и дальнейшей работе с ним, обращайтесь за получением этих данных к представителям своего хостинга. У них же вы сможете уточнить информацию по поводу тонкостей настройки и возникновению различного рода ошибок.
На этом статья подходит к концу. Сегодня мы разобрали процедуру установки сервера VSftpd без привязки к какому-либо хостингу, поэтому учтите это при выполнении наших инструкций и сравнивайте их с теми, что предоставляет компания, содержащая ваш виртуальный сервер. Кроме всего, советуем ознакомиться с другим нашим материалом, в котором разбирается тема установки компонентов LAMP.
Step 3 — Create a FTP User
![]()
You may also be asked to enter some contact information. You can just press ENTER to each of these.
Step 4 — Grant Directory Permissions
You now need to decide where this new FTP user is allowed to view and upload files.
vsftpd uses chroot jails to restrict users to their home directories and requires that the home directory is not writable. For that reason, we have to set up some directories and permissions.
We want this user to upload files to the home directory, so we will create a new directory called ftp in the user’s home directory and another within it called files
Set the ownership of the ftp directory to no nobody:nogroup.
Set permissions for the ftp directory using chmod so that it is not writable by anyone, otherwise vsftpd will not allow you to log in
Next we will create a new directory within /ftp where the user can view and upload files.
Assign ownership of this directory to our new FTP user otherwise they will not be able to write to it.
Step 5 — Configure vsftpd
Rename the config file.
Create a new config file with Vim editor.
Paste in the following:
Your final config file should look like this
Now Save and exit the file
To exit Vim editor Press esc then Shift^ZZ.
Restart vsftpd to apply new changes.
Step — 6 Test FTP
Open terminal and type the following Command
you will be prompted to enter username and password, Enter the username and password of the ftp user which we have created earlier, If everything is Perfect you will get a login Successful message.