How to Upgrade Kernel in Debian 11 Bullseye
Updating your kernel is necessary when you need to add functionalities or device support, patch bugs, or increase your system performance.
After reading this article, you will be able to update your Linux kernel in a few steps.
For this tutorial, I will upgrade to kernel 5.16, but the instructions provided are helpful for other kernel versions too. Just replace the 5.16.15 version in this article for your version.
All instructions are also useful for previous Debian versions. You can ignore the fact this article was written using Debian Bullseye.
The tutorial includes screenshots for all described steps, making it easy for any Linux user to follow them.
Upgrading the Kernel in Debian 11 Bullseye:
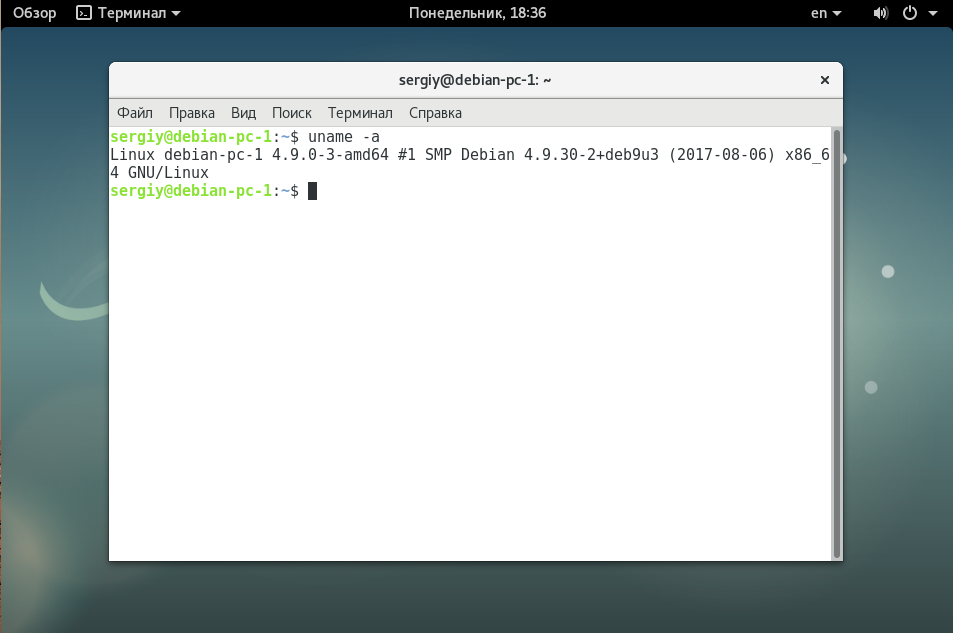
To begin, let’s see how to determine your current kernel. You can use the uname command followed by the -r parameter, as shown below:
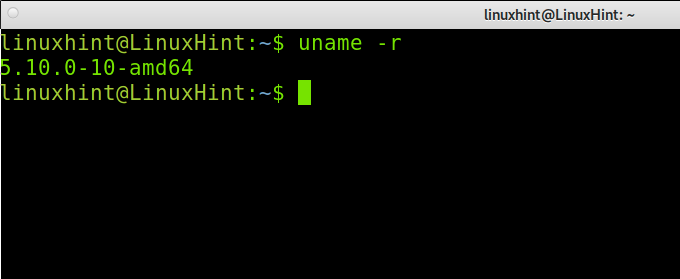
As you can see above, the current kernel is 5.10.0. Let’s download a newer kernel.
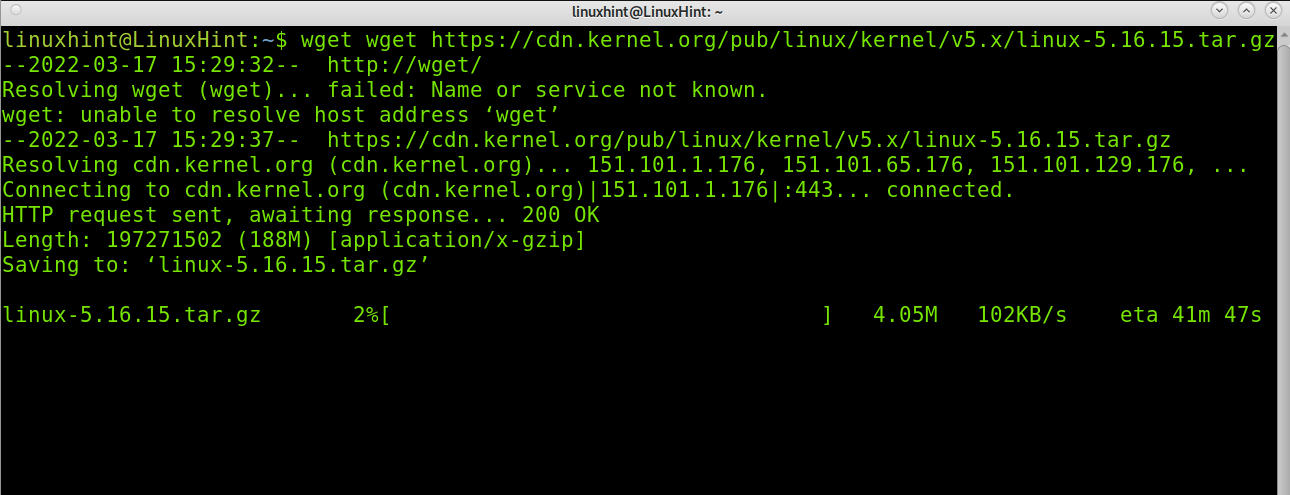
For this Debian tutorial, I will upgrade to the 5.16 kernel. To download it from the source mentioned previously, you can use the wget command as shown below:
Note: You can use this tutorial to install other kernel versions, just replace the path and kernel name.
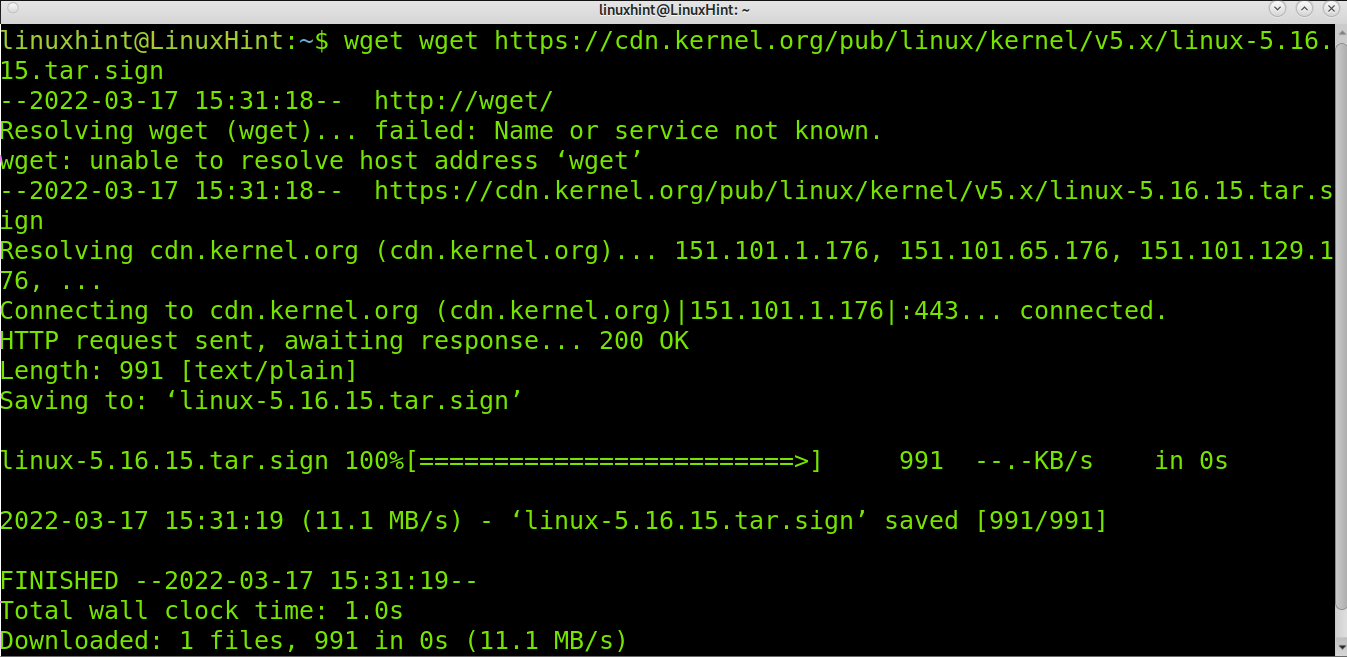
Also, download the kernel signature with the command, as shown below:
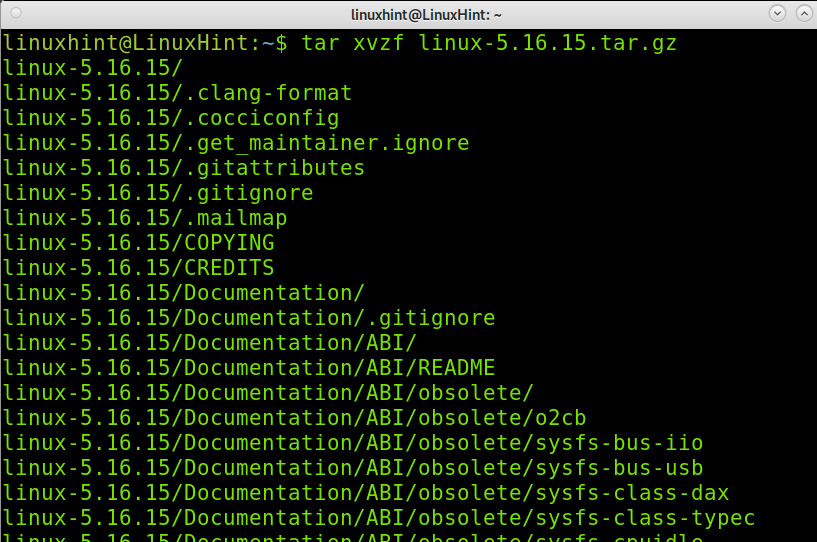
Extract the kernel you downloaded by running the following command (The command below assumes you have the .tar.gz package):
Where “Version” must be replaced with the actual kernel version, you downloaded.
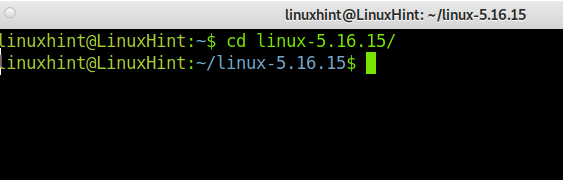
Enter the directory with the files you extracted by running the following command:
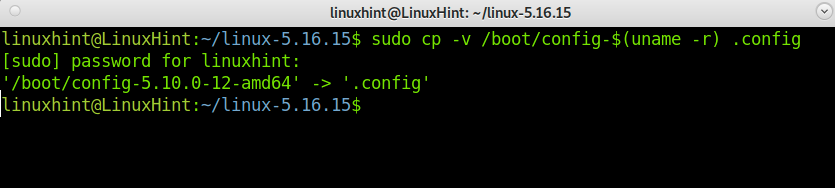
Update the configuration file by running the command shown in the following image:
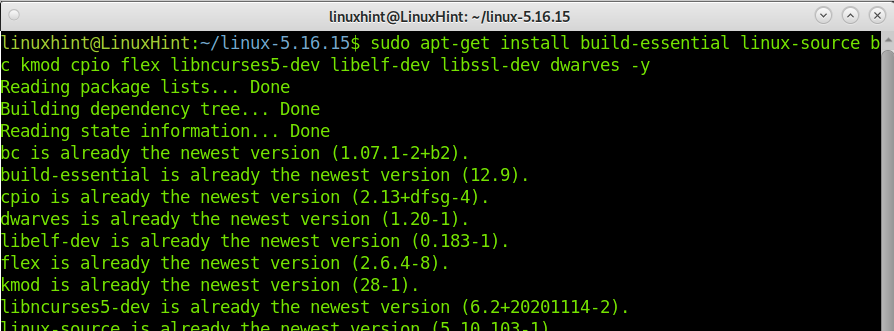
Install the needed packages to compile the Linux kernel by executing the following command:
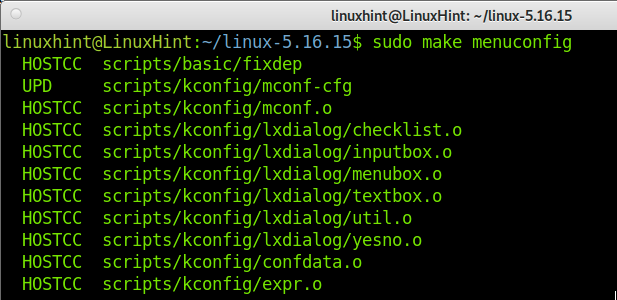
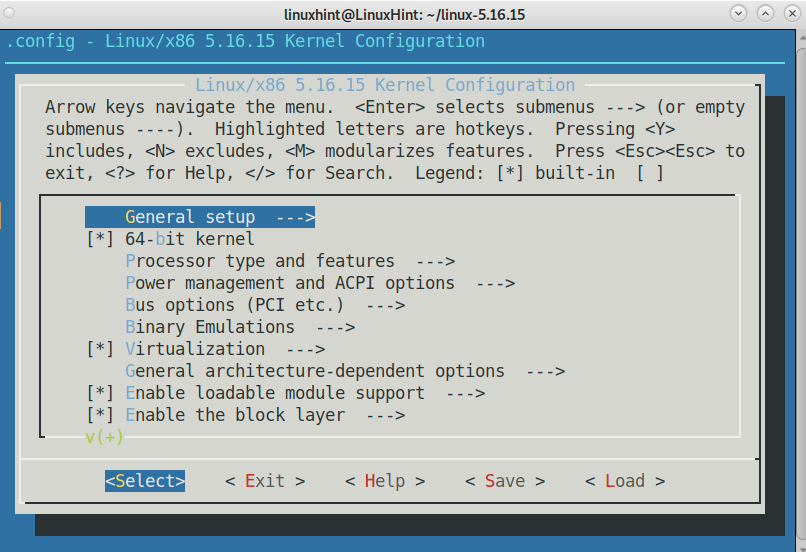
To configure the kernel and adding or removing devices support, run the following command:
You can explore all options on this screen to customize the kernel according to your needs. Once you finish, press the Save button:
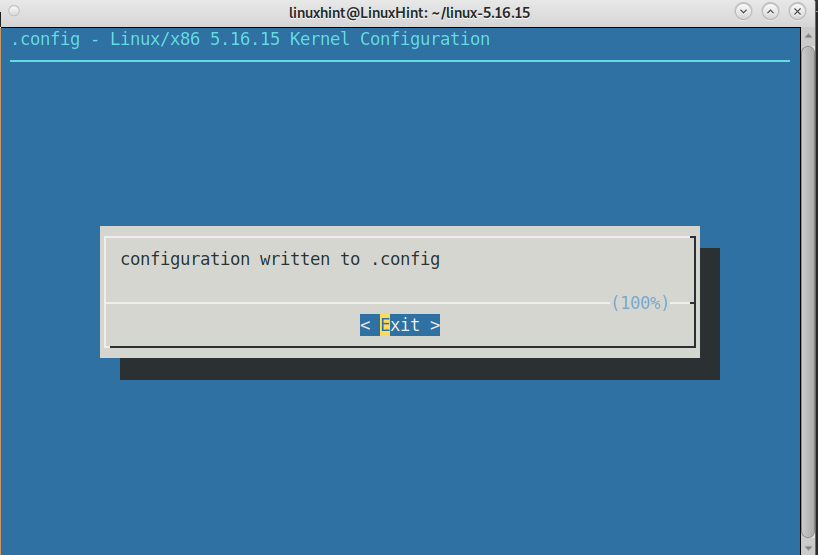
Press the OK button to save the configuration file.

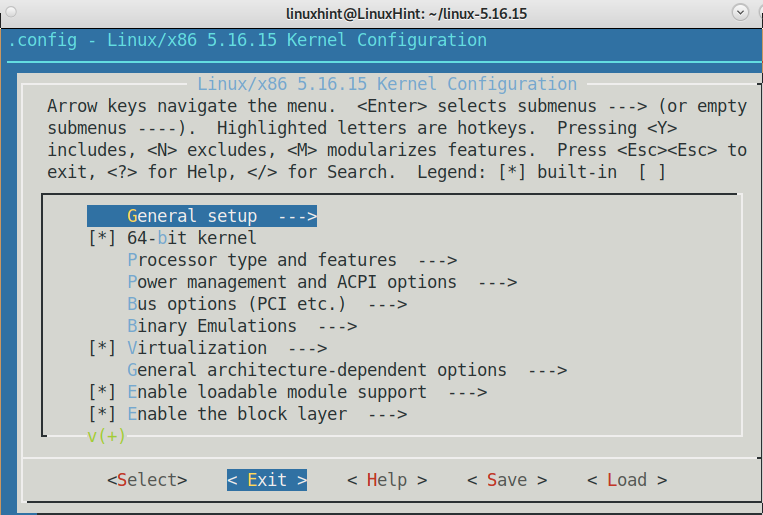
Press the Exit button to finish the process.
Press the Exit button again to return to the terminal.
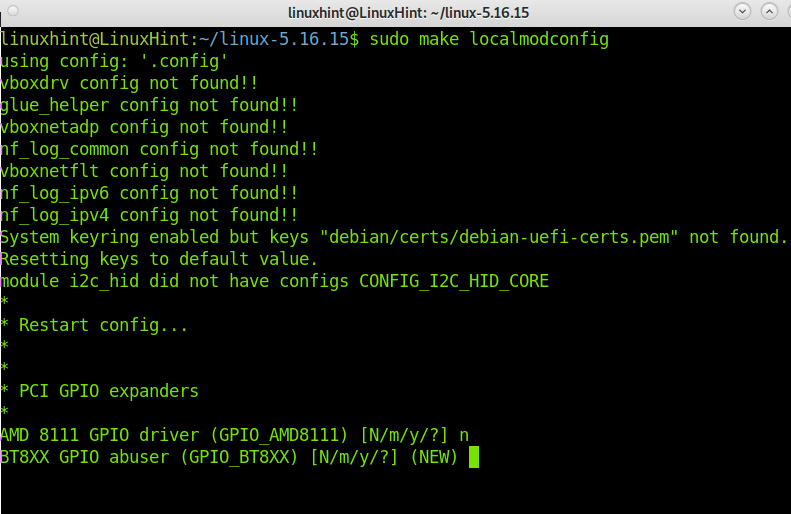
Disable unnecessary modules and create a .config file based on your kernel’s current configuration by executing the following command:
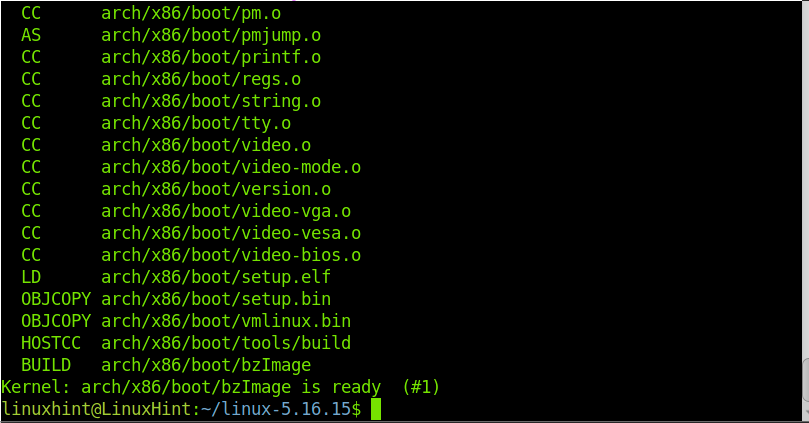
Now, start compiling the new kernel by running the command shown in the following image. This process may take several minutes.

You will get a similar output as shown below:
Install the kernel modules by running the following command:

If you used the sudo command during the process, you might be required to type your sudo password, as shown below:

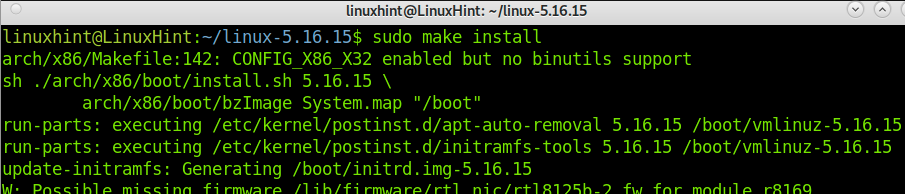
Finish installing the new kernel by executing the following line:
You need GRUB, a bootloader, to incorporate the new kernel to boot it.
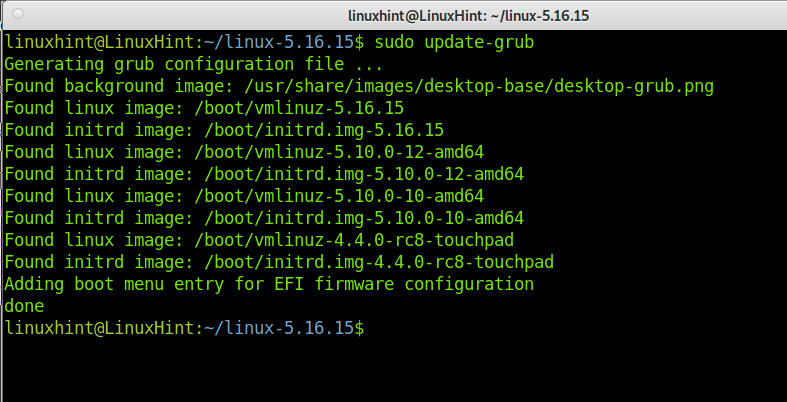
To do it, just update GRUB by running the following command:
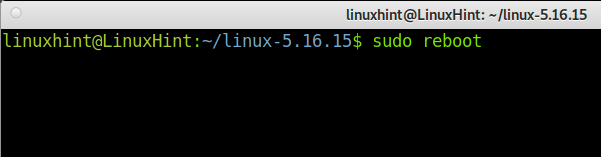
Now, reboot your system to load the new kernel.
After booting, recheck your kernel by running the following command:

As you can see, the kernel was successfully updated. Now, you can enjoy your upgraded system.
What Is the Linux Kernel?
The Linux kernel is the system’s core, whose main task is to allow interaction between hardware and software. It defines the processes that can pass through the CPU and the amount of available resources for each one. It also analyzes the memory and manages drivers.
You can consider part of the kernel function as a translator between different components, including abstract components like the rest of the operating system.
The Linux kernel is free and open-source, and it’s written in the C language. It was developed by Linus Torvalds. It is licensed under the GNU General Public License V2. Today, it is widely supported, and new releases are published periodically. Currently, the community behind the kernel development has over 6,000 collaborators.
Some experts argue the kernel is the operating system, while Linux is an addition.
When compiling it, you can add support for unsupported hardware, add features and patch bugs and security issues, as shown previously in the make menuconfig step. This is especially useful for systems like Debian using old kernel versions.
You can include different kernel versions in your bootloader to choose between them when booting your system.
For additional information on the Linux kernel and releases, visit https://kernel.org.
Conclusion:
As you can see, upgrading the Linux kernel in Debian 11 Bullseye is a long but easy task any Linux user can achieve. There are many steps as described above, but the process is easy by following the steps explained in this tutorial.
If you are using Debian 10 or Debian 9, you can still compile a new kernel by following the instructions above. The process is even similar for other Linux distributions except for the steps using the apt/apt-get packages manager and for systems using a different bootloader than GRUB (In such a case, you only need to replace the GRUB update for your bootloader update). After updating your kernel, you may feel the performance of your system improve the support selected in the configuration step.
Thank you for reading this article explaining how to upgrade the kernel in Debian. I hope this article was useful for you. Keep following Linux Hint for more professional Linux tutorials.
About the author
David Adams
David Adams is a System Admin and writer that is focused on open source technologies, security software, and computer systems.
Обновление ядра Debian
Ядро — это один из самых важных компонентов системы, именно здесь реализуется поддержка оборудования, выполняются основные действия по управлению процессами, памятью, сетью и другие действия. Новые версии ядра имеют максимальную поддержку современного оборудования, содержат исправления уязвимостей и многое другое. Поэтому очень важно, чтобы система использовала самые новые версии ядра.
Но Debian — это стабильный дистрибутив, поэтому в нем изначально применяется уже устаревшая версия. Но если захотеть, то можно установить более новую. В этой статье мы рассмотрим как выполняется обновление ядра Debian. Какие программы лучше использовать и так далее.
Обновление ядра Debian
Когда вы используете Debian, вы должны понимать, что самые новые версии пакетов вы не всегда можете получить. Один из таких компонентов — ядро. Вы можете взять ядро, собранное для других дистрибутивов, например, Ubuntu, но там использованы свои патчи, и скорее всего, оно не будет правильно работать в Debian. Самым простым способом получить новое ядро в этой системе будет использование тестовых репозиториев, таких, как backports и experimental. Например, сейчас самая новая версия Debian — 9. В ней используется ядро 4.9. Но в репозитории experimental есть ядро 4.13, на данный момент, это самая новая версия, доступная на Kernel.org.
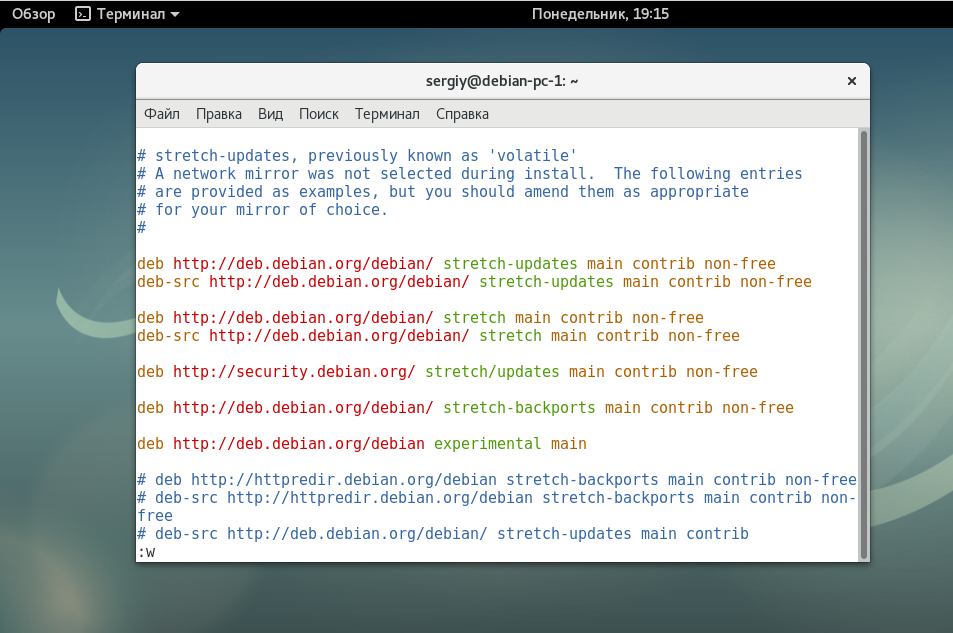
Давайте рассмотрим как установить ядра из exprimental и backports. Пакеты из backports тоже свежие, но не настолько как из experimental, поэтому они более стабильны. Сначала рассмотрим backports, а уже затем experimental. Нам нужно добавить репозиторий в систему, для этого откройте файл /etc/apt/sources.list и добавьте туда такую строку:
deb http://ftp.debian.org/debian/ stretch-backports main non-free contrib
Обновите список пакетов:

Дальше нужно обновить список пакетов, а затем смотрим, какие версии ядра появились в системе:
apt search linux-headers
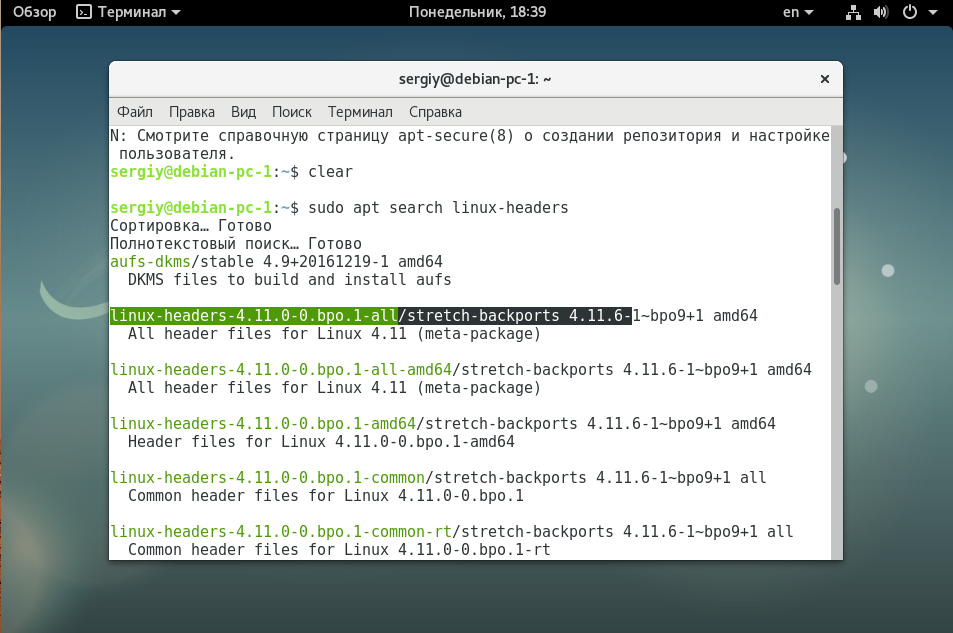
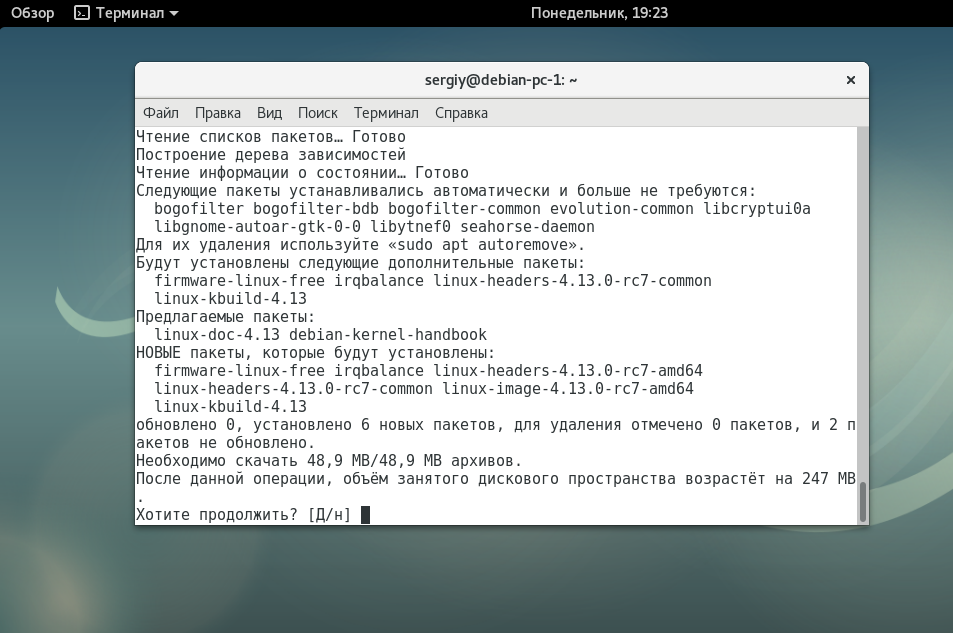
Как видите, в репозитории backports уже есть ядро 4.11, в то время как в официальном стабильном репозитории только 4.9. Теперь мы можем обновить ядро debian:
sudo apt install linux-headers-4.11-bpo.1 linux-image-4.11-bpo.1

После завершения установки ядра будет автоматически обновлен загрузчик Grub и вам останется только перезагрузить компьютер чтобы изменения вступили в силу. Обратите внимание, что если вы используете ноутбук, то вам еще нужно будет установить прошивку firmware из репозитория backports. Например, для iwlwifi:
sudo apt -t wheezy-backports install firmware-iwlwifi
Если вы хотите самую новую версию ядра, то вам придется использовать репозиторий experimental, но тут дела обстоят немного сложнее. Это экспериментальный репозиторий, поэтому перед добавлением нужно указать настройки чтобы по умолчанию он вообще не использовался и активировался для определенного пакета вручную. Для этого добавьте в файл /etc/apt/preferences:
Package: *
Pin: release o=Debian,a=experimental
Pin-Priority: 102
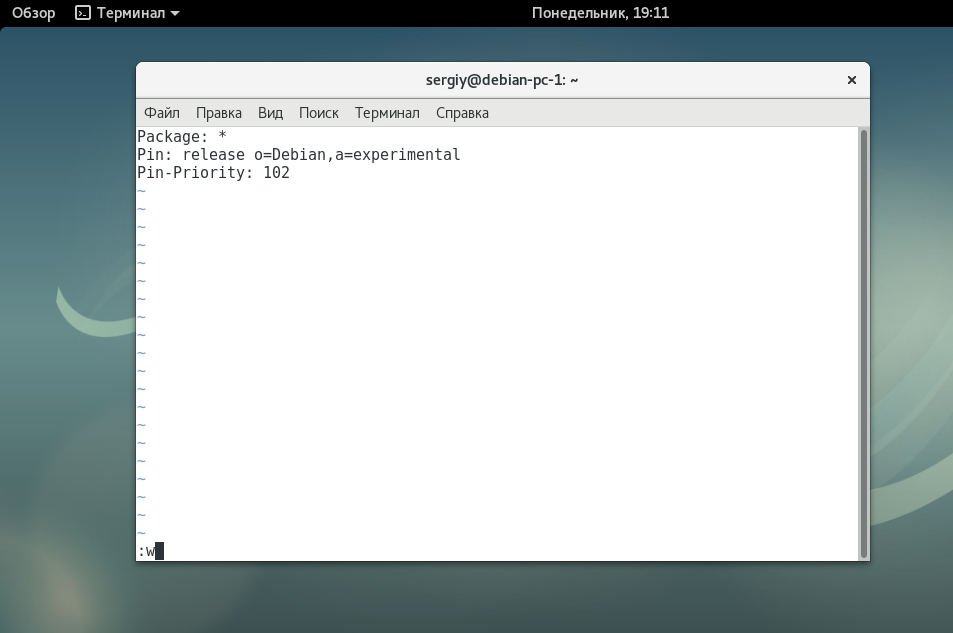
Мы установили такой приоритет, что он намного ниже стандартных репозиториев, а значит ничего случайно не обновится и не установится.
Теперь добавьте репозиторий в систему:
sudo vi /etc/apt/sources.list
deb http://deb.debian.org/debian experimental main
И обновите список пакетов:
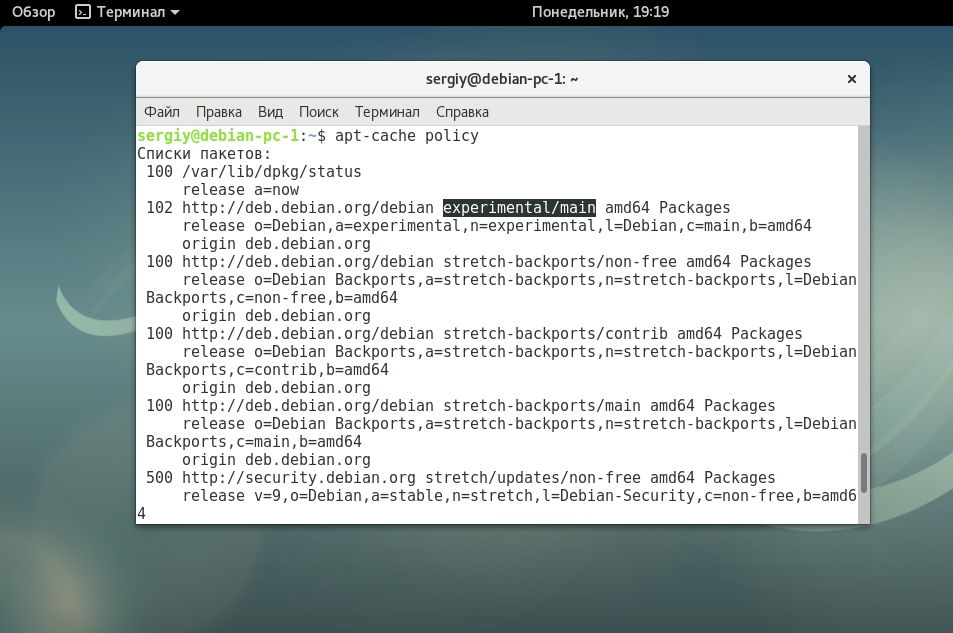
sudo apt update
Проверьте, сработала ли настройка приоритета:
Дальше ищем доступные версии ядра:
sudo apt search linux-headers

Тут мы уже видим новую версию ядра Linux 4.13 из репозитория experimental, о которой я говорил выше. Дальше мы можем ее установить:
sudo apt install linux-headers-4.13 linux-image-4.13
Опять же, после установки будет автоматически обновлен Grub и вы сможете перезагрузить компьютер чтобы работать с новым ядром. Если вы поймаете какую-либо ошибку, то всегда можете выбрать в меню загрузчика предыдущее ядро, которое хорошо работало, а новое удалить командой:
sudo apt purge linux-headers-4.13 linux-image-4.13
Возможно, вам нужно будет указать другие версии пакетов, если вы выполняли установку из backports.
Выводы
В этой небольшой статье мы рассмотрели как выполняется обновление ядра Debian 9. Возможно, это сложнее, чем для других дистрибутивов, но в целом нет ничего сверх сложного и все можно сделать за несколько десятков минут. Но вам нужно учитывать, что если вы используете проприетарные драйвера от NVIDIA или AMD, то ядро лучше вообще не трогать, потому что драйвера могут еще не поддерживать новые версии. Вы можете не только обновить ядро из репозиториев, но и собрать ядро из исходников. Если у вас остались вопросы, спрашивайте в комментариях!
Обнаружили ошибку в тексте? Сообщите мне об этом. Выделите текст с ошибкой и нажмите Ctrl+Enter.
How to Update your Kernel in Debian
Debian is a great Linux distribution. It is stable, has a ton of packages available in the default repositories, and can run on almost anything. While it is stable and great, new version of packages can take some time before they get into the Debian repos. This is true for the kernel as well.
By default, Debian runs on a LTS (long term support) kernel, which is good for stability but it can lack some features, bug-fixes, and functionality which newer versions of the Linux Kernel has to offer.
On Debian, only one version of the kernel is available for install by default. To install another or to update kernel, we will need to enable backports. Backport packages are taken from the next, not yet released version of Debian with support for the current one.
Here in this post, I will show you how you can install a different kernel version on your Debian system and how to boot from it. Let’s get started.
First, in a terminal, type this command:
This will open the sources.list file in nano text editor. If nano is not installed on your system, you will need to install it first via the command sudo apt install nano .
Once there, on a new line paste this to add the backports repository:
Save the file by Pressing Ctrl+o and then exit nano using Ctrl+x.
Now use this command to update the repos:
If the repository was added successfully, you should see similar output from the command:
Once it has been verified that the backport repository is up, we can go ahead and search for all the available kernel packages. To do this, type in terminal:
You should now see all the available kernel versions for your system.
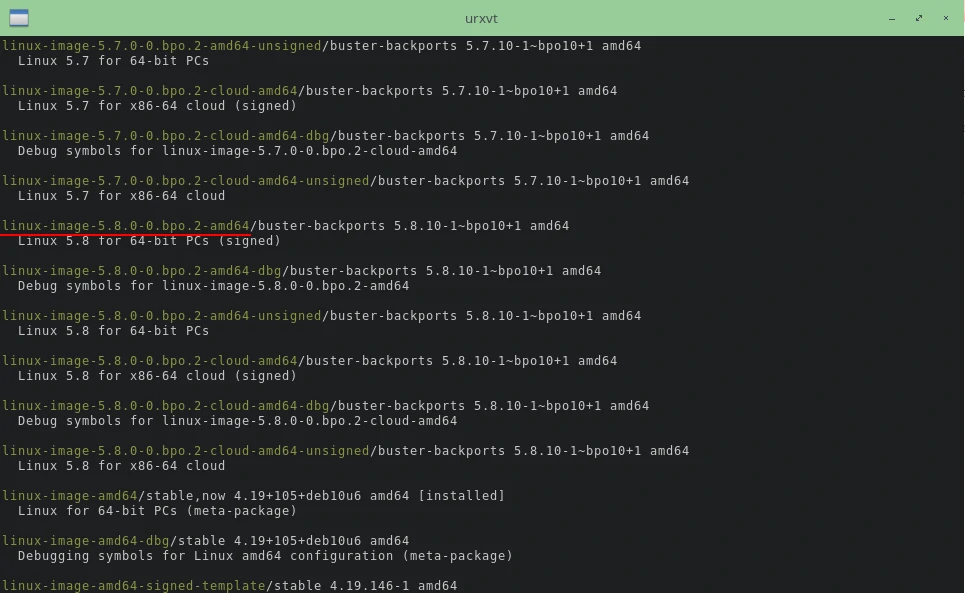
Tip: ‘bpo’ in the kernel name means backport.
You can now go ahead and copy the name of the kernel that you want to install. Here for this tutorial I will be selecting 5.8, which is the latest stable kernel that I can update to at the time this post was written.
It is a big jump from the kernel version 4.19 that came by default on my Debian 10 (Buster) install.
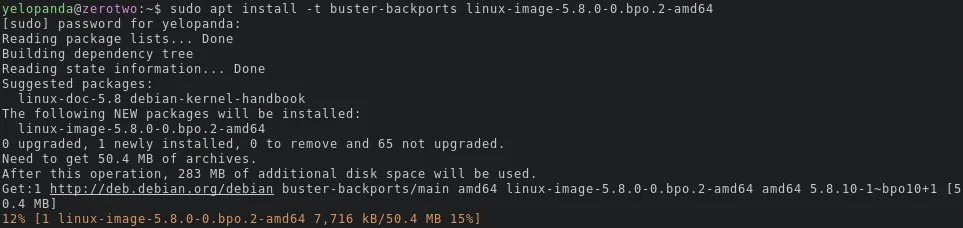
To install a new kernel, type:
I am installing kernel version linux-image-5.8.0-0.bpo.2-amd64 , so the command for me would be:
Once the kernel is installed, you can go ahead and reboot the computer.
On the bootloader screen click on Advanced options and select the new kernel version.
That it, you have successfully booted into Debian using your new kernel. Now here are some common questions that people have regarding Debian Backport kernels.
q1. How can I go back to the previous kernel version?
a. To switch to a different version of kernel, when on the grub menu and click on Advanced options. From there you can select the kernel you want to boot from.
Then when the system boots simply uninstall the kernel via the apt remove command. Don’t forget to run sudo grub-update to update the bootloader entries.
q. It broke something and my system is not booting, What to do?
a. Do exactly as mentioned above, boot from a different kernel, remove the one causing you problems and run grub-update command. If a kernel is problems, chances are that you might have installed a wrong one.
There are multiple kernels types for some versions such as signed, unsigned, cloud, etc. make sure you have installed the right one.
q. Can I have multiple kernels installed at the same time?
a. Yes, you can install as many kernels as you like in Debian and boot using them using their respective bootloader entries.
Conclusion
This concludes my post on how you can update, or install the latest Kernel in Debian, thanks for reading.
Sometimes kernel change can cause issues and a few programs might refuse to work. But as discussed above, the beauty of the Debian is that you can install multiple kernel versions on a single installation. You can easily fall back to another kernel using the bootloader menu.
Share this post if you think this it was helpful and comment down below your thoughts and suggestions on this topic.
2 thoughts on “ How to Update your Kernel in Debian ”
Hi,
I followed your guide on Q4OS 4.8.2-n1 (kernel 5.10.0-15-amd64) to switch to 5.10.0-0.bpo.12-amd64. Upon reboot, X would not come up automatically and I had lost my NVidia driver and config. Only available resolution was SVGA (1024×768).
How to solve?
Best,
t.
It appears, your Nvidia drivers were not installed as dkms, so they did not rebuild themselves for the new kernel. You can still boot the system using the old kernel version and install them for the new kernel using the “sudo dpkg-reconfigure *driver name*” command. Or you can also install/enable dkms for them.
Upgrade Debian
But the safest way to upgrade, that will handle any dependency problems, would be to use:
if your sources list is correct (on the debian release you are following) you can run this for a real full upgrade (with -s option to simulate if you like)
Debian stable security releases
If you want to keep your debian system up to date with security patches (released as updated packages) make sure you have these lines in your /etc/apt/sources.list
using ‘wheezy’ an old release below..
and run the first line above to update package lists and upgrade packages
Update to a new debian release
First change your sources list to point to the release you want to upgrade to, e.g. change all «wheezy» to «jessie», or «stable» to «testing»
Check your apt.conf file isn’t pointing to your current release, for example it might say,
APT::Default-Release «wheezy»;
If it does remove that line or change it..
developers recommend
and that can be simulated first with the -s option
but it is probably much better to do this booted into recovery mode so that many daemons and drivers are not loaded.
You could first download all the packages needed for the upgrade with then boot into recovery mode and run dist-upgrade
Aptitude can be used with
-this command replaces «aptitude dist-upgrade» — it will present solutions to conflicts, and ask confirmation before downloading
It can be simulated first with
or (to put the result into a text file in home)
You could try the apt dist-upgrade way first, and see if its all plain-sailing or not. but if APT is asking you to remove like about half of your system, because of breakages, then you had better think wisely.
Next, try the aptitude way, as it will offer perhaps a better solution — removing some but not so many packages, which can be reinstalled later on (if they are needed or exist in the release — note that some packages are obsoleted and replaced with ones of different names).
I upgraded just now and there were quite a few packages to be removed by aptitude dist-upgrade, so I ran through the ones I thought were important (many lib’s will have different names) at Debian packages, and I only found a few that will need re-installing.
Caution! If you (by mistake) use the apt command «upgrade» after changing your sources file, and actually you are intending to upgrade to another release, apt will not actually upgrade to the new release but will only update your installed packages from the new release -and you will get an irreparable mix of packages from different releases.
For example, if you are stable and you do an upgrade with packages from testing, you will get a mixed install of both stable and testing — and then trying to dist-upgrade, you will have hundreds of packages held back, unable to install because of countless dependency problems.
If you did that, you can revert to stable in sources and do an apt update, apt upgrade, to revert to stable install, and then change sources to testing again, update lists and do a dist-upgrade.
The plain «upgrade» command will not add any new packages or remove unneeded ones -which is necessary when upgrading to another release.
Upgrading to Jessie without installing systemd
su to root then make this apt conf file with
You may also need to deny «upstart» (ubuntu’s startup daemon) from installing as well
then run a dist upgrade with the simulate option to check what will install — and aptitude should be used
note that policykit-1 will not install because it depends on libpam-systemd! This means there may be some errors on startup, hotplugging media will not work (mounting) and there will be no shutdown/reboot option on the logout menu! (this is so with LXDE, as the update removes lxsession, lxpolkit) To get around these problems, I use a power-off script with a yad dialogue, udevil disk management (see my plain OB page), and to prevent the dbus error messages on media insert, turn off the auto-mounting in pcmanfm preferences. But we might not have the pleasure of choosing sysvinit over systemd for much longer, with Debian, and who knows? If we can’t carry on without switching to systemd, then our other choices are. Devuan, or Slackware, which continues to be systemd-free (that’s not a package name there!)
Using backports to update packages
If you follow the current Stable but want some better updates you can give backports a go, which is a way of adding updated packages to your stable debian.
See http://wiki.debian.org/DebianSoftware
and http://backports.debian.org/
The backports sources list entry looks like
(depending on the Debian stable code name)
check to see if your packages are available in wheezy-backports by doing a search at packages.debian.org
update apt cache and then install a package from backports with
Upgrading the kernel
This may be useful (or necessary) when you have hardware that needs latest drivers or to get laptop hot-keys functioning. You have somn choices.
1. Install the latest kernel
To check what kernel version is running, run
search for available kernels with
reboot and select the new kernel if necessary
if it runs well and fixes hardware issues such as video or networking, you can remove the older kernel with apt
find its package name with
update-grub and update-initramfs will run automatically after a kernel removal.
2. Install from stable backports
add the backports to sources with the line
update APT and search for available kernels with apt-cache search linux-image install the desired kernel
3. Install from Testing on Stable
note that this method may install quite a lot of packages from testing and you could end up with a mixed-release Debian.
First add Testing to sources (with stable set to default in apt preferences if running a stable Debian install), then apt update, apt-cache search linux-image to see what kernels are available
Install the linux-headers first, e.g. apt install linux-headers-3.xx-x
reinstall initramfs-tools from testing, -as without doing this a looping problem is caused with linux-image
install the corresponding linux-image with aptitude, e.g. aptitude install linux-image-3.xx-x
reboot and the new kernel will load automatically
4. Install newer kernel after upgrade to Jessie
installing linux-headers-3.16-amd64 hit dependency problems, gcc-4.8 needed, but gcc-4.7 installed
install in this order: gcc-4.8-base, gcc-4.8