Установка Chrome в Ubuntu 22.04
Google Chrome или Chrome — это бесплатный веб-браузер, разработанный компанией Google на основе движка Webkit. По состоянию на 2022 год Google Chrome используют около 61% пользователей интернета, это на 8% меньше чем в 2020 году. Этот браузер доступен для Linux, Android, IOS, Windows и операционной системы MacOS.
В этой статье мы рассмотрим, как установить Chrome в Ubuntu 22.04. У Google Chrome есть версия с открытым исходным кодом Chromium, но в этой статье будет рассматриваться только проприетарная версия.
Установка Google Chrome в Ubuntu 22.04
Установить Google Chrome по этой инструкции можно не только в Ubuntu 22.04, но и в предыдущих версиях, в том числе и в Ubuntu 20.04, а также в Linux Mint и Debian. Кроме того, сам установочный пакет добавляет в систему репозитории Chrome, поэтому вы всегда будете получать обновления браузера при обновлении системы.
Загрузить установщик репозитория стабильной версии Chrome в Ubuntu выполняется командой:

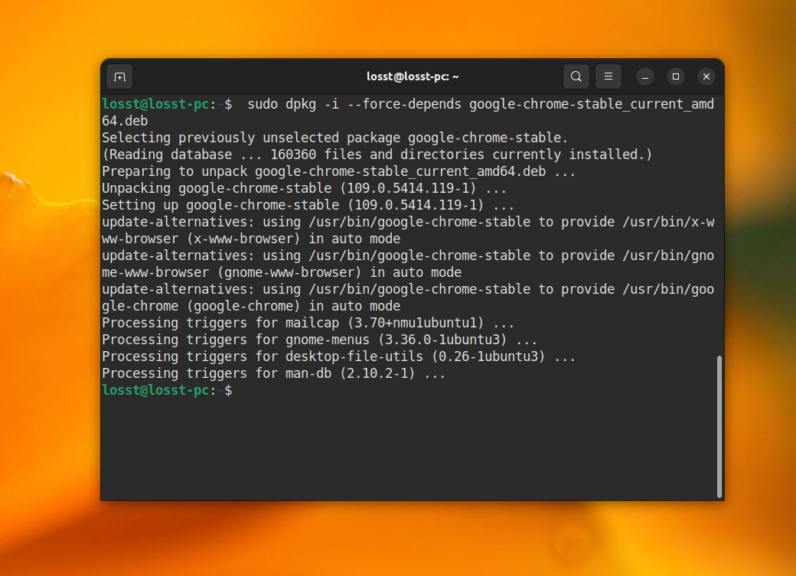
Затем установите этот пакет с помощью dpkg:
sudo dpkg -i —force-depends google-chrome-stable_current_amd64.deb
Для установки нестабильной, но более новой версии надо заменить слово stable на слово unstable:
wget https://dl.google.com/linux/direct/google-chrome-unstable_current_amd64.deb sudo dpkg -i —force-depends google-chrome-unstable_current_amd64.deb
В нестабильном репозитории, как правило, находится более новая версия, но в ней могут встречаться ещё какие-либо баги или недоработки.
Если вам нужна именно 32 битная версия этого браузера, то тут всё сложно. Компания Google уже давно не формирует сборки для 32 битных систем. Но вы всё ещё можете установить Chromium.
В случае, если dpkg сообщает о невозможности удовлетворить зависимости, выполните такую команду:
sudo apt-get install -f
Установка браузера завершена. Для его запуска просто выполните:
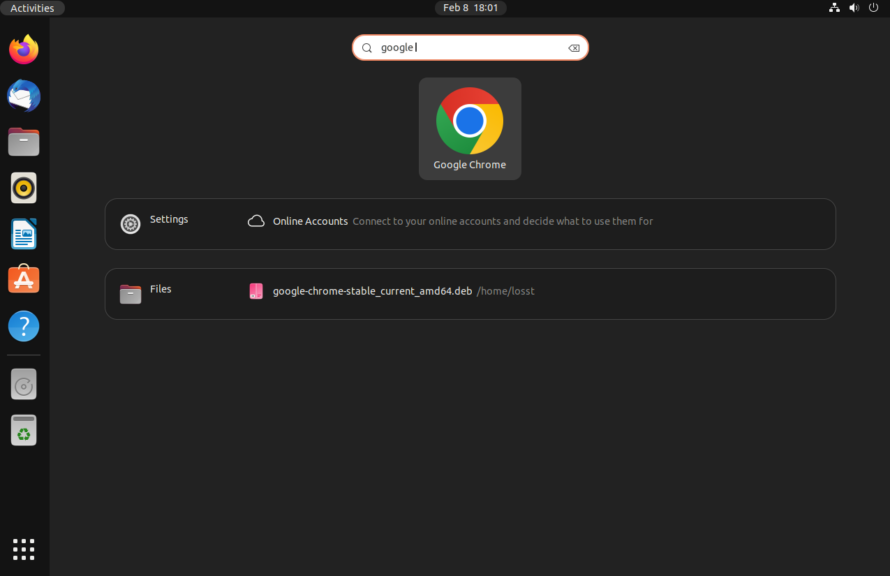
Кроме того, вы можете найти программу в главном меню системы:
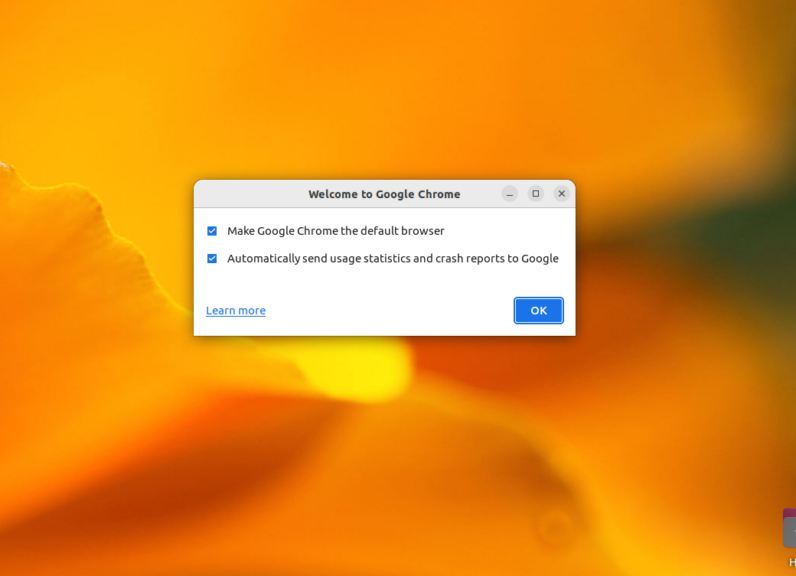
При первом запуске браузер спросит можно ли отправлять данные в Google, а также предложит сделать Chrome браузером по умолчанию.
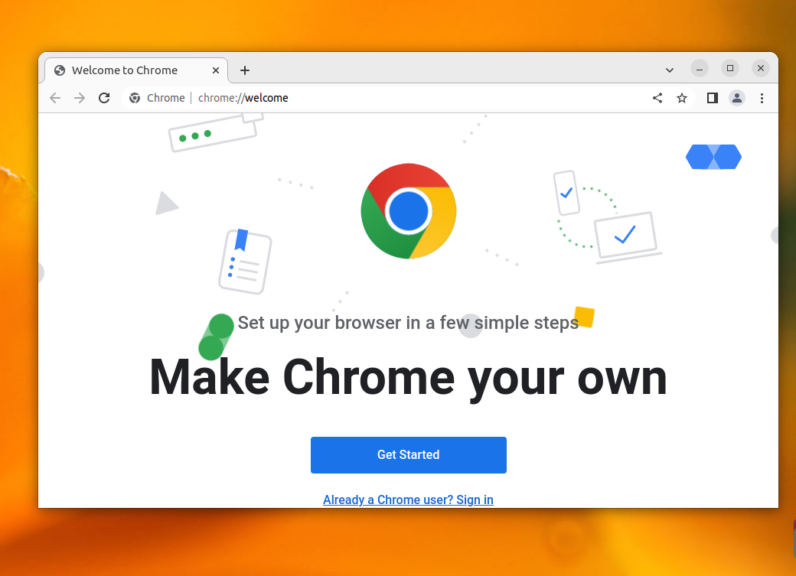
Далее вы можете выполнить первоначальную настройку браузера. Тут можно выбрать цветовую схему, подключить аккаунт Google для синхронизации и некоторые другие мелкие настройки. Или же можно сразу переходить к просмотру веб сайтов, а эту вкладку закрыть оставив все настройки по умолчанию.
Если Chrome не запускается в Ubuntu 22.04, то, скорее всего, причина в Wayland и драйверах на видеокарту. Вы можете попробовать отключить Wayland и переключиться обратно на Xorg. Для этого откройте файл /etc/gdm3/custom.conf и раскоментируйте или добавьте строчку WaylandEnable=false:
Вот и всё. Надеюсь эта статья пролила ясность на установку Google Chrome Ubuntu 22.04 или 20.04.
Обнаружили ошибку в тексте? Сообщите мне об этом. Выделите текст с ошибкой и нажмите Ctrl+Enter.
Как установить Google Chrome на Ubuntu 20.04 LTS

В этом руководстве мы покажем вам, как установить Google Chrome на Ubuntu 20.04 LTS. Для тех из вас, кто не знал, это самый широко используемый веб-браузер в мире. Это быстрый, простой в использовании и безопасный браузер, созданный для современной сети. Chrome доступен для всех основных операционных систем и аппаратных платформ и позволяет синхронизировать закладки, историю и пароли на всех ваших устройствах.
В этой статье предполагается, что у вас есть хотя бы базовые знания Linux, вы знаете, как использовать оболочку, и, что наиболее важно, вы размещаете свой сайт на собственном VPS. Установка довольно проста и предполагает, что вы работаете с учетной записью root, в противном случае вам может потребоваться добавить sudo к командам для получения привилегий root. Я покажу вам пошаговую установку Google Chrome на Ubuntu 20.04 (Focal Fossa) .
Установите Google Chrome на Ubuntu 20.04 LTS Focal Fossa
Шаг 1. Во-первых, убедитесь, что все ваши системные пакеты обновлены, выполнив следующие команды apt в терминале.
Шаг 2. Установка Google Chrome на Ubuntu 20.04.
Теперь скачиваем последний пакет Google Chrome : . deb
После загрузки выполните следующую команду, чтобы установить пакет Chrome .deb в вашей системе:
Шаг 3. Доступ к Google Chrome.
После установки в строке поиска действий введите «Google Chrome» и щелкните значок, чтобы запустить приложение или выполнить следующую команду из своего теминала Ubuntu:
Поздравления! Вы успешно установили Google Chrome . Благодарим за использование этого руководства для установки веб-браузера Google Chrome в системе Ubuntu 20.04. Для получения дополнительной помощи или полезной информации мы рекомендуем вам посетить официальный сайт Google Chrome .
How to Install Google Chrome on Ubuntu 22.04 | 20.04
Google Chrome is a powerful and versatile web browser developed by Google. It’s renowned for its speed, stability, and user-friendly interface, leading to its widespread popularity across a myriad of platforms, including Windows, Mac, and Linux systems such as Ubuntu.
For Ubuntu users, Google Chrome presents several compelling advantages that may tip the balance in its favor when compared to other popular alternatives like Firefox or Opera. Let’s explore why you might want to choose Google Chrome as your go-to browser:
- Speed: Google Chrome is often praised for its fast performance, which is driven by the V8 JavaScript engine. This is a significant advantage for users who demand quick page load times and seamless web browsing experiences.
- Integration with Google Services: If you’re a heavy user of Google services like Gmail, Google Docs, or Google Drive, Chrome offers an unmatched level of integration. The automatic sign-in feature provides a seamless transition between these services.
- Chrome Web Store: The Chrome Web Store is a vast repository of extensions and themes, enabling you to customize your browsing experience to your specific needs. From ad-blockers to productivity tools, the possibilities are nearly endless.
- Sync Across Devices: Chrome allows you to synchronize your browsing data, including bookmarks, history, passwords, and even open tabs across all your devices. This feature is particularly useful if you frequently switch between desktop and mobile devices.
- Security: Chrome is known for its robust security features, including built-in malware and phishing protection and automatic updates that ensure you’re always running the latest, most secure version.
- Developer Tools: Chrome’s built-in developer tools are comprehensive and user-friendly, making the browser a favorite among web developers.
In contrast, while Firefox is known for its focus on user privacy and Opera for its built-in VPN and ad-blocker, they might not offer the same level of speed, Google service integration, and cross-device synchronization that Chrome does.
While Google Chrome is not open-source, for those who prioritize the features mentioned above, it becomes a compelling choice. Fortunately, Ubuntu users have easy access to this browser. The following guide will demonstrate how to install Google Chrome on Ubuntu 22.04 Jammy Jellyfish or Ubuntu 20.04 Focal Fossa using CLI commands with Google’s official APT repository.
Table of Contents
Section 1: Importing Google Chrome Repository
As we embark on the journey to install Google Chrome on your Ubuntu system, we’ll first make sure our system packages are up to date, ensure the required dependencies are in place, and then proceed to the actual installation. By following these instructions, you will be equipped with Google’s versatile web browser in no time.
Step 1: Updating Your Ubuntu System
Before we initiate the installation process, it’s critical to ensure that your Ubuntu system is up to date. This helps to prevent potential conflicts that could arise during the installation process, as outdated software can sometimes interfere with new installations.
To update your system, execute the following command in the terminal:
This command fetches the latest package information from all configured sources. Next, let’s upgrade any outdated packages on your system using the subsequent command:
This command will upgrade all the software packages that have new versions available in the repositories.
Step 2: Installing Necessary Packages
While Google Chrome’s installation is usually straightforward, there are certain packages that you might need for a smooth and successful installation process. These packages are quite common and are typically already installed in most Linux distributions. However, it doesn’t hurt to make sure.
To install these packages, run the following command:
These packages include curl for transferring data, software-properties-common for managing software repositories, apt-transport-https for secure package downloads, and ca-certificates for common SSL/TLS certificates. If they’re already installed, running this command won’t have any adverse effects.
Step 3: Importing the Google Chrome Repository
A crucial step in installing Google Chrome is importing the GPG key for its digital signature. The GPG key is a form of cryptographic identity that ensures the software you’re about to install is authentic, untouched, and issued by the rightful owner.
Import the GPG key using the following command:
With the GPG key in place, we’ll now import the Google Chrome repository. This is the official source from where we’ll download the browser. Execute the following command to accomplish this:
Section 2: Installing Google Chrome
Now that we have all the prerequisites in place, we can proceed to install Google Chrome.
Step 1: Updating the Repository List
Before we install Google Chrome, let’s update our APT sources lists to include the newly added Google’s repository. Run the following command to do so:
Step 2: Installing Google Chrome Stable Edition
Next, we’ll install the stable version of Google Chrome. This is the most tested and reliable version, recommended for most users.
To install Google Chrome Stable, execute the following command:
Step 3: Installing Google Chrome Beta or Unstable Editions (Optional)
For some users, the stable version of Google Chrome might not be enough. If you want a sneak peek at the upcoming features before they make their way to the stable version, you might want to install the beta version. However, be aware that the beta version may contain bugs as it’s a preview version that’s still under testing.
To install the Google Chrome Beta build, run the following command:
For developers or those who love being on the absolute cutting edge, Google offers an unstable version. This version includes the latest features, but they are experimental and may have some bugs or even lead to crashes.
To install the Google Chrome Unstable version, use the following command:
It’s important to note that installing the beta or unstable versions won’t replace your stable version, as these versions are installed separately. This allows you to have multiple versions of Google Chrome on your system, each catering to different needs.
Section 3: Launching Google Chrome
With Google Chrome now installed on your Ubuntu system, the next step is to launch the browser and begin exploring the web. The process for launching Chrome depends on whether you are comfortable using the terminal or prefer navigating through the graphical user interface (GUI). This section will guide you through both methods, allowing you to choose the one that best fits your preferences.
Step 1: Launching Google Chrome from the Terminal
For users who frequently interact with their Ubuntu system via the terminal, launching Google Chrome from the command line might be the preferred choice. It’s straightforward and efficient, saving you a few clicks in the process.
To launch the Google Chrome browser from the terminal, you can use the following command:
Remember, if you’ve installed the Beta or Unstable versions of Google Chrome alongside the Stable version, you will need to specify which version to launch. Use google-chrome-beta or google-chrome-unstable for the respective versions.
Step 2: Launching Google Chrome from the Graphical User Interface
While the command line is a powerful tool, not every Ubuntu user is comfortable with it, and that’s perfectly fine. Ubuntu’s graphical user interface is intuitive and easy to navigate, providing an alternative way to launch Google Chrome.
To open Google Chrome using the GUI, follow these steps:
- Click on ‘Activities’ located at the top-left corner of your screen.
- Next, click on ‘Show Applications’, typically represented by a grid of dots located at the bottom-left corner of the screen.
- Finally, look for ‘Google Chrome’ among the list of applications. If you have multiple versions installed, they will be listed as ‘Google Chrome (Stable)’, ‘Google Chrome (Beta)’, and ‘Google Chrome (Unstable)’. Click on the one you wish to launch.
Example of launching Google Chrome from Ubuntu Linux application menu:

Section 4: Getting Started with Google Chrome on Ubuntu Linux
Once you have Google Chrome up and running on your Ubuntu system, it’s time to delve a bit deeper and make the most out of your browsing experience. Whether you’re a seasoned user or new to Chrome, these tips will guide you through customizations, performance tweaks, and other aspects that can enhance your browsing experience on Ubuntu.
Tip 1: Personalize Your Chrome Experience with Themes and Extensions
Google Chrome is renowned for its flexibility and customization options. You can personalize the look of your browser with a wide variety of themes and extend its functionality with extensions.
- Open Google Chrome and navigate to the Chrome Web Store.
- Select Themes from the left-hand side panel.
- Choose a theme that suits your aesthetic and click on it.
- Click on the Add to Chrome button.
To add an extension:
- Navigate to the Chrome Web Store.
- Select Extensions from the left-hand side panel.
- Search for the extension you want and click on it.
- Click on the Add to Chrome button.
Tip 2: Enhance Performance with Tab Management
Chrome is known to be a bit of a memory hog, especially when you have multiple tabs open. To enhance performance, consider using tab management extensions like The Great Suspender, which puts unused tabs to sleep, freeing up resources.
Tip 3: Use Chrome’s Built-in Task Manager
Much like your Ubuntu system has a task manager, so does Google Chrome. It can be useful for seeing what’s consuming memory or processing power. Access it by clicking on the three-dot menu > More tools > Task manager.
Tip 4: Leverage Chrome Flags for Experimental Features
Google Chrome Flags are experimental features that aren’t quite ready for prime time. They can enable new functionality, improve performance, or customize your browsing experience. Access them by typing chrome://flags into the address bar. However, use them with caution as they might affect the stability of the browser.
Tip 5: Master Keyboard Shortcuts
Keyboard shortcuts can significantly enhance your browsing speed and efficiency. Here are a few to get you started:
- Ctrl+T: Opens a new tab
- Ctrl+Shift+T: Reopens the last closed tab
- Ctrl+W or Ctrl+F4: Closes the current tab
- Ctrl+Tab: Switches to the next tab
- Ctrl+Shift+Tab: Switches to the previous tab
Tip 6: Configure Privacy and Security Settings
Google Chrome provides various settings to protect your privacy and keep your browsing secure. You can access these settings by clicking on the three-dot menu > Settings > Privacy and security.
Example of Google Chrome default UI once launched on Ubuntu Linux:

Section 5: Advanced Google Chrome Commands for Ubuntu Linux
As you venture deeper into the world of Ubuntu Linux and Google Chrome, you might find yourself needing to perform more advanced operations such as updating or even uninstalling Chrome. Let’s walk through these operations step by step.
Updating Google Chrome
Google Chrome receives frequent updates to introduce new features, fix bugs, and patch any security vulnerabilities. Ensuring your browser is up-to-date is crucial for a smooth and secure browsing experience.
To update Google Chrome, we will utilize Ubuntu’s built-in Advanced Package Tool (APT). First, update the package list on your Ubuntu system by running the following command in your terminal:
This command fetches the latest package information from all configured sources, including the Google Chrome repository we added earlier.
Following this, you might need to upgrade your system’s packages. You can do this by executing the command:
This command will upgrade all outdated packages on your system. However, if you wish to specifically update Google Chrome, use the following command:
This command directs APT to only upgrade the google-chrome-stable package, leaving the rest of your system’s packages untouched.
Removing Google Chrome
There might be instances where you need to uninstall Google Chrome from your Ubuntu system. Perhaps you’re troubleshooting an issue or simply want to switch to a different browser.
The command to remove Google Chrome is as follows:
If you’ve installed the beta or unstable builds of Google Chrome, you can remove them with the following commands respectively:
Finally, if you wish to remove the Google Chrome repository from your system entirely, use the following command:
This command removes the file that contains the Google Chrome repository information, effectively removing the repository from your system.
Section 6: Troubleshooting Google Chrome Source Lists on Ubuntu Linux
Ubuntu Linux allows for the installation of all three Google Chrome builds: stable, beta, and unstable. However, it’s crucial to note that each installation creates a new source list file in your /etc/apt/sources.list.d/ directory. This scenario could lead to potential confusion for the APT package manager during updates, as it may encounter multiple source lists for Google Chrome, and some will be ignored.
Do not worry; the solution is straightforward.
Step 1: Removing Extra Source Lists
Firstly, you need to remove the surplus source lists and retain only the original one. You can accomplish this by running the following command:
This command removes all source lists that start with “google” in the /etc/apt/sources.list.d/ directory. If you accidentally delete them all, don’t panic. You can recreate the required source list with the next step.
Step 2: Re-Adding the Google Chrome Repository
Now that the surplus source lists have been dealt with, let’s re-add the Google Chrome repository. Use the following command to accomplish this:
This command creates a new source list for the Google Chrome repository in the /etc/apt/sources.list.d/ directory.
Step 3: Updating APT Package Lists
The final step is to update the APT package lists. By doing this, APT will recognize the new (or restored) Google Chrome repository. To do so, run:
This command instructs APT to update its package lists, including the Google Chrome one we just restored.
Closing Thoughts on Installing Google Chrome on Ubuntu Linux
In summary, installing and managing Google Chrome on an Ubuntu Linux system is a straightforward process, but it’s essential to understand the various steps involved. We’ve discussed the installation process, how to launch the application, the utilization of additional commands for update and removal, and finally, troubleshooting multiple sources for a smooth operation.
Additional Resources and Links
For further information and to deepen your understanding of Google Chrome on Ubuntu Linux, consider exploring the following official resources:
Sorry, you have been blocked
This website is using a security service to protect itself from online attacks. The action you just performed triggered the security solution. There are several actions that could trigger this block including submitting a certain word or phrase, a SQL command or malformed data.
What can I do to resolve this?
You can email the site owner to let them know you were blocked. Please include what you were doing when this page came up and the Cloudflare Ray ID found at the bottom of this page.
Cloudflare Ray ID: 7d6fd0d88edd24bd • Your IP: Click to reveal 88.135.219.175 • Performance & security by Cloudflare