Как вставить таблицу из Excel в Indesign
Подскажите, не получается вставить таблицу в индиз из экселя:/
Вернее она вставляется, но все криво-косо Все столбики смещаются, приходится табом их двигать к нужной колонке. А таких таблиц штук двести, я двинусь их все выравнивать
Есть ли способ чтобы таблица открылась ровненько, как она выглядит в экселе??
UPD если это важно у меня версия cs2
Mtamanov
Участник
- 03.07.2008
- #2
Ответ: Как вставить таблицу из Excel в Indesign
Дело, скорее всего, в криво сделанном экселевском файле, в котором куча ненужных абзацев и табуляций. Наверно стоит посмотреть его в режиме отображения непечатных символов. Именно на них ориентируется индиз, когда формирует таблицу.
Если совсем беда, делайте из таблиц ПДФ и вставляйте так.
Злобный юзер
- 03.07.2008
- #3
Ответ: Как вставить таблицу из Excel в Indesign
Romk9
- 03.07.2008
- #4
Ответ: Как вставить таблицу из Excel в Indesign
Оптимальный вариант с неправильными табличками (для меня, по крайней мере) — экспорт в ПДФ, распознавание ФайнРидером и уже потом закидывать с сохранением форматирования.
Maria_T
Участник
- 03.07.2008
- #5
Ответ: Как вставить таблицу из Excel в Indesign
Попробуйте копировать таблицы в Word, оттуда в InD, все вставится как надо. Пришлите исходную табличку, посмотрю, что с ней можно сделать.
Еще маленькая фича при вставке таблиц из MSOffice.
Колонки едут часто из-за того, что в ячейках таблицы присутствуют лишние Enter’ы (знаки абзаца), которые InDesign при преобразовании текста в таблицу принимает за маркеры конца строки. Чтобы он не путался, стоит такие внутриячейковые Enter’ы-знаки абзаца заменить на какой-нибудь уникальный знак типа @ или #, а потом, конвертировав текст в табличку — обратно на знаки абзаца.
Наш канал на Youtube
Здравствуйте все, кто работает в Индизайне!
Извещаем вас о том, что на youtube.com работает канал «InDesign Мастерская вёрстки». Там уже размещены более 70 видео с полным описанием как работать с программой DoTextOK. Другие интересные темы, касающиеся работы …
Хитрости и секреты, приемы работы, уроки
Особенности новой версии Индизайна
Описание плагинов, информация о плагинах для работы с Adobe InDesign
Готовые к использованию скрипты для Adobe InDesign
Описание языка, приёмов и методов программирования для Adobe InDesign
Импорт сложных таблиц из MS Excell
Представьте, что у вас есть большая сложная таблица в MS Excell и вам необходимо импортировать её раделы в InDesign в виде отдельных таблиц. Если отметить при выборе помещаемого файла Show Import Options, то в диалоговом окне можно указать диапазон импортируемых ячеек, например, B6:F18.
Но только гений или сумасшедший будет запоминать эти координаты. Можно каждую часть таблицы сохранить в отдельный файл, а потом импортировать в Индизайн, можно перебрасывать данные через буфер обмена. На сайте InDesignSecrets предлагают способ именованного диапазона, при помощи которого такую задачу выполнить легче всего.
В Excell выделите нужную часть таблицы и выберите Insert > Name > Define (Mac Excel 2008) или нажмите правую кнопку мыши и выберите Name a Range (Windows Excel 2007). В русском Excell-2007 под Windows этот пункт называется «Имя диапазона».

Задайте имена предназначенных для импорта в Индизайн участков Excell-файла и сохраните его. При импорте в Индизайн в диалоговом окне в выпадающем списке Cell Range выбирайте нужный диапазон.
How to Insert and Link an Excel Table in InDesign: Create Product Sheets
This tutorial will show you how to insert and link a Microsoft Excel file in Adobe InDesign. We’ll create product sheets that retain formatting from the Excel spreadsheet.
- You can download the free project template from the button above.
The ability to copy Excel formatting to an InDesign document can be convenient in many instances, although some control is lost as part of the process. If you want to import an unformatted table in InDesign and apply formatting at a later stage to have a greater level of control, check out this other InDesign Place command tutorial.
Pagination overcomes conversion issues and accurately converts even the most complex spreadsheets. It can also combine multiple data sources, e.g., product information from Excel files and pricing information from your ERP export.
Table of Contents
Insert and link an Excel table in InDesign
Preparing the Excel file
Let’s start our tutorial by preparing our Excel file. Below you can see an example of a formatted spreadsheet that is a perfect candidate for this method:
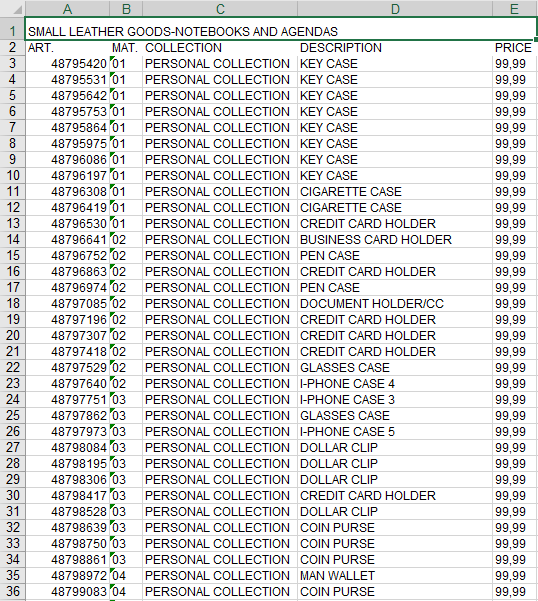
Images should be inserted at this stage (if required) by using Insert -> Picture.
Selecting a cell range
We now need to define the table cells that we want to import. Do this by selecting the relevant data, right clicking and pressing Define name. We’ve called our range “mercedes”:
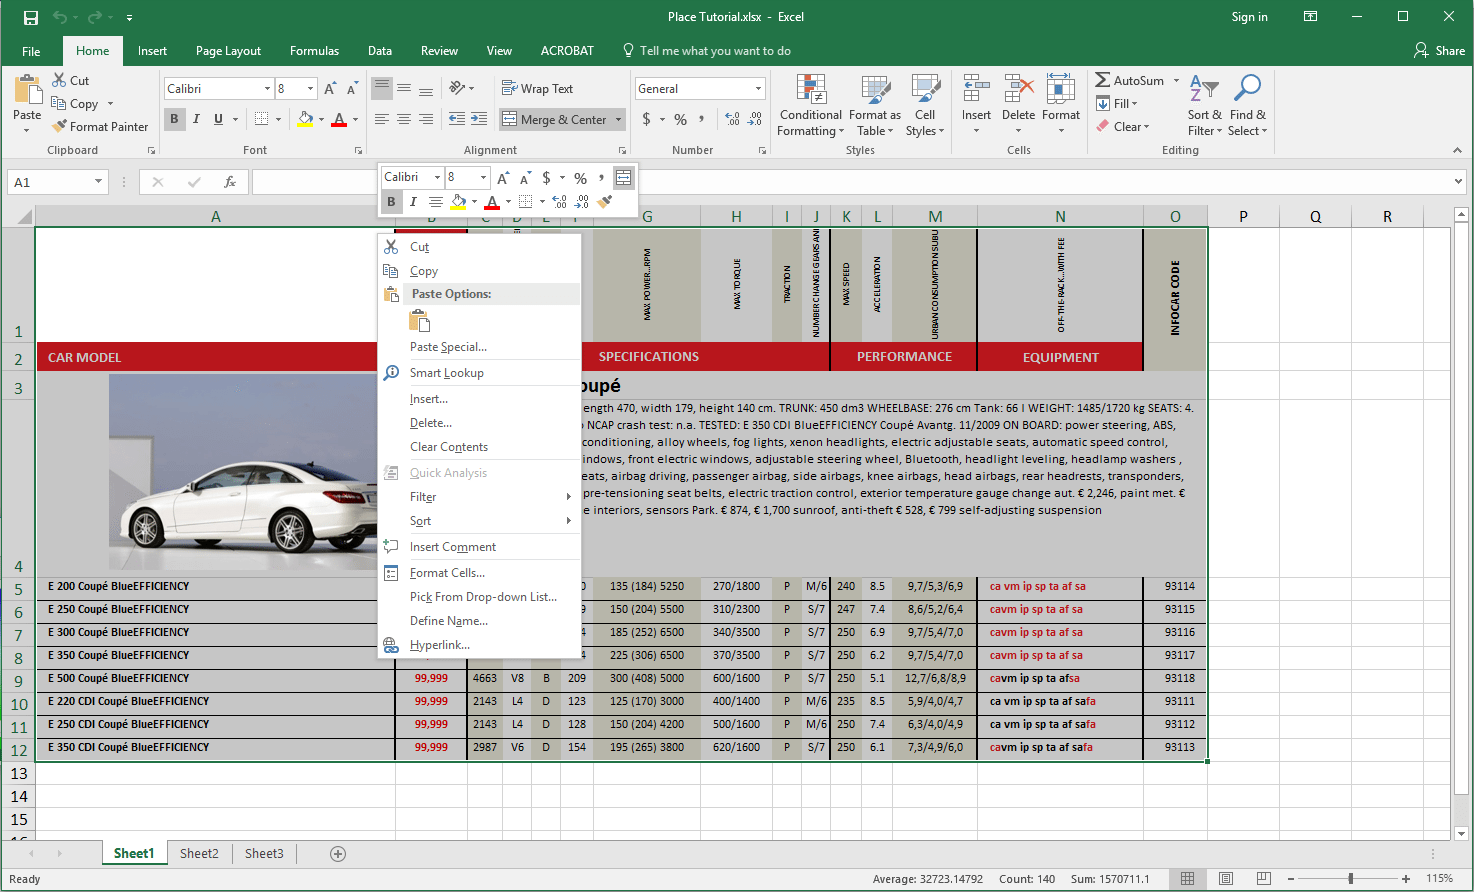
This step isn’t essential but is recommended as a best practice. It’s also only supported for .xlsx files in InDesign CS6 versions and later.
Complete the process by saving and closing the Excel file.
Starting our InDesign document
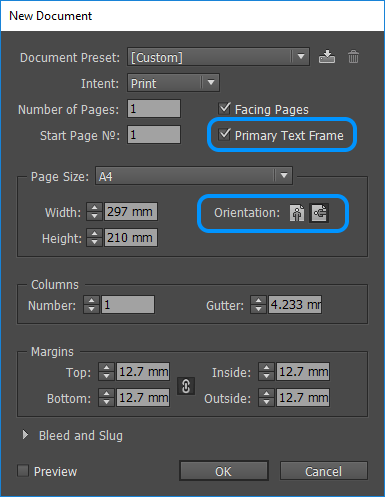
Now open InDesign and create a new document. Check the Primary Text Frame option in the New Document dialog box to ensure that the text flows correctly from page to page. (This option is referred to as Master Text Frame in older versions of InDesign).
Also select the desired page orientation, column number and gutter size.
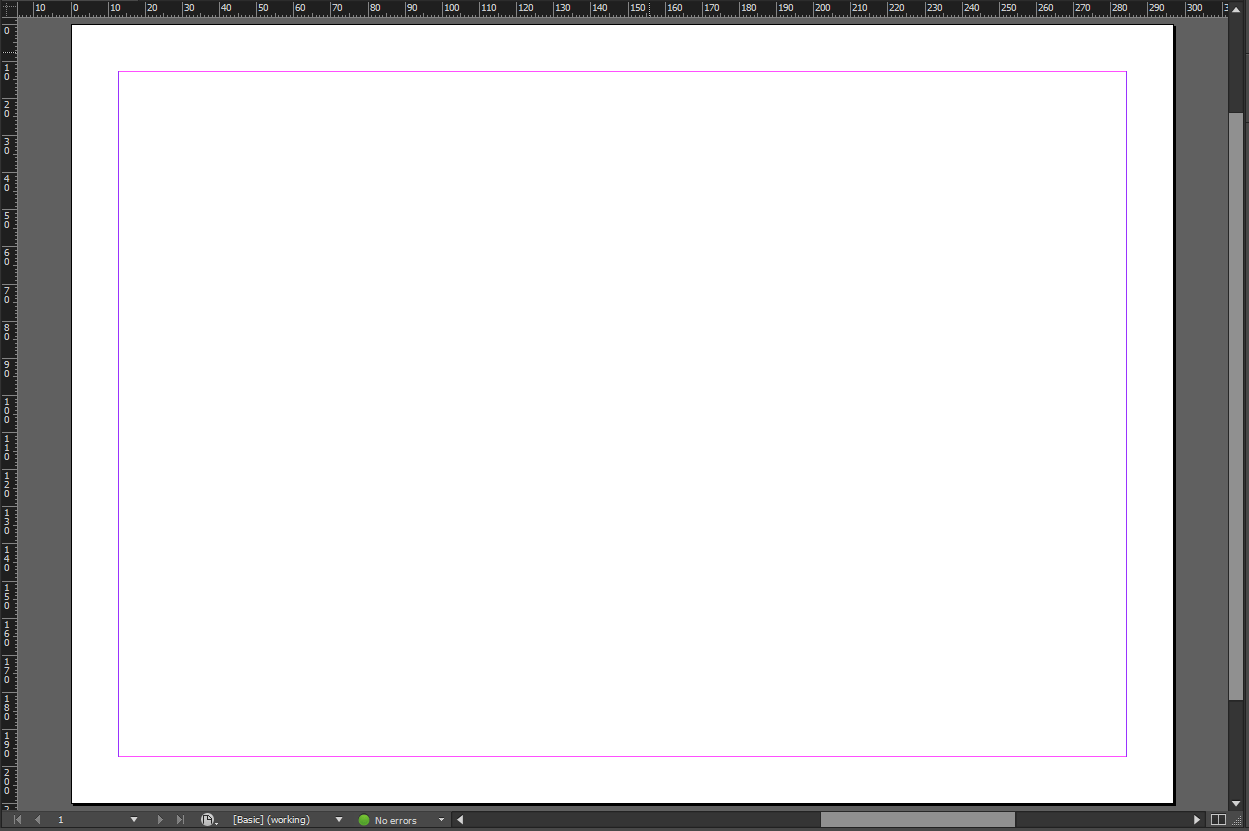
Clicking on OK should reveal our new working document:
Linking InDesign and Excel
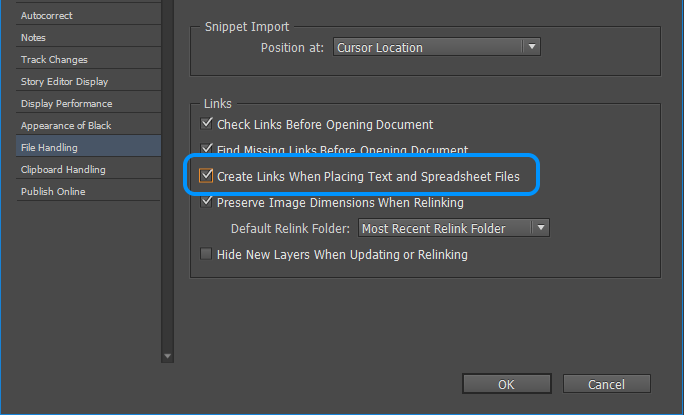
We can next change a setting that will link our InDesign document with our Excel spreadsheet. This linking isn’t enabled by default but vastly simplifies any subsequent updates. You’ll now be able to edit the Excel data and have changes reflected quickly and easily within your InDesign layout.
The required setting is found under Edit > Preferences > File Handlings. Here you’ll need to check the box marked Create Links When Placing Text and Spreadsheets.
Place the table
We’re now ready to add the spreadsheet to our InDesign file. Start by drawing a text frame with the Text tool and moving/resizing it to your desired location/area.
Now choose File > Place from the InDesign menu – or by using Ctrl+D on a Windows machine or Cmd+D on a Mac.
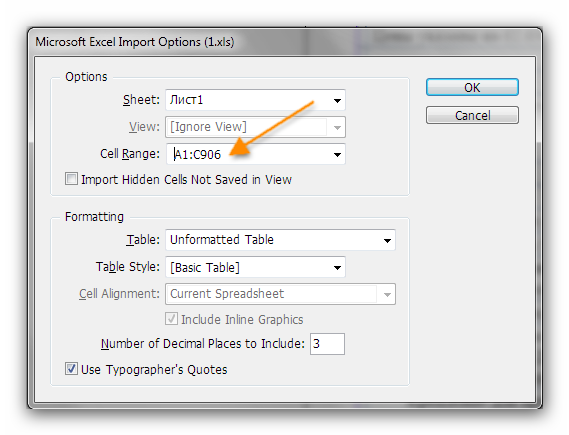
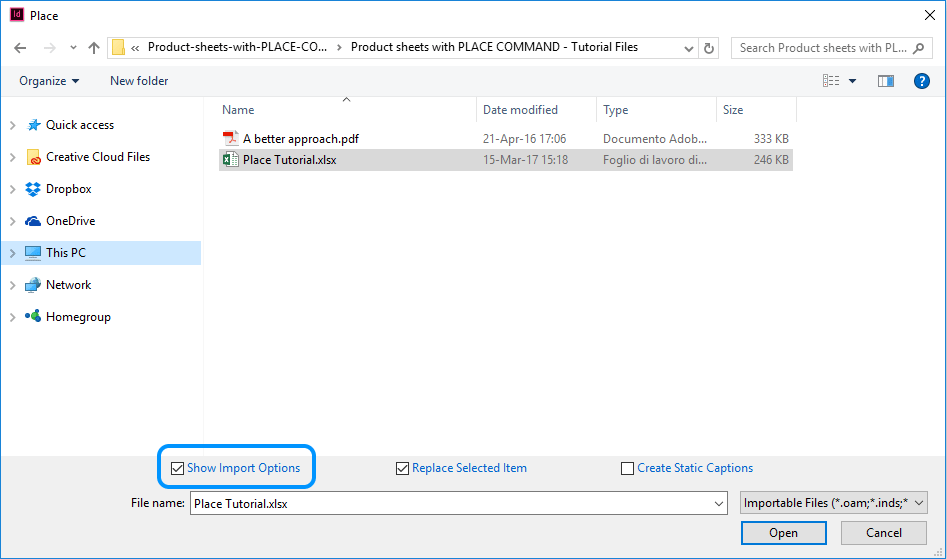
You’ll now see a new Place dialog box. Select the file you want to import, click on Show Import Options in the bottom left corner and then click Open.
A new Import Options dialog box will appear. We need to choose the range of table cells that we want to import under the Cell Range heading. We should see our previous label, i.e., ‘mercedes’.
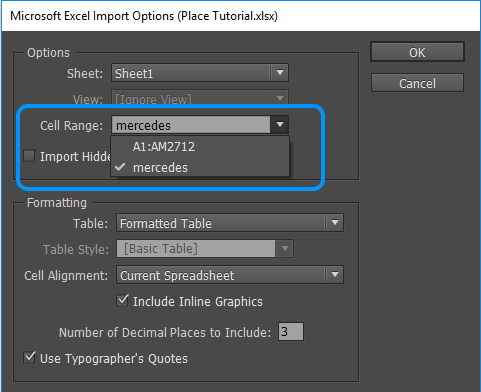
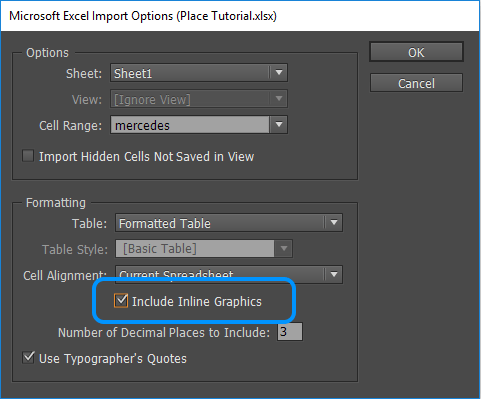
We then need to select the format for our data. We’ll use Formatted Table as our table includes formatting and images:

Selecting Formatted Table will also allow us to check the Include Inline Graphics box. This box is essential to include the spreadsheet’s images with the import.
It’s done!
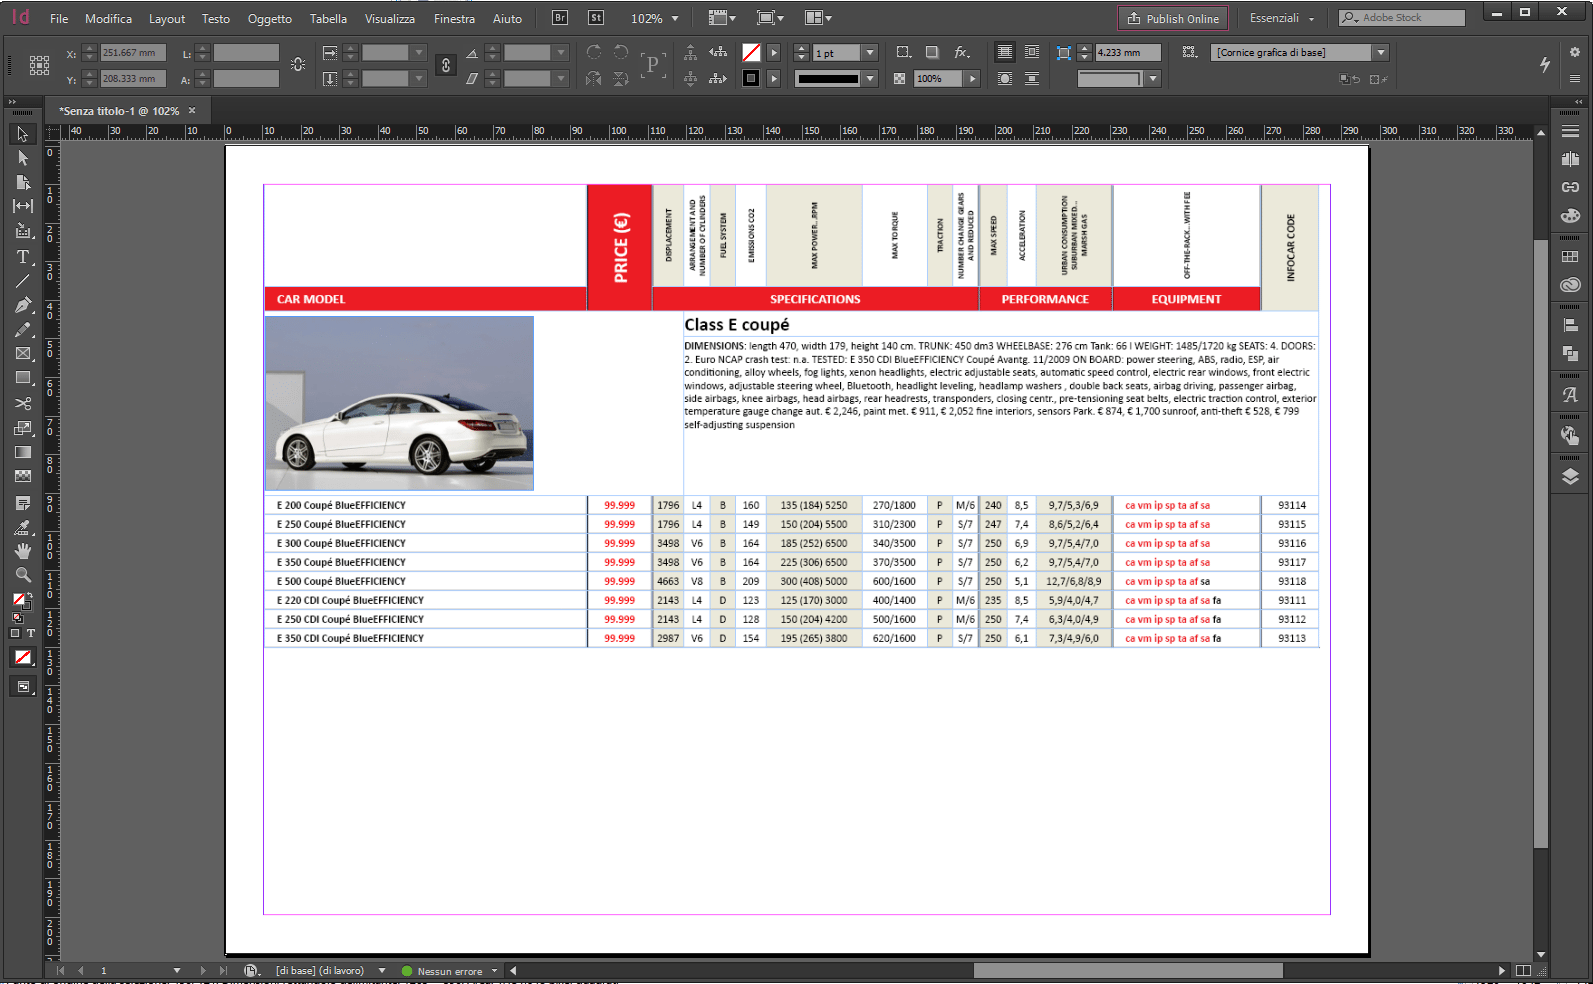
Now click OK to see the following result:
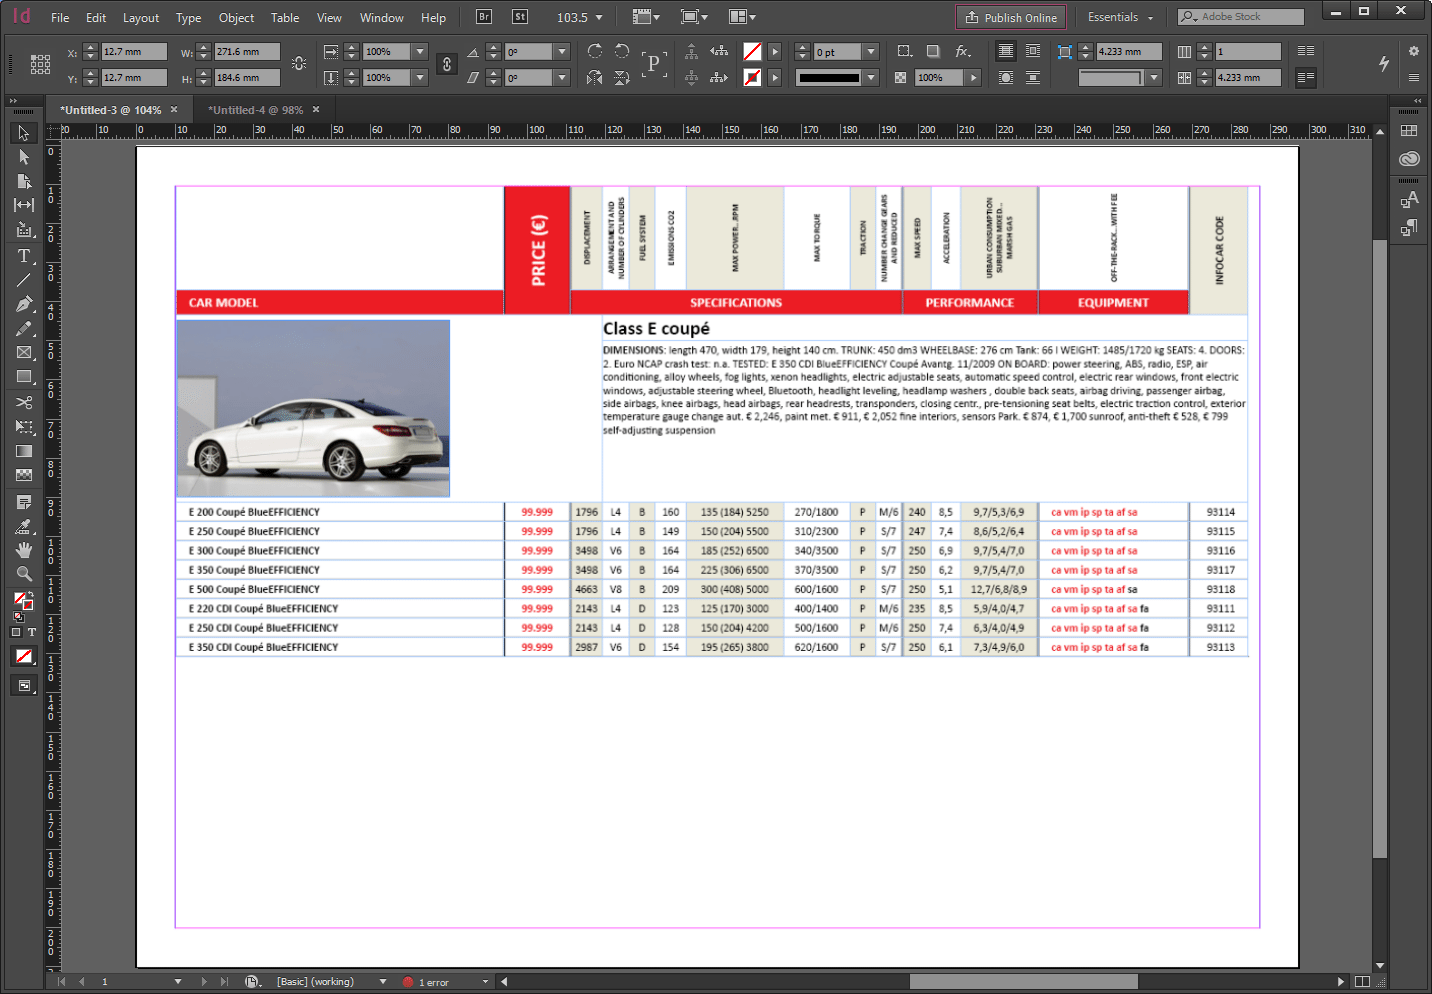
You have successfully created a product sheet by linking an Excel table in InDesign!