Getting Started with SQL Server 2017 Express LocalDB
In a previous tip, I walked through installation and some caveats with the first version of SqlLocalDb, which shipped with SQL Server 2012. Well, it’s been several major releases, and some of the aspects have changed, so I thought I would provide a refresh.
The purpose of SqlLocalDb has remained constant: To provide developers with an easy way to develop with SQL Server locally, on Windows, without the overhead, security, and maintenance of a full-time, proper instance. But for anyone who has used SQL Server and is new to SqlLocalDb, a few of the details are unintuitive.
Solution
The first step is making sure you’re on a supported operating system (Windows 8 / Server 2012 or above), and then download the SQL Server Express Edition installer here. I am using Windows 10 in these examples; if you are using Windows 8 or Windows Server 2012, make sure to consult KB #2681562 : Installing SQL Server on Windows Server 2012 or Windows 8. If you’re using Linux, sorry, but I think you’re out of luck.
Step 1: Install Microsoft SQL Server Express Localdb
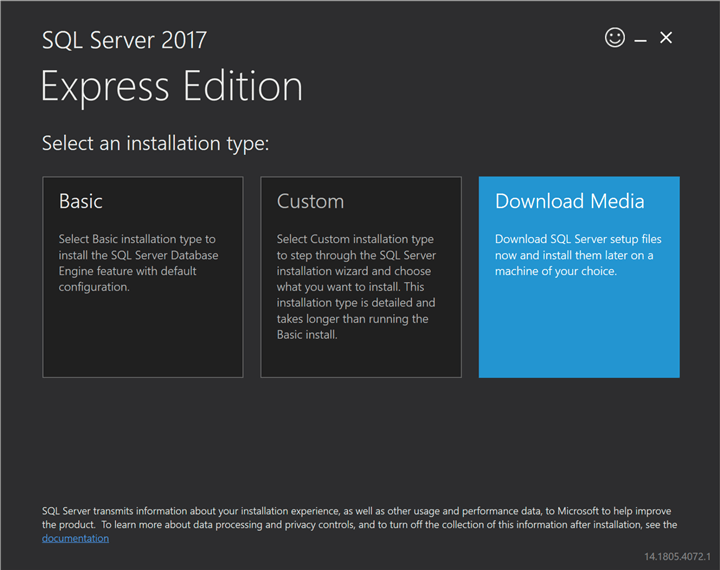
To get just the SqlLocalDb MSI (45 MB) vs. the whole enchilada (700+ MB), choose the “Download Media” option to start downloading:
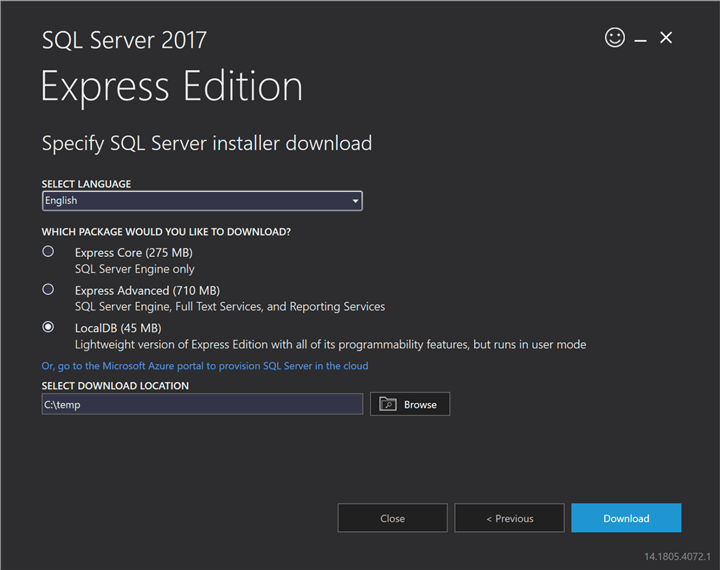
Pick your language, choose the LocalDB option, and pick a location to download the MSI:
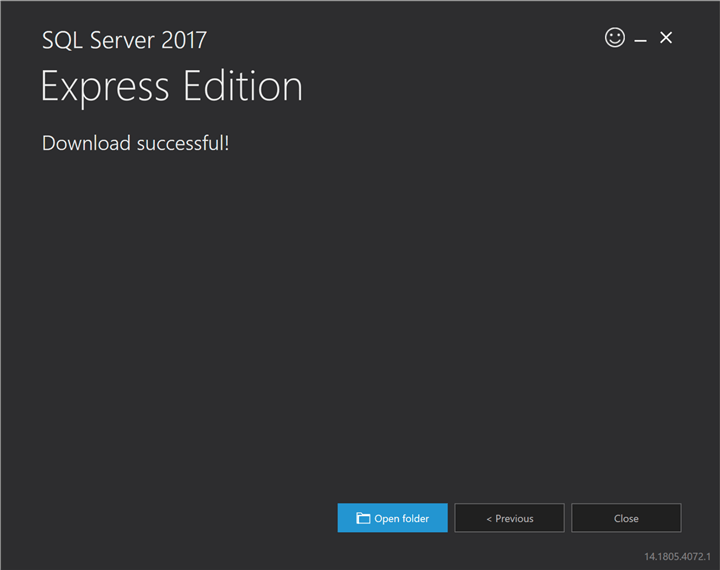
Then you’ll get a very big dialog to indicate success. Choose the Open Folder option:
The folder will open, and you will see SqlLocalDB.msi. Launch this executable to start the wizard:
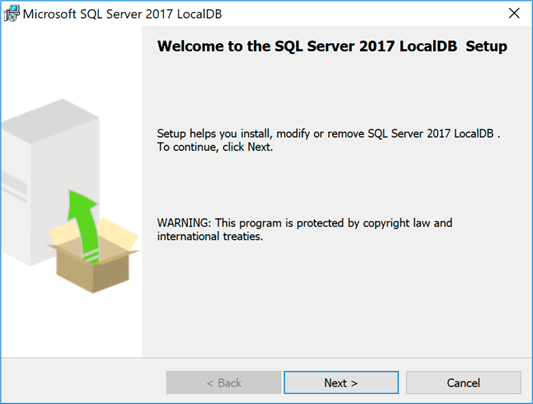
You’ll have to accept a license agreement and then on the next screen click Install:
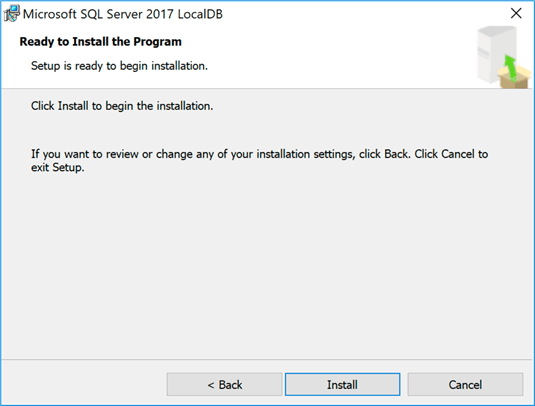
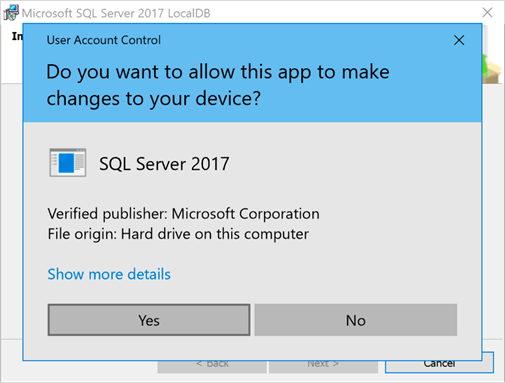
At some point you will probably be prompted by UAC controls:
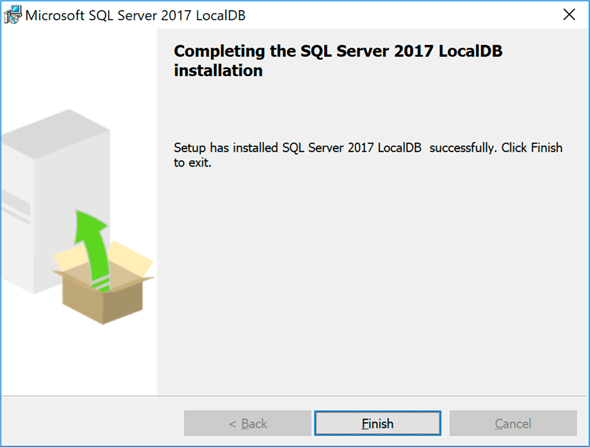
Then it will finish:
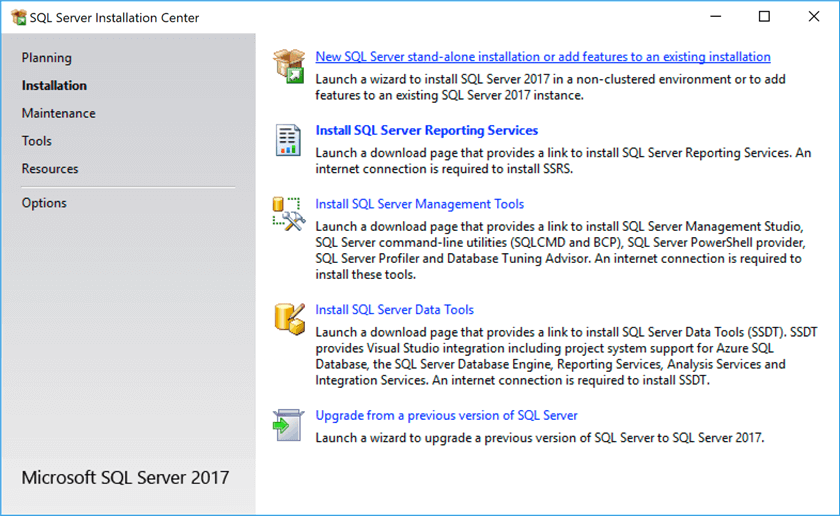
Alternatively, if you already have a valid SQL Server 2017 install media, you can install SqlLocalDb from that installer, and avoid downloading the media above. Run Setup.exe and from the Installation Center choose “New SQL Server stand-alone installation or add features to an existing SQL Server 2017 instance.”
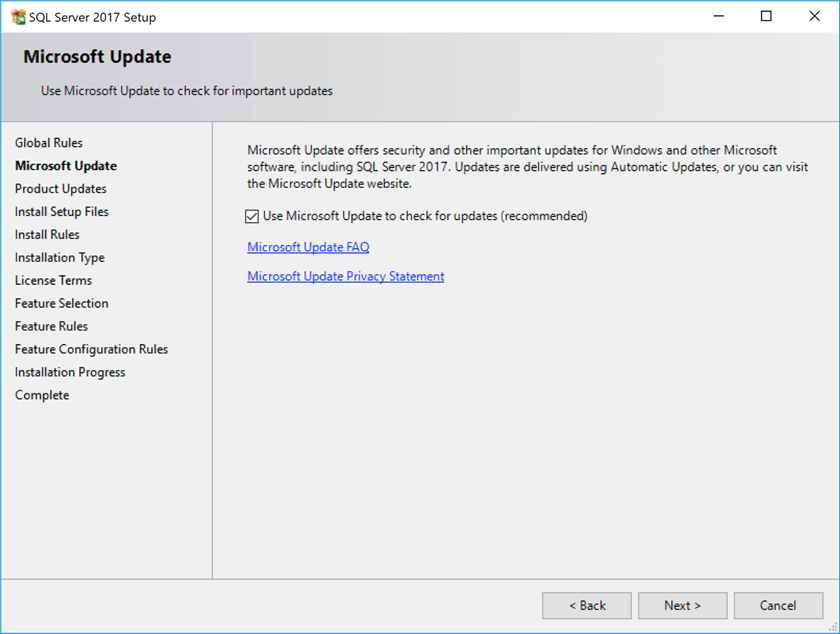
Next, you’ll be offered to include any important updates (you should check this box unless you are on a very slow Internet connection – but don’t worry, we’re going to patch this installation with the latest Cumulative Update anyway):
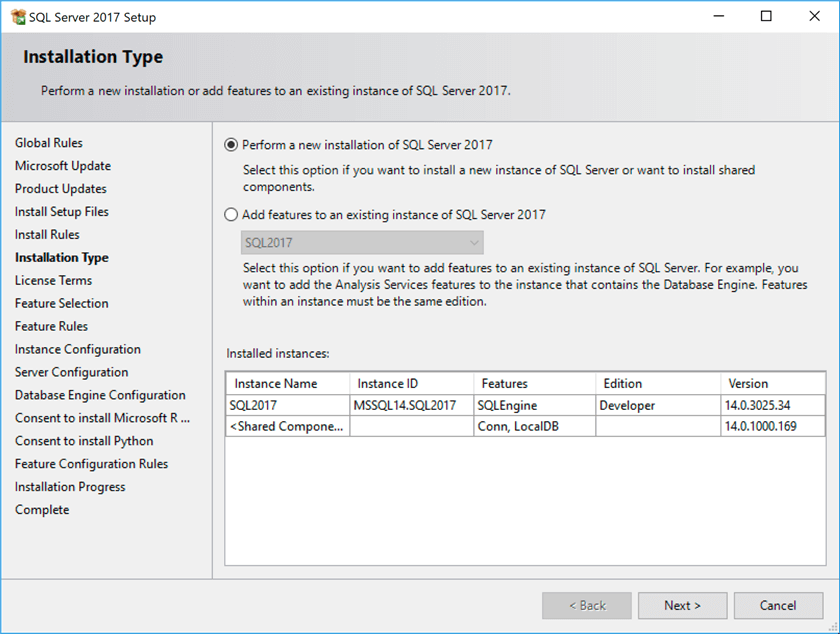
Next, you’ll choose the type of installation to perform; you want “a new installation of SQL Server 2017,” even though that choice may not be the most intuitive:
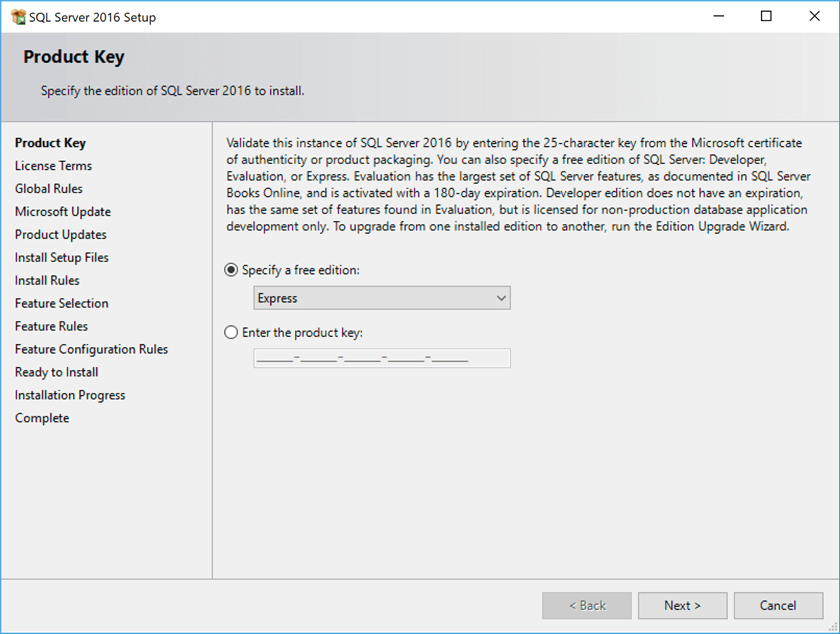
You’ll have to accept the license terms in a new dialog, and then you’ll be asked for a product key. Here, just select the free Express Edition (other editions won’t offer a LocalDB installation):
Then on the Feature Selection screen, make sure you un-check the Database Engine Services option, which is selected by default (unless you also want to install a full-on SQL Server 2017 instance).
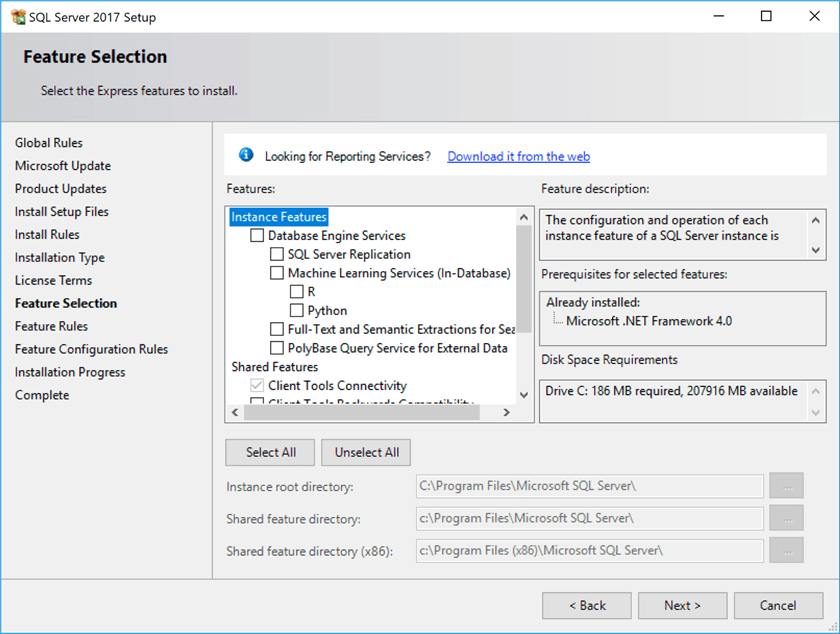
Then scroll down and select the LocalDB option (I also selected Client Tools Connectivity).
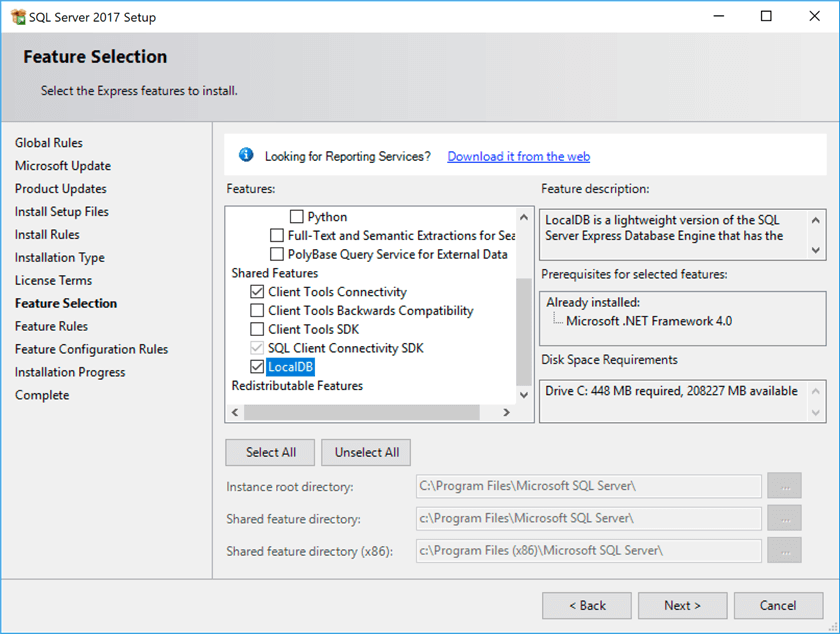
Click Next, Install, and then you should have this:
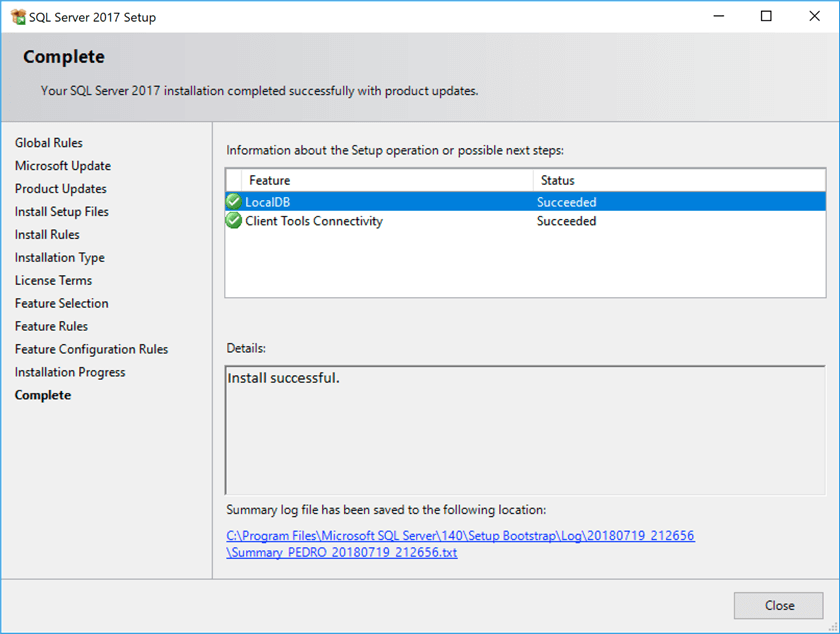
Step 2: Patch Microsoft SQL Server 2017
Before you get started using SqlLocalDb, you should patch SQL Server 2017 to the latest Cumulative Update. The reason is that there was initially a critical bug that prevented the creation of database files due to a missing slash in the file path.
This problem was fixed in CU #6 (see KB #4096875), but at the time of writing, the latest Cumulative Update available was CU #9. You should typically use the latest CU available; you can always get the latest CU here.
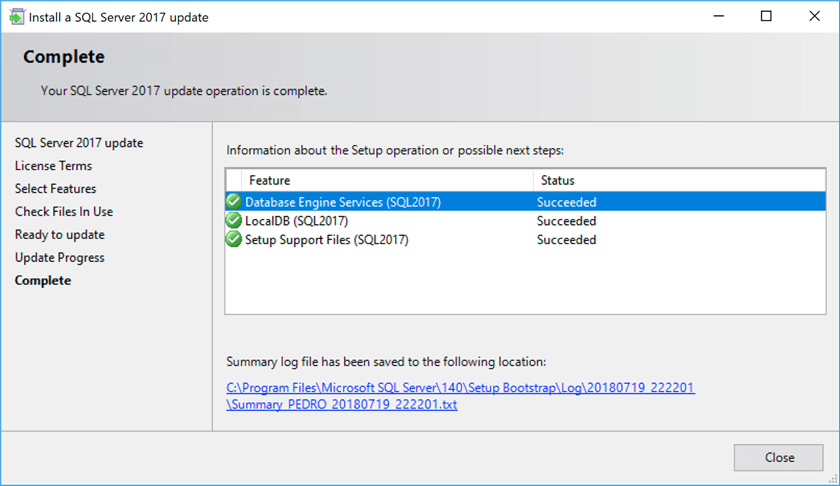
At the beginning of the install it will not indicate anything about SqlLocalDb, but just check all the boxes you can and proceed. At the end you will see confirmation that SqlLocalDb has been patched (in this case I also updated a SQL Server 2017 instance from CU #8 to CU #9):
Step 3: Install client tools and/or SQLCMD and/or PowerShell
If you don’t already have SSMS, or another way to connect to the SQL Server database, you’re not going to get very far. Rather than guide through the full installation I’ll just point you to the locations to get the most recent versions:
- Latest version of Management Studio (17.8.1 at time of writing):
https://docs.microsoft.com/en-us/sql/ssms/download-sql-server-management-studio-ssms - Latest version of SQLCMD (Command Line Utilities 14.0 at time of writing):
https://www.microsoft.com/en-us/download/details.aspx?id=53591 - Installing Windows PowerShell:
https://docs.microsoft.com/en-us/powershell/scripting/setup/installing-windows-powershell
Step 4: Create an localdb instance via SQLLocalDB Command Line
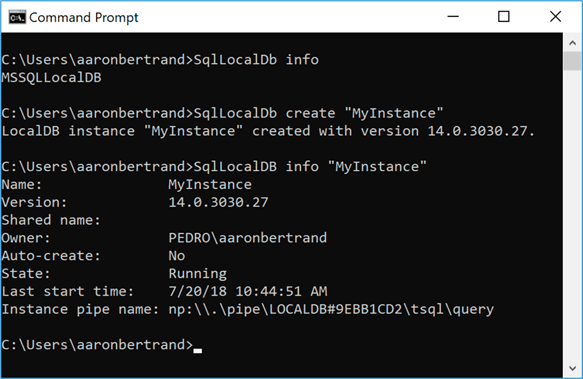
At the command line, you can interact using the SqlLocalDb utility to configure the instance of localdb . Start with getting information about the installation:
This used to return the localdb version number (in the original article, and with the 2012 release, this returned v11.0 .
Next, you can create an instance with the following command:
The Instance pipe name may come in handy later, though I’ve found that a lot of the connectivity issues in earlier versions of this feature have gone away. Also, in older versions you had to explicitly start the instance, but it now starts automatically.
If you want to stop and drop the instance, use:
But don’t do that just yet. Evidence that this all works so far:
Connection String for SQLCMD
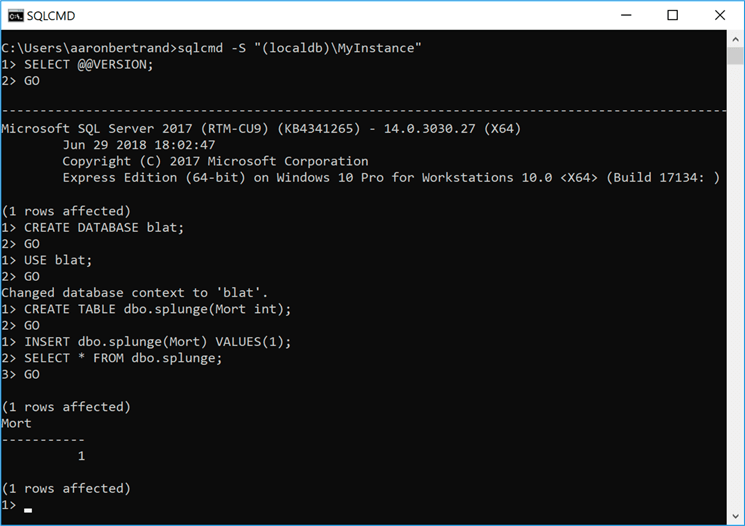
Locate SQLCMD, making sure to use the newest version on your machine (your environment path may list an older version first). Look for the highest version in the Binn folders under C:\Program Files\Microsoft SQL Server\Client SDK\ODBC\[version]\Tools\. You can connect to this instance using Windows authentication with the following code at the command line:
Then we’re greeted with a line number prompt and can enter sql code on-demand. So something like:
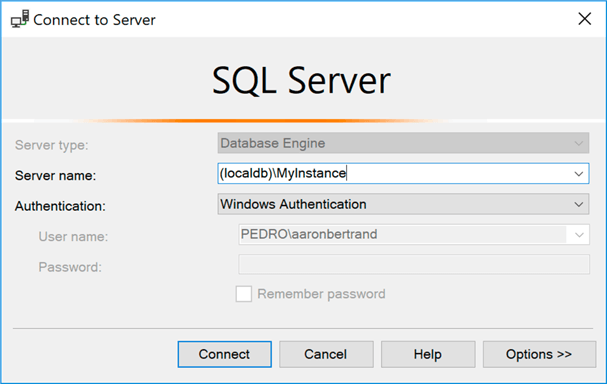
Connect using Microsoft SQL Server Management Studio
Like with SQLCMD, you can connect using (localdb)\MyInstance from SSMS as well (in older versions you needed the pipe name I mentioned above):
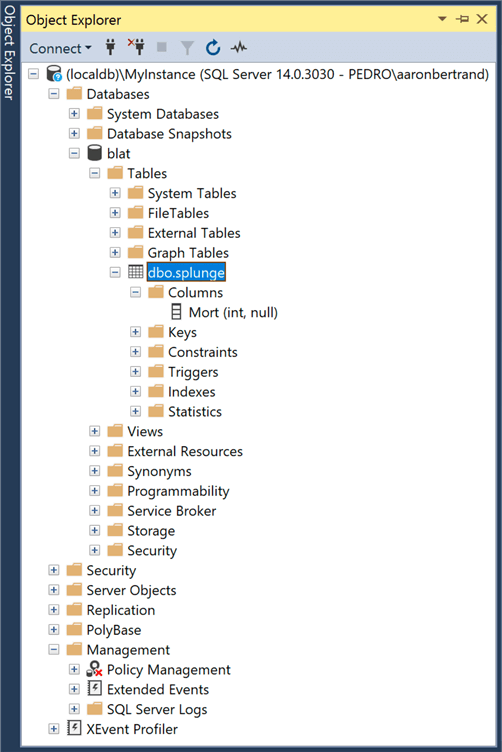
When you open Object Explorer, you’ll see the database and table we created, and you can interact with the instance just like any other SQL Server instance (with obvious exceptions, for example there is no SQL Server Agent node under Management):
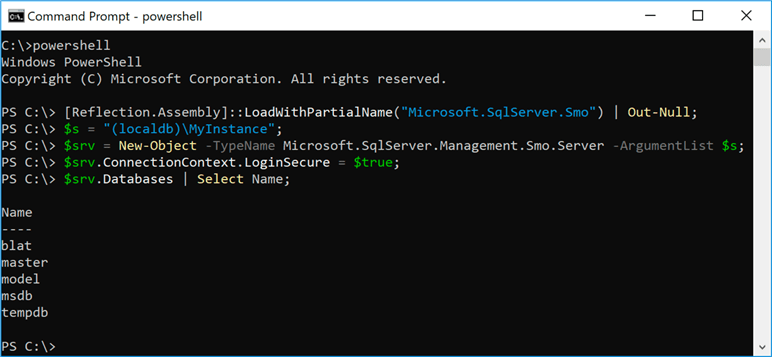
Connection String using PowerShell
Modern versions of PowerShell are also able to connect to LocalDB instances using the simple instance name format. With my default installation, though, I found I still needed to manually load SMO before it would connect and interact.
Conclusion
I hope this gives you a head start into playing with SqlLocalDb for local development. It can be a really useful way to build out a proof of concept or test a query or feature without installing a full-blown SQL Server instance.
Next Steps
- Download and install SQL Server 2017 Express LocalDB.
- Use the standalone engine for local development or proof of concept work.
- See these tips and other resources (some Microsoft links are older, but still relevant):
- Getting Started with SQL Server 2012 Express LocalDB
- Troubleshoot SQL Server 2012 Express LocalDB
- SQL Server Express blog
- SQL Server Express Versions
- All SQL Server Express Edition Tips


About the author
 Aaron Bertrand (@AaronBertrand) is a passionate technologist with industry experience dating back to Classic ASP and SQL Server 6.5. He is editor-in-chief of the performance-related blog, SQLPerformance.com, and also blogs at sqlblog.org.
Article Last Updated: 2021-01-29
Comments For This Article
Thank you very much for this article. It was was very useful.
Thanks for this, it was very helpful. Getting this to work seems to be slightly different every time i do it.
A small point though is that connection to the LocalDb instance using SSMS (2017 client) is achieved using the instance name as «(LocalDb)\MyInstance» and it does seem to mind the case int he localdb.
Local MS-SQL Server 2019 with Docker, Microsoft SQL Server Management Studio for Data Base Setup

I needed to create my own local DB(data base) to test my application on before running it with the production server. Because I don’t have a Windows Server OS (operating system) to create a DB, I needed to create a virtual one to test to on my Windows 10 OS. That is where Docker and Microsoft SQL Server Management Studio come in.
This is a step by step instruction on how I was able to create the local Windows Server with Docker and how I was able to interface and setup the DB using Microsoft SQL Server Management Studio. The instructions provided will help you start if you are new to all of this.
Setup Virtual Windows 2019 Server with Docker
First we need to install Docker if not done so already. Follow the Docker installation instructions for Windows. Hyper-V Setup needs enabled for Docker to work and you may need to enable virtualization through BIOS if its disabled. After Docker installs and if it is running properly you should see a Docker Icon in the bottom right of the tool bar. If the little square blocks are moving, means that something is still loading.
Next we need to download the Windows 2019 Server Image for Docker to create the app container. Open your CMD, you may need to run it in Admin, and run:
You should see several downloads working. The specific command is the latest 2019 Windows server image that is used to create the app container. You can download all sorts of images that can be used for containers but for windows server you can find the list of Microsoft SQL Server images here.
When the download is complete, we can create a new app container to run the Windows 2019 Server. In the CMD, run the command below, renaming “nameDB” and “Password” to your own. “Password” will not work and will through an error on required password requirements.
This will create an initial container with the Windows 2019 server image installed. This setup will automatically create the super user “sa” and set the “SA_PASSWORD”. Port 1433 must be used for the local server setup. When the container is created, you should see a string at the end:
Starting Container CMD:
There are different ways to start the container but I will use the CMD for this setup. If you don’t remember your container name you can look up all the containers you have create by running:
Then you can run the container by running:
Enabling Agent XP for Remote Admin Connections:
Before we can connect to the server using Microsoft SQL Server Management Studio, we need to enable Agent XP configuration for remote admin access. I will show the CMD way but note you can Docker Desktop.
Run the following command enable commands to the container and you should see mssql@xxxxxxxxxxxx appear.
Next run the command below to configure the sqlcmd file. You will be prompt for the password that was used creating the container. If you entered the password correctly, you should see 1> in the CMD window.
Now you have enter the following lines one at a time, hitting enter after each line of text. The first command allows the display of advanced options. Otherwise we wont be able to update the two options we want to change. I will start for the first line then include the rest of the lines to enter:
Now for the rest, again typing or pasting and hitting enter after each line:
If done correctly, you will see a confirmation of the change:
Now we need to do this two more times to configure Agent XPs and remote admin connections:
Committing and Saving Modified Image:
Now we don’t what to have to repeat these steps every time we run the container so we are going to save the changes to the image itself.
Hit ctrl-c, twice to exit out of the “bash” shell.
Type exit and enter to exit out of the mssql shell.We will need to stop our container before we can save so enter into the CMD:
Lets check the status of the container to make sure we have stopped it.
Then we want to commit the changes we made to the image. Run the command below and if completed, will show a random string at the end.
To see the committed image we want to reference use the command which will show all the images:
Now we have to update the new image with a name and tag to use since the new image is created without them. Make sure to use the new image “IMAGE ID” to update the TAG from the committed change. Example:
docker tag 12lettersOfShaCreated user/repositoryname:tagName. I used the command below to tag the new committed image. I used sa for user since I wanted to create the remote login for the sa user. The “repositoryname” must be in all lower case. The command I used:The downloaded image is taking up 1.5 GB of hard drive space and so is our modified image so if you want to reduce the amount of drive space taken up, you can remove the downloaded image. I also want to remove the container created with the downloaded image so we can create one with the image was updated. Run the following commands to remove both.
Now create a new container with the modified image:
Since the updated image already was created with a user name and password, we don’t need to set up whole new app container with those criteria. Lets start the new app container so we can connect and create a DB!
Connecting Microsoft SQL Server Management Studio to Docker Windows Server
Open Microsoft SQL Server Management Studio so we can connect to the Docker container running Windows Server 2019 and create a DB. Once it is loaded, you should see “Connect To Server” pop up in the middle of the app. Set the following settings and click on Connect:
Server type: Database Engine
Server name: 127.0.0.1,1433
Authentication: SQL Server Authentication
Login: sa
Password: passwordYouCreatedThe server name is the local IP address that is used to create the server along with the local port id. We are using the SQL Server Authentication since we don’t have the ability to use Windows Authentication yet. The user is the user name and password is the the same that was created on the initial app container.
If connected successfully, you should see the server up and running in the Object Explorer window.
Creating a Data Base
Now there isn’t a DB(data base) created yet. To do that, right-click the Databases folder and click New Database…
A New Database window will pop up and you can enter the name of the DB you want to create. I am not going to go through the different options setup so click OK after entering the DB name.
Adding Table and Rows
Now that we have a new DB, we can add a table with some rows. Expand the Databases folder, then expand the yourDB folder. My DB I created is called MyNewDB. In yourDB folder, right-click the Tables folder and click on New, then Table…
Creating Table ID Row
Before we can generate the table name and save it to the server a table ID will need to be setup. Add “id” to the Column Name and set the Data Type to “bigint” since this number could get really big depending on the amount of row data could be added.
We need to set the Table Row id as the Primary Key. To do this right-click the arrow icon to the left of the id row then click on “Set Primary Key”.
Now you should see a key Icon along with the arrow to the left of the id row.
Finally to make the “id” row auto-increment we need to setup the table Column Properties.
Scroll to you find Identity Specification and click the arrow to the left of it to expand the options.
Then click the down arrow on (Is Identity) and change to Yes.Now the table hasn’t been saved or named yet. To do that click on the double-disk icon to save all.
This will bring up the option to name your table. I am naming mine FormData for a different instruction set. After entering the your table name, click ok.
Now you may need to click the refresh icon on the Object Explorer to see the added table.
Conclusion
As a new user, you should have the basic setup to create a local docker container with a modified Windows server setup. When the container is running in docker, Microsoft SQL Server Management Studio is used to connect to the windows server. Then DB is created with a table that has an auto-incrementing primary key id row.
There is obviously a lot more setup that could be done but I wanted to get someone new to these specific tools, like me, the basic setup to be done. Then most should be able to figure out how to look up and change things to what they would need.
Настройка MS SQL Express для доступа из локальной сети
В процессе разворачивания все того же VMware View, потребовалась база данных под управлением СУБД MS SQL, или Oracle для хранения событий.
В этой же изолированной тестовой сети был сервер VMware vCenter, который сам по себе содержит MS SQL 2005 Express Edition, поэтому, было решено использовать его и для нужд View Connection Server.
Ну вроде бы все просто: создал базу, создал пользователя, вбил айпишник и радуйся….но мне пришлось все-таки немного потанцевать с бубном, т.к. View напрочь отказывался принимать мой сервер.
Перепроверил все права доступа, пароли, файерволлы и т.п. — все гуд…через ODBC подключается и работает отлично, а View Connection Server — посылает лесом.
Проблема, как оказалось, в конфигурации портов MS SQL Server. Об этом мне сказал netstat.
Как я понял, по умолчанию, в MS SQL 2005 вместо статического порта 1433 указан диапазон динамических портов. Для чего это сделано, точно не скажу, но то, что для View такой вариант не подходит — я знаю точно.
Лечится это все дело быстро и безболезненно:
- запускаем SQL Server Configuration Manager
- открываем ветку SQL Server 2005 Network Configuration
- заходим в Protocols -> TCP/IP (статус должен быть — Enabled)
- правый клик по TCP/IP -> Properties
- переходим на вкладку IP Addresses и опускаемся в самый низ
- удаляем все что написано в поле TCP Dynamic Ports и оставляем поле пустым, а в TCP Port пишем 1433, что бы получилось вот так:

- перезапускаем службы MS SQL Server
- проверяем, что у нас получилось, с помощью команды netstat -an , среди всего прочего, там должно быть что-то такое:

После этого View перестал выпендриваться и скушал мою базу. Все.