SQL Server DBCC CHECKDB Overview
SQL Server database corruption can be a problem and can cause serious damage to a database. If you’re an experienced DBA then you probably have safeguards in place to detect this, but over the years I’ve seen hundreds of SQL Servers with no detection methods at all and this is a problem. There are a few ways to detect database corruption, but this tip will focus more on DBCC CHECKDB.
Solution
You may or may not have heard of DBCC (database console commands) statements. These statements are used to perform different operations in your database and can be broken down into four categories: Maintenance, Miscellaneous, Informational, and Validation. I use some of the DBCC statements on a daily basis, but none more than DBCC CHECKDB.
What is SQL Server DBCC CHECKDB
DBCC CHECKDB, from Microsoft MSDN Library, checks logical and physical integrity of all the objects in the specified database by performing the following operations:
- Runs DBCC CHECKALLOC on the database — Checks consistency of disk space allocation structures for a specified database.
- Runs DBCC CHECKTABLE on every table and view in the database — Checks the integrity of all the pages and structures that make up the table or indexed view.
- Runs DBCC CHECKCATALOG on the database — Checks for catalog consistency within the database.
- Validates the contents of every indexed view in the database.
- Validates link-level consistency between table metadata and file system directories and files when storing varbinary(max) data in the file system using FILESTREAM.
- Validates the Service Broker data in the database
If you’ve ever ran DBCC CHECKDB you know it takes some time for large databases. Now that you know all of the steps that are run, you can see why it takes time to complete.
How can SQL Server DBCC CHECKDB help me?
Data corruption is bad. It can cause all sorts of issues within the database that may include incorrect data results, failed SQL statements, and in some cases can take down the entire SQL instance. DBCC CHECKDB warns you of corruption so that you can fix it before (hopefully) it gets too bad.
How do I use SQL Server DBCC CHECKDB?
DBCC CHECKDB is pretty straightforward. There are a few options you can use with the statement and we’ll go over some of those in the next section, but the basic syntax looks like this:
Automate SQL Server DBCC CHECKDB
Obviously, you don’t want to log in every morning and run this statement on each database, so you can automate this process using a few different methods:
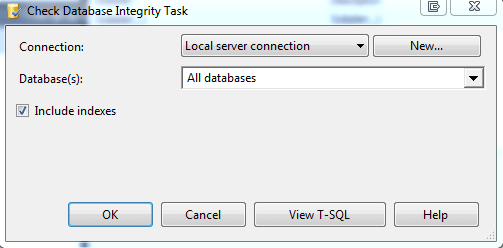
- SQL Server Maintenance plans — Maintenance plans are part of SQL Server out of the box (unless you’re running Express Edition). I don’t like using maintenance plans for the most part, but I don’t mind using them for this type of task. In the Maintenance Plan toolbox you’ll need to use the Check Database Integrity task. The only configurable option is to include indexes so it’s not really user friendly, but in some cases this is all you need. Again, we’ll talk about other options in the next section.
- Custom scripts — Custom scripts are usually what I use and offer the best flexibility as far as adding the options you want. My go-to scripts are already created and free to use from Ola Hallengren. He’s done a wonderful job of creating these and sharing them to the world. Thanks Ola!
- Check out the scripts on MSSQLTips.com:
- Perform Maintenance with SQL Server Databases in Full Recovery mode
- SQL Server Database Maintenance Plans and Backup File Management
- Performing SQL Server Maintenance with No Maintenance Window
SQL Server DBCC CHECKDB Options
There are a few options to use with DBCC CHECKDB and I’ll go over a few of the more popular ones here:
- NOINDEX — Specifies that intensive checks of nonclustered indexes for user tables should not be performed. This decreases the overall execution time. NOINDEX does not affect system tables because integrity checks are always performed on system table indexes.
- NO_INFOMSGS — Suppresses all information messages.
- PHYSICAL_ONLY — Limits the checking to the integrity of the physical structure of the page and record headers and the allocation consistency of the database. This check is designed to provide a small overhead check of the physical consistency of the database, but it can also detect torn pages, checksum failures, and common hardware failures that can compromise a user’s data.
- TABLOCK — Causes DBCC CHECKDB to obtain locks instead of using an internal database snapshot. This includes a short-term exclusive (X) lock on the database. TABLOCK will cause DBCC CHECKDB to run faster on a database under heavy load, but decreases the concurrency available on the database while DBCC CHECKDB is running.
- DATA_PURITY — Causes DBCC CHECKDB to check the database for column values that are not valid or out-of-range. For example, DBCC CHECKDB detects columns with date and time values that are larger than or less than the acceptable range for the datetime data type; or decimal or approximate-numeric data type columns with scale or precision values that are not valid.
We’ll go over some of the REPAIR options in a different section below.
How often should I check for SQL Server corruption?
Every minute of every day. Just kidding.
If you have a daily maintenance window, it would be nice to check for data corruption daily. The faster you can catch it, the less harm it may do. I’ve noticed a lot of people run this on the weekend especially with larger databases. There’s no right or wrong with this, just make sure you have it scheduled periodically.
Do I have to run DBCC CHECKDB in my Production environment?
No, well Yes. Sort of.
To check for data corruption it does no good to run DBCC CHECKDB on your test environment..UNLESS you restore a copy of your production environment to test and then run it. BRILLIANT!
You may be questioning if some HA options are suitable such as AlwaysOn, Log Shipping, etc.? No, you need to check your production *live* environment.
Now that DBCC CHECKDB is configured and running, what am I looking for?
Congratulations! You have DBCC CHECKDB automated and running, but now what? If you have a SQL Server Agent Job setup then make sure you setup Database Mail, an operator, and a notification on the job. If the job succeeds then carry on with your beautiful day. If the job fails, then we have some work to do.
You may see an error like this:
First, don’t panic. Second, check backups. DBCC CHECKDB errors usually tell you what needs to be done.
For the first error a DBCC UPDATEUSAGE will correct the page and row count inaccuracies in the catalog views. Pretty harmless.
The second error reports data corruption. The error mentions using repair_allow_data_loss as the minimum repair level. This means you can run the statement with this argument, but you may lose data. This is why I always recommend restoring to a backup if you can. You need to make sure the backup doesn’t contain corrupted data and you want to make sure there is no data loss.
How to repair a SQL Server database
If you don’t have a backup, we may need to use DBCC CHECKDB with a repair option. Here’s are the repair options that are available to use. These may or may not work and need to be used as a last resort:
- REPAIR_ALLOW_DATA_LOSS — Tries to repair all reported errors. These repairs can cause some data loss.
- REPAIR_REBUILD — Performs repairs that have no possibility of data loss. This can include quick repairs, such as repairing missing rows in non-clustered indexes, and more time-consuming repairs, such as rebuilding an index.
Like I said above, it’s very important to have up to date backups to recover from corruption. Corruption doesn’t care how much data you have, what version of SQL you are running, or how fancy your datacenter is.
I’m feeling pretty good about this, but what else can I use to protect my SQL instances?
DBCC CHECKDB should be ran on every SQL instance you have, but there are a couple of other ways that may help detect/prevent data corruption.
How to check and repair MySQL Databases

You will need know how to check and repair MySQL databases or tables when you troubleshoot your website as they may have become corrupt. The mysqlcheck command is a maintenance tool that can be used to check, repair, analyze and optimize multiple tables from the command line. One of the best features of using mysqlcheck is that you don’t need to stop the MySQL service to perform the database maintenance.
In this tutorial, we will show you how to check/repair MySQL databases and tables.
Note : It is recommended to take a backup of your databases before performing a database repair operation.
Basic Syntax of mysqlcheck
A basic syntax of mysqlcheck is shown below:
mysqlcheck [OPTION] DATABASENAME TABLENAME -u root -p
A brief explanation of each option that you can use with mysqlcheck as shown below:
-c : Used to check a table for errors
-C : Used to check a tables that are changed after last week.
-a : Used to analyze tables.
-A : Used to check all databases.
-g : Used to check tables for version-dependent changes.
-B, –databases : Used to specify multiple databases.
-F : Used to check tables that are not closed properly.
–fix-db-names : Used to fix the database name.
–fix-table-names : Used to fix the table name.
–e : Used to perform an extended check.
-r : Used to repair corrupt table.
Check a Specific Table in a MySQL Database
In some cases, you need to check a specific table in a specific database. In that case, you can use the following syntax:
mysqlcheck -c databasename tablename -u root -p
For example, checks authors table in books database by running the following command:
mysqlcheck -c books authors -u root -p
You should get the following output:

Check All Tables in a MySQL Database
If you want to check all the tables in a specific database use the following syntax:
mysqlcheck -c databasename -u root -p
For example, check all tables in books database by running the following command:
mysqlcheck -c books -u root -p
You should get the following output:

Check and Optimize All Tables and All MySQL Databases
You can check all tables and all databases using the following command:
mysqlcheck -c -u root -p —all-databases
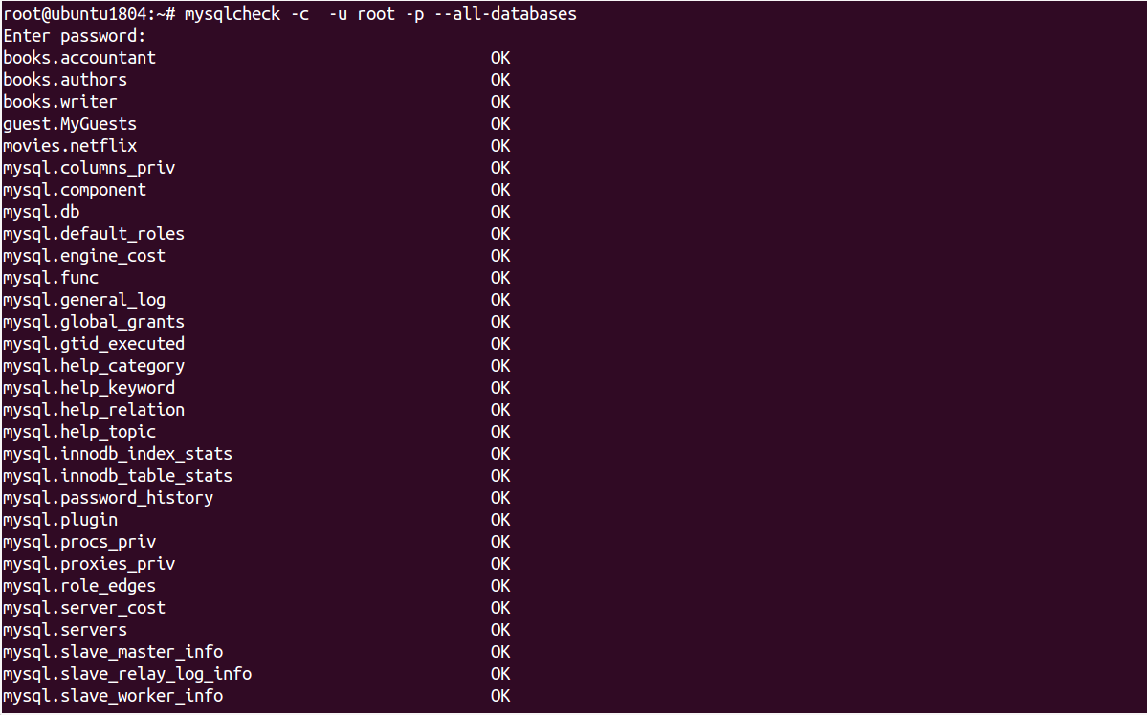
You can optimize all tables and all databases using the following command:
mysqlcheck -o root -p —all-databases
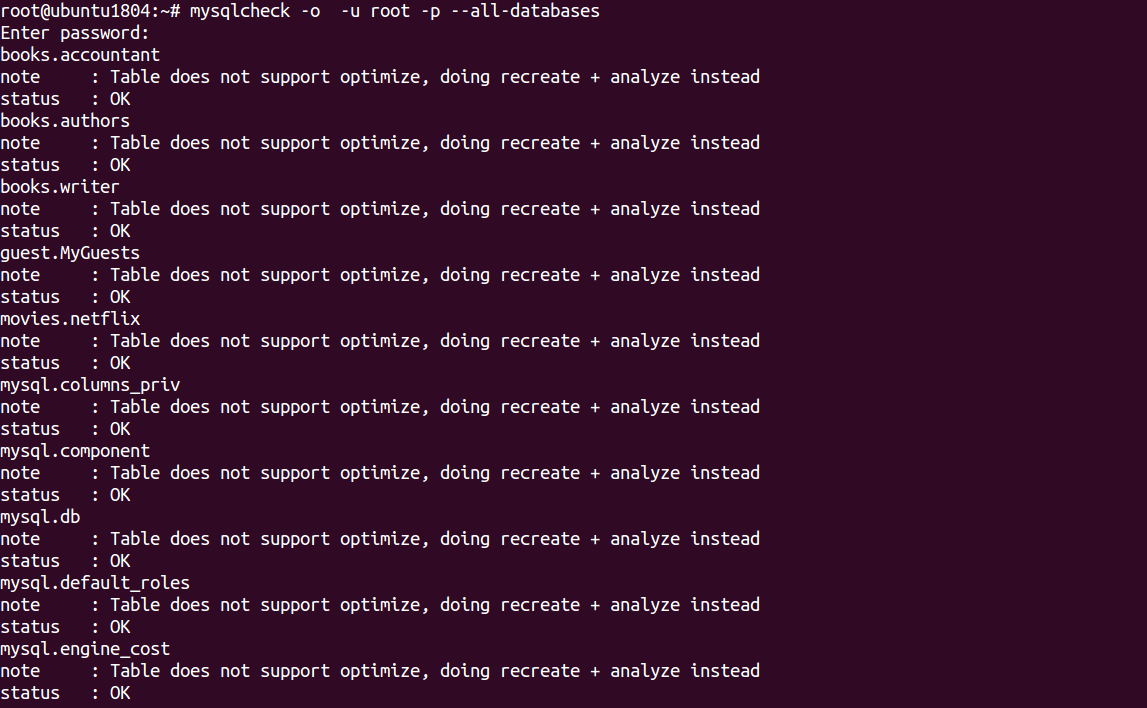
In the above output, you should see “Table does not support optimize” which means the InnoDB table that doesn’t support this option.
Repair MySQL Databases
To repair accountant tables in books database run the following command:
mysqlcheck -r books accountant -u root -p

To repair all tables in both books and movies database run the following command:
mysqlcheck -r —databases books movies -u root -p

To check and repair all tables in all databases run the following command:
mysqlcheck —auto-repair —all-databases -u root -p
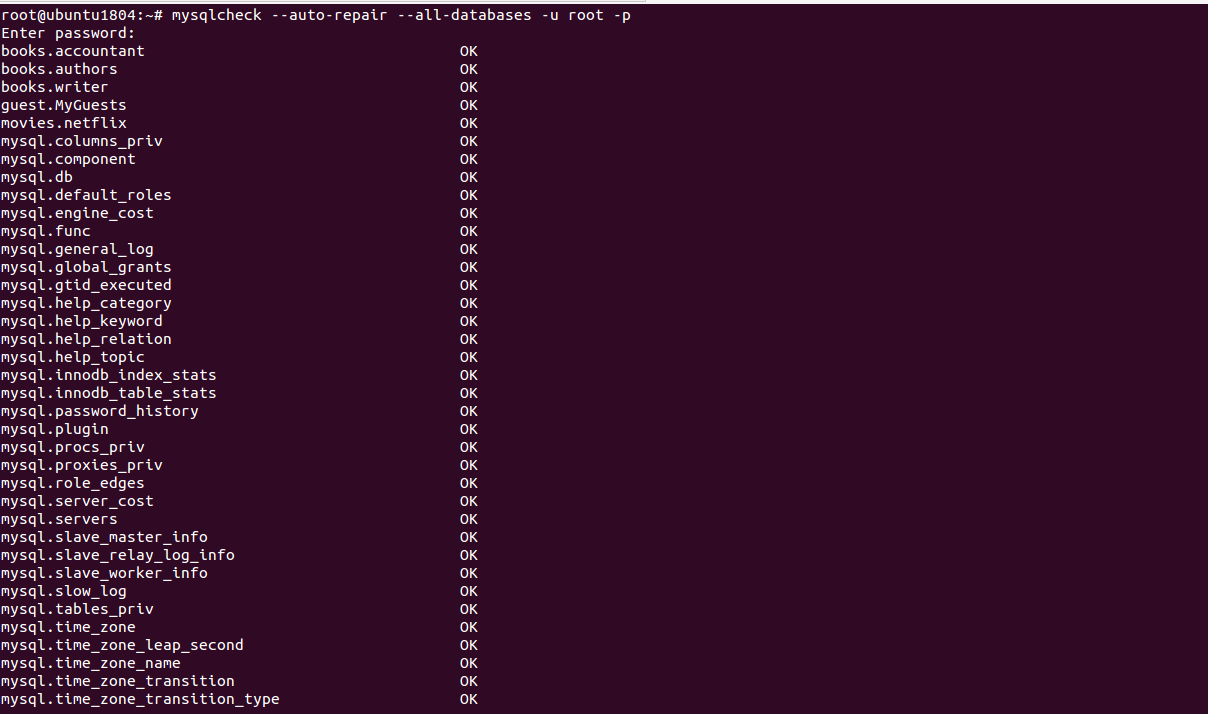
Important note: InnoDB storage engine does not support repair. So you will need to change MySQL storage engine from InnoDB to MyISAM.
Check, Repair and Optimize MySQL Database with PHPMyAdmin
You can also check, repair and optimize tables and databases using the PHPMyAdmin web interface.
You can follow the below steps to check, repair and optimize tables and databases:
1- Open the phpMyAdmin tool through a web browser as shown below:
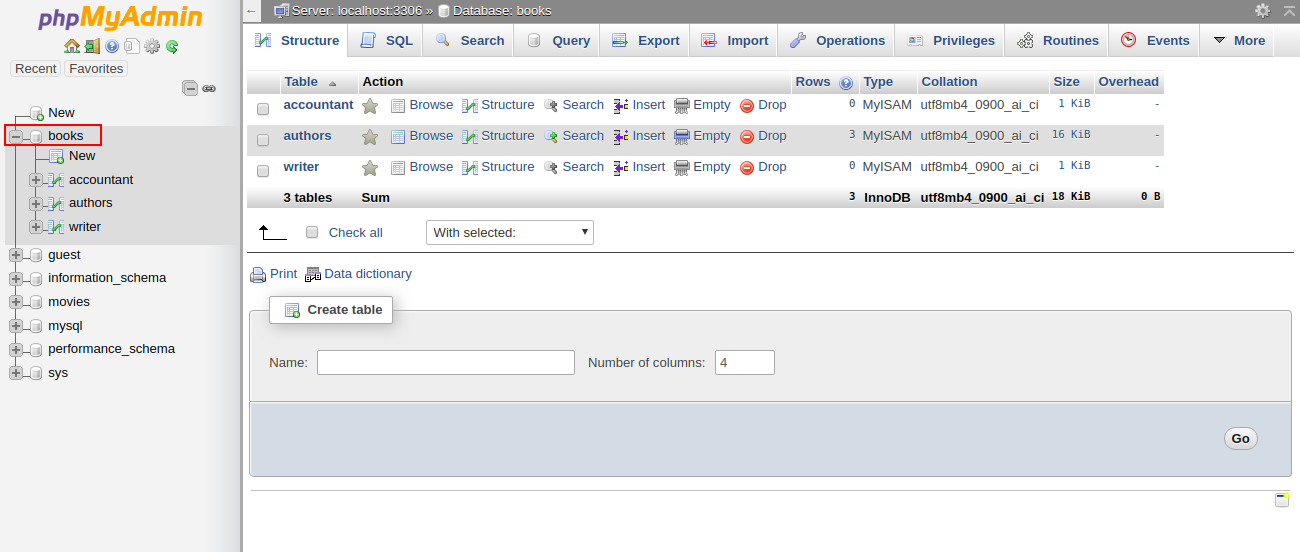
2- Select the affected database in the left pane. You should see all the tables in the right pane in the following screen:
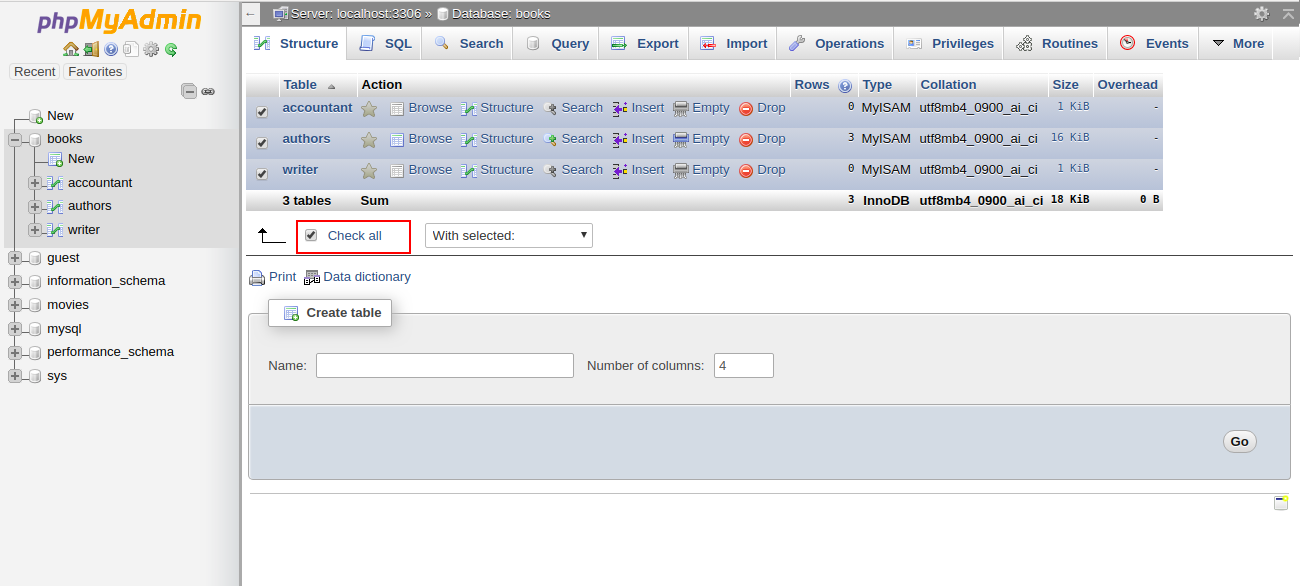
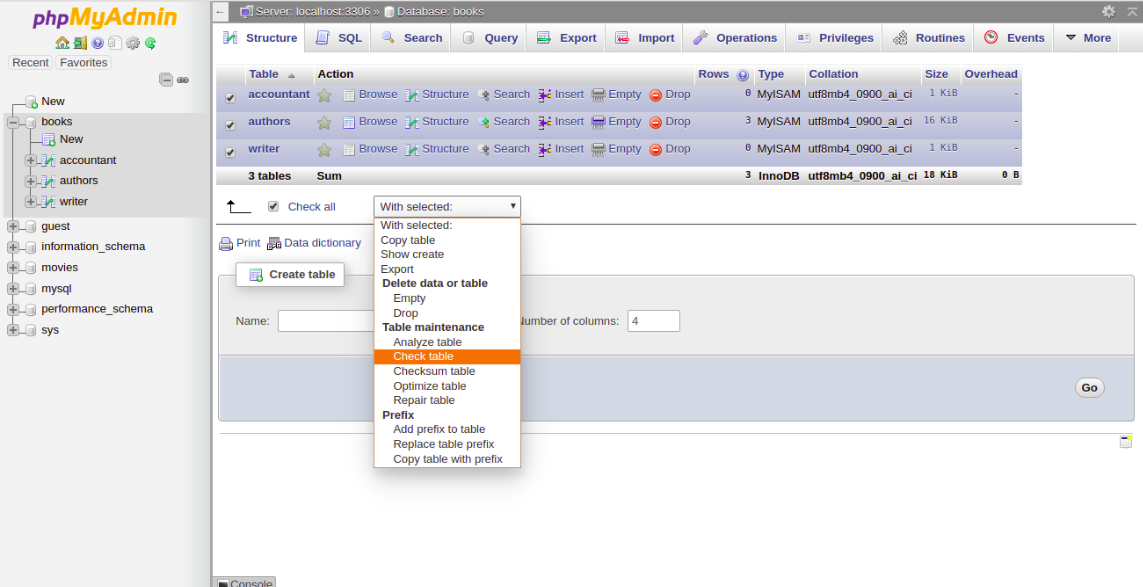
3- Click Check All to select all the tables. At the bottom of the window, choose Check Table from the menu. You should see a summary of the tables in the following screen:
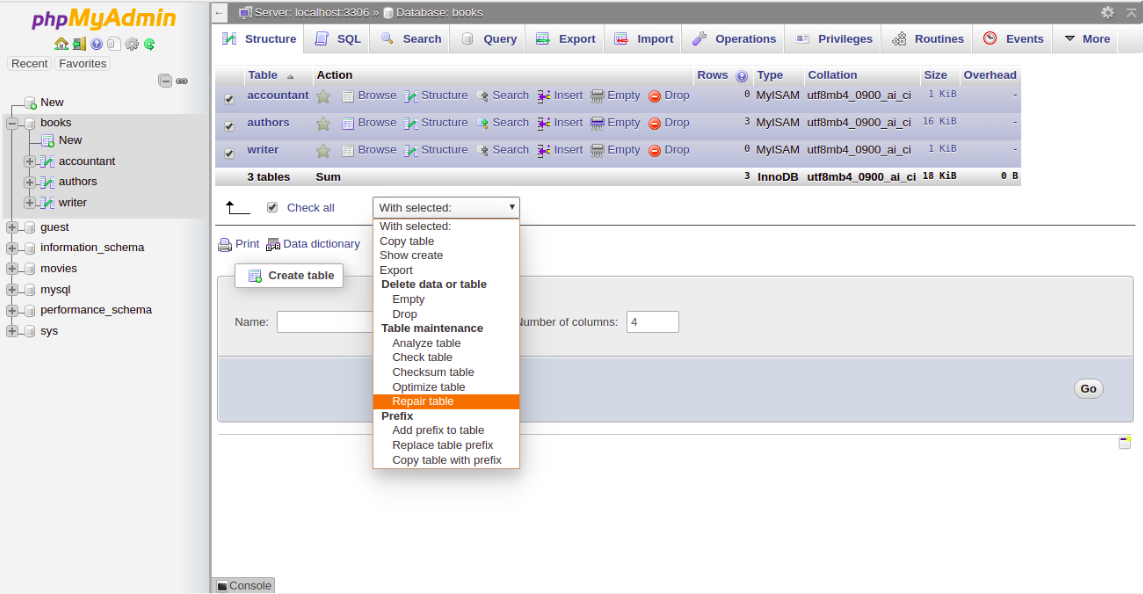
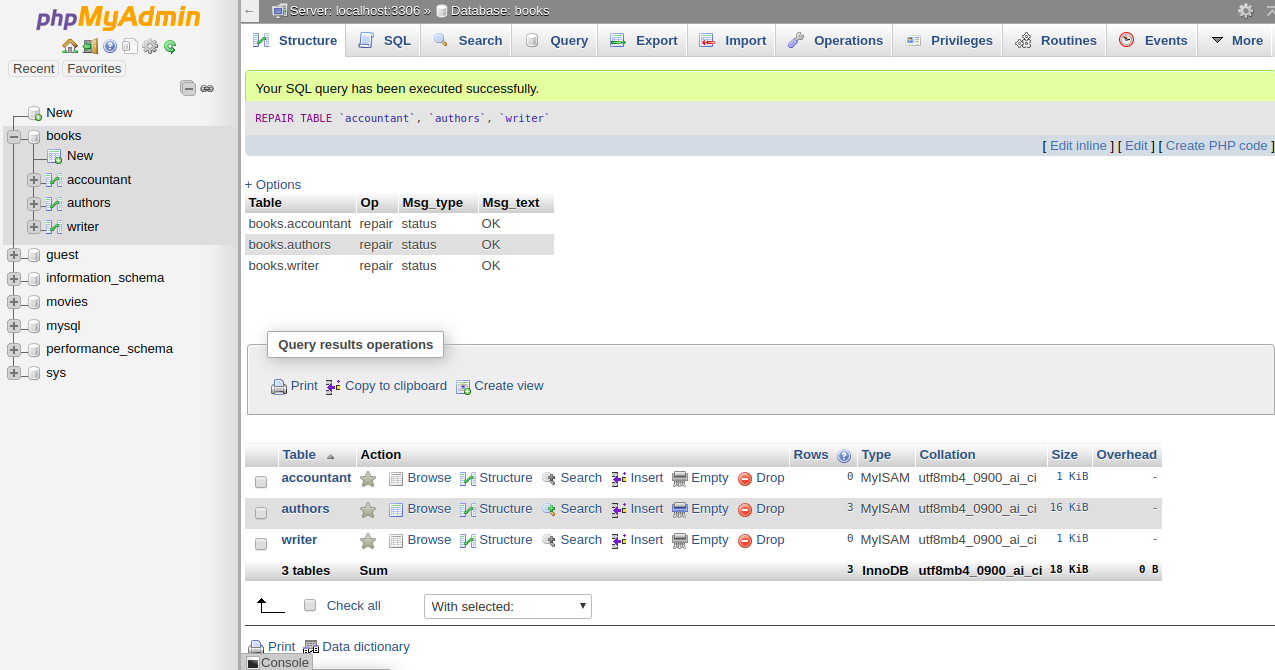
4- To repair the table, Check All to select all the tables and choose Repair Table from the menu. You should see the following page:
Then you should get a confirmation that the command been executed successfully:
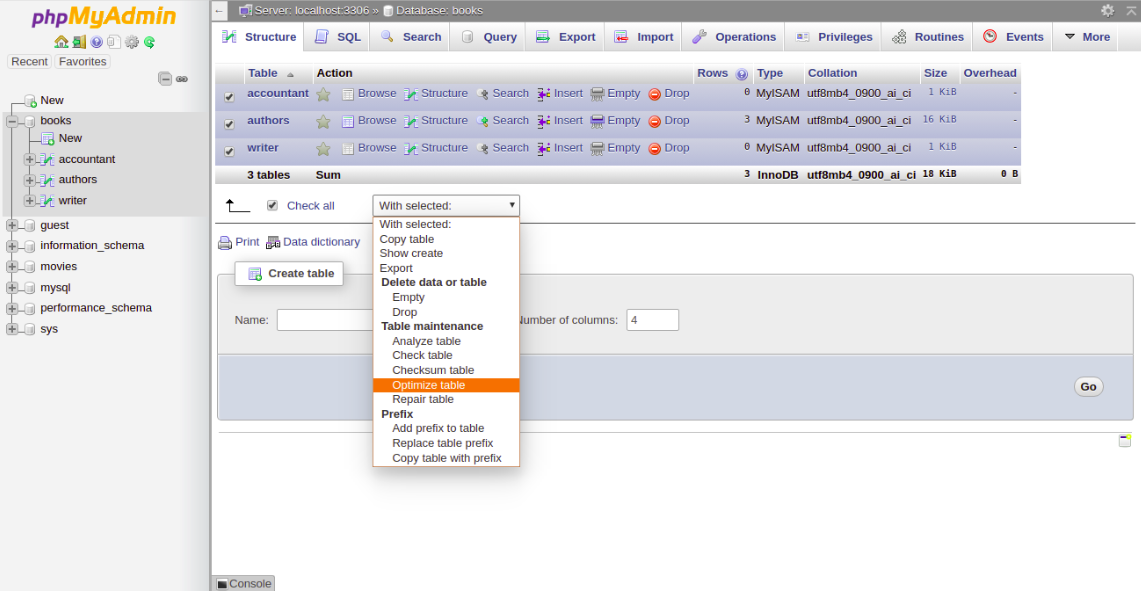
5- To optimize the table, Check All to select all the tables and choose Optimize Table from the menu. You should see the following page:
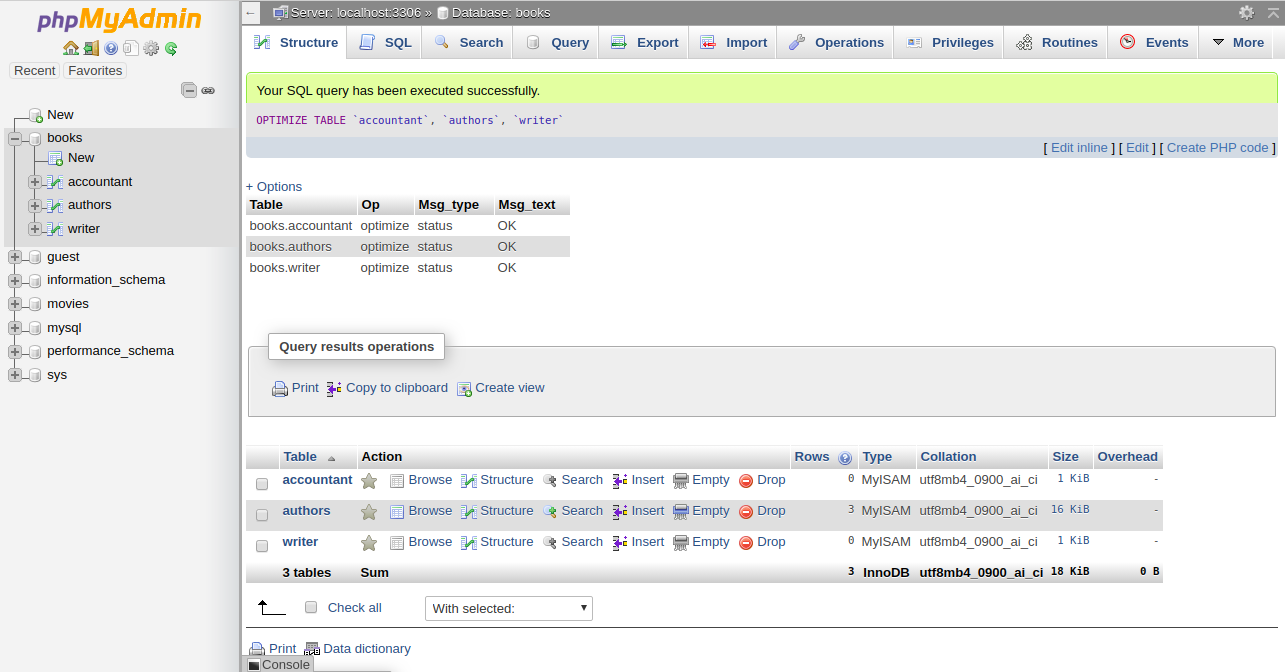
Then you should get a confirmation that the command been executed successfully:
Conclusion
In the above tutorial, we learned how to check and repair MySQL table using mysqlcheck command-line tool. We also learned how to check, repair and optimize database tables using the PHPMyAdmin web interface. I hope you can now easily fix your corrupted tables using this tool.
alt=»Creative Commons License» width=»» />
This work is licensed under a Creative Commons Attribution-NonCommercial 4.0 International LicenseHow to Use DBCC CHECKDB Command for SQL Database Repair?

Summary: Database Console Command (DBCC) CHECKDB is used to identify errors in the SQL Server database. The DBCC CHECKDB comes with three repair options to fix database-related errors. This article outlines how to use DBCC CHECKDB command to repair SQL database. Also, it will discuss about a specialized MS SQL repair software you can use when DBCC CHECKDB fails to repair the database.

DBCC CHECKDB is used to check the physical and logical integrity of database objects, index relationships, and other structural checks. The failure of any of these checks will report consistency errors as part of the database console command.
The best method to repair errors in the database, reported by DBCC CHECKDB, is to run the last known good backup as recommended by Microsoft. However, if the backup is not available or is corrupted, you can try accessing the database in Emergency state.
The Emergency state allows accessing a database marked as suspect. It also allows running DBCC CHECKDB repair options to resolve database corruption. Once the database becomes accessible, repair it using the minimum level of repair option.
Note: Repair operations exclude any constraints applied to or between tables. So, if any of the table has one or more constraints, you must run DBCC CHECKCONSTRAINTS following a repair operation.
How to Use DBCC CHECKDB Command?
Before using DBCC CHECKDB, let’s look at its syntax.
Syntax:
DBCC CHECKDB
[ ( db_name | db_id | 0
[ , NOINDEX
| , < REPAIR_ALLOW_DATA_LOSS | REPAIR_FAST | REPAIR_REBUILD >]
) ]
[ WITH
<
[ ALL_ERRORMSGS ]
[ , EXTENDED_LOGICAL_CHECKS ]
[ , NO_INFOMSGS ]
[ , TABLOCK ]
[ , ESTIMATEONLY ]
[ , < PHYSICAL_ONLY | DATA_PURITY >]
[ , MAXDOP = number_of_processors ]
>
]
]There are a few options you can use to perform database consistency checks using DBCC CHECKDB. These options are as follows:
- database_name | database_id | 0: Specifies the name or ID of the database against which you need to run integrity checks. If the ‘database_name’ or ‘id’ is not specified and ‘0’ is specified, the current database will be used by default.
- NOINDEX: This argument performs only logical checks to reduce the total execution time. Also, it does not include non-clustered indexes in the checks.
- REPAIR_ALLOW_DATA_LOSS | REPAIR_FAST | REPAIR_REBUILD: To repair a database, you need to run the DBCC CHECKDB command with any of these repair options:
- REPAIR_ALLOW_DATA_LOSS: Use this repair option as a last resort to repair a SQL database, as it can lead to data loss.
- REPAIR_FAST:This repair option does not perform any repair actions. It helps maintain syntax for backward compatibility.
- REPAIR_REBUILD:The REPAIR_REBUILD option helps repair the database without any data loss. It can be used to repair missing rows in nonclustered indexes and for rebuilding an index.
Prerequisites to Run DBCC CHECKDB
You must ensure that your system meets the following prerequisites before you run DBCC CHECKDB to perform consistency checks on a database or repair it.
- SQL Server Management Studio (SSMS) must be installed on your machine.
- The user must haveAdministrator privileges.
Steps to Use DBCC CHECKDB for Repairing SQL Database
Open SSMS and follow these steps to repair SQL database by using DBCC CHECKDB:
Note: In below-mentioned steps, we will be using database_name as Dbtesting. Make sure to replace DBtesting with the name of your database.
Step 1: Set Database to Emergency Mode
Change the database status to EMERGENCY mode, which provides a read-only access to the administrator. To put the database in EMERGENCY mode, run the following query in SSMS:

ALTER DATABASE [Dbtesting] SET EMERGENCY
Step 2: Check for Corruption Errors
Once the administrator is able to access the database, execute the following DBCC CHECKDB command to analyze corruption errors in the database:

DBCC CHECKDB (Dbtesting)
If DBCC CHECKDB detects any errors in the database, it will recommend appropriate repair options to fix the issue.
Step 3: Set SQL Server Database to SINGLE_USER Mode
Before using the DBCC CHECKDB repair options, put the corrupt database in SINGLE_USER mode to prevent other users from modifying the data during the repair process. To set SQL database mode to SINGLE_USER, follow these methods:
Method 1: Using Graphical User Interface (GUI)
Open SSMS and perform these steps to set the database to SINGLE_USER mode:
- Right-click the database you want to repair, and then click Properties.

click Properties
- In the Database Properties window, click Options.

Database Properties window
- Click the Restrict Access dropdown box under the State tab, select SINGLE_USER option, and then click OK.

SINGLE_USER option
Method 2: Using Transact-SQL (T-SQL) Commands
You can also set the database to SINGLE_USER mode, by running the following T-SQL query in SSMS:

ALTER DATABASE Dbtesting SET SINGLE_USER
Step 4: Repair the Database
Once you have changed the database mode to SINGLE_USER, run DBCC CHECKDB with the REPAIR_ALLOW_DATA_LOSS repair option to repair SQL server database.

REPAIR_ALLOW_DATA_LOSS
Note: While the REPAIR_ALLOW_DATA_LOSS repair option helps in repairing all reported errors in the SQL server database, it is not the best option for repairing database corruption. This repair option causes data loss. In fact, Microsoft recommends using the REPAIR_ALLOW_DATA_LOSS option as a last resort when you cannot restore a database from the backup. If you do not have a backup and cannot risk losing data, use a specialized MS SQL repair software to repair the database without any loss in database integrity.
Step 5: Set Database Back to MULTI_USER Mode
After successfully repairing the database, set the database to MULTI_USER mode by executing the following command:

ALTER DATABASE Dbtesting SET MULTI_USER
What To Do When DBCC CHECKDB Fails?
Running the DBCC CHECKDB REPAIR_ALLOW_DATA_LOSS command might require deleting some database pages, resulting in loss of data. Also, DBCC CHECKDB commands might fail and return an error when dealing with severely corrupt SQL database files.
In such a case, use a specialized MS SQL repair software, such as Stellar Repair for MS SQL. The software repairs severely corrupt MS SQL database and restores all its components, while maintaining database integrity. The SQL recovery software helps reinstate access to the database with minimal manual efforts and time.
Key Features:
- Repairs both MDF and NDF database files
- Recovers all database components, including tables, keys, indexes, stored procedures, etc.
- Allows recovery of deleted records
- Recovers SQL tables with PAGE and ROW compression
- Supports selective recovery of database objects
- Previews recoverable database objects
To know the complete working process of the software, watch the video
Conclusion
A corrupt database could lead to unnecessary downtime and data loss. To overcome database-related errors, restore the database from the most recent backup. If current database backup does not exist or if the backup itself is corrupt, you can use DBCC CHECKDB ‘REPAIR_ALLOW_DATA_LOSS’ repair option to fix the database. But, this repair option involves risk of data loss. Also, DBCC CHECKDB might fail to fix the issue.
Use Stellar Repair for SQL software to repair MS SQL database and recover all its components with precision, maintaining database structure and integrity of database objects.
About The Author
Priyanka is a technology expert working for key technology domains that revolve around Data Recovery and related software’s. She got expertise on related subjects like SQL Database, Access Database, QuickBooks, and Microsoft Excel. Loves to write on different technology and data recovery subjects on regular basis. Technology freak who always found exploring neo-tech subjects, when not writing, research is something that keeps her going in life.
DBCC CheckDB for Database Consistency

Being day four of the DBCC Command month at SteveStedman.com, today’s featured DBCC Command is DBCC CHECKDB. For more info on DBCC see the Database Corruption Challenge.
DBCC CheckDB Description:
DBCC CHECKDB is used to check the physical integrity of the entire database. DBCC CHECKDB is used to detect corruption in the database, and should be run regularly. This is accomplished by running several of the other DBCC commands, then doing some extra verification.
- Runs DBCC CHECKALLOC.
- Runs for every table DBCC CHECKTABLE.
- Runs DBCC CHECKCATALOG.
- Validates the Service Broker data in the database.
- Validates indexed views.
DBCC CHECKDB Syntax:
DBCC CheckDB Example:
The following example shows how to use DBCC CheckDB.
For instance to run this for the Database called DBHealthHistory it would look like this:
When run the above query should produce the following results indicating that everything is fine:
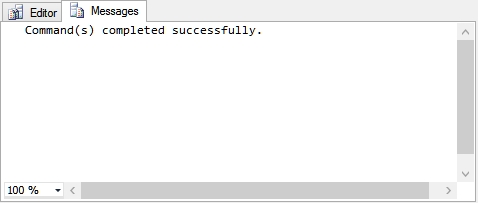
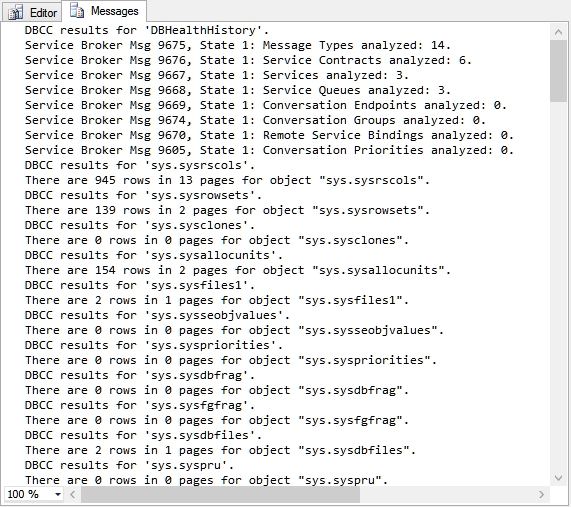
If the NO_INFOMSGS was left off you would get the following:
DBCC CheckDB Example with Corruption:
For the purpose of the demo of have created a database called dbcc_corruption, create a table called departments with 4 rows, and then modified the database to corrupt one of the rows. To start with the table looked like the following:
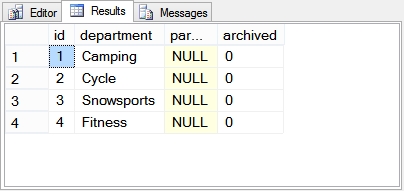
Then I messed with DBCC WritePage to overwrite one of the columns with too much data. The causing of corruption is out of the scope of this blog entry. Then the table ends up looking like this:

In addition to the output above, the following error messages are thrown to the messages window.
Next I run DBCC CheckDB() to see how the database looks.
Which produces the following output:
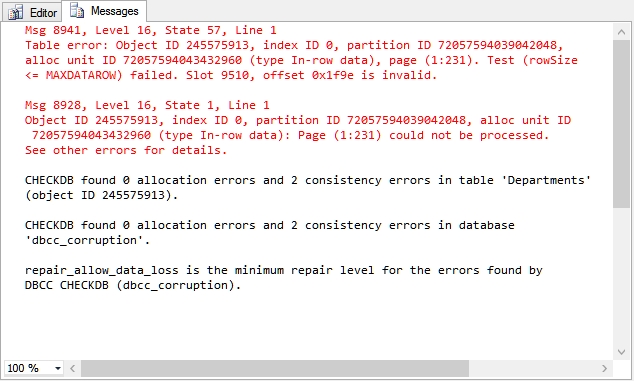
Now we need to fix it, the following options are available:
- Try DBCC CheckTable(Departments, REPAIR_REBUILD);
- Try DBCC CheckTable(Departments, REPAIR_ALLOW_DATA_LOSS);
- Drop the Departments table, restore from backup to another instance, and copy the table from that instance.
- Copy what we can out of the table, repair it, and put the values back in.
First we try to repair rebuild the table, but it is unsuccessful. Note that the database must be put into single user mode before attempting to rebuild:
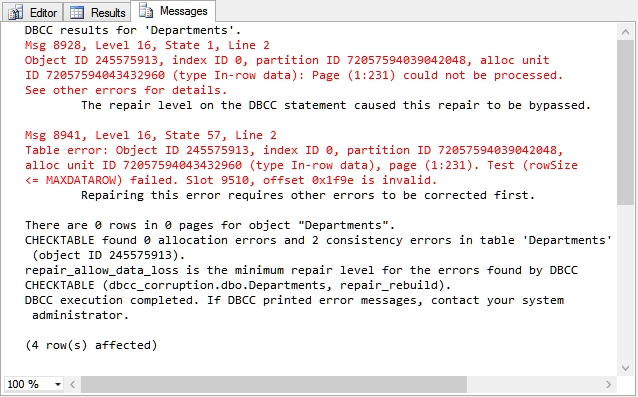

As shown above, the repair didn’t occur.
Then we can try the REPAIR_ALLOW_DATA_LOSS option, in this case it repairs the table, and the table ends up empty. All Data is lost.
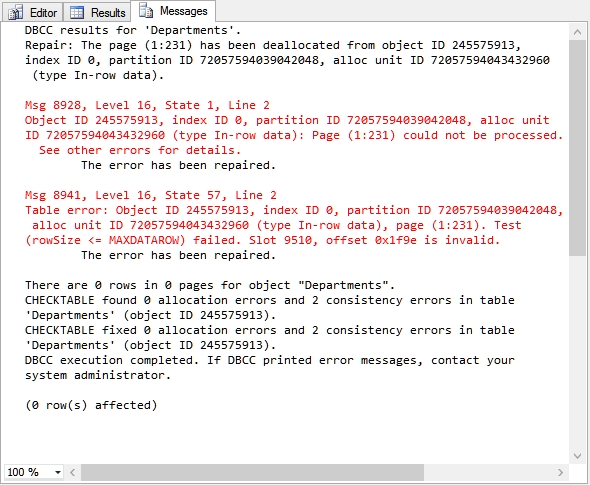
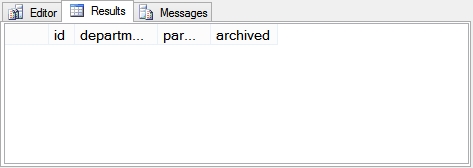
At this point the table has been fixed, but all of the rows have been lost. Not a very good solution.
Lets back up and try this again, but first we copy what we can out of the table into another table temporarily.
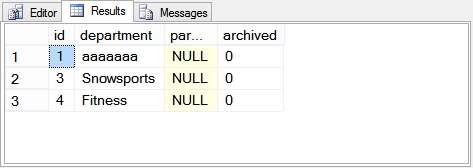
At this point we end up with 3 of our original 4 rows, the only row missing is the one row that had been corrupted in the example.
Depending on your backup strategy, and the frequency of change in the corrupt table, this option to repair may be your best choice, or an alternative would be to restore from backup to another instance, and find the missing rows and bring the missing row into the table.
What If DBCC CheckDB produces errors:
The best option is to restore from backup. This may not always be possible, sometimes you can restore from backup to a secondary server, drop the items that are corrupt on the primary database and move the backed up tables to the primary database. It really depends on what is corrupt. If you have a corrupt index, you may be able to just drop the index, and recreate it.
Scheduling a Check Integrity Task:
You can easily schedule a Check Integrity task with the Maintenance Plan Wizard. The Check Integrity task will run DBCC CheckDB for you on a regular schedule.
Step 1. Start the Maintenance plan wizard, but right clicking on the Maintenance Plans section in the Object Explorer:
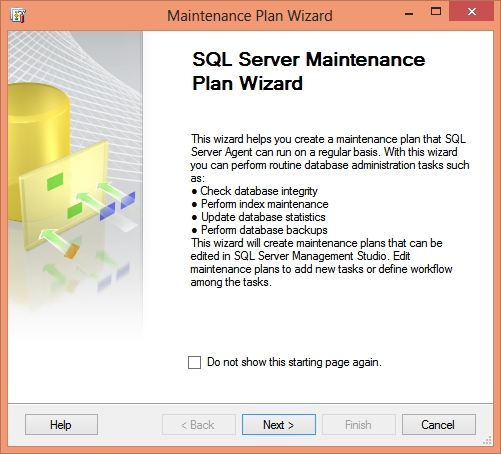
Step 2: Name your maintenance plan. Here I have set the name as “DBCC CheckDB”, but you can name it anything you wish. You can add a description also.

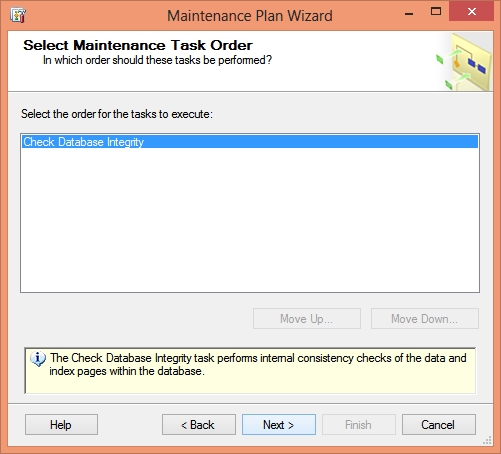
Step 3: Set order, but there is only one task, so the order doesn’t matter.
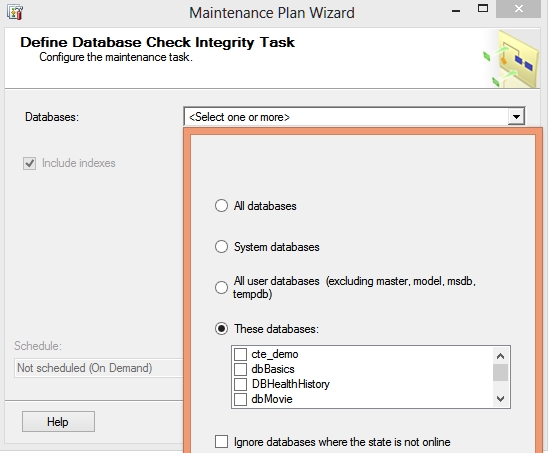
Step 4: Choose the database you wish to check regularly.
Step 4: view the choices made in the wizard, and then click Finish. Your maintenance plan will then be created and run.

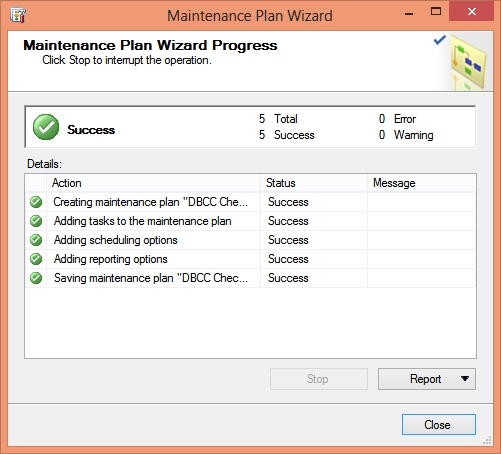
Step 4: Watch the output as your maintenance plan is run. It may take a while depending on the size of the database.
If you need to modify our maintenance plan you can get to it in the object explorer. Use this page to set the scheduled time for the maintenance plan to be run.
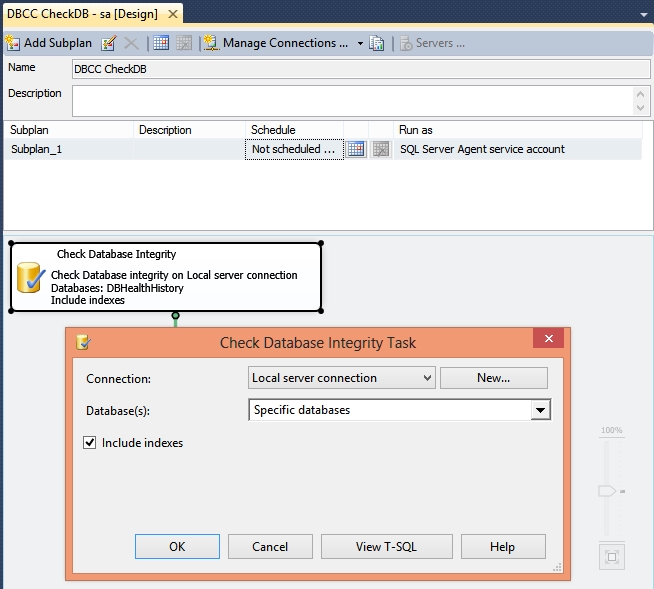
Quick and easy, 4 steps to get the maintenance plan scheduled.
Exclusively Locked
You will get the following error on SQL Server 2005 if one other connection is using the database against which you run the DBCC CHECK command or t
- he database contains at least one file group that is marked as read-only.
“ The database could not be exclusively locked to perform the operation ”
DBCC CheckDB Notes:
Running DBCC CheckDB regularly will not prevent corruption, however it will give you an indication when corruption occurs and increase the likelihood that you will be able to recover.
DBCC CheckAlloc along with DBCC CheckTable for every object in the database are called when DBCC CheckDB is run. Running DBCC CheckAlloc or DBCC CheckTable would be redundant after running DBCC CheckDB.