База знаний
Подключение к MacOS по протоколу удалённого доступа RDP
В данной статье будет рассказано как подключиться к операционной системе Mac по протоколу RDP. Как вы все наверняка знаете, операционная система Mac имеет встроенный VNC сервер, к которому можно подключаться через VNC клиента. Но я подумал, почему-бы не использовать стандартный RDP client в Microsoft Windows для подключения к операционной системе Mac? Немного погуглив, я обнаружил, что есть бесплатный RDP сервер на Mac и называется он xRDP. Данный сервер легко устанавливается на ОС Linux/Unix. Об установке и настройке этого сервера я и хотел рассказать.
Установку я производил на свой Macbook с ОС Mac Big Sur. Для начала нам необходимо установить инструменты командной строки Xcode. Для этого выполняем команду в ПО терминала
xcode-select —install
Далее установим менеджер сторонних пакетов Homebrew командой
$ /usr/bin/ruby -e «$(curl -fsSL https://raw.githubusercontent.com/Homebrew/install/master/install)»
Установим библиотеку OpenSSL командой
brew install openssl
После установки OpenSSL, присвоим переменной CPPFLAGS путь к библиотеке, чтобы компилятор смог данную библиотеку найти. Выполним команду
export CPPFLAGS=»-I/usr/local/opt/openssl/include»
Установим необходимые пакеты командами
brew install automake
brew install libtool
brew install pkgconfig
brew install nasm
Установим XQuartz – программное средство системы X Window System.Необходимо установить версию 2.7.11. Скачать программу можно с официального сайта https://www.xquartz.org/
После установки необходимо перезайти в систему.
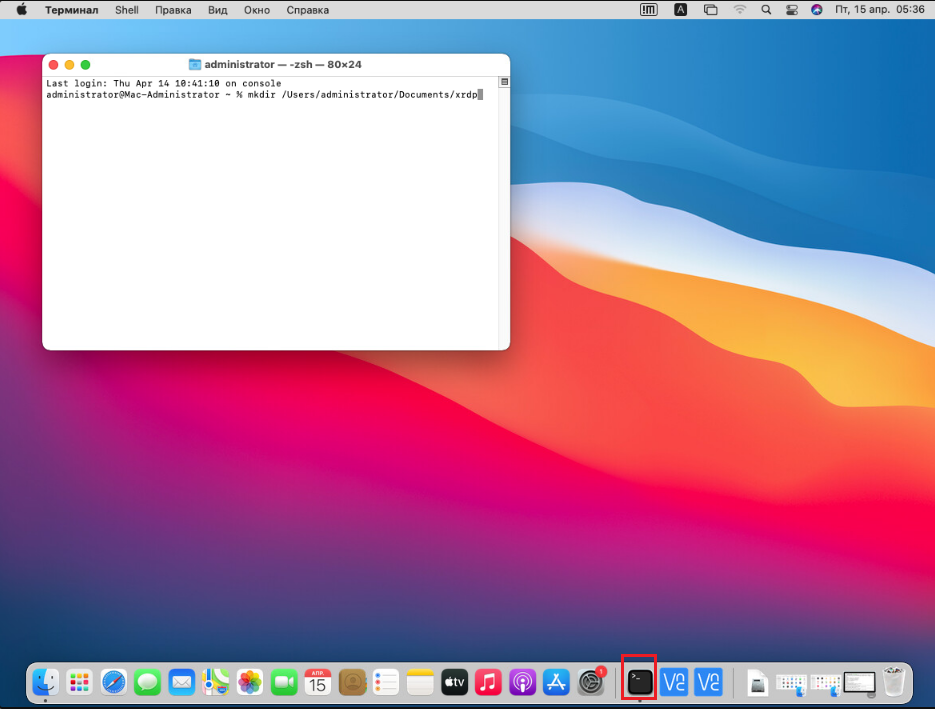
Для удобства работы откроем терминал и создадим отдельную папку как на рисунке 1 ниже:
mkdir /Users/administrator/Documents/xrdp/
Рис. 1
Теперь включим встроенный VNC сервер. Для этого перейдём в «Системные настройки» как на рисунке 2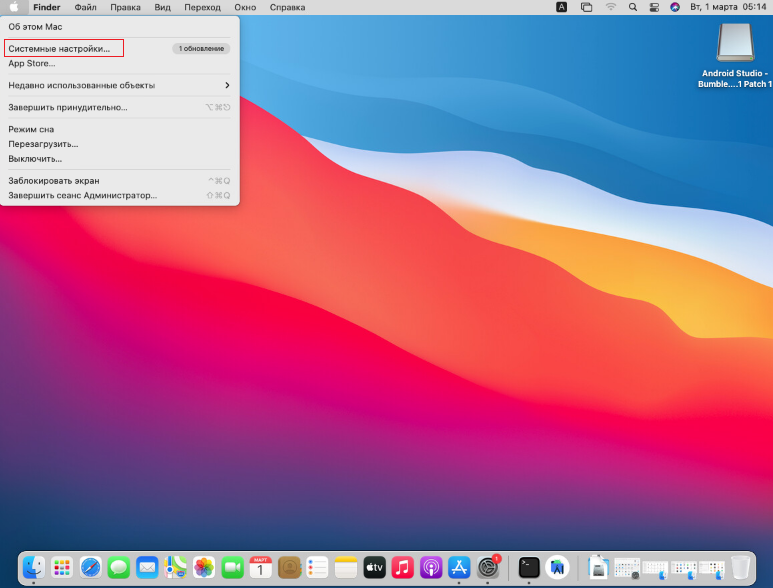
Рис.2
Далее выбираем «общий доступ» как на рисунке 3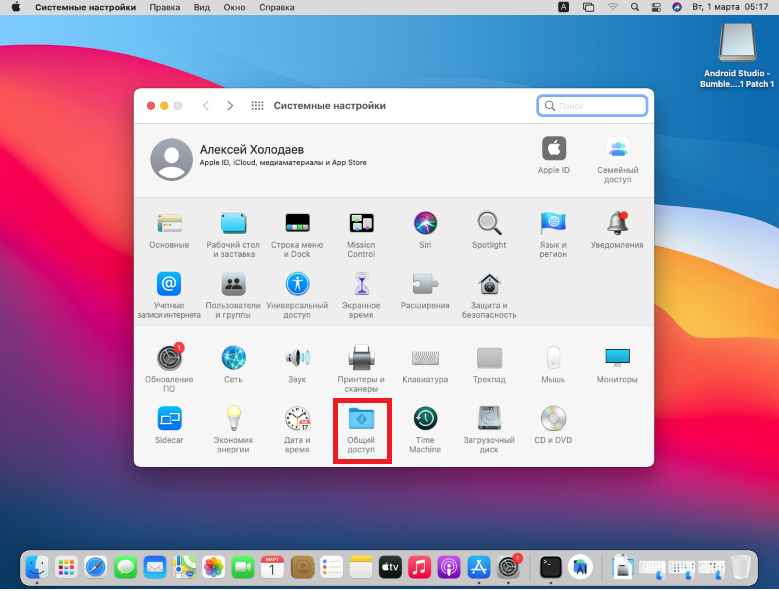
Рис.3
Включите функцию “Общий экран” и перейдите в настройки компьютера как на рисунке 4
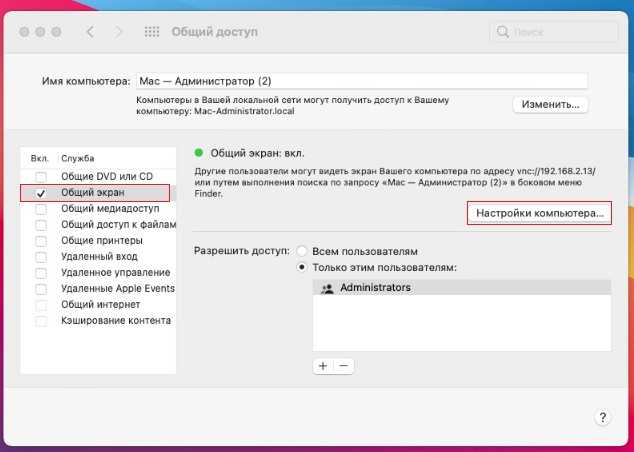
Рис. 4
Включите опцию “любой пользователь может запросить разрешение управлять экраном” и задайте пароль в пункте “Пользователи VNC могут получить управление экраном по паролю” как на рисунке 5
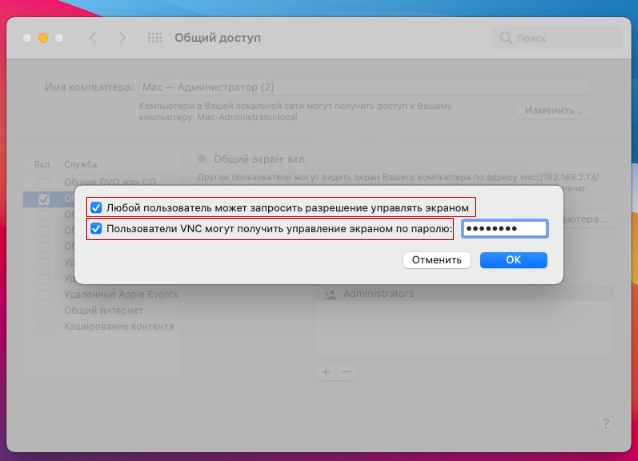
Рис. 5
Теперь загрузим необходимые пакеты
Нам требуются xRDP и xOrgRDP в формате исходного кода.
Загрузить их можно с сайта http://xrdp.org/. Загрузим сначала xrdp.Переходим на сайт и нажимаем “View xrdp releases» как на рисунке 6

Рис. 6
Находим “xrdp” версии 0.9.11 и нажимаем “кнопку” выделенную красным прямоугольником на рисунке 7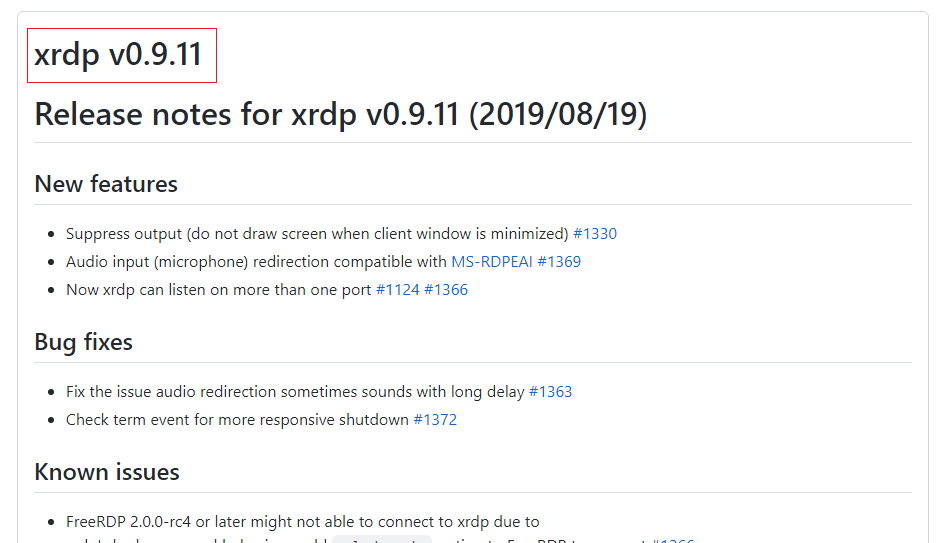
Рис. 7
Далее нажимаем “кнопку” выделенную красным прямоугольником на рисунке 8
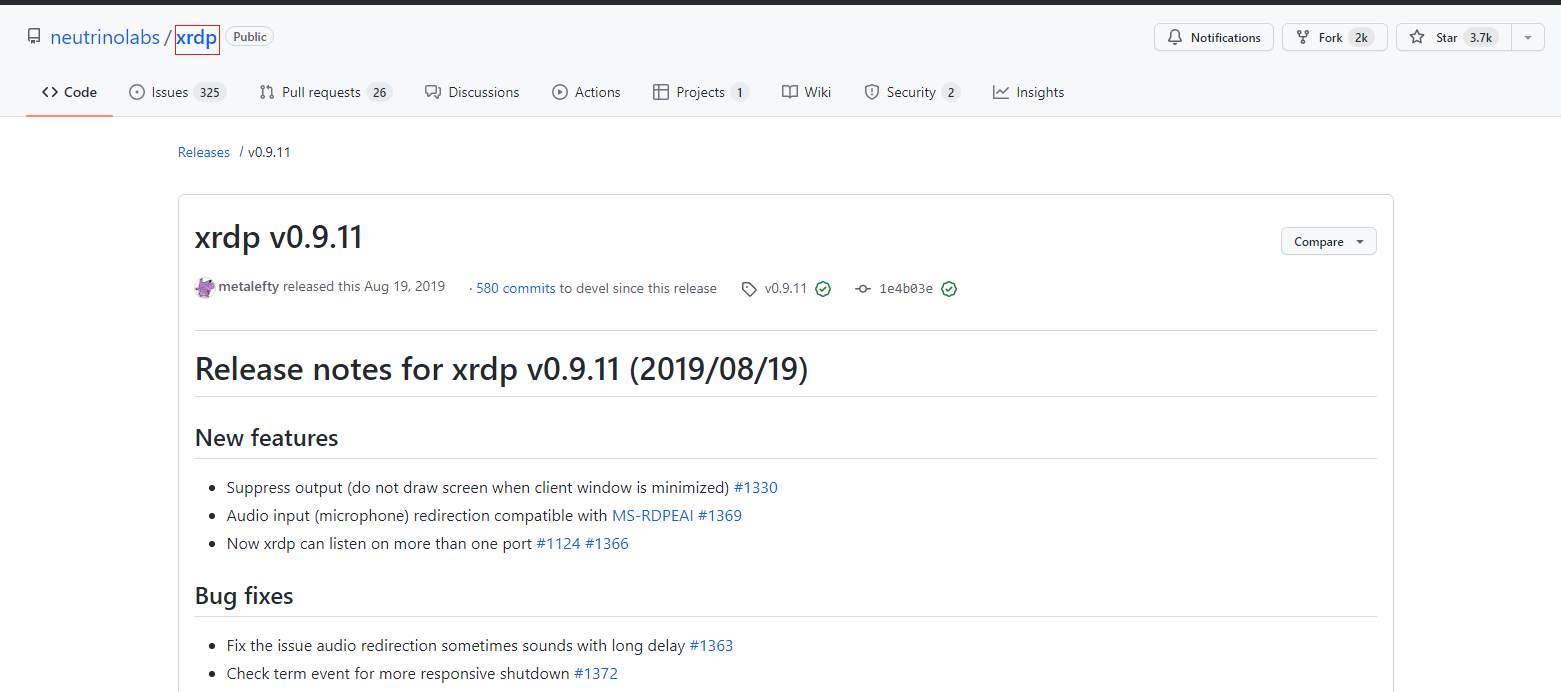
Рис. 8
Далее необходимо нажать “кнопку” “Code” и скопировать ссылку “кнопкой” выделенной красным квадратиком на рисунке 9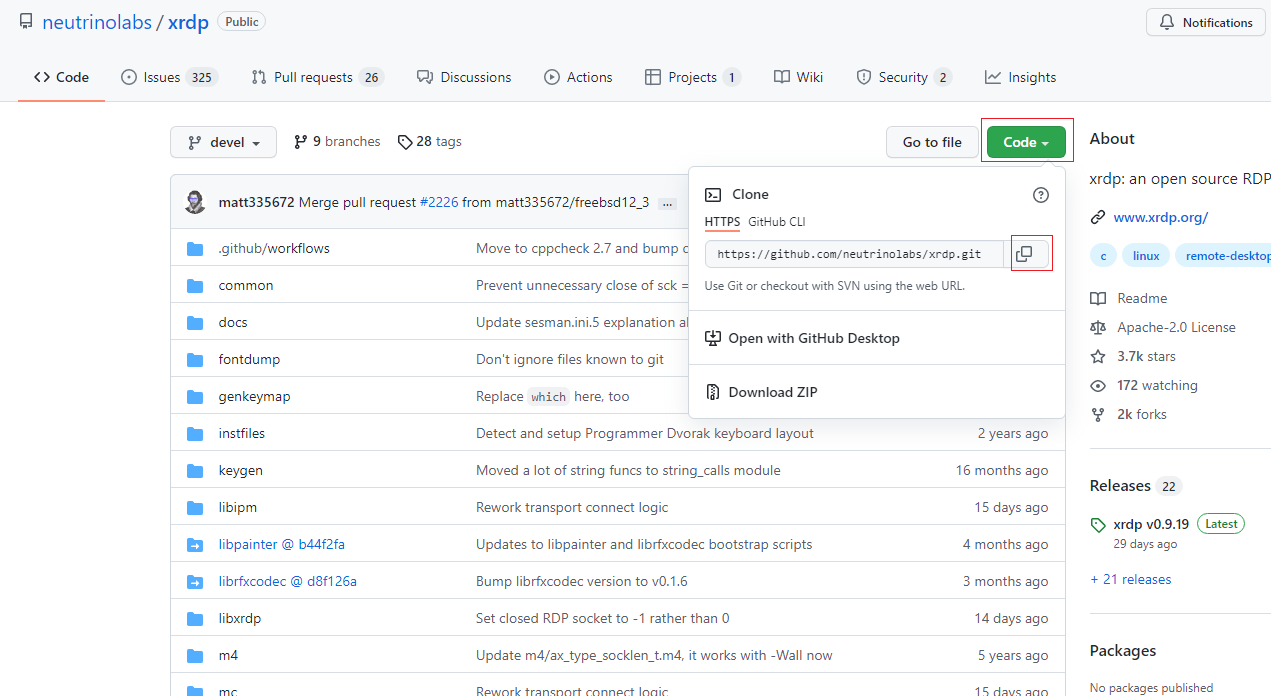
Рис. 9
Склонируем репозиторий на Mac внутри созданной нами папки “xrdp” выше с помощью “git” командой как на рисунке 10 ниже:
git clone https://github.com/neutrinolabs/xrdp.git 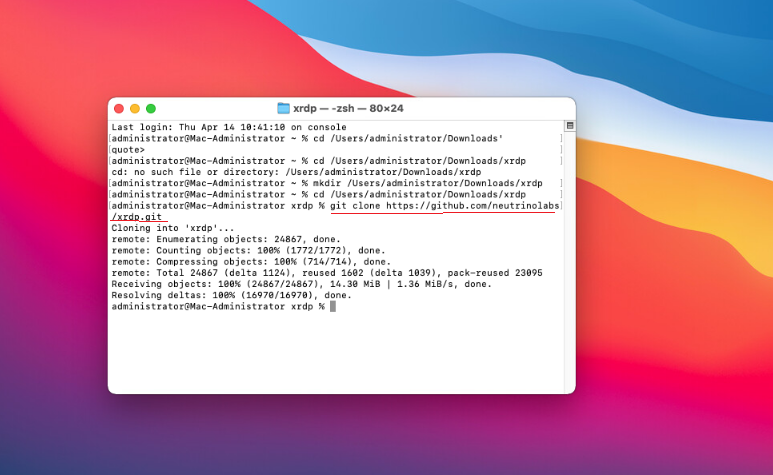
Рис. 10
Теперь загрузим пакет xorgrdp.Переходим на главную страницу сайта и нажимаем “кнопку” “View xorgrdp releases” как на рисунке 11
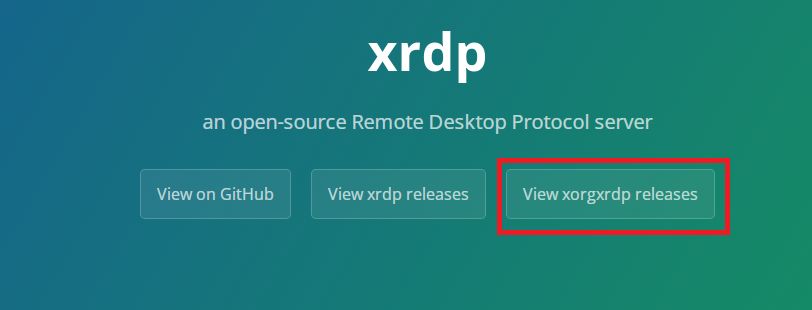
Рис. 11
Находим версию 0.2.11 и нажимаем кнопку выделенную красным прямоугольником на рисунке 12

Рис. 12
Далее нажимаем “кнопку” выделенную красным прямоугольником на рисунке 13
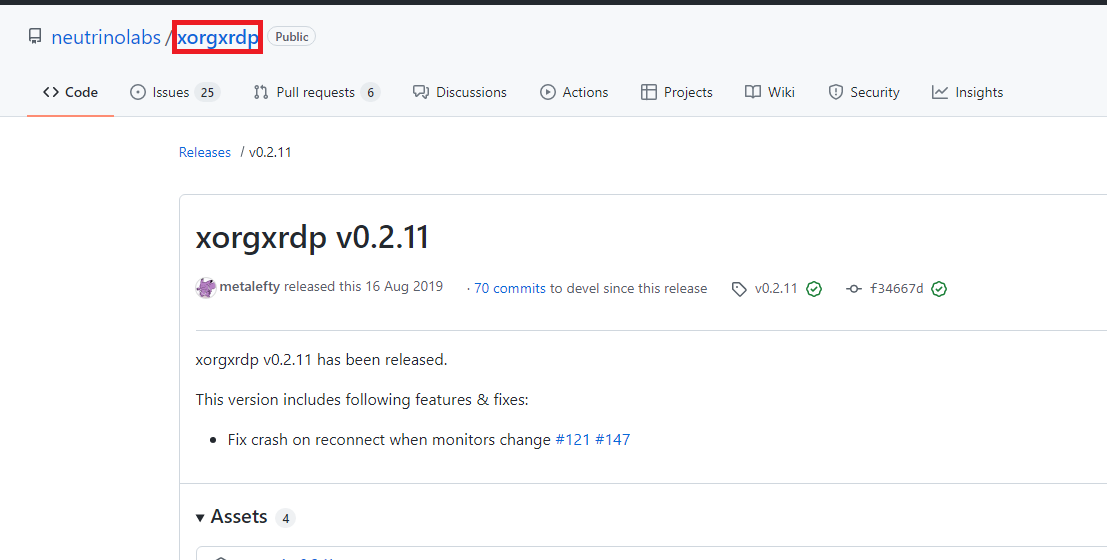
Рис. 13
Далее необходимо нажать “кнопку” “CODE” и скопировать ссылку как показано на рисунке 14 ниже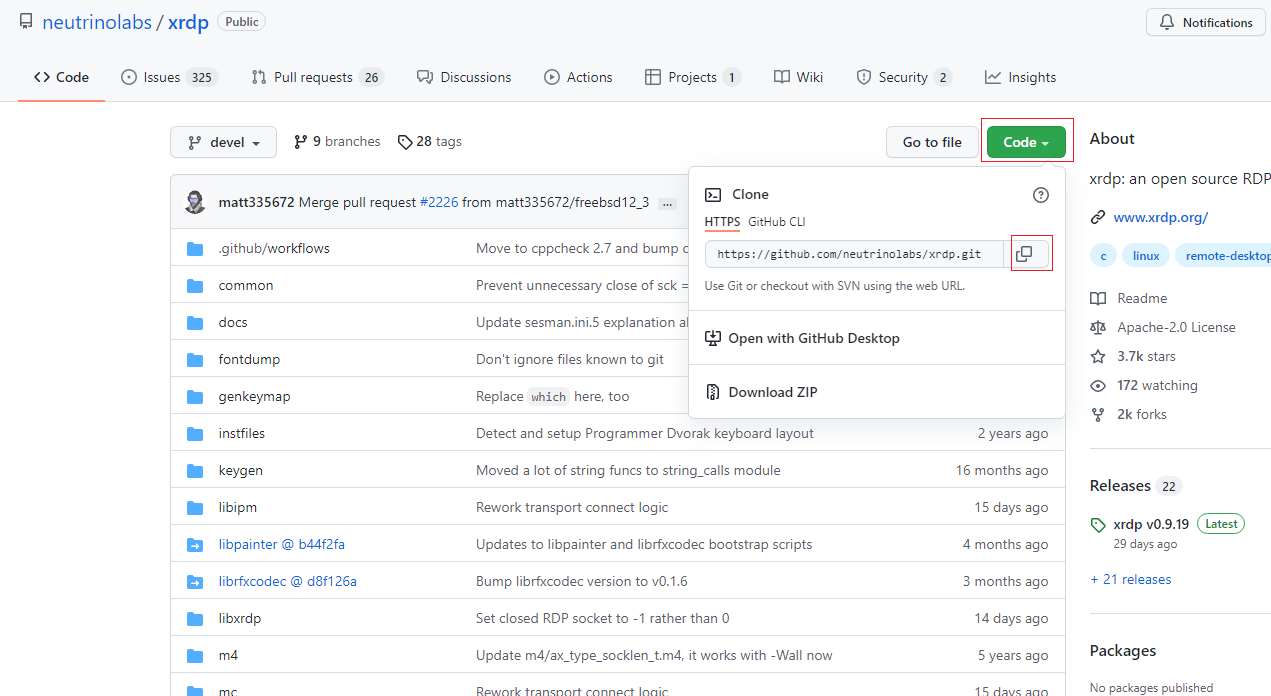
Рис. 14
Склонируем репозиторий xorgxrdp как показано на рисунке 15 на Mac OS внутри созданной нами папки “xrdp” выше с помощью “git” командой:
git clone https://github.com/neutrinolabs/xorgxrdp.git
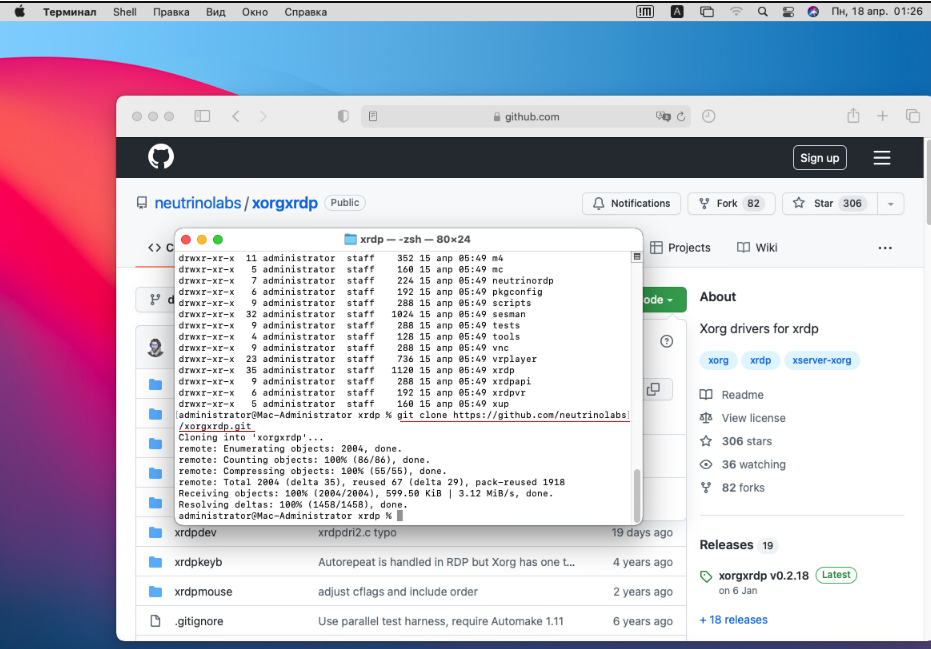
Рис. 15
Сборка xRDP
Перейдём в каталог с “xrdp» репозиторием командой:
cd /Users/administrator/Documents/xrdp/xrdp
Запустим Bootstrapper
./bootstrap
сконфигурируем сборку с помощью OpenSSL
./configure PKG_CONFIG_PATH=/usr/local/opt/openssl/lib/pkgconfig
Запустим make
make
Затем запустим make установщик
sudo make install
Если вы получаете ошибку на этом шаге, то скорей всего это связано с неправильным экспортом OpenSSL CPPFLAGS.
Сборка xOrgRDP
Перейдём в каталог с «xorgrdp» репозиторием командой:
cd /Users/administrator/Documents/xrdp/xorgrdp
Для сборки нам также понадобится репозиторий xrdp.Скопируем репозиторий xrdp в репозиторий xorgrdp командой:
cp –R /Users/administrator/Documents/xrdp/xrdp /Users/administrator/Documents/xrdp/xorgrdp
Запустим Bootstrapper и сконфигурируем сборку так, чтоб она происходила при помощи OpenSSL. Затем запустим make установщик:
./bootstrap
./configure PKG_CONFIG_PATH=/opt/X11/lib/pkgconfig
make
sudo make install
Если вы столкнулись с ошибкой, убедитесь, что вы перезапустили сессию после установки сервера xQuartz X11. Если вы получаете ошибку /opt/X11/include/xorg/dixfontstr.h:30:10:fatal error ‘X11/fonts/libxfont2.h’ file not found, необходимо поправить файл dixfontstr.h , а именно, прописать #include “/opt/X11/fonts/libxfont2.h” вместо #include “/X11/fonts/libxfont2.h”
Наш xRDP сервер почти готов. Теперь необходимо настроить его. Давайте откроем наш файл xrdp.ini.
sudo vi /etc/xrdp/xrdp.ini
Найдём секцию в файле со всеми типами сессий
[Xorg]
name=Xorg
lib=libxup.so
username=ask
password=ask
ip=127.0.0.1
port=-1
code=20
[Xvnc]
name=Xvnc
lib=libvnc.so
username=ask
password=ask
ip=127.0.0.1
port=-1
#xserverbpp=24
#delay_ms=2000
[vnc-any]
name=vnc-any
lib=libvnc.so
ip=ask
port=ask5900
username=na
password=ask
#pamusername=asksame
#pampassword=asksame
#pamsessionmng=127.0.0.1
#delay_ms=2000
[neutrinordp-any]
name=neutrinordp-any
lib=libxrdpneutrinordp.so
ip=ask
port=ask3389
username=ask
password=ask
Я буду подключаться через модуль Xvnc. Используем библиотеку libvnc.dylib вместо libvnc.so. Я закомментирую все модули, которые не буду использовать. Вот так будет выглядеть изменённая секция с типами сессий в файле xrdp.ini
#[Xorg]
#name=Xorg
#lib=libxup.so
#username=ask
#password=ask
#ip=127.0.0.1
#port=-1
#code=20
[Xvnc]
name=Xvnc
lib=libvnc.dylib
username=ask
password=ask
ip=127.0.0.1
port=5900
xserverbpp=24
#delay_ms=2000
#[vnc-any]
#name=RDP to VNC Connector
#lib=libvnc.so
#ip=127.0.0.1
#port=5900
#username=ask
#password=ask
#xserverbpp=24
#pamusername=asksame
#pampassword=asksame
#pamsessionmng=127.0.0.1
#delay_ms=2000
#[neutrinordp-any]
#name=neutrinordp-any
#lib=libxrdpneutrinordp.so
#ip=ask
#port=ask3389
#username=ask
#password=ask
Примечание: В редакторе vi нажмите клавишу «i», чтобы войти в режим редактирования. Чтобы сохранить и выйти, нажмите «ESC» и введите :wq!.
Теперь запустим демоны xRDP и xRDP-sesman. Они находятся по пути /usr/local/sbin/.
Выполним следующие команды
sudo /usr/local/sbin/xrdp
sudo /usr/local/sbin/xrdp-sesman
Нстройка со стороны операционной системы закончена
Теперь необходимо настроить вашь edge
Для RDP доступа в настройках EDGE Вам необходимо прописать правила firewell и nat.
1. В настройках firewall должны быть правила разрешающие сетевой трафик.
2. В настройках NAT.
2.1. Создаем правило DNAT:
— в original IP, прописываете IP Edge. Есть выбор через «Select»;
— в графе Original port, прописываете номер по которому разрешаете подключение;
— в графе Protocol выбираем TCP;
— в графе Translated IP, прописываете IP виртуальной машины к которой необходим RDP доступ.
— в графе Translated Port: 3389
— в графе Source IP/Source port: any/any
После настроек нажимаете Keep и сохраняете настройки NAT’а.
Пробуем подключиться по RDP.Подключаться надо под учётной записью администратора.Вводим пароль Администратора, нажимаем ENTER
В следующем появившемся окне также вводим пароль Администратора и нажимаем ENTER
Если у вас появилось окно авторизации Mac OS, значит, всё работает правильно.
Если у вас возникают какие-либо ошибки, смотрите логи. Они находятся по пути:
/var/logs/xrdp.log
/var/logs/xrdp-sesman.log
Вот таким способом можно предоставить доступ на Mac OS по протоколу RDP.
- 0 Пользователи нашли это полезным
Связанные статьи
В этой статье я расскажу вам как подключиться к операционной системе MAC OS по протоколу.
В данной инструкции описан процесс установки Android Studio в операционную систему MAC OS.Также.
How to Remote Connect to Mac from Windows with SSH
If your Mac is your primary computer, you’ll like to have the ability to connect to it remotely from another computer. This gives you access to your files and folders even when you’re away from your machine.
If your second computer happens to be a Windows machine, you can use the SSH protocol to remote connect to your Mac from your Windows computer. This establishes a very secure connection between two of your computers and lets you work on your Mac files from your Windows machine.
In order to connect a Windows PC to your Mac via SSH, you need to first configure a few options on your Mac. Then you’ll be all set to connect to your Mac from any Windows computer located anywhere in the world.
Enable The Remote Login Feature On Mac
Your Mac has a feature called Remote Login that allows other computers on your network as well as on the Internet to remote connect to your Mac and perform tasks on it. To be able to SSH into your Mac from a Windows PC, you need to first enable this option on your Mac.
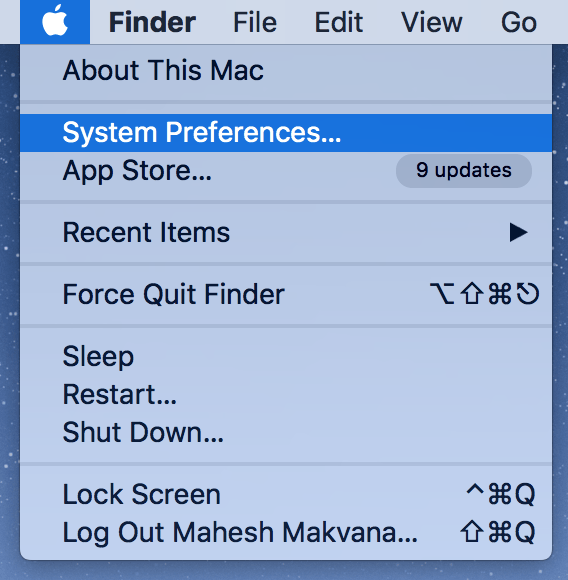
- Click on the Apple logo at the top-left corner of your screen and select System Preferences.
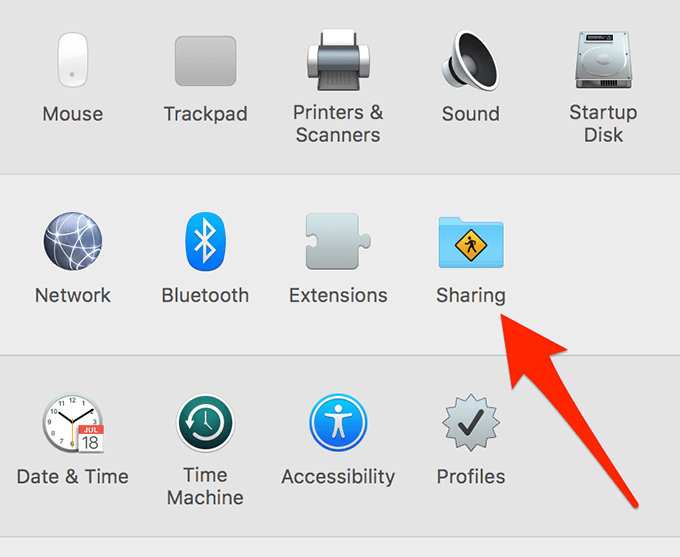
- On the following screen, find the option that says Sharing and click on it. It’ll open the sharing settings menu for your Mac.
- The screen that opens has several options letting you share the contents of your Mac. Find the option that says Remote Login in the list and put a tick-mark in its box. This will enable the feature on your Mac.
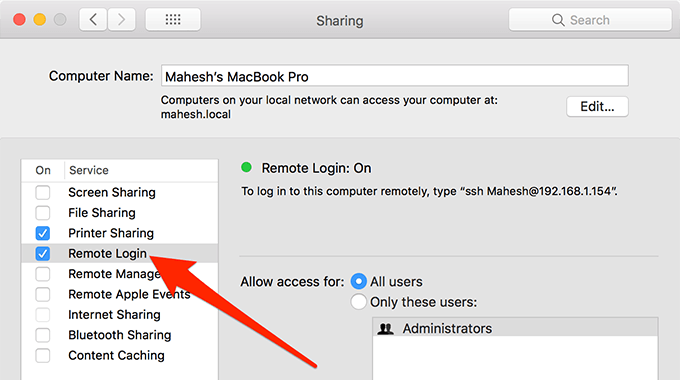
You are now all set to connect to your Mac from your Windows PC over SSH.
The only thing you now need is the IP address of your Mac. If you’ll be connecting from a Windows machine that is on the same network as your Mac, you’ll need the local IP of your Mac. You then don’t need to enable port forwarding on your router.
If you’ll be connecting from a Windows machine that’s not on your home network, you’ll need the global IP of your Mac. In this case, you’ll need to follow the port forwarding instructions given below to access your Mac remotely.
Find The Local IP Of Your Mac
You’ll find your Mac’s local IP on the Sharing pane you accessed previously. If you’ve closed it already, click on the WiFi icon at the top and select Open Network Preferences.
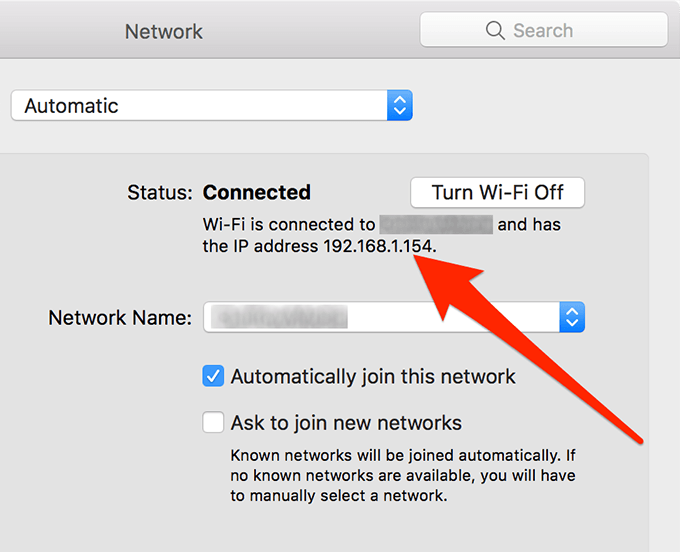
Your IP address should be listed on the following screen.
Find The Global IP Of Your Mac
You can do a simple Google search to find your IP address on the global Internet.
Head over to Google and search for My IP Address.
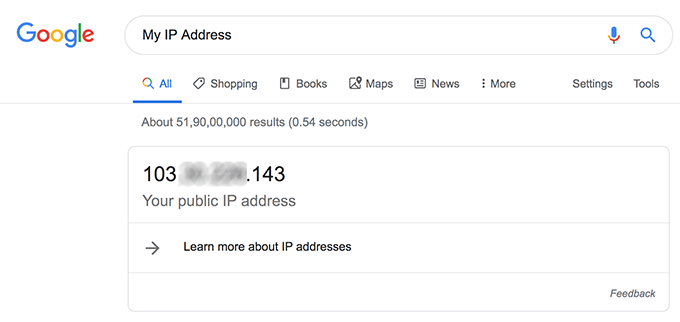
Google will let you know your public IP address.
Set Up Port Forwarding On Your Router
If you’re going to be remotely connecting to your Mac from a Windows PC far away from your home and not on your local network, you’ll need to forward the port on your router as shown below.
- Open a new tab in your browser, enter 192.168.1.1 in the address bar, and hit Enter. It’ll open your router’s settings page.
- When the page opens, log in using the default login which is admin and admin for both the fields and continue.
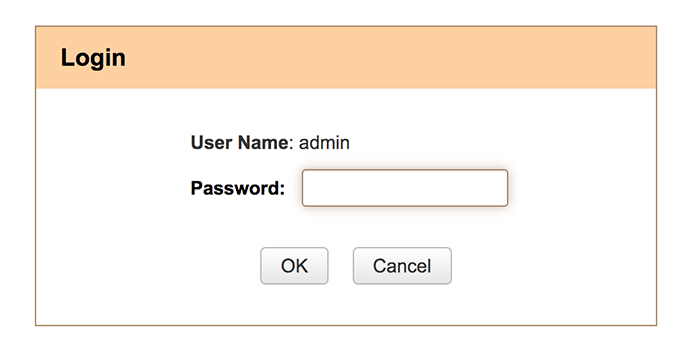
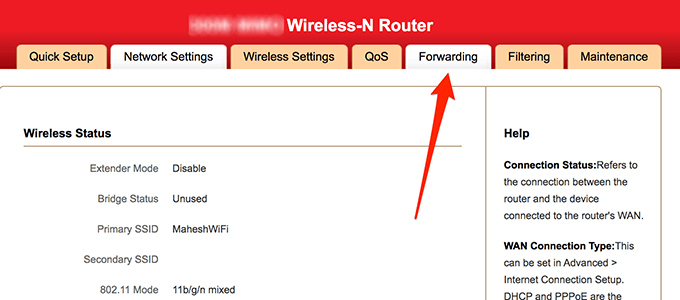
- Click on Forwarding at the top to open your forwarding settings page.
- Click on Port Forwarding on the following screen. Enter 22 and 22 in both port fields. Then, enter the local IP of your Mac in the LAN IP field, tick-mark Enable, and click on OK at the bottom.
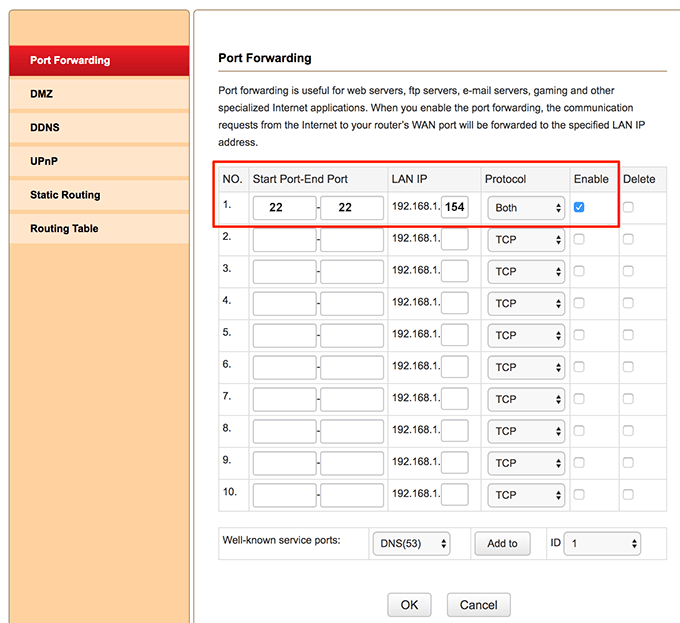
All the incoming traffic for your IP on port 22 will now be forwarded to your Mac. The reason you used port 22 is because it’s the port that SSH uses for connections.
Remote Connect To Mac with SSH Using PuTTY
PuTTY is a free SSH client available for Windows machines that lets you easily connect to any remote computer over the SSH protocol. This is what you’ll be using to remote connect to your Mac from your Windows computer.
- Head over to the PuTTY website and download and install the app on your PC.
- Launch the app when it’s installed. The main interface shows several fields you can enter values.
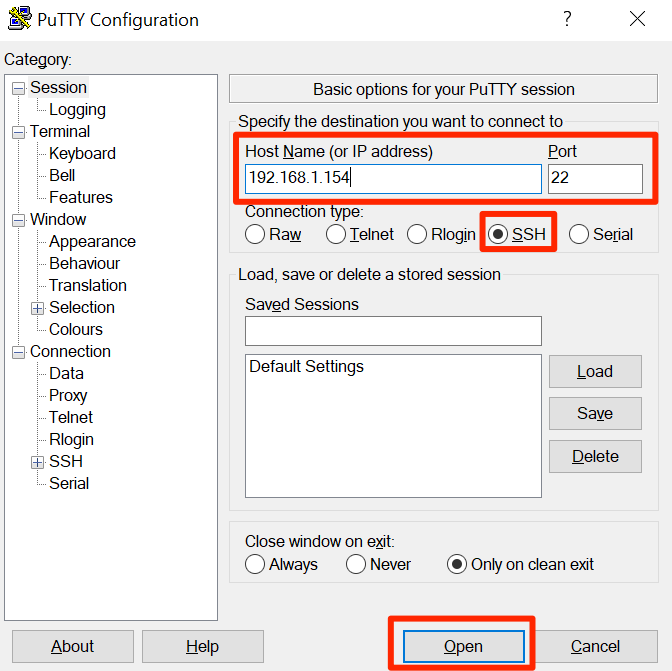
- Put your cursor in the Host Name field and type in the IP address of your Mac.
- Ensure the Port field has 22 in it.
- Select the SSH option to ensure you’re connecting using the SSH protocol.
- Finally, click on Open to open a remote connection to your Mac.
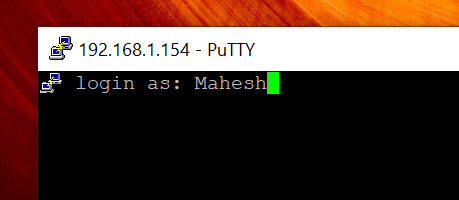
- It’ll ask you to enter the username for your Mac. Enter your Mac username and press Enter.
- You’ll be asked for your user account password. Enter the Mac user account password and press Enter.
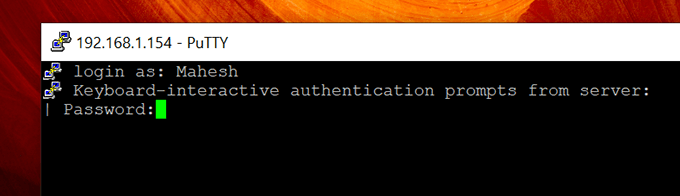
- If all goes well, you’ll be connected to your Mac from your Windows PC.
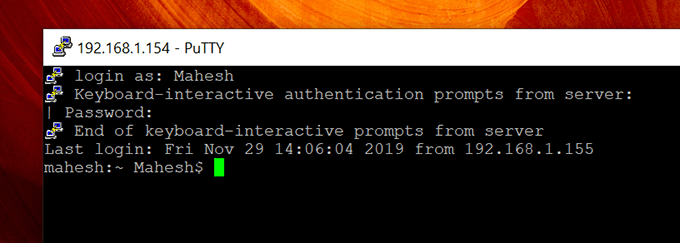
Now that you’re connected, you’ll want to know what things you can do with your SSH connection. Here are some of the basic commands you can run to perform actions on your Mac.
View Files And Folders List
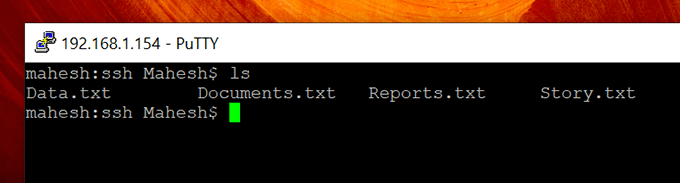
To view the files and folders list for your current directory, you can run the following command.
ls
Change The Directory
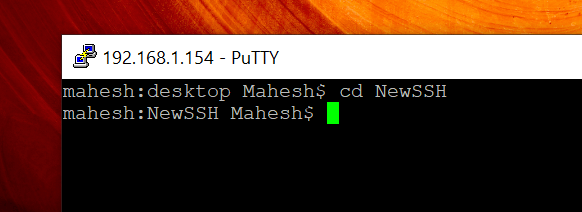
To change the current directory in your SSH session, use the following command.
cd new-directory
View File Contents
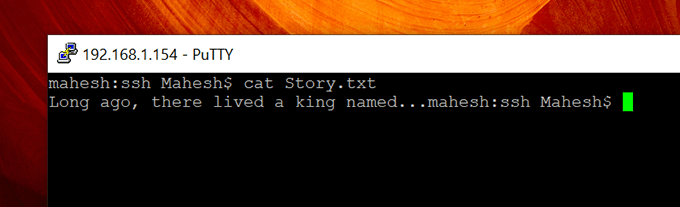
You can access the contents of a file using an SSH command as follows.
cat file-name.ext
Create a New Folder
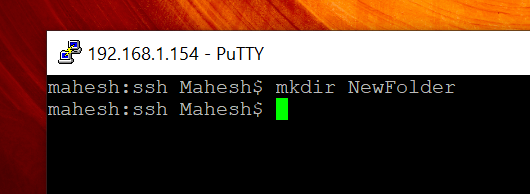
SSH lets you create new directories as well. To do it, run the following.
mkdir directory-name
Create a New File
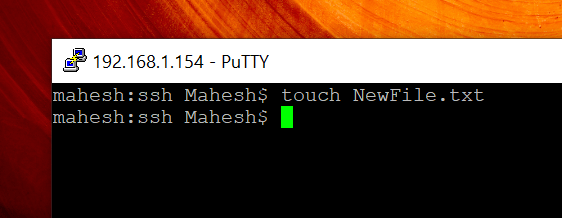
You can even create a new file remotely on your Mac from Windows.
touch file-name.ext
Delete a File
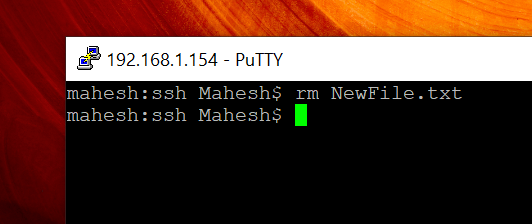
To get rid of a file on your Mac, use the following command on your PC.
rm file-name.ext
In addition to these, SSH has several other commands you can use to perform tasks on your Mac from your PC.
Mahesh has been obsessed with technology since he got his first gadget a decade or so ago. Over the last few years, he’s written a number of tech articles on various online publications including but not limited to MakeTechEasier and Android AppStorm. Read Mahesh’s Full Bio
Доступ к вашему Mac удаленно — с MacBook, iPhone и Windows
Вы можете получить доступ к своему MacBook удаленно с других устройств Mac. У Apple есть эта удивительная прогрессивная функция, которая позволяет пользователю получать доступ к своему MacBook с других ноутбуков или iPhone.
Чтобы получить удаленный доступ к любому MacBook или iMac, у него есть основной вариант удаленного управления MacBook. В качестве альтернативы, вам необходимо сначала настроить MacBook для этого, загрузив Anydesk на свой MacBook и настроив его со всеми необходимыми шагами и информацией, которые помогут вашему MacBook быть доступным с других устройств.
Вы также можете получить удаленный доступ к MacBook с помощью сторонних приложений со своего iPhone.
Вы даже можете получить к нему доступ с другого MacBook к вашим общим файлам или папкам с ним. Вы можете войти в свой Mac со своего MacBook, чтобы поделиться экраном.
В этой статье есть вся информация об удаленном доступе к MacBook.
Здесь вы узнаете обо всех способах доступа к MacBook с других устройств. Вся информация представлена в виде подробных инструкций, чтобы вам было проще следить за ней и действовать соответствующим образом.
Что такое Apple Remote Management?
Удаленное управление Apple — это внутренняя настройка, которая помогает пользователям удаленно управлять задачами или получать доступ к файлам на Mac с помощью других macOS. Это технология Apple, которая позволяет пользователю войти в свой MacBook с любого устройства MacOS и управлять им оттуда.

Вы можете получить удаленный доступ к своему Mac с других ноутбуков, iPhone или MacBook. Вам необходимо настроить удаленный вход, чтобы иметь доступ или управлять своим Mac удаленно.
Для этого вам необходимо настроить удаленный вход, перейдя в раздел «Системные настройки» в настройках, а затем нажав «Общий доступ», чтобы выбрать устройство, с которого вы хотите управлять своим Mac.
Вам необходимо знать имя пользователя и IP-адрес вашего Mac, чтобы получить к нему удаленный доступ с других устройств Mac.
Удаленный доступ к MacBook с любого другого устройства
Вы можете получить доступ к своему MacBook удаленно с любого другого устройства. Чтобы включить эту функцию для удаленного доступа к вашему Mac, вам необходимо загрузить приложение AnyDesk для MacOS.
Anydesk позволяет пользователям Mac получать удаленный доступ к своему MacBook с любого другого устройства.
Чтобы получить удаленный доступ к Mac с любого устройства и установить AnyDesk на macOS,

- Прежде всего, скачайте приложение AnyDesk и нажмите «Установить» на свой MacBook.
- Для настройки после завершения загрузки щелкните значок стрелки загрузки в правом верхнем углу, чтобы найти его, а затем щелкните AnyDesk.
- После его открытия дважды щелкните значок AnyDesk, чтобы начать процесс установки, затем нажмите « Открыть» , затем нажмите « Принять» в поле продвижения.
- Теперь перейдите к параметру « Системные настройки», который вы найдете на нижней панели. Выберите опцию Безопасность и конфиденциальность.
- Затем нажмите на опцию « Доступность» в левом разделе опций и укажите правильное имя пользователя и пароль для входа, нажав « Разблокировать» .
- Затем установите флажок AnyDesk. Идите и выберите опцию Screen Recording и установите флажок AnyDesk .
- Щелкните значок замка внизу страницы, чтобы сохранить его, чтобы избежать изменений.
- Вернувшись в AnyDesk , нажмите « Принять» в поле запроса, и все готово .
Теперь вы сможете подключиться к своему MacBook и получить к нему доступ с любого устройства.
Как получить удаленный доступ к MacBook с iPhone?
Вы можете получить доступ к MacBook удаленно с помощью iPhone. Чтобы применить и использовать этот умный метод, вам потребуется загрузить и установить некоторые сторонние приложения.
Ниже перечислены приложения, которые рекомендуется использовать для удаленного доступа к MacBook с iPhone:
1. Удаленная мышь
Эти инструменты имеют расширенные функции и простой дизайн, чтобы предоставить пользователю лучший опыт. Он превращает ваш iPhone в пульт дистанционного управления для доступа к MacBook и управления им.
 Особенности удаленной мыши:
- Он имеет небольшие функции, которые предназначены для использования одной рукой.
- Он полностью стимулировал функцию мыши.
- Доступна такая функция, как распознавание голоса и набор текста с помощью голоса.
- Он отображает разные клавиши для Mac, поддерживает жест мультитач.
- У него есть варианты питания для удаленного выключения, сна или перезапуска.
- Доступна защита паролем.
- Он имеет разные методы подключения, такие как подключение с использованием IP-адреса, QR-кода и т. Д.
Шаги по использованию удаленной мыши:
Вы можете использовать инструмент Remote Mouse для управления Mac, выполнив следующие действия:
- Загрузите и установите приложение на свой компьютер и iPhone.
- Откройте его на своем MacBook после загрузки для настройки.
- Предоставьте все разрешения, отображаемые во всплывающих окнах, для завершения пошагового процесса на компьютере.
- Теперь откройте приложение на своем iPhone.
- Проведите влево по руководству, и все готово.
- Теперь вы можете использовать свой iPhone для доступа к MacBook с помощью жестов и кнопок регулировки громкости вашего iPhone. Вы можете изменить интерфейс по своему усмотрению.
2. Удаленный рабочий стол Chrome
Chrome Remote Desktop имеет различные расширенные функции, которые помогают пользователю использовать свой iPhone для управления MacBook.
 Функции:
- Имеет простой интерфейс, возможность использования одной рукой.
- Ключи для поддержки Mac и Windows.
- Легко подключаемый метод. Он защищен булавкой.
Шаги по использованию Удаленного рабочего стола Chrome :
- Загрузите и установите приложение на Mac и iPhone.
- На свой MacBook установите приложение и укажите имя для своего устройства.
- Затем установите штифт.
- Предоставьте приложению разрешение на доступ к вашим настройкам специальных возможностей.
- На своем iPhone откройте приложение « Удаленный рабочий стол Chrome» и войдите в систему, используя те же данные.
Вы сможете увидеть тот же экран, что и ваш MacBook, на своем iPhone. Теперь вы сможете управлять им с помощью iPhone.
Как получить удаленный доступ к iMac с MacBook?
Выполните следующие действия для управления iMac и доступа к нему с MacBook:
- На iMac щелкните значок маленького яблока в верхнем левом углу экрана, а затем выберите параметр « Системные настройки» .
- Теперь вы увидите окно с подсказками на вашем экране. Выберите опцию Совместное использование.
- Вы увидите белое поле с мигающими параметрами на вашем экране.
- В наборе параметров в левой части поля под списком служб установите флажки рядом с разделом « Общий доступ к экрану», «Общий доступ к файлам», «Удаленный вход» и «Удаленное управление».
- Теперь вам нужно добавить пользователей, которые могут получить доступ к вашему iMac с помощью MacBook.
- Нажмите на знак +, чтобы добавить свой MacBook в качестве пользователя, которому вы можете получить к нему доступ, и убедитесь, что вы включили опцию « Чтение и запись».
- Затем нажмите на опцию удаленного входа и выберите опцию Только эти пользователи.
- Теперь на вашем MacBook откройте страницу окна файла.
Обратите внимание, что ваш MacBook подключен к той же сети Wi-Fi, что и iMac.

- Затем вы найдете свое имя iMac в левой части окна. Щелкните по нему, чтобы продолжить.
- Щелкните « Подключить как» и войдите в систему, указав правильную информацию.
- Затем нажмите « Подключиться».
Теперь у вас будет доступ ко всем вашим файлам iMac с вашего MacBook.
Обратите внимание, что оба устройства должны быть подключены к работающему Wi-Fi. Если вам нужен доступ из другого Интернета, попробуйте метод AnyDesk, как в первом методе.
Итоги:
Доступ к MacBook или управление им удаленно с других устройств возможно, если вы выполняете его, используя правильные шаги. Вы узнаете всю информацию о том, как получить удаленный доступ к своему Mac с других устройств, из этой статьи. В нем есть все подробные шаги ясно и всесторонне, чтобы вам было легче следовать.
5 Ways to Remotely Access Apple Mac OS X from Windows
Controlling your Windows computer remotely using third-party software or the built-in Remote Desktop feature is easy. However, the options for controlling a computer running on a different OS are quite limited.
Although Windows computers dominate the market, many people still use Macbooks that run on OS X. You might want to connect your old Windows PC to a Mac to access some files or programs.
Apple has its own remote access premium shareware called Apple Remote Desktop (ARD.) It comes with powerful features like software distribution and automation to perform repetitive tasks on remote computers. Unfortunately, it’s designed for Mac to Mac and not cross-platform.
In this article, we will be sharing a few methods to remotely access Apple Mac computers from another computer running Windows.
How to Remote to macOS from Windows
- RealVNC – Best for remotely accessing macOS from Windows overall
- Remote IT – Great for connecting users and devices when other solutions fail
- TightVNC – Open-source tool for remotely connecting to computers
- TeamViewer – Great remote access software for remotely connecting computers
- Zoho Assist – User-friendly remote control tool for quickly initiating
- AnyDesk – Excellent for managing remote desktop contacts
- UltraVNC – Great for connecting to a virtual PC or app
- BeyondTrust – Best tool for accessing your desktop securely
- Chrome Remote Desktop – Great for remotely controlling another computer’s desktop
- LogMeIn – Excellent for working remotely with access to remote control tools
1. RealVNC – Best for remotely accessing macOS from Windows overall
- Operating System: Windows, MacOS, Linux, and Raspberry Pi
- Pricing: Freemium
- Developer: RealVNC® Limited
RealVNC provides server and client tools for remotely connecting to another computer’s screen. It’s great for people who require 24/7 oversight over their systems to attend to problems when they occur.
You can use RealVNC to access your macOS computer from a Windows PC. It requires proper credentials, access to the internet, and having the software installed on both computers.
On the Mac, download VNC Connect and add your credentials after installing it. Second, download VNC Client on your Windows computer and verify the account from your email. A remote computer will automatically appear on your app screen. Select it to start controlling the device.
You’ll need to enter your desktop login credentials. Once logged in, you can control every aspect of the computer from your remote location.
- With a stable internet connection, the app takes just a few minutes
- Using the RealVNC server ensures your connection is secure
- The company offers easy-to-follow tutorials to help you get started faster
- Keep your organization connected, saving time and increasing productivity
- Once your free trial is over, you’ll pay to access the features
2. Remote IT – Great for connecting users and devices when other solutions fail
- Operating System: Windows, MacOS, Linux, and Raspberry Pi
- Pricing: Freemium
- Developer: RealVNC® Limited
Remote IT helps you connect computers using your browser, desktop, and mobile like they were on the same local network. Getting started with the application is free. It uses a private network to enhance security and provide better performance.
You can use Remote IT to connect to an endpoint or device, even if you don’t have the software installed on the target computer. It offers the option to connect to AWS, Mac, Windows, RasberryPi, Linux, Google Cloud, and Azure, among others.
To connect to Mac normally, download and install the software on the endpoint, register the devices, and add the services you’d like to connect to on port 5900, including SSL, Terraria, and RDP.
Navigate to System Preferences > Sharing and click the box next to Screen Sharing. Click on Allow Access for All Users and exit the window.
On your Windows PC, install any VNC client and open the Remote IT desktop app. The target computer should appear on your desktop under the devices tab. Click on it, log in, and start controlling the computer.
- The application offers a free plan for non-commercial usage
- You can connect to up to 2000 devices with access to all features
- Connect using a private network with advanced security
- Embed Remote IT on small IOT devices where you cannot install VPNs
- You need a third-party VNC client to use it
3. TightVNC – Open-source tool for remotely connecting to computers
- Operating System: Windows, MacOS, iOS, and Android
- Pricing: Free
- Developer: GlavSoft LLC
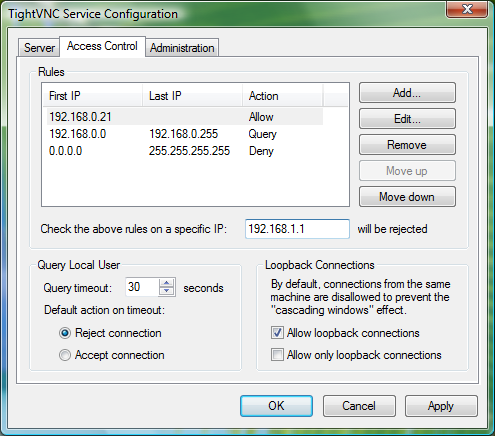
TightVNC is a free and open-source remote desktop software for accessing and controlling other computers using the internet. It’s made for Windows and Linux, but a commercial license is available for Mac users.
After Screen Sharing your Mac computer with other users, you can use a tool like TightVNC on Windows to connect remotely. First, enable screen sharing then enable a VNC password on your Mac.
Next launch your TightVNC app on your desktop. Type in the IP address from your Mac computer displayed in the Screen Sharing window and click on Connect. Enter your macOS login credentials and start using the computer.
Pros
- The software is free and open source to use
- You connect to the computer directly using the internet
- TightVNC does not require you to create an account
- The application requires minimal configurations
Cons
- The connection is less secure compared to other options
4. TeamViewer – Great remote access software for remotely connecting computers
- Operating System: Windows, MacOS, Linux, Chrome OS, Android, iOS, and Raspberry Pi
- Pricing: Freemium
- Developer: TeamViewer
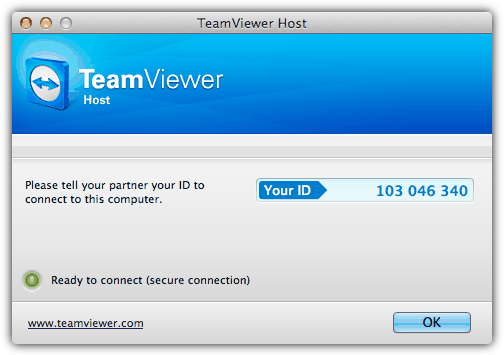
TeamViewer is a popular remote access software commonly used to provide remote support. It’s easy to use and comes with compelling features such as file transfer, switch sides, conference calls, VoIP, and screen recording. The app works on multiple operating systems, allowing you to control a Mac OS X system from a Windows computer.
You will need to download and install the “HOST” version of TeamViewer on the Mac computer that you want to remotely control. As for the Windows computer that will be controlling the Mac computer, simply download the TeamViewer full version, and install and run it. Enter the ID followed by the password and you’re able to connect to the OS X machine. The ID will not change and always stay the same on the machine.
The TeamViewer Host options can be accessed by clicking on the TeamViewer icon at the menu bar and selecting Preferences. You can change your password, configure the voice, microphone, phone conferencing, access control and etc.
Pros
- The software does not require installing an application on the host computer
- You can screen record, transfer files, and make conference calls
- It’s most suitable for business usage and team collaboration
- The tool is popular, so it’s easy to find solutions to the more pressing problems
Cons
- You might experience performance issues for slow computers
5. Zoho Assist – User-friendly remote control tool for quickly initiating

- Operating System: Web-based
- Pricing: Freemium
- Developer: Zoho Corporation Pvt. Ltd
Zoho Assist is a user-friendly remote control application for initiating secure remote support and screen-sharing sessions. It assists you to get secure web-based control over remote PCs, laptops, mobile devices, and servers.
The software provides a Mac remote desktop software to help you access your Mac desktops and back-end servers. You get instant access to desktops so you can provide screen support to your customers anytime.
You must create a Zoho account, start a remote desktop protocol, and share your details with the host computer owner to get started. If you’re the owner, create a session and join using your PC and remote control your desktop with ease.
Pros
- The software offers a free account for personal use
- Schedule a session at your convenient time or start now
- When they receive an invite, users can download the shareware and start connecting
- The session remains secure as you only share your ID with respective people
Cons
- You need an enterprise license to access all features
6. AnyDesk – Excellent for managing remote desktop contacts
- Operating System: Windows, MacOS, Android, iOS, ChromeOS, Linux, and Raspberry Pi
- Pricing: Freemium
- Developer: AnyDesk Software GmbH
AnyDesk is a remote desktop connection protocol application for managing remote contacts and customers. You can use the software to access personal remote computers or other devices running the app.
You can use AnyDesk to connect any Windows computer to a Mac device. You don’t require an AnyDesk application, but you may need third-party VNC tools. The most recommended tool to use alongside AnyDesk is Atera.
The tool will download AnyDesk automatically on the target computer and enable remote access on your behalf. Copy the given code and paste it into your AnyDesk platform.
Pros
- It’s easy to find and install AnyDesk on a device on the user’s command
- The system saves your previous sessions, so it’s easier to connect to them in the future
- It’s easy to adapt the software to your company’s needs
- Most configurations are done for you by the AnyDesk app
Cons
- The premium version can be expensive to use
7. UltraVNC – Great for connecting to a virtual PC or app
- Operating System: Windows, MacOS, and Linux
- Pricing: Free
- Developer: UltraVNC Team
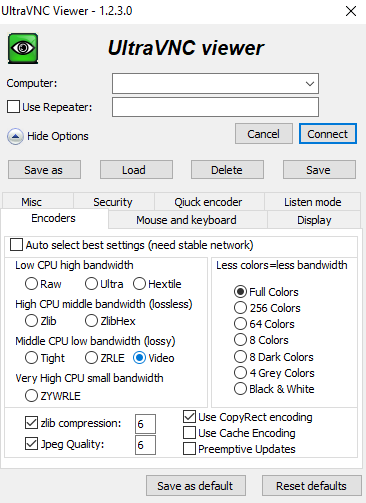
UltraVNC is a free and open-source remote administration or desktop control utility for Windows and Linux. You don’t need to install it on your Mac PC as you can use system settings to share your screen.
To get started, share your screen from the Screen Share preferences on your Mac computer. On the Screen Share screen, select the Computer Settings button and choose VLC Viewers May Control Screen With Password.
On your Windows PC, open UltraVNC viewer and enter your IP address, and select Connect. Type the password you created on your Mac and the app will connect you to your Mac in a few seconds.
Pros
- UltraVNC is free and open-source so you can use it for life
- Use your mouse and keyboard to control other computers
- Great for connecting PCs in your local network
- It comes with features not present on other free versions
Cons
- Many companies consider UltraVNC a security risk
8. BeyondTrust – Best tool for accessing your desktop securely
- Operating System: Windows, MacOS, Linux, Chrome OS, and web-based
- Pricing: Freemium
- Developer: BeyondTrust Corporation
BeyondTrust is a company that develops many access management, identity management, privileged remote access, and vulnerability management programs. It ensures that access is managed, monitored, and privileged access.
The platform supports access to Mac, Windows, and Linux simultaneous connections. You can also access your Android and iOS with screen sharing and remote control. The connections are fast, allowing you to manage unattended and grow your business securely with automation.
With privileged remote access, you can secure, manage, and audit team members’ privileges without using a VPN. It brings all appliance-based security that usually requires VPN tunneling, port-forwarding, and firewall configurations.
Pros
- Connect computers without the need for port-forwarding or VPNs
- Screen share your Android, iOS, Mac, Windows, and Linux devices
- See the screen of devices and control devices remotely
- Manage a large pool of devices simultaneously
Cons
- High licensing costs
9. Chrome Remote Desktop – Great for remotely controlling another computer’s desktop
- Operating System: Web-based
- Pricing: Free
- Developer: Google
Chrome Remote Desktop is a remote desktop software designed for remotely controlling another computer internally. You can install the app to access more shortcuts or use a web browser, which takes up less space.
The downside of the software is that it gives the person connecting to your computer access to your IP and email address, among other critical information. However, if you own the device, then you don’t have to worry about anything.
Pros
- Allow another user to access and control your PC
- Installing a Chrome extension takes a few seconds
- Access another user’s computer by entering a code
- Set up SSH for remote computer connections
Cons
- The tool will share your private information
10. LogMeIn – Excellent for working remotely with access to remote control tools
- Operating System: Windows, MacOS, Linux, and Raspberry Pi
- Pricing: Freemium
- Developer: RealVNC® Limited
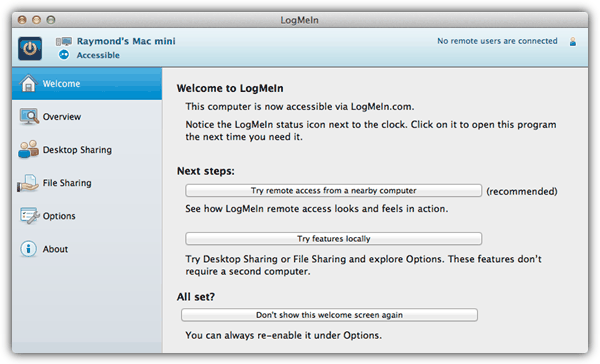
LogMeIn Free allows you to conveniently remotely control a Mac computer running OS X from Windows through its web interface or the Firefox plugin. You will need to create a free account and log in from the Mac computer.
Click the Add Computer button to download the LogMeIn Installer. After installation, you are able to access that computer from any other computer by logging in to LogMeIn. Do take note that the file transfer feature is disabled in the free version.
Pros
- Remotely control a computer from a remote location
- Access all your desktop files, programs, and information
- Provide high-level customer support by visualizing the problem
- Empowers your team to work from anywhere
Cons
- LogMeIn is an expensive tool
How Do I Remotely Control Another Mac?
You don’t need to install additional software to control another Mac remotely; you can remotely control it using your MacOS. To get started, navigate to the Apple menu > System Settings and click General in the sidebar.
Turn on the remote login and click the info button on the right. Next, click Allow full disk access for remote users checkbox on your panel, giving the other computer full access.
Conclusion
If you have multiple computers or workstations, you don’t have to use one at a time. You can operate both computers simultaneously using the same mouse and keyboard. Try the above-mentioned tools to see which is most useful for you.
What do you think about the above-mentioned tools? Have a favorite app that you’d like to share with our readers? Share your thoughts in the comment section below.
You might also like:
RealVNC is useless because it does not support data compression compatible with Mac VNC server. So it uses extremely slow and traffic-consuming uncompressed RGB.
Can you suggest a better VNC client or alternative strategy?
Can I use softwares like Photoshop, Illustrator, Dreamweaver etc (which are in MAC) from Windows system if the windows system doesn’t have the same softwares?
If the OSX commuter has remote management enabled, what client does the Windows computer need to run to connect to it?
Logmein Free isn’t completely free anymore. You can buy an account, and for IT people, you can buy Logmein Central, and then tie a couple of Logmein Pro pay-for machines to the account (easy). Then you are given logmein free subscriptions you can then tie into the account. If the remote access is going to give you an hourly rate or save you time (and time is money) then it is WORTH buying the annual subscription.
The thing that has always been an issue for me is Logmein wants to boast about their ability to stream the remote desktop as HD, and frankly that is just bells and whistles to me. That requires WAY more bandwidth, and is pointless in most cases. The GREAT thing about logmein, even over their join.me product, is you can cut back the color quality or even make it black and white. This SIGNIFICANTLY speeds up the remote session to make sure things work right. Join.me is a $100/yr subscription, to compete with their enterprise version rescue, but again the quality of the remote session is simply limiting and time wasting for the average IT guy who needs to help the user.
More to the point of Logmein Pro, you can actually perform secure file transfers, and monitor the system in a dashboard. The Dashboard for pro subscriptions ALSO gives you things like the top fifteen running processes, all scheduled tasks, the most current 15 lines of the event viewer log, etc. You can perform various levels of remote boot, and even utilize a scripting type offering called one to many.
It is incredibly powerful, and COMPLETELY worth the cost of the annual subscriptions.
(I do NOT work for Logmein, just an IT consultant.)
Thank you very much. Used realvnc viewer on win 7 64bit, to connect to a mac laptop on OS X Mavericks.