Create Image Elements in JavaScript
In this JavaScript tutorial, you’re going to learn 14 common scenarios you’ll probably run into, if you have not already when working with images.
Show Image in Plain HTML
Create a static image tag with a src attribute with an image URL in the HTML file.
Exit fullscreen mode
output:

As you can see, I use the picsum website for demonstration purposes. It lets me get a random image URL with specific dimensions passed at the end of the URL.
Pretty straight forward right?
Let’s see how to set a src attribute dynamically via JavaScript next.
Set Src Attribute in JavaScript
In the HTML file, create an HTML image tag like so:
Exit fullscreen mode
In JavaScript, get a reference to the image tag using the querySelector() method.
Exit fullscreen mode
Then, assign an image URL to the src attribute of the image element.
Alternatively, you can set a src attribute to the image tag using the square brackets syntax like this:
Exit fullscreen mode
output:

Set Multiple Src Attributes in JavaScript
Let’s say you have three image elements in the HTML page in different parts.
Exit fullscreen mode
Using ID or class attribute, you can easily target each image element separately to set a different value to the src attribute which I will cover later in this chapter.
Let me show you what �� NOT to do when having multiple static image tags in your HTML page.
Exit fullscreen mode
In the previous example, I used the querySelector() method to target the image element which works fine for a single image element.
To get a reference to all three image elements, we’ll need to use querySelectorAll().
Exit fullscreen mode
This will get all of the image element references and create a Node List Array from them.
Exit fullscreen mode
This works fine, but there is a one problem with this approach.
Let’s say you no longer need the first image element and remove it from the HTML code.
The second and third image elements will end up having the first and second images.
Create Image Element in JavaScript
Create an image element using the createElement() method on the document object.
Then, set an image URL to its src attribute.
Exit fullscreen mode
Finally, add the image element to the DOM hierarchy by appending it to the body element.
Alternatively, you can use the Image() constructor which creates a new HTMLImageElement instance and it’s functionally is equivalent to document.createElement(“img”).
Optionally, you can pass width and height parameters to it.
Exit fullscreen mode
It will be equivalent to this in HTML:
Exit fullscreen mode
Add Inline Style to the Image in JavaScript
Using the style property, we can apply style to the image element directly in JavaScript.
As you can see in the example below, I’ve applied a border as well as border radius styles to it.
Exit fullscreen mode

Add ID Attribute to the Image in JavaScript
Adding multiple styles to the image element individually would be tedious.
Instead, let’s create a new CSS rule inside the style tags or an external CSS file with an ID selector like below.
Exit fullscreen mode
Then, assign it to the ID attribute of the image element using its ID property.
Exit fullscreen mode
As you know, it’s pretty straight forward as the value of the ID attribute should not be duplicated in a single page.
Alternatively, you can invoke the setAttribute() method on the img object with two arguments: the attribute name and the value.
Exit fullscreen mode
Add Class Attribute to the Image in JavaScript
Unlike ID attribute, you can add multiple class names in a single image element or the same class name in multiple image elements or combinations of both.
Let’s say we have a CSS rule with a class name called .img-rounded-border.
Exit fullscreen mode
Then, we can add this class to the image element using the add() method on the classList property passing the class name as an argument.
JavaScript, работающий с изображениями

В этом руководстве по JavaScript вы изучите 14 распространенных сценариев, с которыми вы, вероятно, столкнетесь, если еще не встречались при работе с изображениями.
1. Показать изображение в виде обычного HTML
Создайте тег статического изображения с атрибутом src с URL-адресом изображения в файле HTML.
Как видите, я использую веб-сайт picsum в демонстрационных целях. Это позволяет мне получить случайный URL-адрес изображения с определенными размерами, переданными в конце URL-адреса.
Довольно просто, правда?
Давайте посмотрим, как установить атрибут src динамически с помощью JavaScript.
2. Установите атрибут Src в JavaScript.
В файле HTML создайте тег изображения HTML следующим образом:
В JavaScript получите ссылку на тег изображения с помощью метода querySelector ().
Затем назначьте URL-адрес изображения атрибуту src элемента изображения.
В качестве альтернативы вы можете установить атрибут src для тега изображения, используя синтаксис квадратных скобок, например:
3. Установите несколько атрибутов Src в JavaScript.
Допустим, у вас есть три элемента изображения на HTML-странице в разных частях.
Используя атрибут ID или class, вы можете легко настроить таргетинг на каждый элемент изображения отдельно, чтобы установить другое значение для атрибута src, о котором я расскажу позже в этой главе.
Позвольте мне показать вам, что �� НЕ делать при наличии нескольких тегов статических изображений на вашей HTML-странице.
В предыдущем примере я использовал метод querySelector () для нацеливания на элемент изображения, который отлично работает для одного элемента изображения.
Чтобы получить ссылку на все три элемента изображения, нам нужно использовать querySelectorAll ().
Это получит все ссылки на элементы изображения и создаст из них массив списка узлов.
Это нормально работает, но у этого подхода есть одна проблема.
Допустим, вам больше не нужен первый элемент изображения, и удалите его из HTML-кода.
Второй и третий элементы изображения будут иметь первое и второе изображения.
4. Создайте элемент изображения в JavaScript.
Создайте элемент изображения, используя метод createElement() для объекта документа.
Затем установите URL-адрес изображения в его атрибут src.
Наконец, добавьте элемент изображения в иерархию DOM, добавив его к элементу body.
В качестве альтернативы вы можете использовать конструктор Image() , который создает новый экземпляр HTMLImageElement, который функционально эквивалентен document.createElement («img»).
При желании вы можете передать ему параметры ширины и высоты.
Это будет эквивалентно этому в HTML:
5. Добавьте встроенный стиль к изображению в JavaScript.
Используя свойство style, мы можем применить стиль к элементу изображения непосредственно в JavaScript.
Как вы можете видеть в приведенном ниже примере, я применил к нему границу, а также стили радиуса границы.
6. Добавьте атрибут ID к изображению в JavaScript.
Добавление нескольких стилей к элементу изображения по отдельности было бы утомительным.
Вместо этого давайте создадим новое правило CSS внутри тегов стиля или внешнего файла CSS с селектором идентификатора, как показано ниже.
Затем назначьте его атрибуту ID элемента изображения, используя его свойство ID.
Как вы знаете, это довольно просто, поскольку значение атрибута ID не должно дублироваться на одной странице.
Кроме того, вы можете вызвать метод setAttribute() для объекта img с двумя аргументами: имя атрибута и значение.
7. Добавьте атрибут класса к изображению в JavaScript.
В отличие от атрибута ID, вы можете добавить несколько имен классов в один элемент изображения или одно и то же имя класса в несколько элементов изображения или их комбинации.
Допустим, у нас есть правило CSS с именем класса .img-rounded-border.
Затем мы можем добавить этот класс к элементу изображения, используя метод add () в свойстве classList, передавая имя класса в качестве аргумента.
Если вы хотите добавить еще один класс к тому же элементу изображения, вам придется снова использовать метод add ().
Кроме того, вы можете использовать метод setAttribute (), чтобы добавить один или несколько атрибутов класса к элементу изображения в одной строке.
Когда вы используете setAttribute, все предыдущие классы, добавленные к элементу, будут сброшены.
8. Прикрепите событие щелчка к элементу изображения.
Чтобы прикрепить событие щелчка к элементу изображения, вызовите метод addEventListener () для объекта img.
Для этого потребуется два аргумента:
- click = название события и
- function () <> = функция обратного вызова
9. Переключить селектор CSS при нажатии на изображение.
Допустим, вы хотите добавить и удалить границу изображения, когда пользователь щелкает по нему, используя класс .img-rounded-border.
Все, что вам нужно сделать, это вызвать метод toggle (), передав имя класса в качестве аргумента свойства classList внутри функции обратного вызова события щелчка.
В качестве альтернативы объект события, который передается в функцию обратного вызова, может использоваться для доступа к элементу изображения для добавления или удаления класса.
10. Получить выбранный элемент изображения при нажатии
Мы можем получить любую информацию о выбранном элементе, используя объект event, который передается в функцию обратного вызова, как я упоминал ранее.
Допустим, вы хотите получить URL-адрес выбранного изображения.
Используя e.target.src, вы можете легко получить URL-адрес изображения, который является значением атрибута src.
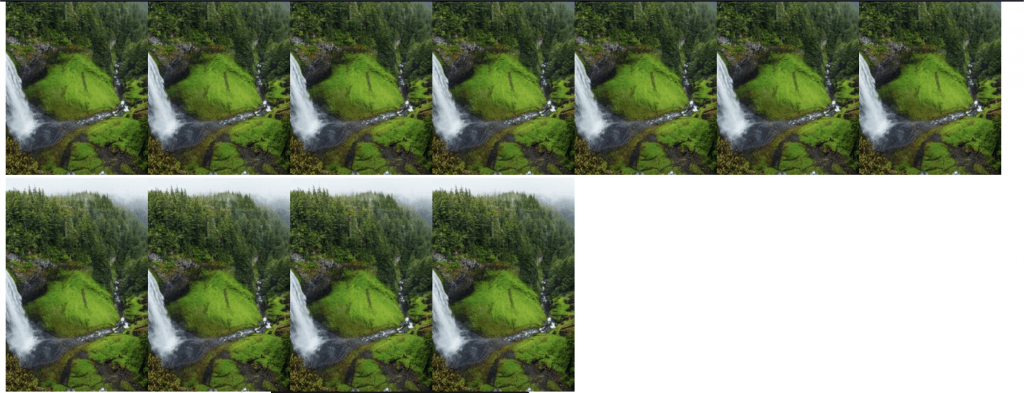
11. Создание нескольких изображений в JavaScript
Допустим, мы хотим создать 10 изображений динамически.
Сначала повторите 10 раз, используя цикл for.
Затем создайте элемент изображения внутри цикла и установите атрибут src со случайным URL-адресом изображения из picsum.
Добавьте все 10 изображений к элементу body.
Давайте добавим отступы между изображениями.
Создайте новое правило CSS внутри тегов стиля или внешнего файла CSS.
Затем добавьте его к элементам изображения внутри цикла с помощью метода add ().
12. Условный стиль в изображении цикла
Давайте изменим конкретное изображение на другой стиль.
Давайте изменим свойство радиуса границы для 6-го элемента, используя условие if.

13. Добавьте события щелчка ко всем изображениям.
Присоедините метод addEventListener () к элементу img на каждой итерации, который принимает два аргумента.
- click = название события и
- function () <> = функция обратного вызова
Обязательно используйте let вместо var в заголовке цикла for при объявлении переменной i, чтобы избежать подъема.
14. Примените класс CSS только к изображению, по которому щелкнули мышью.
Я добавил класс img-margin к каждому элементу img, который даст некоторое пространство между изображениями при начальной загрузке.
При щелчке по любому элементу img к этому элементу добавляется класс img-rounded-border, вокруг которого будет отображаться толстая красная граница.
Но что, если мы хотим добавить класс img-rounded-border только к выбранному элементу изображения, а не ко всем остальным.
Одно из решений, позволяющих исправить это, — сначала удалить класс .img-rounded-border из всех изображений, прежде чем добавлять его к изображению, по которому щелкнули мышью.
Работать с изображениями в JavaScript всегда весело. Надеюсь, вам понравился этот урок из 14 распространенных сценариев работы с изображениями.
Я знаю, что существует гораздо больше сценариев, чем этот. Пожалуйста, дайте мне знать, если вы хотите, чтобы я добавил что-нибудь к этому уроку!
How to Change Image Source JavaScript
JavaScript can integrate with HTML to fulfill the demands of users. By integration, users can employ a feature to change the image source. For instance, the src property is utilized to specify the image source. The sources may include a local file system as well as the image URL. This guide serves to change the image source file by utilizing the src property. All the latest browsers support the src property for locating the source image.
This post serves the following learning outcomes:
How to Change the Image Source in JavaScript
JavaScript is essential for dynamically changing the display of the image. For instance, the img HTML element provides the src property to modify the source of the image. The source of the image may be a local system or any URL image.
The syntax to apply the src property using JavaScript is provided below:
Syntax
Parameter
The description of the parameters is as follows:
- myImageId: specifies the image id.
- src: refers to the source of the image.
Example 1: Change Image Source of the Local Image
An example is adapted to change the source of an image through the local file in JavaScript. The example comprises HTML and JavaScript code files.
HTML Code
In this code, the src attribute is utilized to fetch the image “computer.jpg“. After that, a “Change Image Button” is added to the HTML file that triggers the changeScr() method. The changeScr() method is written in a JavaScript file.
JavaScript Code
In this code, the changeSrc() method fetches the element using its id “imgid” and sets the value of the “src” attribute of that element.
Output
The output shows that after pressing the “Change Image Button” the source file of the image is changed, and the new image is displayed.
Example 2: Change Image Source of a Web-Based Image
Another example is employed for changing the image source through the URL in JavaScript. The complete code is divided into HTML and JavaScript files.
HTML Code
The description of the code is as below:
- Firstly, the width and height of the image are assigned to the image within <img> tags.
- After that, the URL of an image is provided by the src property to display the image in the browser window.
JavaScript Code
In this code, the changeScr() method is used to trigger an event when the user clicks on the button to change the source of the image.
Output
The output illustrates that when a user clicks on the “Change Image”, the new image is replaced with the existing one.
Conclusion
JavaScript provides a src attribute to change the image source by specifying the path of the file. For instance, the getElementId() method is utilized to extract the HTML element through id, and then the src property will change the source image. After extraction, the new source image file is assigned. Here, you have learned to change the image source in JavaScript. For this, we have demonstrated a set of examples in various scenarios.
About the author

Syed Minhal Abbas
I hold a master’s degree in computer science and work as an academic researcher. I am eager to read about new technologies and share them with the rest of the world.
Javascript что делает image src
The HTML DOM Image src Property is used to set or returns the value of the src attribute of the <img> element. This attribute is used to specify the URL of the Image.
Syntax:
Returns the image src property.
Set the image src property.
Property Values: It contains a single value URL that specifies the URL of the document that is embedded in the Image. There are two types of URL links which are listed below:
- Absolute URL: It points to another webpage.
- Relative URL: It points to other files of the same web page.
Return value: It returns a string value that represents the URL of the image.