Как подключить Magic Mouse к Windows-компьютеру
Apple Magic Mouse – возможно, самая необычная компьютерная мышь в мире. Почему? У неё есть всего одна кнопка, а поверхность распознает мультитач-жесты, так что происходящим на экране компьютера можно управлять жестами – так же, как на iPhone или iPad. Хотите попробовать такую мышку на своём ПК на Windows?

Подключить Magic Mouse к компьютеру на Windows просто – достаточно включить на ПК модуль Bluetooth. Но после сопряжения мыши и компьютера вы получите самую обыкновенную мышку, да к тому же ещё и однокнопочную. Все «сочные» фишки вроде нажатия в любой точке, нажатия правой кнопки мыши двумя пальцами, скроллинга веб-страниц и фотографий двумя пальцами, импульсной прокрутки протестировать не получится. В чём дело?
В позиции Apple, которая сделала Magic Mouse официально совместимой только с компьютерами Mac. Но не расстраивайтесь – уникальные жесты «яблочной» мышки все-таки можно перенести на ПК. Сразу несколько способов по настройке Magic Mouse под Windows предлагается ниже.
Способ I – Magic Mouse Utilities
Самый простой вариант «подружить» мышь Apple с вашим компьютером – набор бесплатных сторонних программ от разработчика Trackpadmagic.
1. Убедитесь, что на вашем ПК есть модуль Bluetooth. Если его нет, приобретите специальный Bluetooth-адаптер. Рекомендуемая модель для покупки – IOGEAR Bluetooth 4.0 USB Micro Adapter (GBU521), он проверен на работу с Magic Mouse. Пожалуйста, имейте в виду – с «яблочной» мышью совместим не каждый адаптер. Так что при прочих равных следует отдать предпочтение именно модели, приведенной выше.
2. Скачайте драйвер Magic Mouse. C его помощью вы сможете подключить мышь к компьютеру на Windows и получить базовую функциональность.
3. Скачайте и установите Magic Mouse Utility. C её помощью вы получите доступ к «продвинутым» функциям вроде скроллинга и возможности следить за уровнем заряда батареи. Условие – утилита должна быть включена всякий раз, когда вы пользуетесь чудо-мышкой Apple. Для этого зайдите в настройки и активируйте автозапуск сразу же после загрузки Windows.
4. Подключите Magic Mouse к ПК через Bluetooth. Если во время сопряжения возникнут проблемы, попробуйте провести сопряжение устройств с кодом 0000.

Способ II – установка драйверов Bootcamp
Bootcamp – набор драйверов для работы «железа» Apple в окружении Windows. Обычно их используют для установки «винды» второй системой на Mac, но подойдут они и в нашем случае.
Идеальный вариант для установки – последовательная установка версий драйверов Bootcamp.
1. Скачайте Bootcamp 3.0, смонтируйте его образ на диске и запустите файл Setup. После окончания установки перезагрузите ПК.
2. Установите версию Bootcamp 3.1 (32-разрядные ПК, 64-разрядные ПК). Затем снова перезагрузите ПК.
3. Установите Bootcamp версии 3.2 (32-разрядные ПК, 64-разрядные ПК). Перезагрузите компьютер.
Если желания «накатывать» все версии Bootcamp у вас нет, установите два драйвера: AppleWT и AppleMultiTP
Если Magic Mouse по-прежнему не работает:
1. Откройте на компьютере раздел настроек Bluetooth, выберите Добавить устройство.
2. Включите Magic Mouse.
3. Когда Windows распознает мышь, добавьте её в список устройств.
Готово! Теперь вы можете опробовать Magic Mouse в действии. Доступны будут не все функции, но самое интересное – жесты, клики, скроллинг – доступны Windows.
Bluetooth pairing
For Bluetooth pairing no additional software is required, it is fully handled by Windows.
There is no need to install the Magic Utilities to pair your device.
Select your Magic Mouse model:
Magic Mouse 1 — with 2x AA batteries in silver 
Magic Mouse 2 — rechargeable in silver , space gray  or black
Prepare for pairing
For fastest pairing, turn off Bluetooth on all other nearby devices.
This includes mobile phones, laptops and desktop computers as well as Bluetooth speakers.
- Make sure you have 2 fresh AA batteries inserted at the bottom of your Magic Mouse.
Bring your mouse into pairing mode
- At the bottom of the mouse, turn your Magic Mouse off and back on again.
- Wait until the little green light above the power switch is blinking .
- Make sure your Magic Mouse is charged. A new mouse is already charged by Apple otherwise charging for 10 minutes is enough.
Bring your mouse into pairing mode
- At the bottom of the mouse, turn your Magic Mouse off and back on again.
Pair your Magic Mouse
- Double click the Bluetooth icon in the Windows taskbar. If you can’t see the Bluetooth icon,
click on the + symbol below for detailed instructions.
- Click on the little up arrow on the right side of the taskbar.
- If there is still no Bluetooth icon it might be removed from the taskbar icons.
- Search Windows for Bluetooth settings or Add a device or refer to your Windows Help System on how to add a device.
- On Windows 10 select Settings > Devices
If a numeric code is requested while pairing enter 0000 (4 times zero) .
Verify pairing
In Windows 10, sometimes your device is paired, but is not working.
In Settings > Devices make sure your device is listed in the Mouse, keyboard & pen section.
If it’s listed in the Other devices section it won’t work.
- Delete your device from Other devices and wait a bit.
- Disable the Bluetooth radio
- Enable the Bluetooth radio again.
- Pair your device again.
- Double-check if it’s now appearing in the Mouse, keyboard & pen section.
Once the Magic Mouse is paired it should work as a generic mouse.
Moving your mose moves the cursor. Left and right clicks can be performed by clicking the left or right side of the mouse.
If you can move the mouse pointer on the screen it’s time to install the Magic Utilities.
Note: If pairing doesn’t work in the first place, installing the Magic Utilities does not help either.
In case you have constant Bluetooth issues, follow this comprehensive guide.
How to Use Apple Magic Mouse on Windows 11 & 10

The magic mouse is Apple’s answer to the word for wireless mouse and though the company has not intentionally launched it to be used separately and is mainly for Mac desktop PCs, there are users who also use it on other devices, like on Windows.
Yes, Apple’s Magic use can be used on Windows PCs as well, and if you are wondering how then stick around to this guide and I’ll show you how you can set up and use Apple Magic Mouse on Windows 11 or Windows 10 PCs.

How to add and setup Apple Magic Mouse on Windows
The Magic Mouse also uses Bluetooth connectivity in order to get connected as an input device and hence connecting to the Windows PC is no big deal. It is a pretty straightforward and simple procedure just like connecting any other Bluetooth mouse. Here is how you can add and set up the Magic Mouse on Windows via Bluetooth.
Attention Windows Users!!
Facing issues on your Windows PC every now and then? We would recommend you use the Restoro PC Repair tool.
It is a one-stop solution to repair common computer errors, protect your Windows PC from data loss, malware, hardware failure, Registry issues, BSOD errors, etc. and optimize your PC for maximum performance in just three simple steps:
- Download Restoro Tool that comes with Patented Technologies (see patents here).
- Install and click on Start Scan to find the issues on your Windows PC.
- Finally, click on Repair All to fix the issues.
4,533,876 users have downloaded Restoro till now.
On Windows 11
1. Press Win + I on the keyboard to open the Windows Settings.
2. Go to Bluetooth & devices from the left.
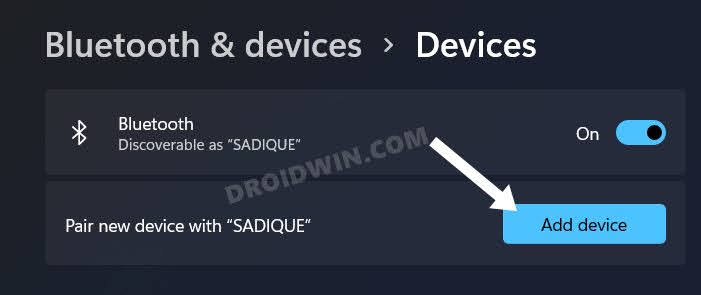
3. Make sure the Bluetooth is turned on and then click on Add Device right next to the Devices option.
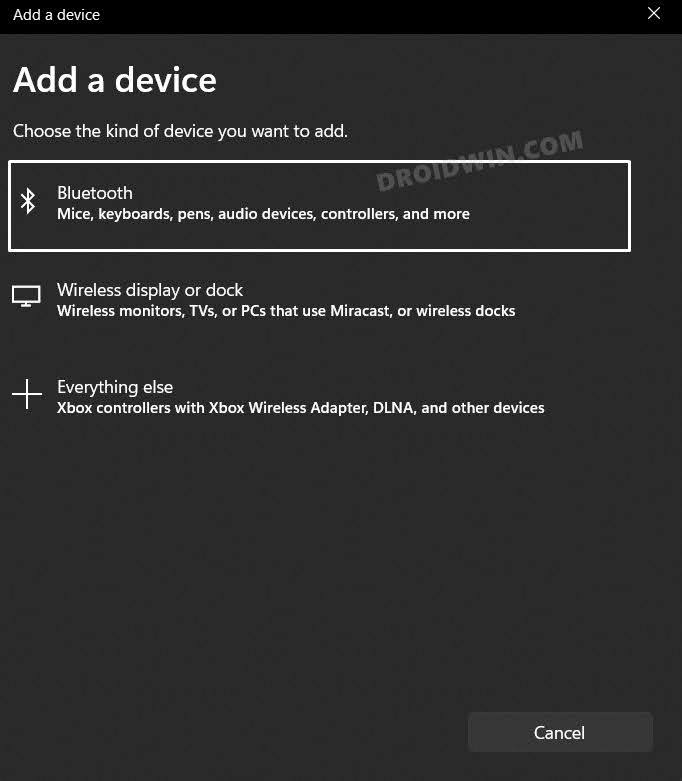
4. On the Add a device window, click on Bluetooth. This will start your PC to search for available nearby Bluetooth devices.
5. Make sure your Magic Mouse is turned on. If it is not then toggle on its switch located at the bottom.
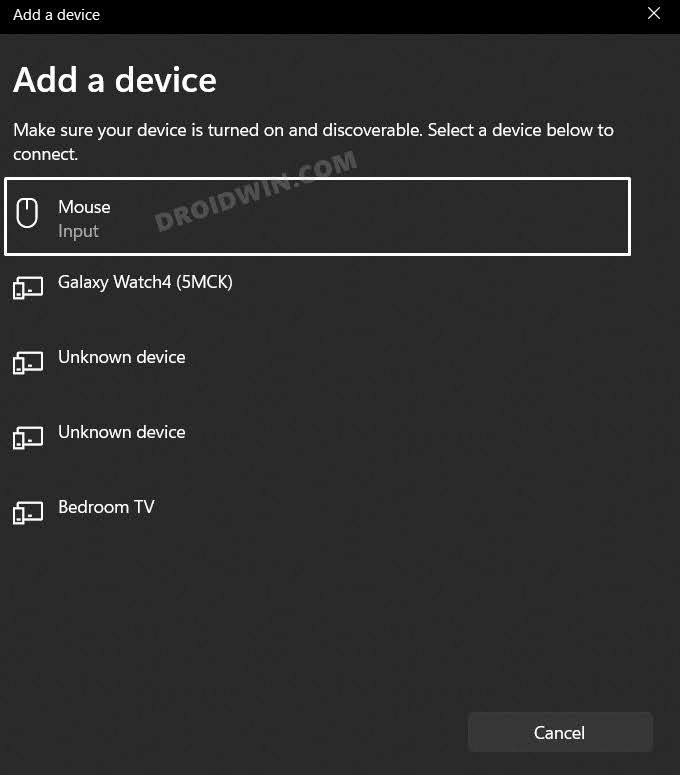
5. Your Magic Mouse will get appear on the Add a device on your Windows PC. Click on it to connect it to your PC.
On Windows 10
1. Open Windows Settings by pressing Win + I.
2. Go to Devices.
3. Select Bluetooth & other devices option from the left.
4. Here, make sure the Bluetooth is on and then click on Add Bluetooth or other devices.
5. The Add a device will appear. Click on Bluetooth.
6. Now, Windows will start searching for available Bluetooth devices. Hence make sure the tour Magic Mouse is turned on. If it’s not, then switch it on from the toggle at the bottom.
7. Now, your Magic Mouse will appear in the list of available Bluetooth devices. Click on it to connect it to your PC.
And that’s it. You have successfully connected your Magic Mouse to your Windows PC. You can now use the Magic Mouse on your Windows PC just like any other Bluetooth mouse. You even customize the Magic Mouse, like swapping the right and left clicks and the speed of the cursor. You can even change the scrolling speed of the mouse.
But here is a catch, you can’t scroll on Windows using the Magic Mouse on your Windows PC. And to solve this issue you’ll have to install the Apple Wireless drivers on your PC.
Installing Apple Wireless Mouse Drivers
There is no direct single driver file that can be downloaded and installed on your PC right away. Instead, there are two manual ways by which you can get the Apple Wireless Mouse Drivers installed on your PC, and here are those methods.
Apple provides a Boot Camp Support Software program that also contains the Apple Wireless Mouse drivers. These driver files can be used on your Windows PC to enable scrolling. This method is a bit outdated and there are chances that this method may not work on your Windows 11 or even the Windows 10 PC. But you give it a try.
Install drivers using Boot Camp Support Software
1. Head over to Apple’s official Boot Camp Support Software download page and click on the Download button to begin the download process.
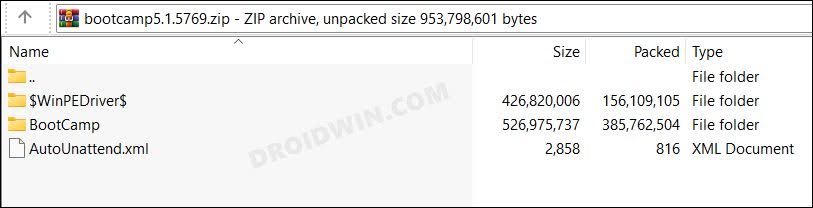
2. Once the Boot Camp zip file is downloaded, extract it.
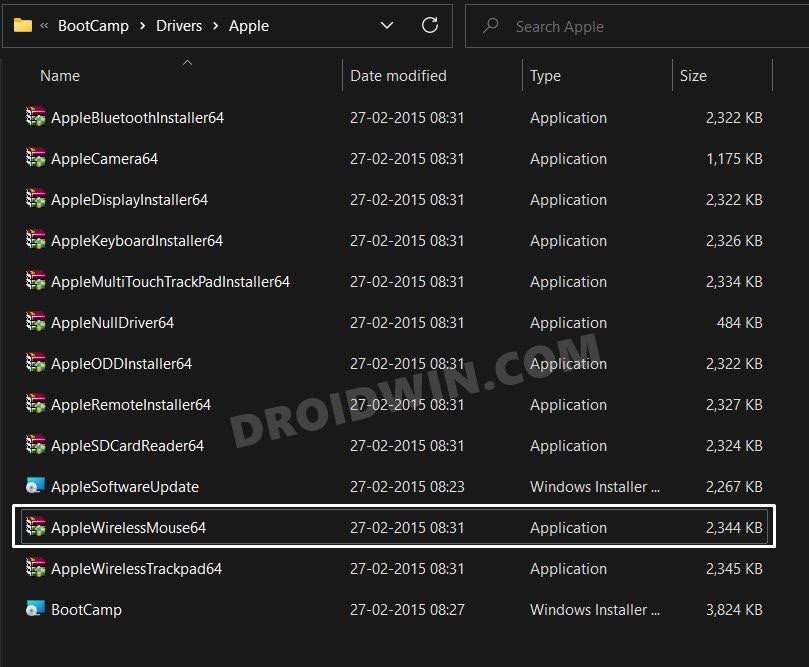
3. Once extracted, go to BootCamp > Drivers > Apple.
4. In the Apple folder, look for the file by the name AppleWirelessMouse64.
5. Right-click on the AppleWirelessMouse64 file and select Run as administrator.
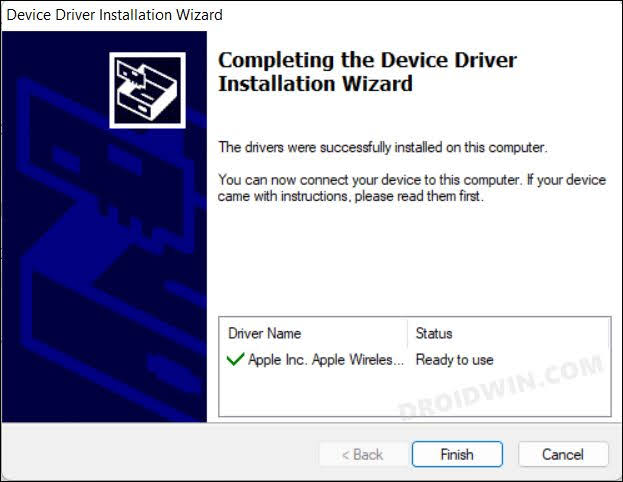
6. This will open the installation window of the Apple Wireless Mouse drivers. Follow the on-screen instructions and install the drivers.
Once done, restart your PC and check if you are able to scroll up and down properly using your Magic Mouse or not. If not, then head over to the next method.
Install drivers From Apple Using Brigadier
Brigadier is a Python script that can download the latest Boot Camp Support Software on your Windows PC by identifying it as a Mac machine. There are high chances that this method will work more prominently than the previous one as in this method we can download the Boot Camp for the latest possible MacBook and can extract its components and install the Apple Wireless Mouse drivers from it.
1. Head over to this GitHub link and download Brigadier on your desktop location.
2. Now open Command Prompt.
3. Type the following command in the command prompt and hit enter:
cd Desktop
4. Now, execute the following command after that:
brigadier.exe -m MacBookPro17,1
5. This command consists of the Mac identifier i.e. MacBookPro17,1. That means your Windows PC is being identified as the 13-inch MacBook Pro 2020 with Apple M1 Chip. You can change this Mac identifier but I would recommend you to use the identifier of the latest possible MacBook Pro.
6. Wait for the brigadier to download and extract the latest drivers on your Windows desktop. If Brigadier failed to download the files or if the folder created by Brigadier is empty, try installing 7-Zip and try again.
7. Once done, open the BootCamp folder and navigate to WinPEDriver$ > AppleWirelessMouse.
8. In the AppleWirelessMouse folder right-click on the AppleWirelessMouse64.inf file and select Install.
9. Follow the on-screen instructions and install it.
Once done, finally restart your PC and you should now be able to scroll using your Magic Mouse on your Windows PC.
Installing Apple Wireless Mouse Drivers on Mac
There are many Mac that uses Windows on their system using Boot Camp and generally when you set up Windows using Boot Camp, it automatically installs the Boot Camp Support Software package containing all the required drivers for Apple hardware to work properly on Windows. But in many cases, the Magic Mouse will not scroll items until the pending driver updates are not done. You can do this by using the Apple Software Update.
1. Search and open the Apple Software Update.
2. Wait for the Apple Software Update to check for the pending updates.
3. Check to mark the Apple Input Device Update and Boot Camp Update. You can also checkmark the other options that are available there to update.
4. Finally, click on the Install button to download and install the updates.
Try Magic Mouse Utilities
This is a well-experienced thing that the Magic Mouse doesn’t;t work as fluently as it works with Mac. And if you are concerned about this and seeking a solution, then you can give Magic Mouse Utilities a try.
The Magic Mouse Utilities is a 3rd-party utility software that can be used to improve the Magic Mouse’s functioning on Windows on both PC and Mac. It provides a ton of functionality that you can add to your Magin Mouse, like multiple gestures that allow you to switch b/w desktops, pages, etc. You can also manage the scrolling, introduces customizable middle-click, etc.
Magic Mouse Utilities is a paid software but it initially offers a 28-days free trial period so that you can properly test and use the software if it suits you or not.
How to Connect and Use Apple Magic Mouse in Windows 10/11
In this guide, we will show you the steps to connect and use your Apple Magic Mouse on your Windows 10/11 PC. There’s no denying the fact that Apple peripherals are probably the best in the business. To justify this claim, one shouldn’t look any further than its wireless mouse. Granted it is a tad more costly than its counterpart, but upon daily usage, you might be able to justify this high cost.
While the look and feel of this mouse play a part, but the major reason why users are inclined towards it is the built-in gesture support. Be it for switching between pages or tabs, performing zoom in/out, or scrolling through a page, all these could easily be carried out just by performing the specific gesture on the mouse itself.

Apple Magic Mouse 2 connected to Windows 11
So on to all these benefits attached, many users are looking forward to connecting and using their Apple Magic Mouse on their Windows 10/11 PC. If you are also on the same page, then this guide shall help you out. Follow along for the instructions.
How to Connect and Use Apple Magic Mouse in Windows 10/11

- To begin with, download the official Boot Camp Support Software from Apple.
- Once downloaded, extract it to any convenient location on your PC.
- Then go to the extracted folder > BootCamp > Drivers > Apple.
- Now double-click on the applewirelessmouse64.exe file to launch the setup.
- Then proceed with the on-screen instructions to complete the setup.
- Once done, open the Settings menu via Windows+I shortcut keys.
- Then go to Bluetooth and Devices and click on Add Device.
- After that, select Bluetooth from the list.
- Now click on Mouse from the list of devices. That’s it.
- Your Apple Mouse is now paired and connected with your Windows 10/11 PC.

That’s it. These were the steps to connect and use your Apple Magic Mouse 1/2 on your Windows 10/11 PC. If you have any queries concerning the aforementioned steps, do let us know in the comments. We will get back to you with a solution at the earliest.
About Chief Editor
Sadique Hassan
A technical geek by birth, he always has a keen interest in the Android platform right since the birth of the HTC Dream. The open-source environment always seems to intrigue him with the plethora of options available at his fingertips. “MBA by profession, blogger by choice!”