Simple Steps to Install gcc compiler and g++ Compiler on Windows 10
If you are a developer and trying to compile your C/C++ program in the command prompt, then this article will help you to install gcc compiler and g++ compiler on your Windows 10 computer in order to compile your code. If these compilers are not installed, you will get the error “gcc is not recognized as an internal or external command“.
- Minimalist GNU for Windows (MinGW): It is a development environment for Windows applications.
- gcc compiler: Use this compiler to compile C programs.
- g++ compiler: Use this compiler to compile C++ programs.
gcc and g++ compiler along with other compilers come together as a package when you install the MinGW tool. So, you are required to download and install the MinGW tool on your development environment.
Here is a step-by-step guide.
Step 1: Download MinGW tool
You can download the installable from MinGW official website or from any other trusted source.
On the official website, click on the Downloads tab on the top side and go to List of Releases. Under the Download List section, look for the Windows download button as shown below and download the setup file. 
The mingw-get-setup.exe file gets downloaded to your computer in the downloads folder.
Step 2: Steps to install MinGW
- Right-click on the mingw-get-setup.exe file and run as administrator.
- In the MinGW Installation Manager Setup Tool window, click on Install.
- By default, the installation directory is set as C:\MinGW. You can change the installation directory by clicking on the Change button and selecting a different folder.
- Click on the Continue button to start the installation.
- Once the installation is complete, click the Continue button to close MinGW Installation Manager Setup Tool.
Step 3: Install packages in MinGW / Install gcc compiler
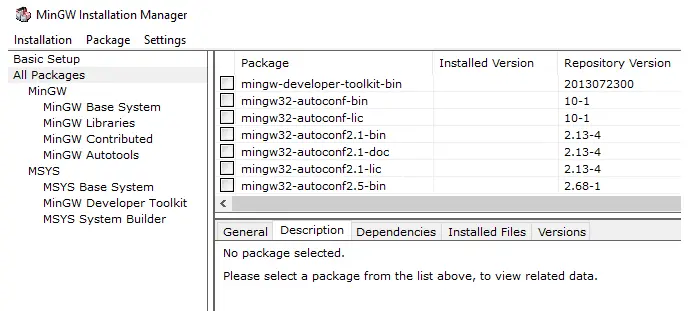
Once you install MinGW, open MinGW Installation Manager from the Windows start menu that contains the list of packages you can install.
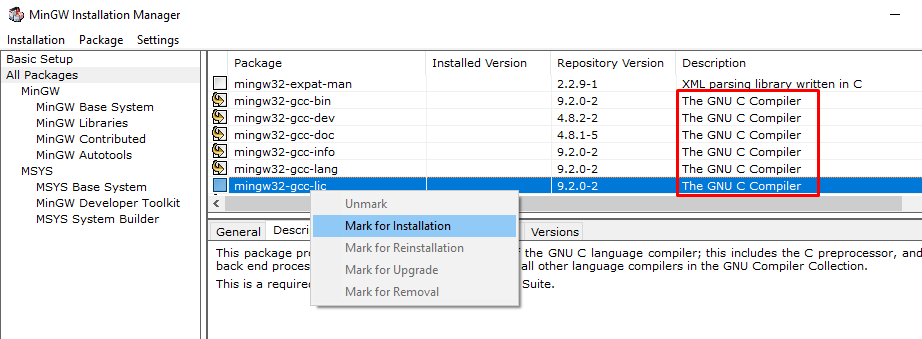
Select the packages you want to install and right-click and choose Mark for Installation. Make sure to mark all GNU C compilers as shown below.
Note: After installation, if you want to remove, upgrade or reinstall certain packages, then you can use MinGW Installation Manager and choose respective option by right-clicking on the package.
Once you mark all packages for installation click on Installation menu and select Apply Changes.
In the Schedule of Pending Actions window, click on Apply button. It starts installing marked packages on your local environment.
Step 4: Set up the environment variable for MinGW
- Go to Control Panel → System and Security → System or right-click on This PC → Properties.
- Click on Advanced system settings. It opens System Properties dialog box.
- In the System Properties window, under the Advanced tab, click on the “Environment Variables...” button to open the environment variables window.
- Under the System variables section, edit the path variable and append gcc compiler path up to the bin folder.
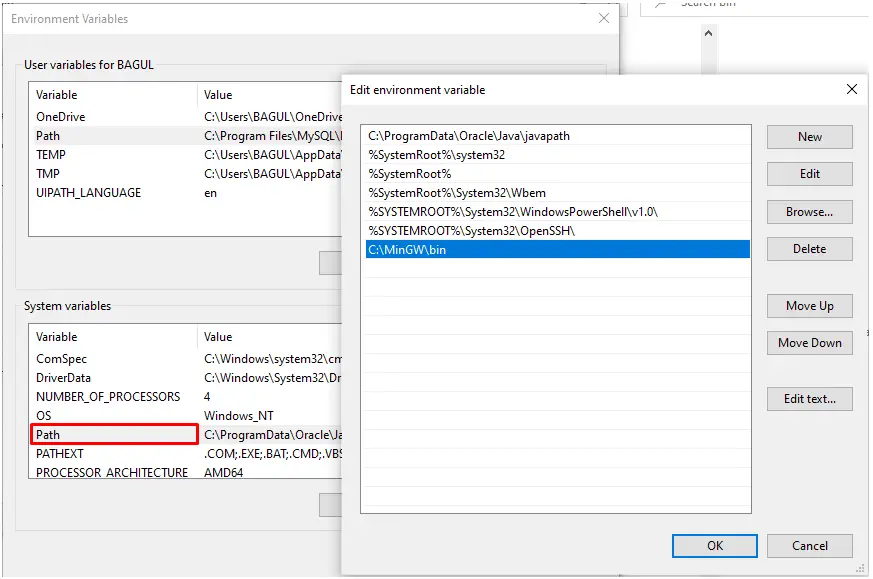
Note: The bin folder contains executable files of the compiler.
Step 5: Test installation of gcc and g++ compiler
To test if the gcc compiler or the g++ compiler is installed correctly, open a command prompt and type the following command.

For gcc compiler: gcc –v
For g++ compiler: g++ -v
If these commands return the version of the compiler, then it means you have installed gcc and g++ compilers correctly.
If you are getting an error message “gcc is not recognized as an internal or external command” then click on the below link to resolve the error.
Final words:
These are all the steps you need to follow in order to install gcc compiler and g++ compiler on your computer and execute your C/C++ program in the command prompt. If you have any questions or issues, do let us know in the comments section.
Русские Блоги
Window10-MinGW скачать и установить компилятор gcc, g ++
Справочник статей
Завершите шаги процесса:
Открыть скачанный mingw-get-setup.exe Здесь выберите каталог установки как F:\MinGW 。


3. Загрузите и установите gcc / g ++
по MinGW Installation Manager Загрузите gcc / g ++. Проверить mingw32-gcc-g++-bin , Нажмите на Apply Changes Загрузите и установите gcc / g ++.


4. Настройте переменные среды:
Редактировать системные переменные Path И добавить переменную среды F:\MinGW\bin Специально в корневом каталоге MinGW \bin Справочники разделены точками с запятой на английском языке.


5. Проверьте, был ли gcc / g ++ успешно загружен и установлен:
открытый cmd Терминал, введите gcc -v и g++ -v Убедитесь, что gcc и g ++ установлены и настроены успешно. Если это как показано ниже, это успешно.

Проблемы возникают:
1. На шаге 3 (загрузить и установить gcc / g ++) некоторые пакеты не могут быть успешно загружены:
В частности, потому что URL отсутствует libgmp-6.1.2-2-mingw32-dll-10.tar.xz , libmpfr-3.1.5-1-mingw32-dll-4.tar.xz Два пакета, что приводит к важным компонентам при компиляции g ++ libgmp-10.dll и libmpfr-4.dll Потеря.


Скопируйте эти два пакета со студентами, которые уже скачали и установили, или из облегченной IDE с MinGW, такой как Dev-cpp 、 Code Blocks Скопируйте эти два пакета в путь, а путь — в корневой каталог MinGW. \var\cache\mingw-get\packages 。
Затем распакуйте эти два архива и поместите в них компоненты libgmp-10.dll и libmpfr-4.dll Скопировать в корневой каталог MinGW \bin 。
Интеллектуальная рекомендация
cf 1092d2 мышление + стек
Заглавие: n столбцов из вертикально расположенных кирпичей, высота каждого столбца ai, существует бесчисленное множество кирпичей 2 * 1, которые можно разместить горизонтально только на двух соседних .
Using GCC with MinGW
In this tutorial, you configure Visual Studio Code to use the GCC C++ compiler (g++) and GDB debugger from mingw-w64 to create programs that run on Windows.
After configuring VS Code, you will compile and debug a simple Hello World program in VS Code. This tutorial does not teach you about GCC, GDB, Mingw-w64, or the C++ language. For those subjects, there are many good resources available on the Web.
If you have any problems, feel free to file an issue for this tutorial in the VS Code documentation repository.
Prerequisites
To successfully complete this tutorial, you must do the following steps:
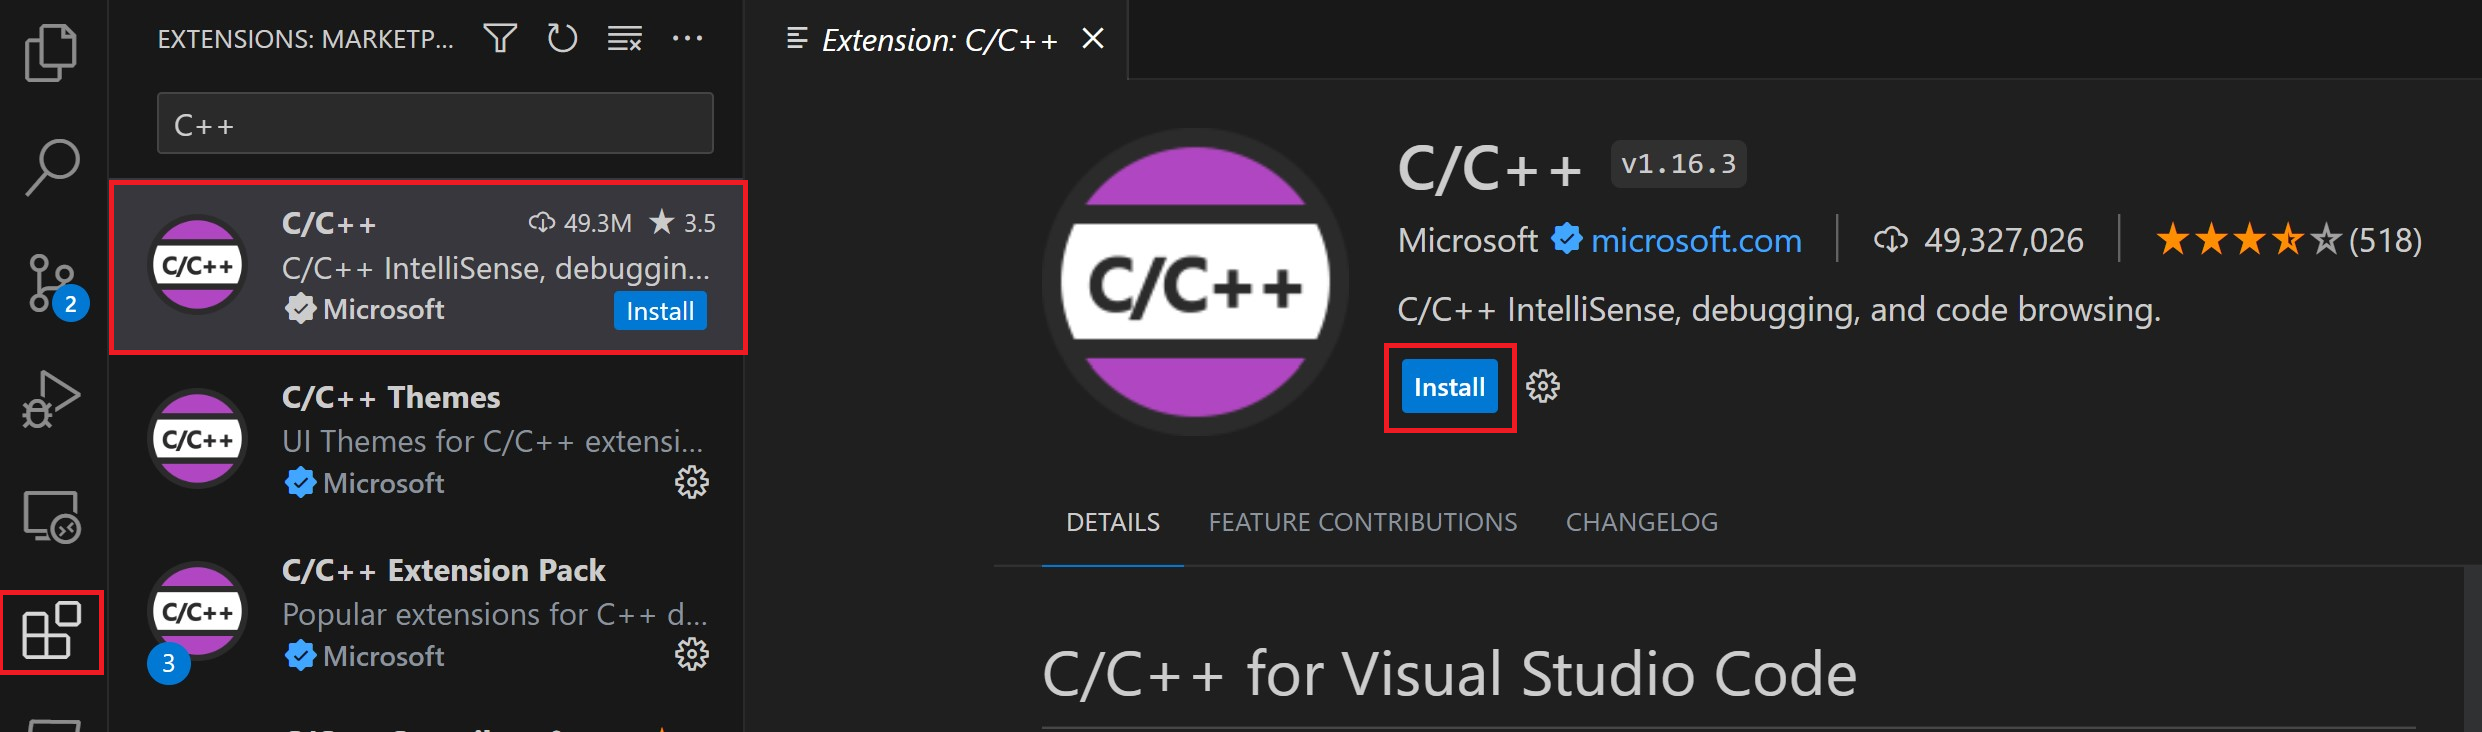
Install the C/C++ extension for VS Code. You can install the C/C++ extension by searching for ‘c++’ in the Extensions view ( ⇧⌘X (Windows, Linux Ctrl+Shift+X ) ).
Get the latest version of Mingw-w64 via MSYS2, which provides up-to-date native builds of GCC, Mingw-w64, and other helpful C++ tools and libraries. You can download the latest installer from the MSYS2 page or use this link to the installer.
Follow the Installation instructions on the MSYS2 website to install Mingw-w64. Take care to run each required Start menu and pacman command.
Install the Mingw-w64 toolchain ( pacman -S —needed base-devel mingw-w64-x86_64-toolchain ). Run the pacman command in a MSYS2 terminal. Accept the default to install all the members in the toolchain group.
Add the path to your Mingw-w64 bin folder to the Windows PATH environment variable by using the following steps:
- In the Windows search bar, type ‘settings’ to open your Windows Settings.
- Search for Edit environment variables for your account.
- Choose the Path variable in your User variables and then select Edit.
- Select New and add the Mingw-w64 destination folder path to the system path. The exact path depends on which version of Mingw-w64 you have installed and where you installed it. If you used the settings above to install Mingw-w64, then add this to the path: C:\msys64\mingw64\bin .
- Select OK to save the updated PATH. You will need to reopen any console windows for the new PATH location to be available.
Check your MinGW installation
To check that your Mingw-w64 tools are correctly installed and available, open a new Command Prompt and type:
- If you don’t see the expected output or g++ or gdb is not a recognized command, make sure your PATH entry matches the Mingw-w64 binary location where the compilers are located. If the compilers do not exist at that PATH entry, make sure you followed the instructions on the MSYS2 website to install Mingw-w64.
- If gcc has the correct output but not gdb , then you need to install the packages you are missing from the Mingw-w64 toolset.
- Missing the mingw-w64-gdb package is one cause of the "The value of miDebuggerPath is invalid." message upon attempted compilation if your PATH is correct.
Create Hello World
From a Windows command prompt, create an empty folder called projects where you can place all your VS Code projects. Then create a sub-folder called helloworld , navigate into it, and open VS Code in that folder by entering the following commands:
The "code ." command opens VS Code in the current working folder, which becomes your "workspace". Accept the Workspace Trust dialog by selecting Yes, I trust the authors since this is a folder you created.
As you go through the tutorial, you will see three files created in a .vscode folder in the workspace:
- tasks.json (build instructions)
- launch.json (debugger settings)
- c_cpp_properties.json (compiler path and IntelliSense settings)
Add a source code file
In the File Explorer title bar, select the New File button and name the file helloworld.cpp .
Add hello world source code
Now paste in this source code:
Now press ⌘S (Windows, Linux Ctrl+S ) to save the file. Notice how the file you just added appears in the File Explorer view ( ⇧⌘E (Windows, Linux Ctrl+Shift+E ) ) in the side bar of VS Code:
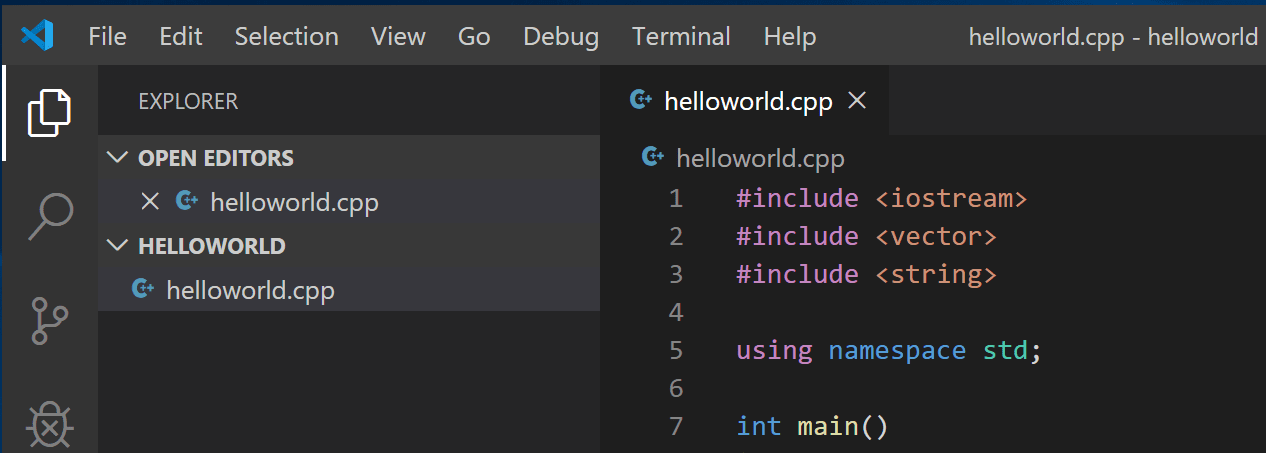
You can also enable Auto Save to automatically save your file changes, by checking Auto Save in the main File menu.
The Activity Bar on the far left lets you open different views such as Search, Source Control, and Run. You’ll look at the Run view later in this tutorial. You can find out more about the other views in the VS Code User Interface documentation.
Note: When you save or open a C++ file, you may see a notification from the C/C++ extension about the availability of an Insiders version, which lets you test new features and fixes. You can ignore this notification by selecting the X (Clear Notification).
Explore IntelliSense
In your new helloworld.cpp file, hover over vector or string to see type information. After the declaration of the msg variable, start typing msg. as you would when calling a member function. You should immediately see a completion list that shows all the member functions, and a window that shows the type information for the msg object:
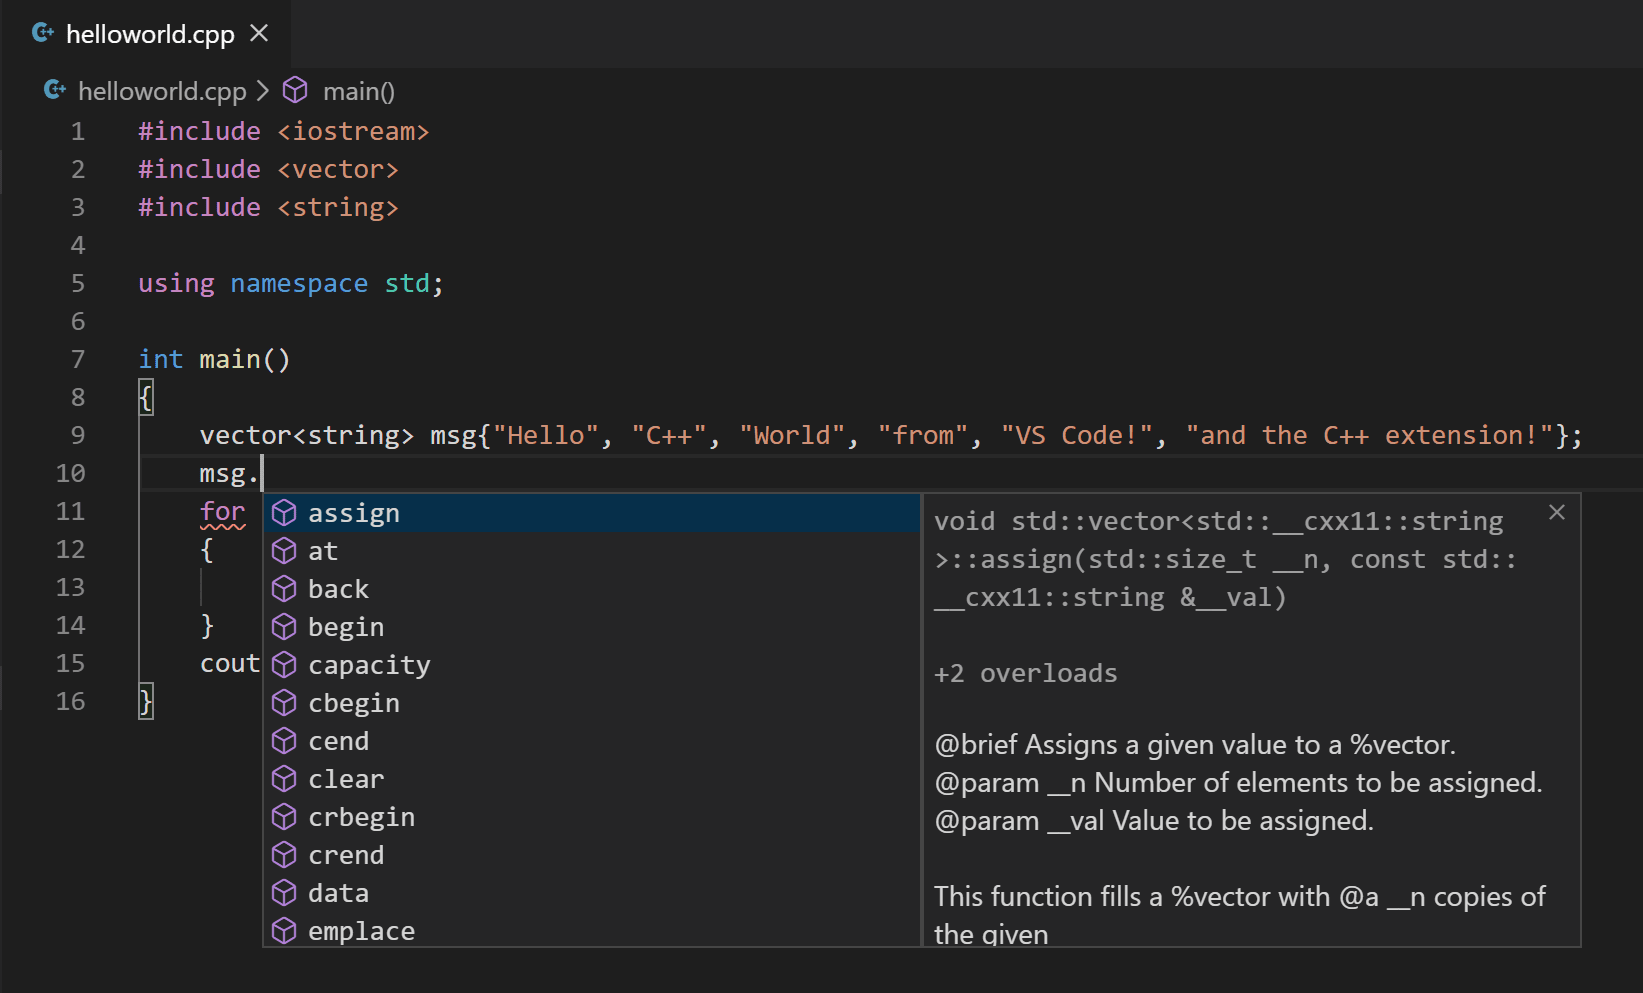
You can press the Tab key to insert the selected member; then, when you add the opening parenthesis, you will see information about any arguments that the function requires.
Run helloworld.cpp
Remember, the C++ extension uses the C++ compiler you have installed on your machine to build your program. Make sure you have a C++ compiler installed before attempting to run and debug helloworld.cpp in VS Code.
Open helloworld.cpp so that it is the active file.
Press the play button in the top right corner of the editor.
Choose C/C++: g++.exe build and debug active file from the list of detected compilers on your system.
You’ll only be asked to choose a compiler the first time you run helloworld.cpp . This compiler will be set as the "default" compiler in tasks.json file.
After the build succeeds, your program’s output will appear in the integrated Terminal.
The first time you run your program, the C++ extension creates tasks.json , which you’ll find in your project’s .vscode folder. tasks.json stores build configurations.
Your new tasks.json file should look similar to the JSON below:
Note: You can learn more about tasks.json variables in the variables reference.
The command setting specifies the program to run; in this case that is g++. The args array specifies the command-line arguments that will be passed to g++. These arguments must be specified in the order expected by the compiler.
This task tells g++ to take the active file ( $
The label value is what you will see in the tasks list; you can name this whatever you like.
The detail value is what you will as the description of the task in the tasks list. It’s highly recommended to rename this value to differentiate it from similar tasks.
From now on, the play button will read from tasks.json to figure out how to build and run your program. You can define multiple build tasks in tasks.json , and whichever task is marked as the default will be used by the play button. In case you need to change the default compiler, you can run Tasks: Configure default build task. Alternatively you can modify the tasks.json file and remove the default by replacing this segment:
Modifying tasks.json
You can modify your tasks.json to build multiple C++ files by using an argument like "$
Debug helloworld.cpp
- Go back to helloworld.cpp so that it is the active file.
- Set a breakpoint by clicking on the editor margin or using F9 on the current line.
- From the drop-down next to the play button, select Debug C/C++ File.
- Choose C/C++: g++ build and debug active file from the list of detected compilers on your system (you’ll only be asked to choose a compiler the first time you run/debug helloworld.cpp ).
The play button has two modes: Run C/C++ File and Debug C/C++ File. It will default to the last-used mode. If you see the debug icon in the play button, you can just click the play button to debug, instead of using the drop-down.
Explore the debugger
Before you start stepping through the code, let’s take a moment to notice several changes in the user interface:
The Integrated Terminal appears at the bottom of the source code editor. In the Debug Output tab, you see output that indicates the debugger is up and running.
The editor highlights the line where you set a breakpoint before starting the debugger:
The Run and Debug view on the left shows debugging information. You’ll see an example later in the tutorial.
At the top of the code editor, a debugging control panel appears. You can move this around the screen by grabbing the dots on the left side.

Step through the code
Now you’re ready to start stepping through the code.
Click or press the Step over icon in the debugging control panel.
This will advance program execution to the first line of the for loop, and skip over all the internal function calls within the vector and string classes that are invoked when the msg variable is created and initialized. Notice the change in the Variables window on the left.
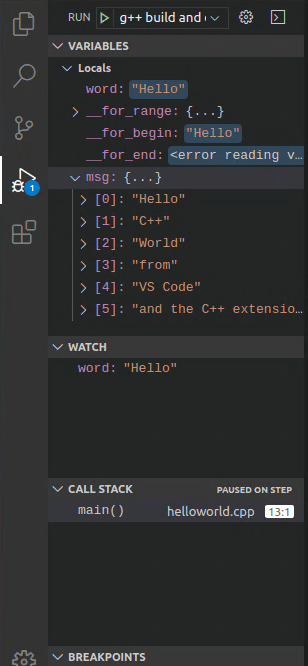
In this case, the errors are expected because, although the variable names for the loop are now visible to the debugger, the statement has not executed yet, so there is nothing to read at this point. The contents of msg are visible, however, because that statement has completed.
Press Step over again to advance to the next statement in this program (skipping over all the internal code that is executed to initialize the loop). Now, the Variables window shows information about the loop variables.
Press Step over again to execute the cout statement. (Note that as of the March 2019 release, the C++ extension does not print any output to the Debug Console until the loop exits.)
If you like, you can keep pressing Step over until all the words in the vector have been printed to the console. But if you are curious, try pressing the Step Into button to step through source code in the C++ standard library!
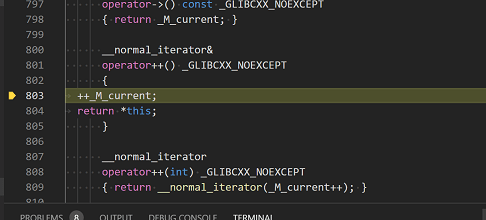
To return to your own code, one way is to keep pressing Step over. Another way is to set a breakpoint in your code by switching to the helloworld.cpp tab in the code editor, putting the insertion point somewhere on the cout statement inside the loop, and pressing F9 . A red dot appears in the gutter on the left to indicate that a breakpoint has been set on this line.
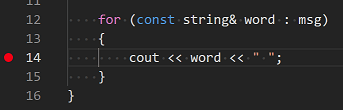
Then press F5 to start execution from the current line in the standard library header. Execution will break on cout . If you like, you can press F9 again to toggle off the breakpoint.
When the loop has completed, you can see the output in the Integrated Terminal, along with some other diagnostic information that is output by GDB.

Set a watch
Sometimes you might want to keep track of the value of a variable as your program executes. You can do this by setting a watch on the variable.
Place the insertion point inside the loop. In the Watch window, click the plus sign and in the text box, type word , which is the name of the loop variable. Now view the Watch window as you step through the loop.
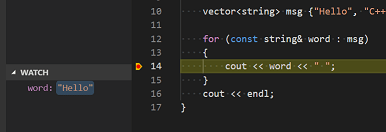
Add another watch by adding this statement before the loop: int i = 0; . Then, inside the loop, add this statement: ++i; . Now add a watch for i as you did in the previous step.
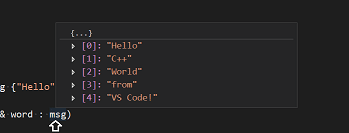
To quickly view the value of any variable while execution is paused on a breakpoint, you can hover over it with the mouse pointer.
Customize debugging with launch.json
When you debug with the play button or F5 , the C++ extension creates a dynamic debug configuration on the fly.
There are cases where you’d want to customize your debug configuration, such as specifying arguments to pass to the program at runtime. You can define custom debug configurations in a launch.json file.
To create launch.json , choose Add Debug Configuration from the play button drop-down menu.
You’ll then see a dropdown for various predefined debugging configurations. Choose C/C++: g++.exe build and debug active file.
VS Code creates a launch.json file, which looks something like this:
In the JSON above, program specifies the program you want to debug. Here it is set to the active file folder ( $
By default, the C++ extension won’t add any breakpoints to your source code and the stopAtEntry value is set to false .
Change the stopAtEntry value to true to cause the debugger to stop on the main method when you start debugging.
From now on, the play button and F5 will read from your launch.json file when launching your program for debugging.
C/C++ configurations
If you want more control over the C/C++ extension, you can create a c_cpp_properties.json file, which will allow you to change settings such as the path to the compiler, include paths, C++ standard (default is C++17), and more.
You can view the C/C++ configuration UI by running the command C/C++: Edit Configurations (UI) from the Command Palette ( ⇧⌘P (Windows, Linux Ctrl+Shift+P ) ).
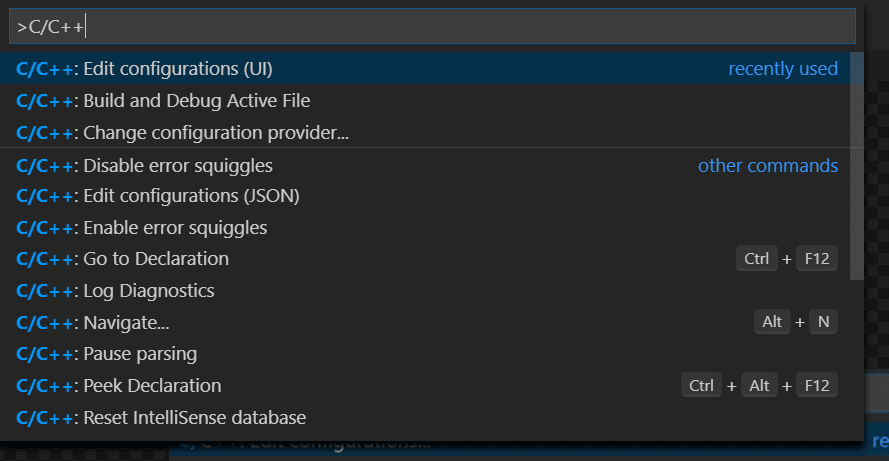
This opens the C/C++ Configurations page. When you make changes here, VS Code writes them to a file called c_cpp_properties.json in the .vscode folder.
Here, we’ve changed the Configuration name to GCC, set the Compiler path dropdown to the g++ compiler, and the IntelliSense mode to match the compiler (gcc-x64).
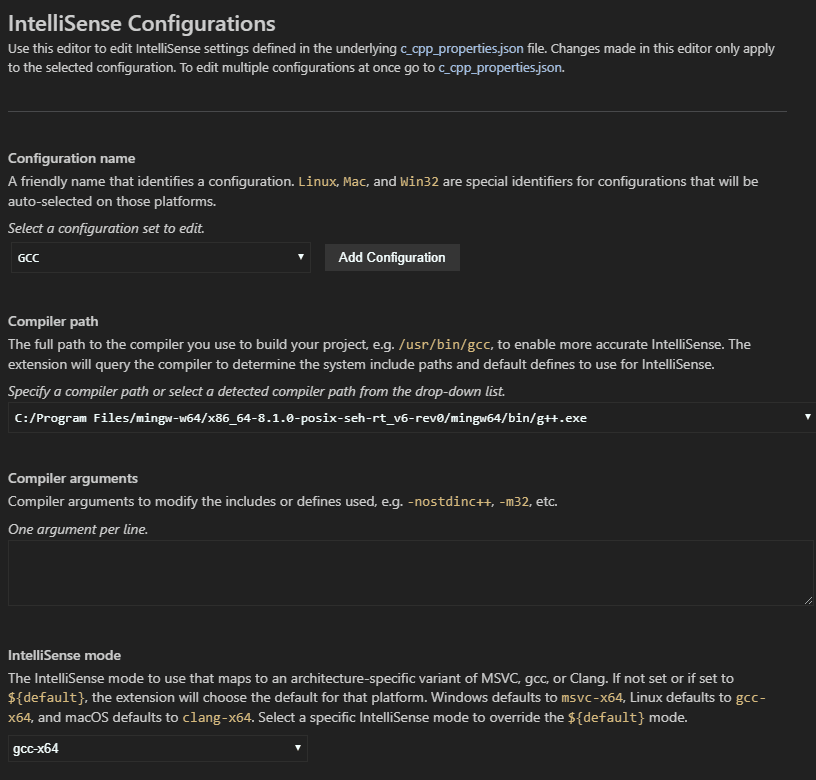
Visual Studio Code places these settings in .vscode\c_cpp_properties.json . If you open that file directly, it should look something like this:
You only need to add to the Include path array setting if your program includes header files that are not in your workspace or in the standard library path.
Compiler path
The extension uses the compilerPath setting to infer the path to the C++ standard library header files. When the extension knows where to find those files, it can provide features like smart completions and Go to Definition navigation.
The C/C++ extension attempts to populate compilerPath with the default compiler location based on what it finds on your system. The extension looks in several common compiler locations.
The compilerPath search order is:
- First check for the Microsoft Visual C++ compiler
- Then look for g++ on Windows Subsystem for Linux (WSL)
- Then g++ for Mingw-w64.
If you have Visual Studio or WSL installed, you may need to change compilerPath to match the preferred compiler for your project. For example, if you installed Mingw-w64 version 8.1.0 using the i686 architecture, Win32 threading, and sjlj exception handling install options, the path would look like this: C:\Program Files (x86)\mingw-w64\i686-8.1.0-win32-sjlj-rt_v6-rev0\mingw64\bin\g++.exe .
Troubleshooting
MSYS2 is installed, but g++ and gdb are still not found
You must follow the steps on the MSYS2 website and use the MSYS CLI to install Mingw-w64, which contains those tools. You will also need to install the full Mingw-w64 toolchain ( pacman -S —needed base-devel mingw-w64-x86_64-toolchain ) to get the gdb debugger.
MinGW 32-bit
If you need a 32-bit version of the MinGW toolset, consult the Downloading section on the MSYS2 wiki. It includes links to both 32-bit and 64-bit installation options.
как установить gcc компилятор на windows
что бы он работал без всяких глобальных настроек системы. Мобильно, удобно для переноса между компами. Ниже приведена правильная последовательность действий дающая такой результат.
Все локально
Базовый MinGW не требует никаких обязательных настроек системы, реестра, путей и т.п., даже если иное вы прочитаете на их сайте.
Я специально отделяю эту инсталляцию от других возможных инсталляций GCC в системе. Она не вызывает конфликта ни с QT ни с SDK для контроллеров.
Они требуют прописывать PATH, я делаю это не системно а локально в компиляционных скриптах. Так мы точно знаем какой компилятор откуда запустился.
Откуда все взялось знать не обязательно.
Откуда взялось
Исходное скачивание проводится на компе с интернетом.
Я не хочу менять никаких системных настроек. Хочу, чтобы компилятор копировался на другие компы и был готов к работе без всяких подготовительных процедур.
Предупреждаю, что эта процедура может привести к скачиванию более новых версий и соответственно к несовместимости с какими то исходниками отлаженными под то что выдано выше.
mingw-get
Распаковываем в C:\MinGW.
Запускаем cmd.exe и пишием:
(далее текущая директория C:\MinGW\bin подразумевается)
Проверяем
По мининимуму больше ничего не нужно. Компиляцию будет организовывать Jam.
Лицензия
Мы не поставляем ни GCC ни MinGW ни как часть наших инсталляций, ни как неотъемлемую часть SDK. Они не являются составляющей частью наших продуктов ни в каком виде. Если какая либо поставка утилит будет включать GCC или MinGW то все связанные с ними исходники требуемые лицензиями и копия лицензии приложены и либо доступны для скачивания с нашего сайта либо входят в поставляемый архив.
Установка gcc в Windows 10
Введение
GNU Compiler Collection (обычно используется сокращение GCC) — набор компиляторов для различных языков программирования, разработанный в рамках проекта GNU. GCC является свободным программным обеспечением, распространяется фондом свободного программного обеспечения (FSF) на условиях GNU GPL и GNU LGPL и является ключевым компонентом GNU toolchain. Он используется как стандартный компилятор для свободных UNIX-подобных операционных систем.
Изначально названный GNU C Compiler поддерживал только язык Си. Позднее GCC был расширен для компиляции исходных кодов на таких языках программирования, как C++, Objective-C, Java, Фортран, Ada, Go, GAS и D.
С версии 4.2.2 GCC перешёл на лицензию GPLv3.
Перед установкой
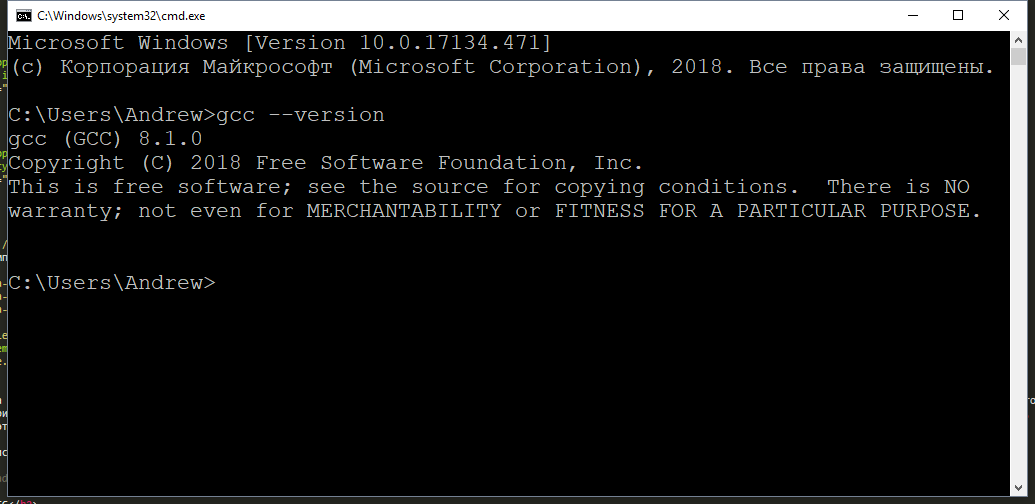
Проверить, установлен ли gcc можно в cmd командой
Если gcc установлени, Вы увидите версию
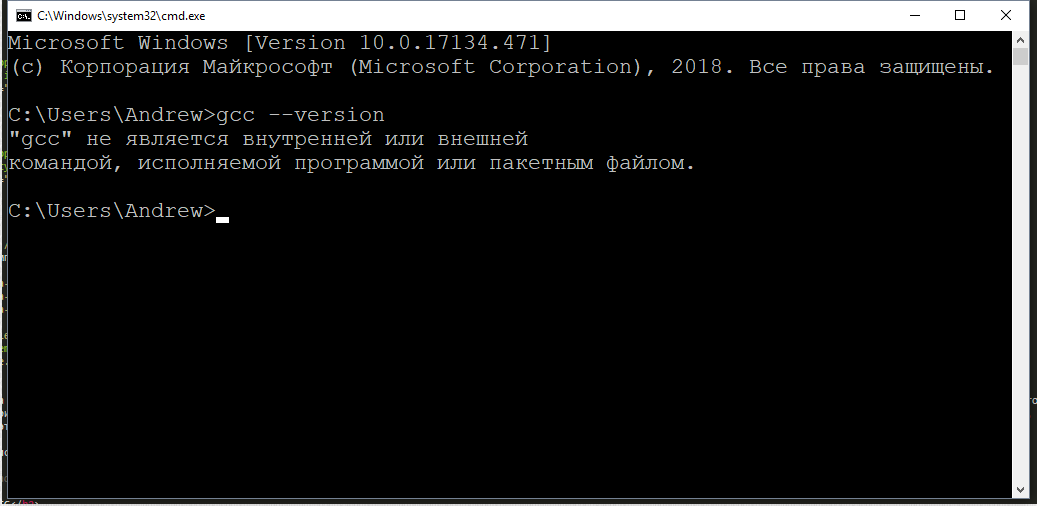
Если gcc не установлен, Вы увидите следующее сообщение
Установка
Для работы в Windows нужен MinGW скачать его можно на сайте nuwen.net/mingw.html
Для этой статьи использовался mingw-17.1.exe
Далее действуйте по инструкции
Двойной клик на mingw-17.1.exe


После установки нужно добавить C:\MinGW\bin в системную переменную среды PATH.
Если Вы не знаете как это сделать, прочитайте мою статью «Системная переменная PATH»
После установки
Итак, Вы установили MinGW написали простейшую программу 3.cpp, компилируете с помощью gcc
c:/mingw/bin/../lib/gcc/x86_64-w64-mingw32/9.2.0/../../../../x86_64-w64-mingw32/bin/ld.exe: C:\Users\Andrei\AppData\Local\Temp\ccuoNssB.o:3.cpp:(.text+0x28): undefined reference to `std::ios_base::Init::
Init()’ c:/mingw/bin/../lib/gcc/x86_64-w64-mingw32/9.2.0/../../../../x86_64-w64-mingw32/bin/ld.exe: C:\Users\Andrei\AppData\Local\Temp\ccuoNssB.o:3.cpp:(.text+0x58): undefined reference to `std::ios_base::Init::Init()’ collect2.exe: error: ld returned 1 exit status
Если Вы планируете писать софт, который должен будет работать под UNIX-подобными ОС, например Linux или OpenBSD то устанавливать MinGW не стоит.
Попробуйте добавить в Ваш Windows подсистему для Linux и установить gcc там.
Установка gcc в подсистеме Linux для Windows
sudo apt install build-essentials
Установка Cygwin
У меня пока что только негативный опыт работы с ним, но у Вас может получиться лучше.
Как установить компилятор gcc / g++ для Windows. Установка gcc
Время чтения: 5 минут
Для того, чтобы писать программы на C/C++ обычно достаточно установить какую-нибудь интерактивную среду разработки (IDE), например, Visual Studio или Eclipse, однако иногда (обычно в целях обучения студентов) требуется создавать программы в обыкновенном текстовом редакторе и компилировать приложение, используя консоль и компилятор gcc. В Unix системах он обычно установлен прямо «из коробки», а вот на Windows системах такой роскоши не наблюдается. Более того, у многих пользователей возникает множество проблем при установке компилятора. Поэтому нами было принято решение написать данную статью, чтобы помочь всем тем, кому пришлось или приходится мучаться с установкой этого компилятора на Windows.
0. Прежде чем поставить компилятор GCC
Если в окне консоли появилось сообщение с версией компилятора и другая информация о GCC (второй скриншот), значит компилятор уже установлен и больше дополнительно ничего делать не нужно. А вот если вывод командной строки такой:
— значит GCC ещё не установлен в системе, поэтому двигаемся дальше.
1. Скачиваем установщик компилятора
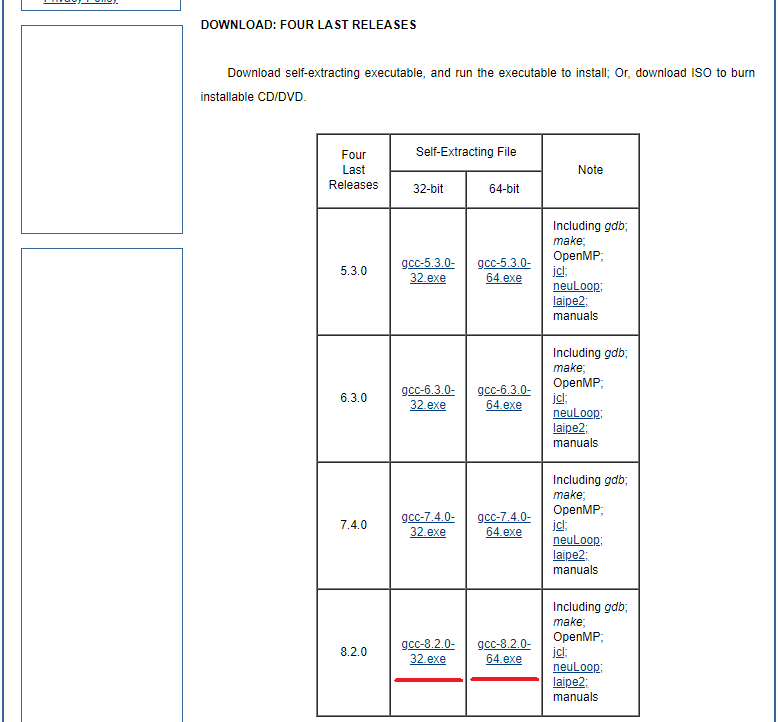
Чтобы поставить GCC на операционную систему Windows, необходимо скачать установочный файл для него. Сделать это можно здесь: equation.com/servlet/equation.cmd?fa=fortran. Найдите в таблице версию компилятора, которая вам больше нравится (мы рекомендуем скачивать самую последнюю, на текущий момент — это версия 8.2.0) и скачайте установщик для вашей системы (32 или 64 бит).
2. Установка GCC
После того, как файл был скачан, откройте в проводнике папку, в которую был скачан установщик и запустите его, кликнув по файлу дважды левой кнопкой мыши. Появится окно, требующее подтверждения действия. В нём нужно выбрать да (иначе ничего ставиться не будет).
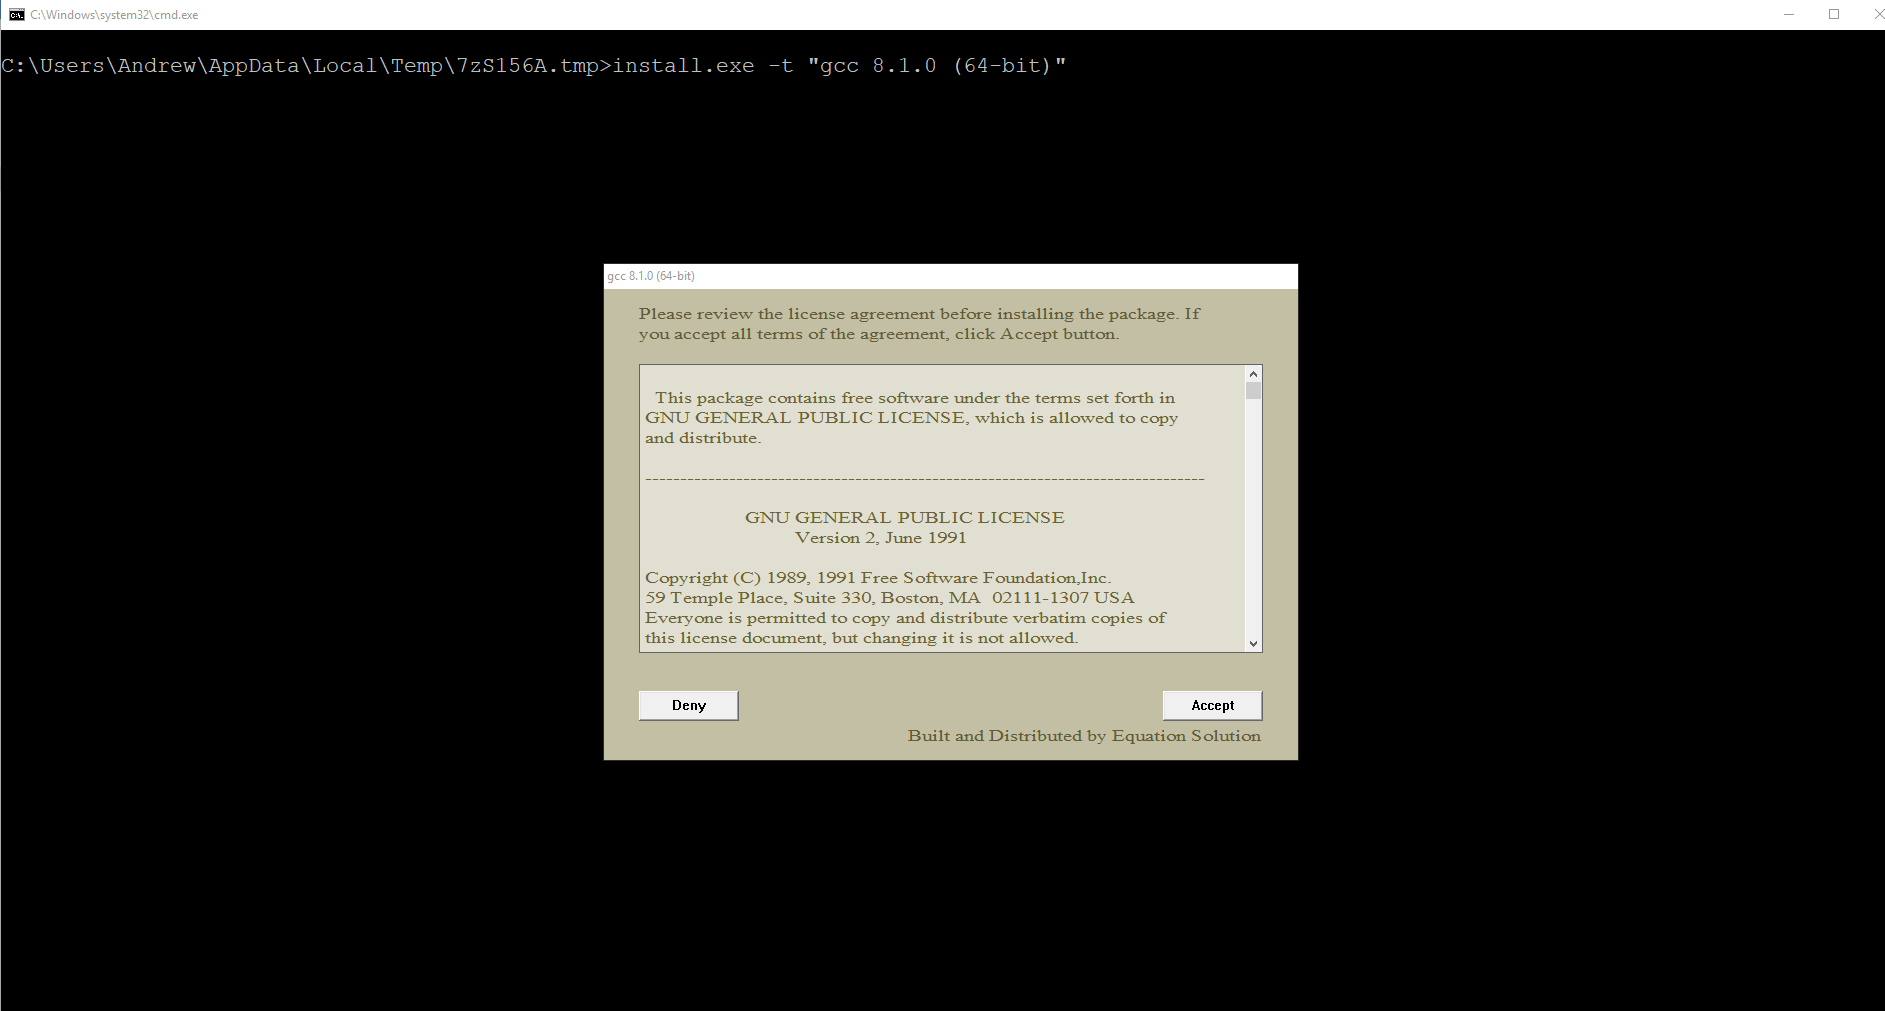
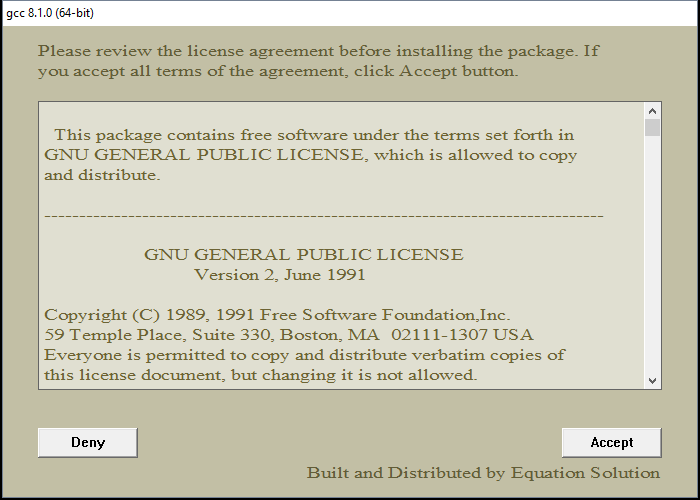
Установщик начнёт работу и отобразит окно с консолью, а также окно с бежевым фоном, в котором попросит прочесть и принять (или отклонить) лицензионное соглашение. Нажимаем Accept.
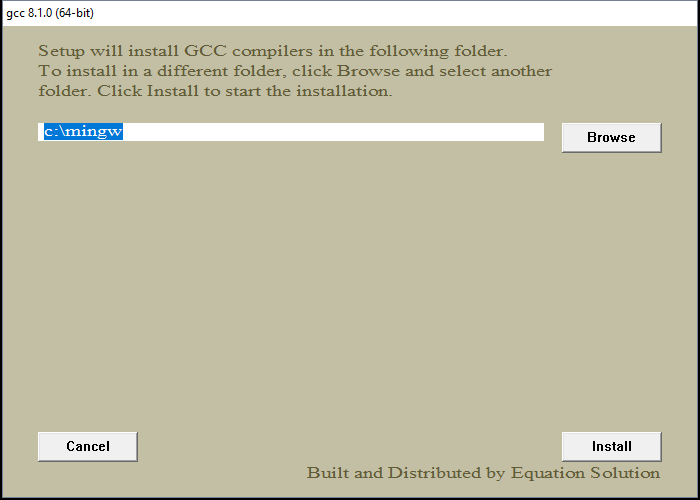
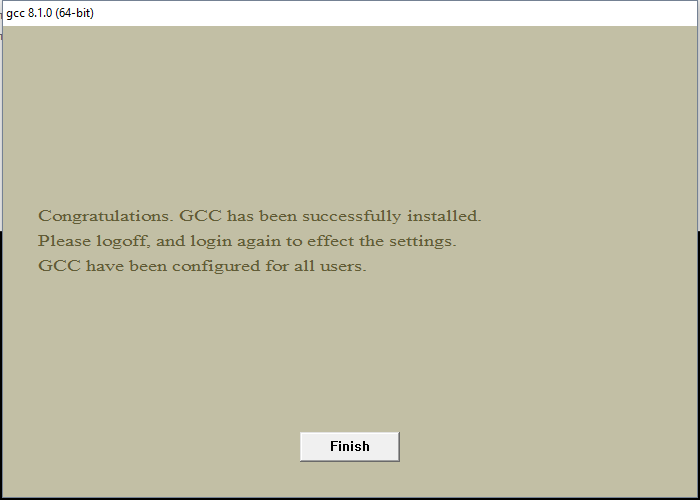
Теперь остаётся только дождаться окончания распаковки архивов и установки их на компьютер. Как только все файлы будут установлены, инсталятор сообщит об этом, после чего нужно будет нажать на кнопку Finish.
3. Проверка установки
Поздравляем! Теперь на вашем компьютере установлен компилятор GCC и вы можете писать программы на языках C и C++, а компилировать их через командную строку!
4. Бонус. Компиляция программ с помощью GCC
Что ещё за a.out? Непонятно!
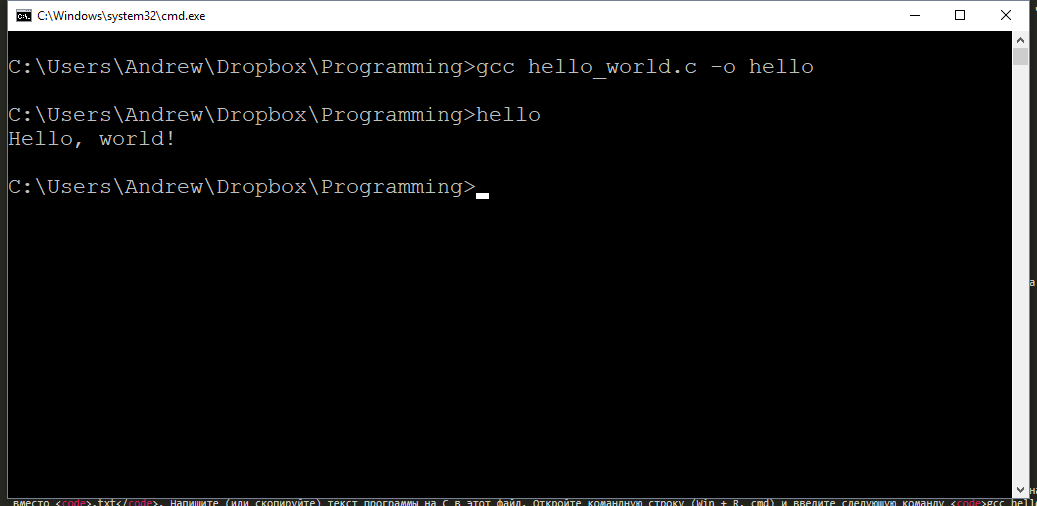
Используя понятные имена выходных программ (исполняемых файлов), вы гарантируете себе простоту работы и сокращение времени на разбирательство спустя долгое время.

Программист, сооснователь programforyou.ru, в постоянном поиске новых задач и алгоритмов
Языки программирования: Python, C, C++, Pascal, C#, Javascript
Выпускник МГУ им. М.В. Ломоносова
Programforyou — это сообщество, в котором Вы можете подтянуть свои знания по программированию, узнать, как эффективно решать те или иные задачи, а также воспользоваться нашими онлайн сервисами.
Предоставляет полный набор инструментов для компилирования и линковки программ без использования каких либо платных библиотек или инструментов.
Все утилиты предназначены для работы из командной строки, но могут использоваться такими популярными IDE как NetBeans, Eclipse и DevCPP, которые предоставляют графический интерфейс к компиляторам GCC.
Обзор GCC
Впоследствии функциональность компилятора была расширена и включена поддержка таких языков программирования как Objective-C, Java, Fortran, ADA и другие.
Установка MinGW
Официальный сайт MinGW http://www.mingw.org. Чтобы скачать комплект, перейдите на страницу http://sourceforge.net/downloads/mingw, вам понадобится файл «mingw-get-inst» с расширением EXE.
Для установки требуется подключение к сети интернет.
Рзмещайте все файлы по стандартному пути, например, «C:\MinGW».
Если всё выбрано правильно, жмём «Install».
Нам потребуется значение переменной PATH, там должны быть прописаны пути к папкам с исполняемыми файлами MinGW и MSYS, в данном случае это директории «C:\MinGW\bin» и «C:\MinGW\msys\1.0\bin».
Если эти значения не были автоматически добавлены в переменную в процессе установки, допишите их вручную, добавте в начало строку «C:\MinGW\bin;C:\MinGW\msys\1.0\bin;», только без кавычек.
Если в вашей операционной системе отсутствует переменная PATH, то создайте её самостоятельно.
Теперь, когда все инструменты установлены, можно использовать GCC компиляторы в режиме командной строки или настроить их использование в своей IDE.
Windows: установка Cygwin — GCC + make + gbd
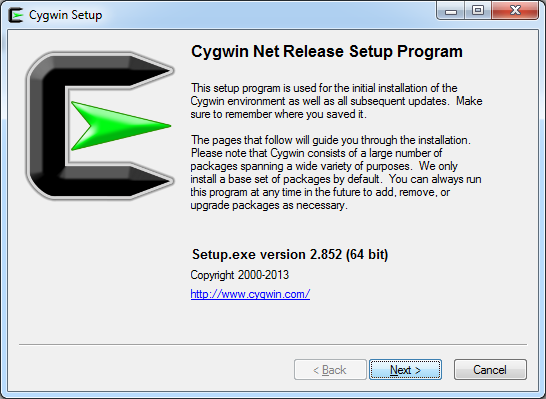
Качаем файл http://cygwin.com/setup-x86_64.exe.
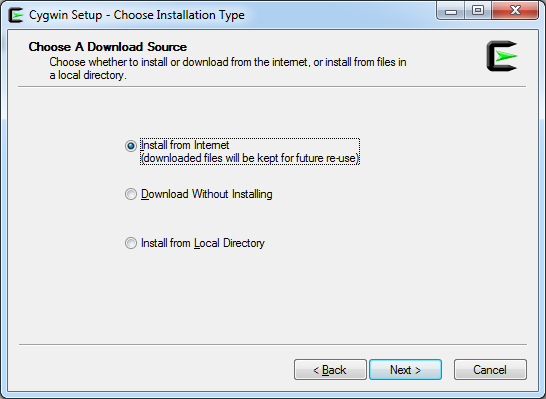
Выбираем Install from Internet:
Выбираем директорию для установки:
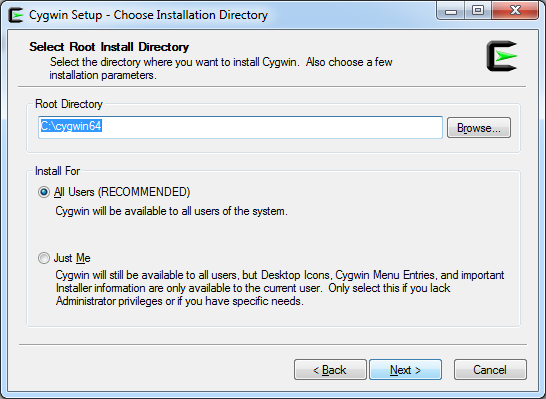
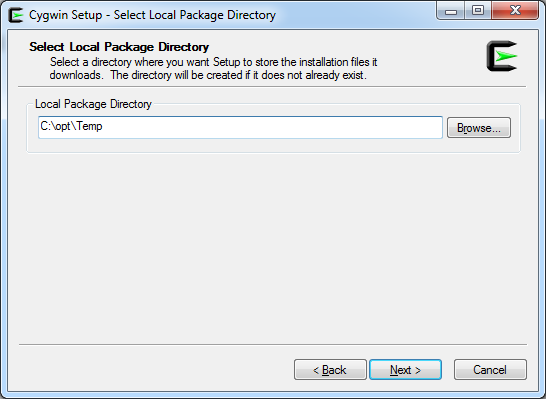
Выбираем директорию для установочных файлов:
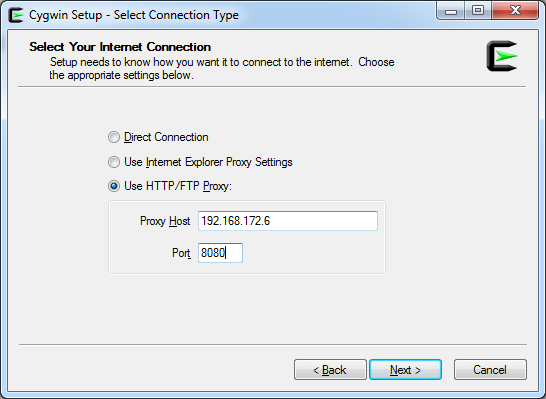
Настраиваем подключение к сети:
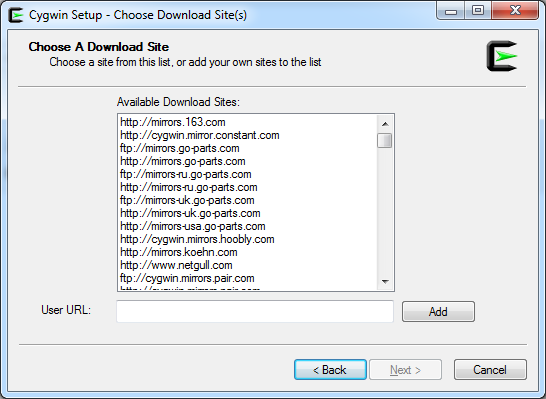
Выбираем зеркало для загрузки:

Находим gcc-core для Win64 : и кликаем на Skip, что бы выбрать версию для установки (первой будет показана последня актуальная версия)