How To Change RDP (Remote Desktop) Port On Windows 10
Many of you use Remote Desktop feature to access your home or work computers running Windows 10. All you usually need to do to implement this is set up a port forwarding rule on your router.
You can receive incoming connections on any port and direct them to RDP port of the Windows workstation on the LAN. But what to do if your PC is connected directly to the Internet without a router? How to configure the remote access and stay secured? The answer is – change remote desktop port in Windows settings.
By default, Remote Desktop uses port 3389, which is a commonly known fact. Consequently, hackers can scan the default RDP port and if they receive a login/password prompt they can start brute force attack and ultimately gain access to your PC via RDP.
Here is how to change Remote Desktop Port on Windows 10 to some non-standard value to improve security and evade from brute force attacks aimed at default one.
How To Change Remote Desktop Port Number On Windows 10 (RDP, Terminal)
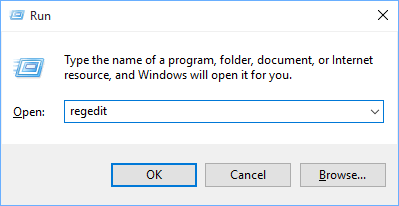
- Firstly open the registry editor (press Win+R, type regedit, press Enter):
- Then navigate to
- Here find and double-click on the PortNumber value.
- Switch it to Decimal mode
Let’s Check The Access Using the New RDP Port
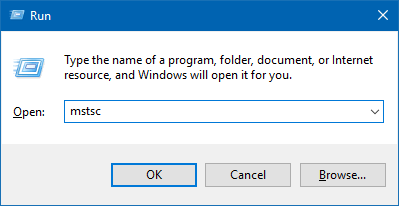
- Press Win+R .
- Type
- Hit Enter:
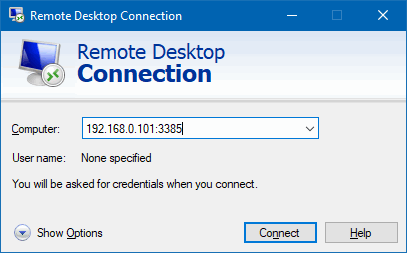
- Type your remote server’s IP or hostname and new port number through the colon. Just like this: 192.168.0.1:3385
- Hit Enter to connect:
Once more: we don’t recommend to use RDP session without setting up OpenVPN or VPN. But changing the default port for Remote Desktop service will make a possible hack a bit more difficult as hackers use to scan/attack standard ports to gain access to your PC or server.
And the last tip: if you are using a shortcut to access your remote desktop server, don’t forget to save its new version with the new port number (otherwise you may not be able to connect anymore). To create a new RDP shortcut or update existing:
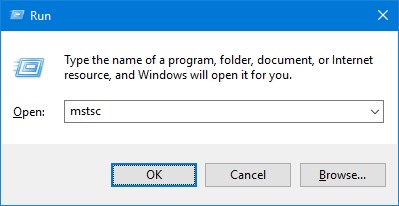
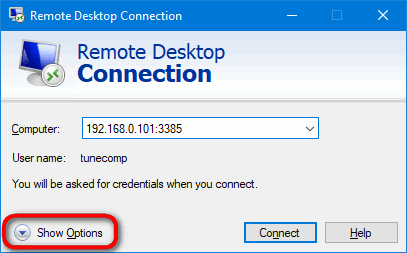
- press Win+R, type mstsc (from deprecated “Microsoft Terminal Server Client”) and press Enter to launch RDP dialogue:
- here click More Options:
- now you may optionally enter your user name and, if you wish, even check the flag Allow me to save credentials and then click Save as:
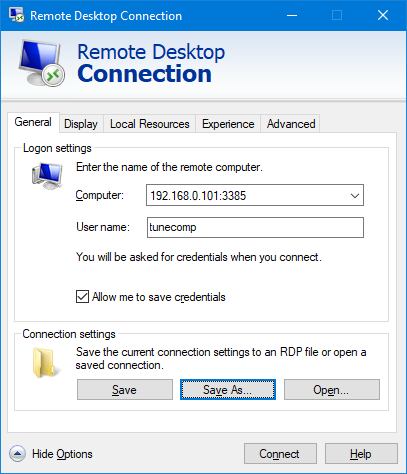
- Create a new RDP shortcut or replace the existing one.
That’s it! Now you know how to boost your security by changing the RDP port on Windows 10, 8 and 7.
How to change Remote Desktop port (RDP port) using PowerShell
Remember the infamous BlueKeep vulnerability? It exploited port 3389 by sending a specially crafted message that allowed the attackers to execute any code remotely on a compromised system. Considering the security risk, it is often recommended to disable RDP when it is not needed; however, there are still certain systems where you just can’t disable it, such as servers.
The alternative solution is to change the RDP port number from the default to something else. This certainly won’t make your Windows system bulletproof, but it surely does help stop a few script kiddies. I mean, that’s the whole point of security through obscurity.
For this guide, I will change the RDP port on a system named TERMINAL that is running Windows 10. Since we are using PowerShell, we can leverage PowerShell remoting to run all the commands from our own system. Just launch an elevated PowerShell console, and use the following command to open an interactive PS remoting session to the remote computer where you want to change the RDP port.
If your currently logged-in user is a member of the Domain Admins AD group, you can skip the -Credential parameter.

Opening an interactive PS remoting session to the remote computer using the Enter PsSession command
You can also use the Invoke-Command cmdlet to run each command if you don’t wish to open a persistent interactive session to the remote computer.
Determining the current Remote Desktop port
Now that we are connected to a remote computer (TERMINAL, in our example), you can use the following command to determine what port number RDP is currently using:

Using PowerShell to view the port number currently used by RDP
This command returns the current port number used by the RDP service on your target computer. You can see that the information is stored in the Windows registry, and we just queried the particular registry key for the port number using the Get-ItemProperty cmdlet. Modern versions of Windows (starting with Server 2012 and Windows 8) tend to use both the TCP and UDP protocols for RDP, which essentially means that, by default, the remote desktop server service (TermService) listens on both TCP 3389 and UDP 3389 on a typical Windows system. You can confirm this by running the Get-NetTCPConnection and Get-NetUDPEndpoint commands, as shown in the following screenshot:

Using the NetTCPConnection and Get NetUDPEndpoint commands to view the TCP and UDP endpoints for RDP
Changing the RDP port
Now that you are sure that the remote desktop service on your target computer is currently using a default port, use the following command to change the RDP port number:

Changing the RDP port using PowerShell
This command uses the Set-ItemProperty cmdlet to change the port number to an ephemeral port (50102, in our example). When you change the RDP port number using this command, both the TCP and UDP endpoints will be changed to the same port number.
You can use any port number, but it is recommended to use one between 1024 and 65535. Some people even like using a port number from the IANA suggested range (49152–65535), since it is not likely to conflict with other well-known or custom services.
Adding firewall rules for custom RDP ports
Now that the RDP port number has changed, you need to adjust the Windows Defender firewall to allow your new custom RDP port. Use the following PowerShell commands to add the rules:
These two commands add rules to allow inbound traffic on the custom RDP port number. Make sure you modify the port number to match your own.

Adding Windows Defender firewall rules for custom RDP port numbers using PowerShell
If you intend to access the remote desktop from a list of known IP addresses, you could slightly modify the above commands to permit the known IPs only like this:
Remember that the remote computer will continue to use the old (default) port number until the Remote Desktop service (TermService) is restarted on the target computer. To restart the service on the target computer, use the following command:

Restarting the remote desktop service on the target computer using PowerShell
Once the remote desktop service is restarted, the target computer will start listening on a new custom RDP port number.
Verifying the new RDP port
At this point, your remote computer is all set to use a custom port for Remote Desktop. If you run the following PowerShell command on a remote computer, it will give you the new endpoints:

Verifying the new TCP and UDP remote desktop endpoints on the target computer using PowerShell
Alternatively, you could use the Test-NetConnection cmdlet on your own computer, as shown in the following command:

Using the Test NetConnection cmdlet to verify connectivity with the target computer on a new RDP port
True in output indicates that your local computer was able to successfully connect to a remote computer on the specified port number (50102, in our example), which proves that your new custom RDP port is now active. If you repeat this command with the default RDP port number, the connection will fail and will return false, as shown in the screenshot.
Using the custom Remote Desktop port
When the Remote Desktop service runs on the default port, you do not need to specify it when connecting to the target computer using the Remote Desktop Connection application. However, once you customize the port, you need to specify the port number in ComputerName:PortNumber or IPAddress:PortNumber format, as shown in the screenshot:
Subscribe to 4sysops newsletter!

Specifying a custom RDP port with the Remote Desktop Connection app
Conclusion
You just learned how to change the remote desktop port number using PowerShell. As discussed earlier, a custom RDP port doesn’t promise to make a Windows system fully secure, but it adds a layer of obscurity to offer protection to a certain degree. It is always a good idea to disable Remote Desktop on public-facing Windows hosts. If you really have to keep Remote Desktop enabled, it is highly recommended that you use VPN.
Change the Default Remote Desktop (RDP) Port 3389 in Windows
In all Windows operating systems, the default port assigned to RDP (Remote Desktop Protocol) is TCP 3389. After you enable RDP in Windows, the TermService (Remote Desktop Services) starts listening on port 3389. In this article, we’ll show you how to change the default RDP port number on the desktop editions of Windows (7/8/10/11) and on Windows Server using the Registry Editor and PowerShell.
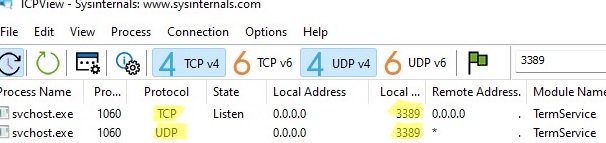
You can change the default RDP port number in Windows from 3389 to any other. This is most often used when you need to hide your RDP/RDS host from port scanners that look for Windows hosts on the network with an open RDP port TCP/3389.
Changing the RDP port will reduce the chances of exploiting RDP vulnerabilities (the last critical vulnerability in RDP BlueKeep is described in CVE-2019-0708), reduce the number of RDP brute force attacks (don’t forget to regularly analyze RDP connection logs), SYN, and other types of attacks when NLA is disabled. Most often, the RDP port is changed on computers with a direct connection to the Internet (VPS/ VDS), or in networks where the edge router forwards port 3389/RDP to a Windows host in your LAN.
When choosing a non-standard RDP port, please note that it is not recommended to use ports in the range 1-1023 (known ports). Use a dynamic port in the RPC port range ( 49152 to 65535 ), or any port in the range 1024 to 49151 that is not in use by another service or application.
How to Change the Remote Desktop Port on Windows?
In our example, we will change the port number on which the Remote Desktop service is listening to 1350. To do this:
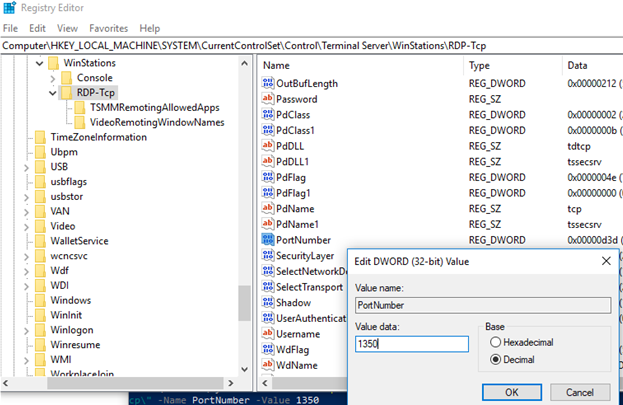
- Open the Registry Editor ( regedit.exe ) and go to the registry key HKEY_LOCAL_MACHINE\System\CurrentControlSet\Control\Terminal Server\WinStations\RDP-Tcp;
- Find the DWORD parameter with the name PortNumber. This parameter shows the port, on which the Remote Desktop service is listening. The default is 3389 (decimal);
- Change the value of this parameter. I have changed the RDP port to 1350 (Decimal);
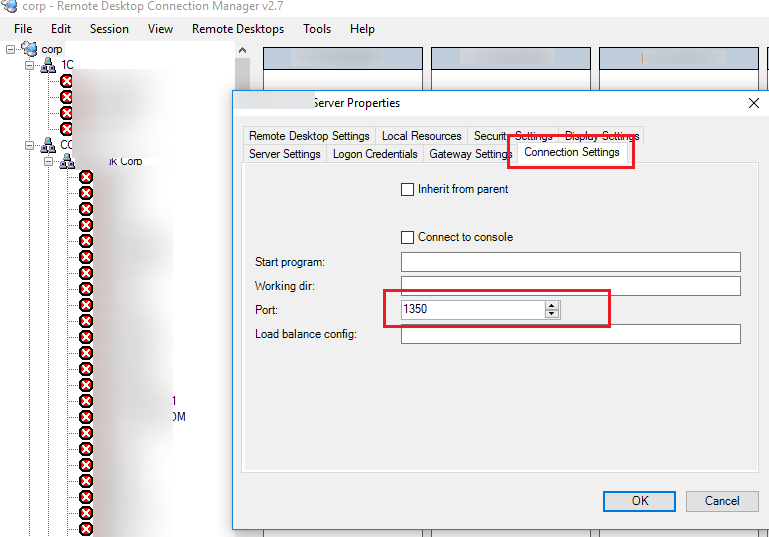
If you are using RDCMan to manage multiple RDP connections, you can specify the RDP port you have configured in the Connection Settings tab.
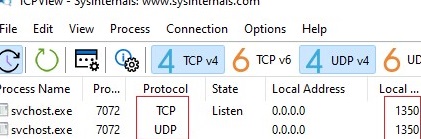
Note that the UDP RDP port number also automatically changed to 1350 (you can check this with the TCPView tool).
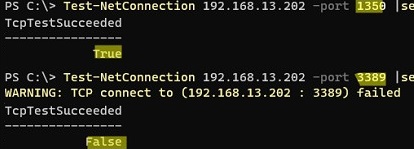
Use the Test-NetConnection command to check that the default RDP port 3389 is now closed ( TcpTestSucceeded: False ):
Test-NetConnection 192.168.3.102 -port 3389 |select TcpTestSucceeded
Now you need to use the new port 1350 for the RDP connection.
If you want to change the RDP port number on domain computers, you can use the Group Policy features. Create a new GPO that will deploy the PortNumber registry parameter with the new RDP port number to domain computers.
Change RDP Listening Port Number with PowerShell
A complete PowerShell script to change the RDP port number, create the firewall rule, and restart the Remote Desktop service might look like this:
Write-host «Specify the number of your new RDP port: » -ForegroundColor Yellow -NoNewline;$RDPPort = Read-Host
Set-ItemProperty -Path «HKLM:\SYSTEM\CurrentControlSet\Control\Terminal Server\WinStations\RDP-TCP\» -Name PortNumber -Value $RDPPort
New-NetFirewallRule -DisplayName «NewRDPPort-TCP-In-$RDPPort» -Direction Inbound –LocalPort $RDPPort -Protocol TCP -Action Allow
New-NetFirewallRule -DisplayName «NewRDPPort-UDP-In-$RDPPort» -Direction Inbound –LocalPort $RDPPort -Protocol UDP -Action Allow
Restart-Service termservice -force
Write-host «The number of the RDP port has been changed to $RDPPort » -ForegroundColor Magenta
You can change the RDP port number on a remote computer. To do this, you need to enable WinRM on the remote computer, and then you can use the Invoke-Command cmdlet to connect to the computer:
Invoke-Command -ComputerName wksname112 -ScriptBlock
If you need to change the RDP number remotely on multiple computers in your AD domain (in the specific OU), use the following script (you can get a list of computers in the OU using the Get-ADComputer cmdlet):
Write-host «Specify the number of your new RDP port: » -ForegroundColor Yellow -NoNewline;$RDPPort = Read-Host
$PCs = Get-ADComputer -Filter * -SearchBase «CN=IT,CN=Computers,CN=NY,DC=woshub,DC=com»
Foreach ($PC in $PCs) <
Invoke-Command -ComputerName $PC.Name -ScriptBlock <
param ($RDPPort)
Set-ItemProperty -Path «HKLM:\SYSTEM\CurrentControlSet\Control\Terminal Server\WinStations\RDP-TCP\» -Name PortNumber -Value $RDPPort
New-NetFirewallRule -DisplayName «NewRDPPort-TCP-In-$RDPPort» -Direction Inbound –LocalPort $RDPPort -Protocol TCP -Action Allow
New-NetFirewallRule -DisplayName «NewRDPPort-UDP-In-$RDPPort» -Direction Inbound –LocalPort $RDPPort -Protocol TCP -Action Allow
Restart-Service termservice -force
>
This guide for changing the default RDP port is suitable for any Windows version starting from Windows XP (Windows Server 2003) and up to modern Windows 10, Windows 11, and Windows Server 2022 builds.
How To Change Remote Desktop (RDP) Port On Windows 10
M any PC owners enjoy the feature of Remote Desktop for accessing their home or work PCs on Windows 10. Implementing this feature requires setting up a specific port forwarding rule by accessing your router settings. As a result, you can get incoming connections on any port and forward them to the RDP port of the Windows computer on the LAN. However, what if your PC is connected to the web without any router? How to set up remote access and maintain your system in a safe environment? The trick is simple – modify the remote desktop port in Windows parameters.
The Remote Desktop by default applies port 3389, which is a well-known fact. This means that hackers can examine the default RDP port, and if they manage to obtain a login/password prompt, they may initiate the brute force attack and eventually gain access to your system via RDP. Below please find the working solution to amend Remote Desktop Port on Windows 10 to some non-standard parameter to enhance security and avoid brute force attacks targeting the default service port.