How do I include image files in Django templates?
I’m new to Django and I’m trying to learn it through a simple project. I’m developing a system called ‘dubliners’ and an app called ‘book’. The directory structure is like this:
I have a JPG file that needs to be displayed in the header of each Web page. Where should I store the file? Which path should I use for the tag to display it using a template? I’ve tried various locations and paths, but nothing is working so far.
Thanks for the answers posted below. However, I’ve tried both relative and absolute paths to the image, and I still get a broken image icon displayed in the Web page. For example, if I have an image in my home directory and use this tag in my template:
The image doesn’t display. If I save the Web page as a static HTML file, however, the images display, so the path is correct. Maybe the default Web server that comes with Django will display images only if they’re on a particular path?
![]()
15 Answers 15
settings.py
urls.py
Caveat
Beware! using Context() will yield you an empty value for <
I hope, this will help.
![]()
In production, you’ll just have the HTML generated from your template pointing to wherever the host has media files stored. So your template will just have for example
And then you’ll just make sure that directory is there with the relevant file(s).
during development is a different issue. The django docs explain it succinctly and clearly enough that it’s more effective to link there and type it up here, but basically you’ll define a view for site media with a hardcoded path to location on disk.
I do understand, that your question was about files stored in MEDIA_ROOT, but sometimes it can be possible to store content in static, when you are not planning to create content of that type anymore.
May be this is a rare case, but anyway — if you have a huge amount of "pictures of the day" for your site — and all these files are on your hard drive?
In that case I see no contra to store such a content in STATIC.
And all becomes really simple:
static
To link to static files that are saved in STATIC_ROOT Django ships with a static template tag. You can use this regardless if you’re using RequestContext or not.
<% load static %><img src="<% static "images/hi.jpg" %>" alt="Hi!" />
In development
In your app folder create folder name ‘static’ and save your picture in that folder.
To use picture use:
In production:
Everything same like in development, just add couple more parameters for Django:
add in settings.py
STATIC_ROOT = os.path.join(BASE_DIR, «static/») (this will prepare folder where static files from all apps will be stored)
be sure your app is in INSTALLED_APPS = [‘myapp’,]
in terminall run command python manage.py collectstatic (this will make copy of static files from all apps included in INSTALLED_APPS to global static folder — STATIC_ROOT folder )
Thats all what Django need, after this you need to make some web server side setup to make premissions for use static folder. E.g. in apache2 in configuration file httpd.conf (for windows) or sites-enabled/000-default.conf. (under site virtual host part for linux) add:
Alias \static «path_to_your_project\static»
Require all granted
![]()
I have spent two solid days working on this so I just thought I’d share my solution as well. As of 26/11/10 the current branch is 1.2.X so that means you’ll have to have the following in you settings.py:
*(remember that MEDIA_ROOT is where the files are and MEDIA_URL is a constant that you use in your templates.)*
Then in you url.py place the following:
Then in your html you can use:
The way django works (as far as I can figure is:
- In the html file it replaces MEDIA_URL with the MEDIA_URL path found in setting.py
- It looks in url.py to find any matches for the MEDIA_URL and then if it finds a match (like r’^static/(?P.)$’* relates to http://localhost:8000/static/) it searches for the file in the MEDIA_ROOT and then loads it
/media directory under project root
Settings.py
urls.py
template
![]()
If your file is a model field within a model, you can also use «.url» in your template tag to get the image.
If this is your model:
Pass the model in context in your views.
In your template you could have:
![]()
will work for a HTML file read from disk, as it will assume the URL is file:///home/. . For a file served from a webserver though, the URL will become something like: http://www.yourdomain.com/home/tony/london.jpg , which can be an invalid URL and not what you really mean.
For about how to serve and where to place your static files, check out this document. Basicly, if you’re using django’s development server, you want to show him the place where your media files live, then make your urls.py serve those files (for example, by using some /static/ url prefix).
Will require you to put something like this in your urls.py :
In production environment you want to skip this and make your http server (apache, lighttpd, etc) serve static files.
Another way to do it:
This would require you to move your media folder to a sub directory of a static folder.
Then in your template you can use:
I tried various method it didn’t work.But this worked.Hope it will work for you as well. The file/directory must be at this locations:
settings.py
proj/app/templates/filename.html
If fb.png was inside /home/project/app/static/image/fb.png then
I’ve had the hardest time figuring this out so I am making this post to explain as clearly as i can, what worked for me, to help someone else.
Let’s say you have a project called project_name. and an app called app_name. your root directory should look like this:
DEVELOPMENT.
while in development mode, your CSS and JS files should be inside ./app_name/static/app_name/..
however your images should be inside ./app_name/static/media/..
now add these to settings.py :
If this not already there, add
This tells Django where to find all the static files.
This points Django to the folder where your images are, after it loads static. In this case it is /media/ because our images are in /static/media.
next, you should put this in the individual template where you need the image (I thought putting a single <% load static %>in the general layout.html template would suffice, it didn’t):
depending on how you set up your project, image_name could be the exact name of the image file like "image.jpg" , a variable for an image field like user.image etc
lastly, go into the project_name urls.py (same folder as settings.py ) and add this line to the end:
basically telling Django to use a work around so you can see use the images in development.
That is all. your project will now display images while you are writing and testing your code(development)
PRODUCTION.
When you want to deploy your project, there are some extra steps you need to take.
Because Django does not serve images as static files during production, you have to install a Middleware called Whitenoise.
Then add the following to settings.py :
look for MIDDLEWARE and add just under django.middleware.security.SecrutiyMiddleware :
Next we have to define our paths, this is because in production Django will basically collect all the static files from all our apps and rearrange them in a single folder.
Add the following to settings.py :
This tells Django where to put static files when it collects them. In this case we are telling Django to put the files in the root folder. so after collectstatic runs our app would look like
This tells django where to put files that a user who on our site uploads..
Next,we want to go up and change Debug to False.
Debug mode is used for testing in development, and in production you don’t want your app displaying error codes and the names of files and lines where something went wrong. potential security threat. Once you turn debug mode to false, Django changes how it serves the static files. so ordinarily, if you were to run your app now, you won’t see the images..
with these done, now you are ready for production. to test that everything is okay, you can run:
(type yes if prompted) Django will collect all the static files and arrange them as necessary. if you run your project now, with debug still turned off you should see your images. you can even now delete the individual static folders in app_name or any other apps you have, if you want because Django will not use them in production. Once debug is off, Django only uses static from the collected static folder. You can now deploy your project
Django Adding Image file
Adding images files in Django project is done the same way as adding css files or adding js files in Django:
Static files, like css, js, and images, goes in the static folder. If you do not have one, create it in the same location as you created the templates folder:
Add a image file (.png, .jpg, .gif, etc.) in the static folder::
Modify the Template
Now you have a image in the static folder. The next step will be to include this image in a HTML template:
Open the HTML file and add the following:
Restart the server for the changes to take effect:
Example
Didn’t Work?
Make sure that DEBUG = True in the settings.py file, otherwise the example will fail in development.
Set the DEBUG property to True :
Handling Static Files
When your website is in production, and open for everyone, static files are handled differently than they are in development.
You will learn how to deploy the website to production later in this tutorial, and you will learn how to handle static files in production then.

COLOR PICKER


Report Error
If you want to report an error, or if you want to make a suggestion, do not hesitate to send us an e-mail:
Thank You For Helping Us!
Your message has been sent to W3Schools.
Top Tutorials
Top References
Top Examples
Get Certified
W3Schools is optimized for learning and training. Examples might be simplified to improve reading and learning. Tutorials, references, and examples are constantly reviewed to avoid errors, but we cannot warrant full correctness of all content. While using W3Schools, you agree to have read and accepted our terms of use, cookie and privacy policy.
Как загружать файлы и изображения в приложении Django

Для начала создайте каталог, в котором будут находиться проект и виртуальная среда (она нужна, чтобы отделять проектные зависимости от операционной системы).
Теперь выполните команду cd на этот каталог и сформируйте виртуальную среду:
Активируйте ее и туда же установите Django:
Создайте новый проект Django и назовите его file uploads :
В каталоге данного проекта создайте приложение с именем files . Приложения в Django используются для разделения различных компонентов и необходимы для масштабирования самих приложений. Они также являются перемещаемыми элементами и их можно перетащить в другой проект Django, не ломая код.
Добавьте файлы приложения к списку установленного софта в файле settings.py :
Django сохраняет файлы локально с помощью параметров MEDIA_ROOT и MEDIA_URL .
Определим эти константы в файле settings.py. :
MEDIA_ROOT будет использоваться для управления сохраненными данными, а MEDIA_URL — как url данных, которые требуется предоставить.
Загрузка данных
Самый простой вариант — загружать файлы с помощью FileFields . Начните с создания простой модели в файле models.py , которая будет содержать три поля: имя, электронную почту и файл для загрузки.
Параметр upload_to указывает, куда будут перемещены файлы.
Запуск миграций
Миграции создадут актуальные таблицы в базе данных.
Формы
Django имеет встроенный класс ModelForm , позволяющий легко создавать формы из модельных полей. Создайте новый файл forms.py и добавьте код:
Определив форму, вы получите данные из нее с помощью request.FILES , используя запрос POST в представлении. Чтобы получить данные, содержащиеся в форме, откройте файл view.py и напишите следующий код:
В вышеизложенном коде проверьте, чтобы метод запроса был POST , затем получите данные из формы, проверьте их и сохраните в базе данных. Если метод запроса — GET , то отобразите форму в шаблоне.
Мы еще не создали шаблон upload.html (Django автоматически найдет его в соответствующем каталоге), с помощью которого будет отображена форма, так что давайте приступим. Создайте файлы, как показано ниже:
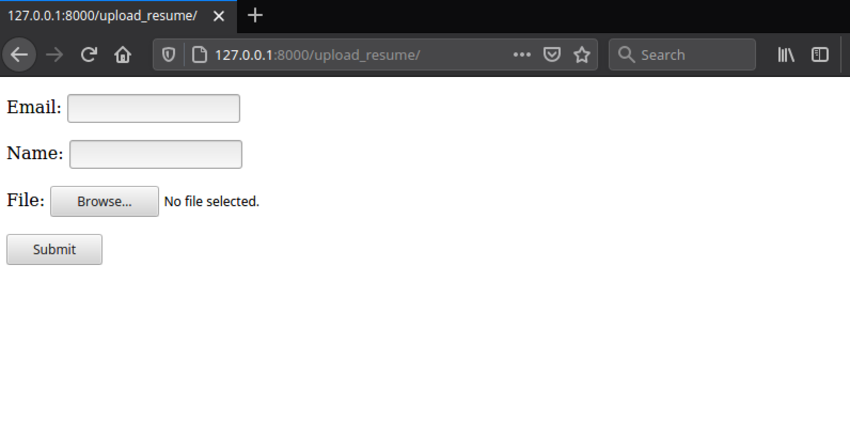
Для отправки формы в шаблон ей необходим атрибут enctype=»multipart/form-data» , иначе request.FILES вернется пустым:
Тег csrf_token защитит форму от вредоносных данных, а form.as_p отобразит поля в виде параграфов.
Регистрация путей URL
Сперва создайте файл urls.py , чтобы зарегистрировать URL для отображения формы, а затем — urls.py . Добавляем код:
Следующий шаг — регистрация файлов URL в корне url.py :
Теперь, если вы запустите сервер и перейдете по адресу http://127.0.0.1:8000/upload_resume/, вы увидите формы, как изображено ниже:
Django Admin
Django Admin — мощный интерфейс, который позволяет разработчикам добавлять данные в приложении. Зарегистрируем модель Resume в файле admin.py :
Создание суперпользователя
Суперпользователь позволяет выполнять действия администратора:
Когда вы перейдете по адресу http://127.0.0.1:8000/admin/ и войдете в систему под именем созданного суперпользователя, вы сможете просмотреть представленные данные.
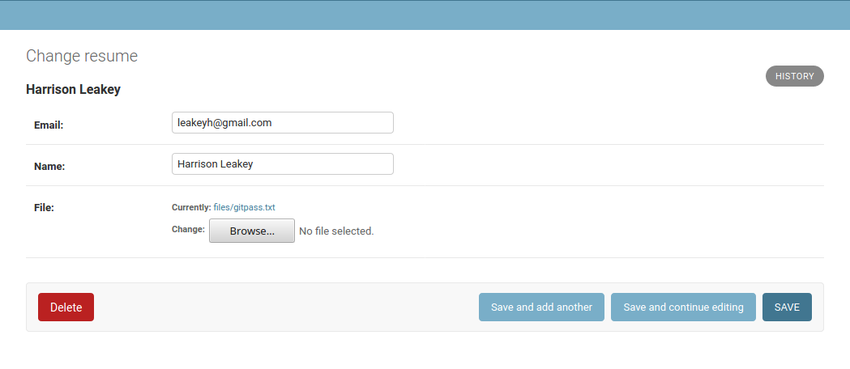 Как видите, ваш файл хранится в каталоге files.
Загрузка изображений в Django
Мы научились загружать файлы с помощью FileField , но как быть с изображениями? Чтобы загружать картинки, необходимо использовать ImageField . Переходим в модели и добавляем ImageField , как показано ниже:
Для поля imageField , которое определено выше, необходима библиотека pillow, поэтому установите ее с помощью pip :
Примените миграции, чтобы повлиять на изменения в моделях:
Запустите команду migrate :
Далее создайте форму по примеру Resume :
Для отображения изображения в форме необходимо представление. В файл views.py добавьте код:
Создайте файл image.html в папке templates и пропишите в нем следующее:
Теперь подключите представление upload_image к URL, открывайте urls.py и прописывайте:
Форму загрузки изображения можно найти по адресу http://127.0.0.1:8000/upload_images/.
Предоставление файлов
Первым делом добавьте django.template.context_processors.media в опцию context_processors в TEMPLATES в файле settings.py . Это позволит использовать << MEDIA_URL >> в шаблоне:
Далее обновите представление, чтобы выбрать изображения из базы данных:
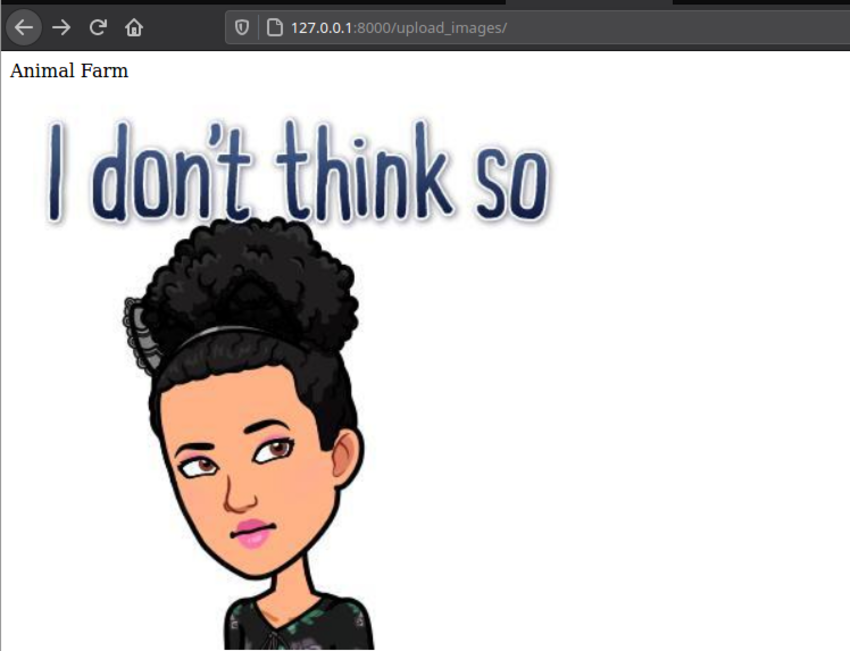
Обновите шаблон image.html для отображения картинок:
Вы можете предоставлять загруженные файлы из медиамаршрута в процессе работы, используя представление django.views.static.serve() .
Добавьте следующий путь в корень URL-файла:
Теперь при переходе по адресу http://127.0.0.1:8000/upload_images/ ваши изображения будут выводиться на экран.
Заключение
В этом гайде затрагиваются все аспекты работы с файлами и медиа в Django. Библиотека Pillow также предоставляет множество функций для открытия, редактирования и сохранения большого количества форматов файлов изображений.
How To Upload Images With Django
One of the most common requirement in any modern web application is the ability to take images or pictures from the users as input and save them on the server however Letting users upload files can have big security implications.
In this article, we will learn how to upload images in a Django application.
Uploading Images in Django
Django has two model fields that allow user uploads FileField and ImageField basically ImageField is a specialized version of FileField that uses Pillow to confirm that a file is an image.
Let’s, start by creating models.
models.py
The image column is an ImageField field that works with the Django’s file storage API, which provides a way to store and retrieve files, as well as read and write them.
The upload_to parameters specify the location where images will be stored which for this model is MEDIA_ROOT/images/
Setting dynamic paths for the pictures is also possible.
This will store the images in date archives like MEDIA_ROOT/users/2020/04/12
Now, Install Pillow by running the following command in your shell.
For Django to serve media files uploaded by users with the development server, add the following settings to the settings.py file of your project.
settings.py
MEDIA_URL is the URL that will serve the media files and MEDIA_ROOT is the path to the root directory where the files are getting stored.
Now add the following configuration in the project’s urls.py file.
urls.py
With that Django’s development server is capable of serving media files. Next, we need to create a model form for the Image model.
forms.py
This will generate a form with fields title and image, which will be rendered in the templates. So let’s create a barebone template for file uploading.
index.html
You must remember to include the enctype property in the form tag for the uploaded file to be attached to the request properly.
With that let’s write views for handling the form.
views.py
This is a very simple view since Django is doing all the work under the hood we are just validating the form and saving it on successful file upload. Now that we are done with the view let’s map it to a URL.
urls.py
Save all the files and run the server and navigate to the URL you should see the form in action.