Custom Scrollbars In CSS
Custom scrollbars are getting more popular nowadays, and I’m very keen to dig into them. There are different reasons why to customize a scrollbar. For example, the default scrollbar can make an app UI look inconsistent across multiple operating systems, and here we can get the benefit of having a unified style.
I have always been interested in learning about how to customize a scrollbar in CSS but didn’t get the chance to do so. In this article, I will take the opportunity and learn about them and document this journey.
Introduction
The first thing that I want to explain is the components or the parts of a scrollbar. A scrollbar contains the track and the thumb. Here is a visual that shows them:

The track is the base of the scrollbar, where the thumb is what the user drag to scroll within a page or a section.
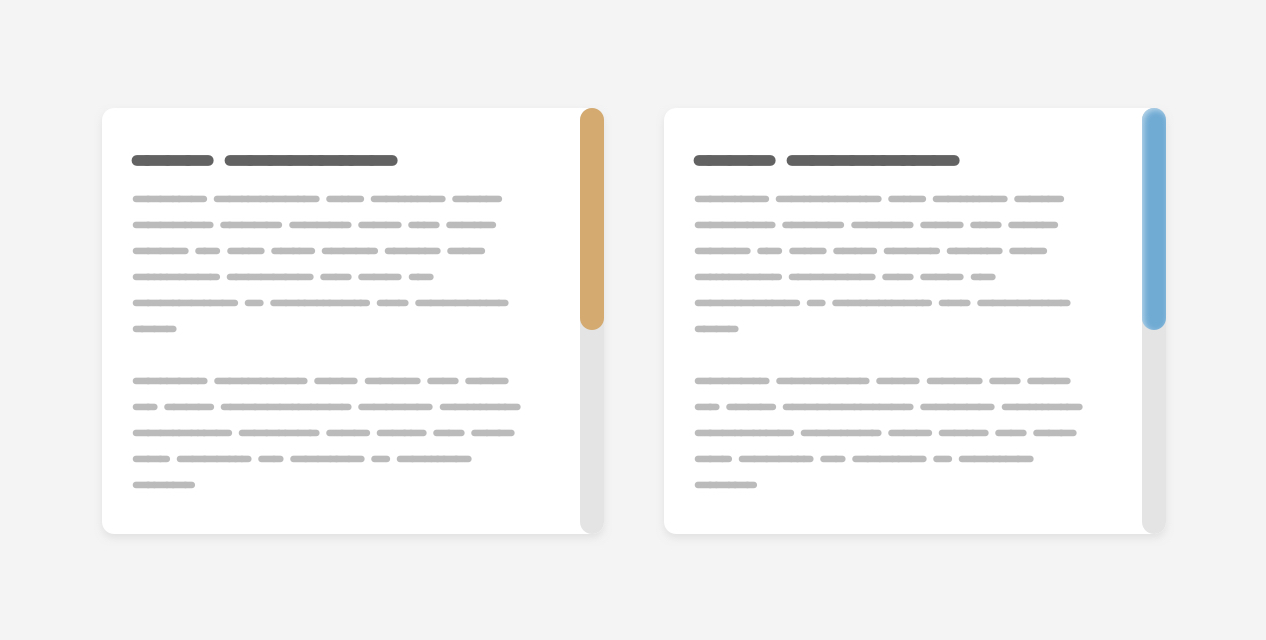
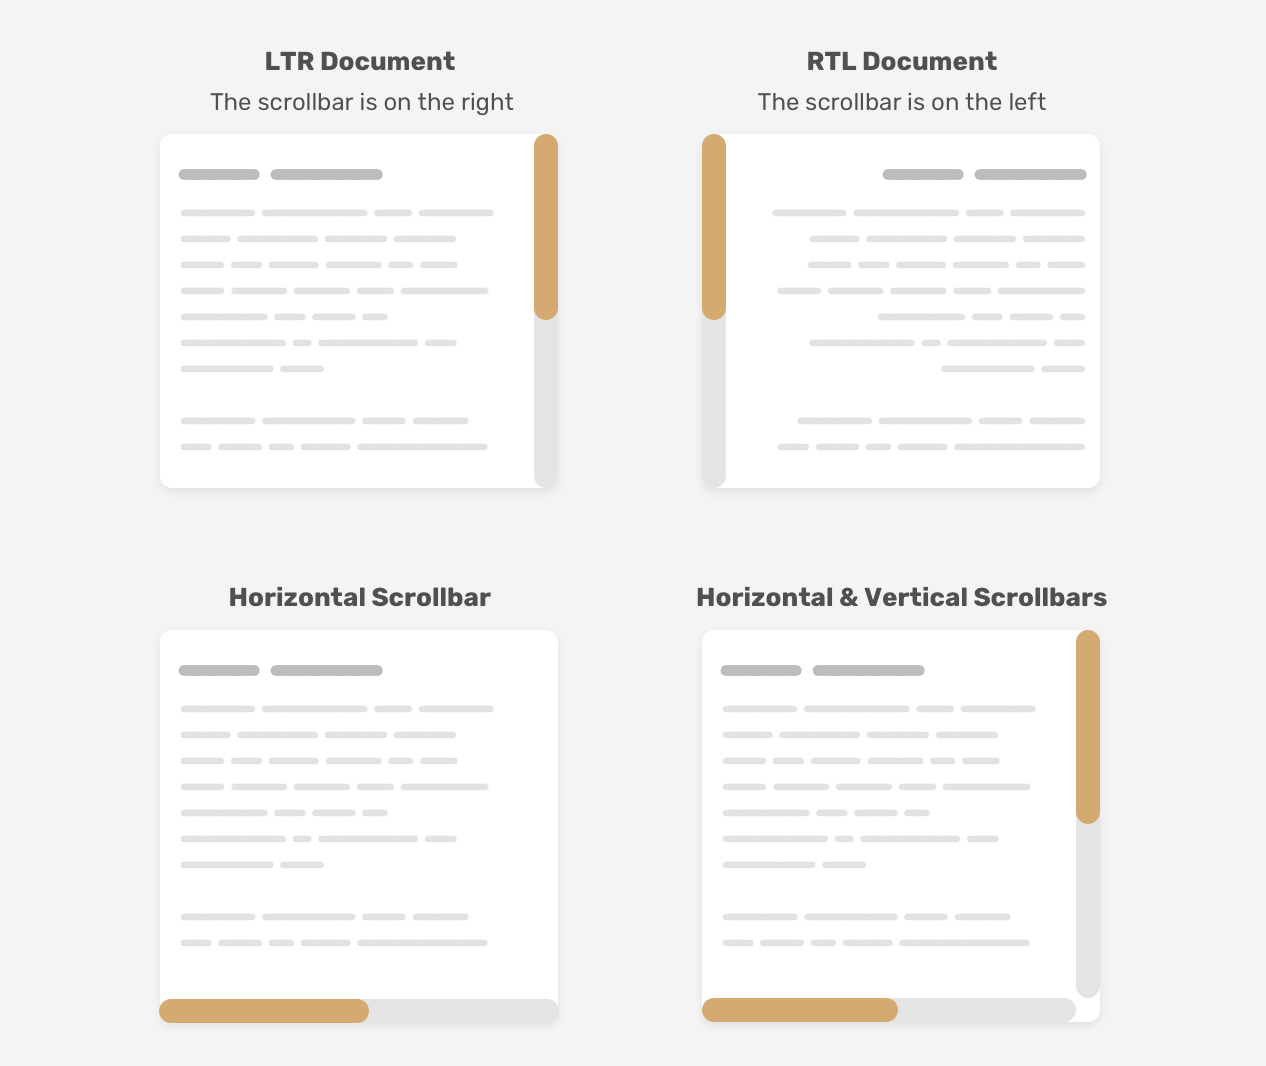
There is one important thing to keep in mind that a scrollbar can work horizontally or vertically, depending on the design. Also, that can change while working on a multilingual website that works in both left-to-right (LTR) and right-to-left (RTL) directions.
Customizing a scrollbar design
Having a custom scrollbar used to be webkit only so Firefox and IE were out of the game. We have a new syntax that works only in Firefox and will make things easier for us when it’s fully supported. I will go through the old Webkit syntax, and then the new one.
The old syntax
The scrollbar width
First, we need to define the size of the scrollbar. This can be the width for vertical scrollbars, and the height for horizontal ones.
With that set, we can style the scrollbar itself.
The scrollbar track
This represents the base of the scrollbar. We can style it by adding background colors, shadows, border-radius, and borders.
The scrollbar thumb
Once we have the base of the scrollbar ready, we need to style the scrollbar thumb. That is important as the user might drag this thumb to interact with the scrollbar.
With that, we have covered the old way of styling a custom scrollbar in CSS. Let’s explore the new syntax.
The new syntax
Scrollbar width
As it says, this defines the scrollbar width and the values we care about most are auto and thin . Unfortunately, we can’t define a specific number like in the webkit syntax.
Scrollbar color
With this property, we can define a color for both the scrollbar track and thumb as pair values.
As simple as this new syntax is, but it’s limiting. We can only apply solid colors. We can’t add shadows, gradients, rounded edges, or anything like that. What we’re allowed to customize is the colors only.
Scrollbar gutter
Have you ever wondered about how we can avoid layout changes when the content grows in a scrolling container? Let’s take the following case.
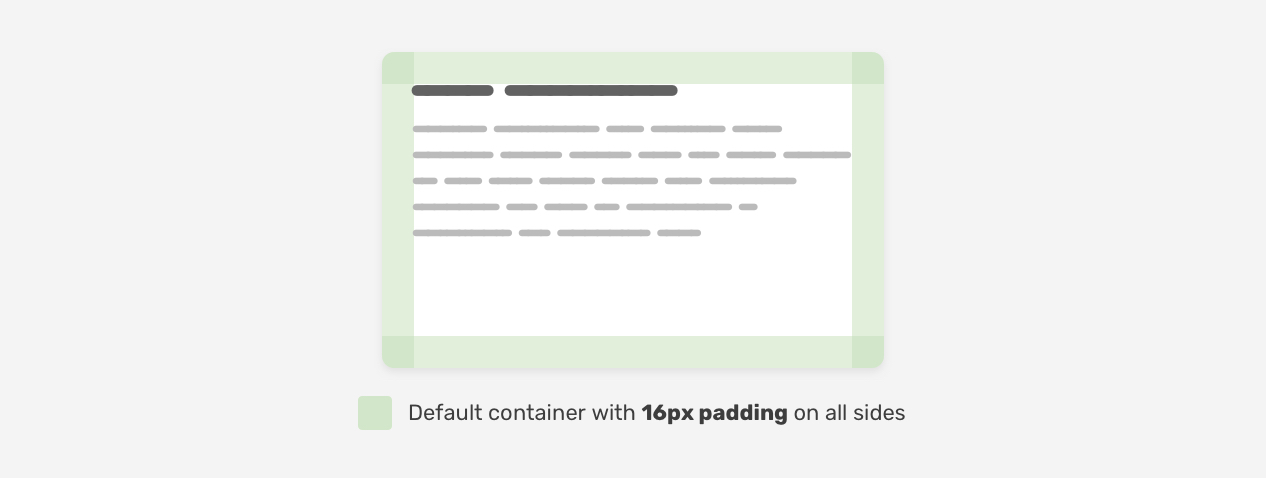
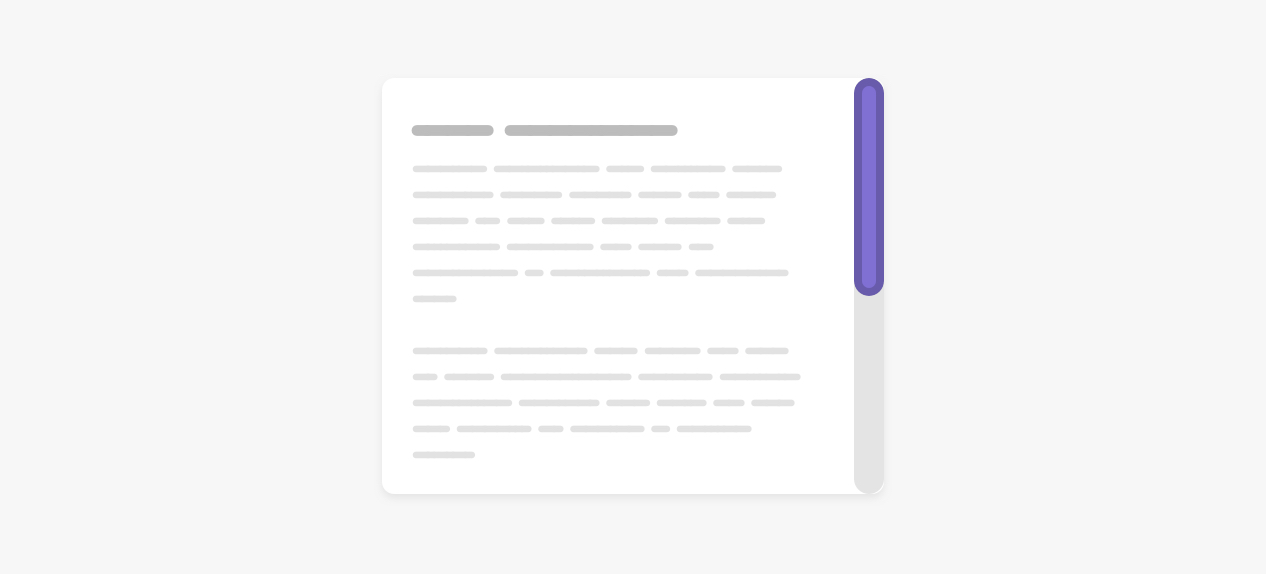
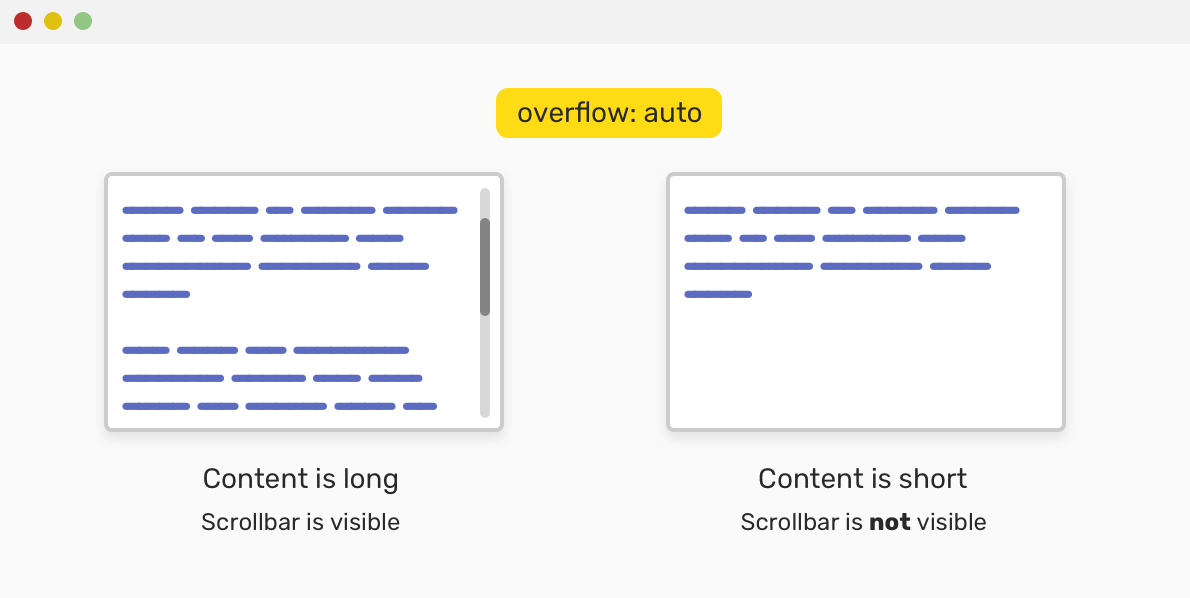
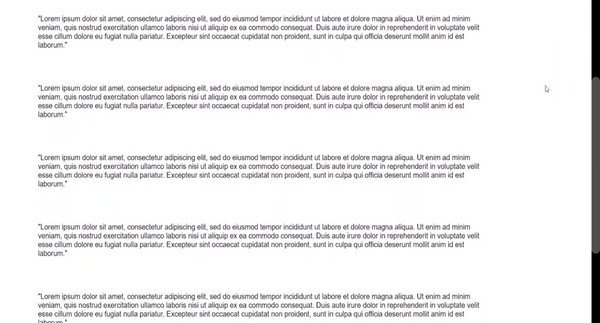
We have a container with 16px padding on all sides. Until now, the content is short and the scrollbar isn’t shown because overflow-y: auto is used (A friendly reminder: when auto is used for overflow-y , it won’t show a scrollbar until the content is long).
When the content grows, the scrollbar will be shown and thus the space available for the content will be reduced.
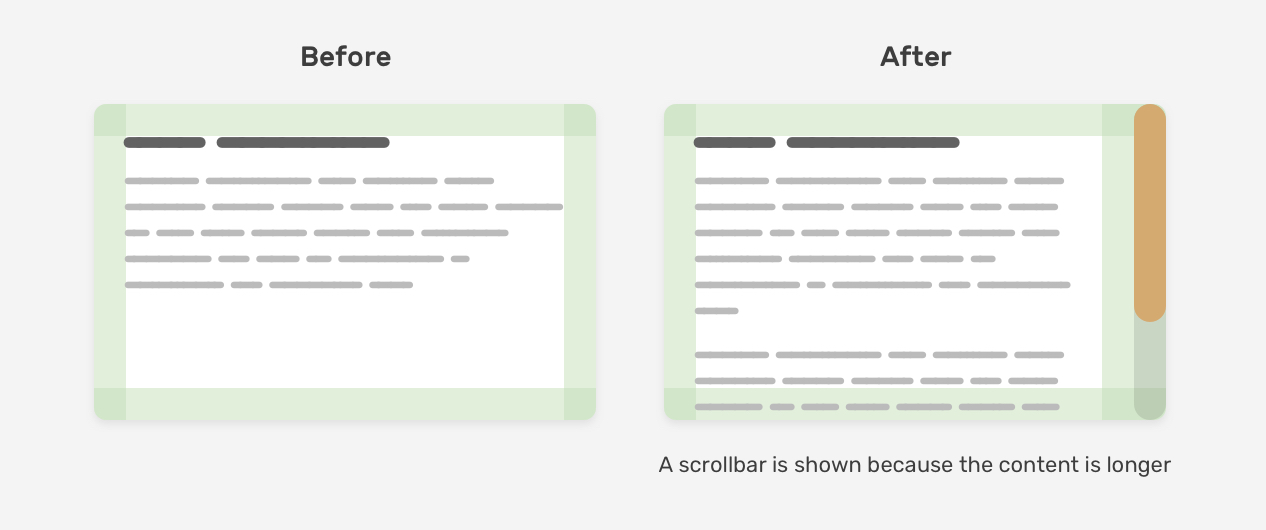
Notice how the content shifted when there is a scrollbar. That’s because the browser should reserve a space for the scrollbar.
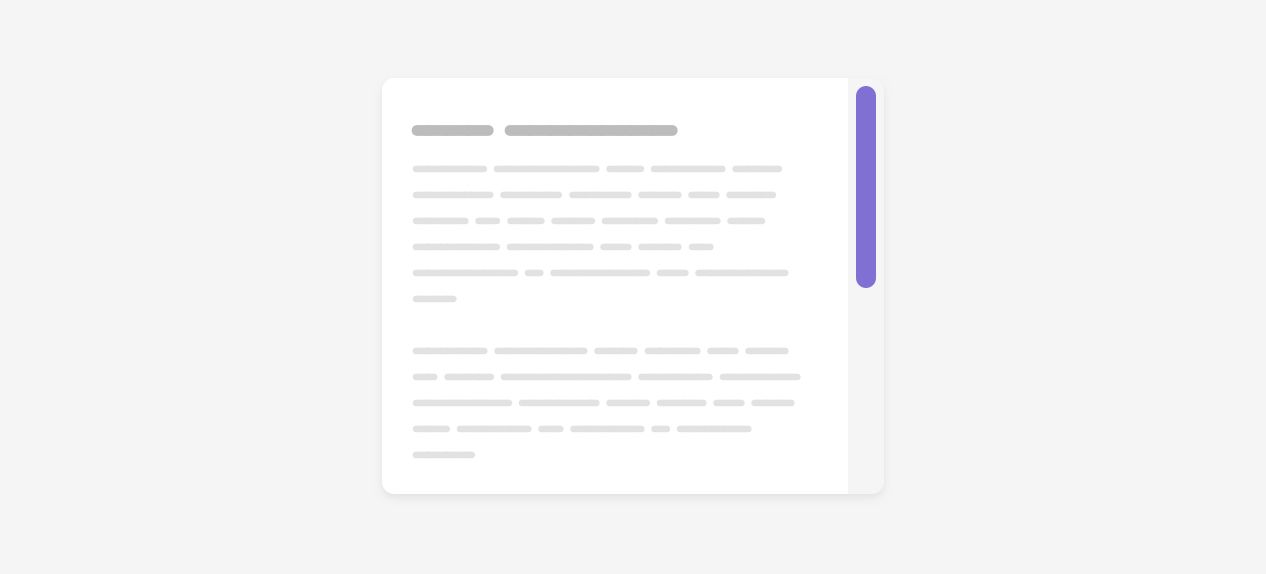
Thankfully, this can be solved now with scrollbar-gutter (supported in Chromium-based browsers, v94+). It works in a way that lets us reserve the space in advance. The default value is auto , and the other value is stable . It’s also worth mentioning that there is an optional value both-edges which shows the gutter on both sides.
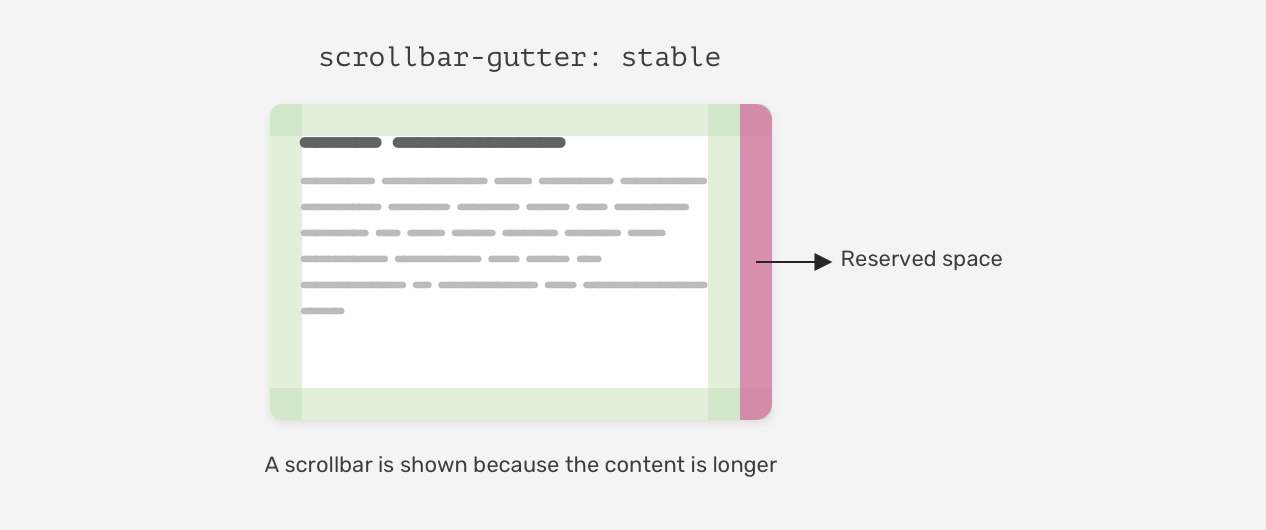
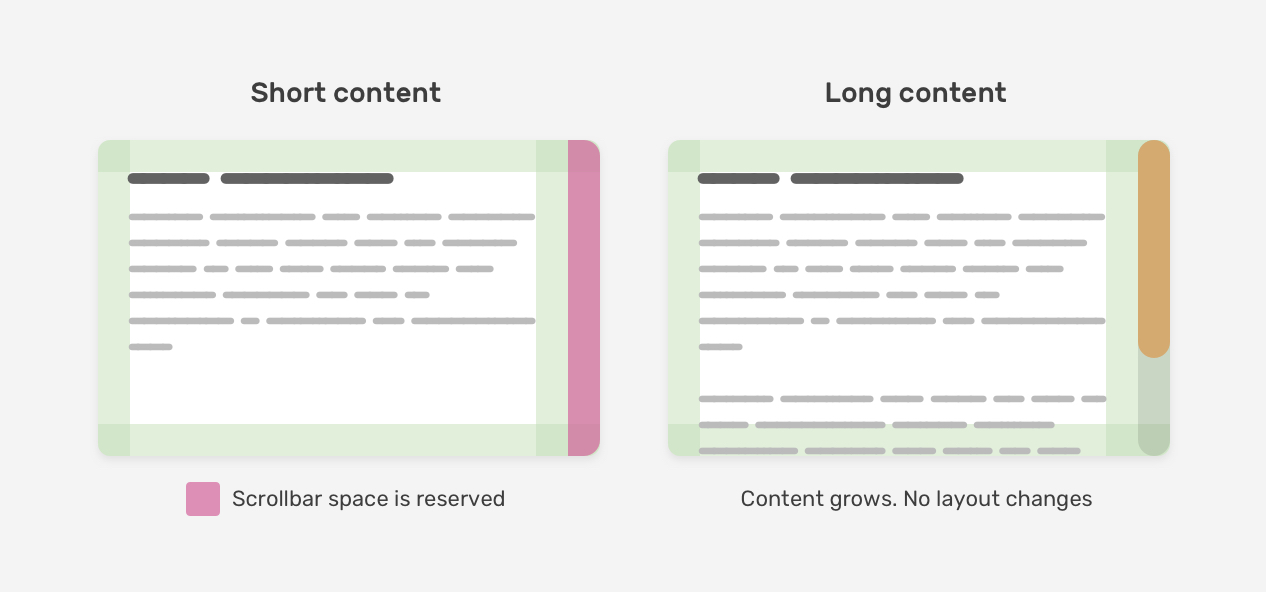
That way, when the content grows, it won’t shift because the browser already reserved a space for it. Here is a visual that shows the two cases (Short content vs long content).
To make things more clear, I worked on an interactive demo that shows how a gutter is added to a container.
Specifying the scope of the custom scrollbar
An important thing to know is that where to customize the scrollbar. Do you want the style to be generic and work for all scrollbars on the website? Or do you want it for specific sections only?
With the old syntax, we can write the selectors without attaching them to an element, and they will be applied to all scrollable elements.
However, if you want to apply for a specific section only, you need to append the element before the selectors.
For the new syntax, it’s almost the same. The thing that I noticed is that if you want a generic style, it should be applied to the <html> element, not the <body> .
I tried adding the above for the <body> but it didn’t work as expected.
Now that we know how the old and new syntax work, let’s get into customizing some scrollbar designs.
Customizing a scrollbar design
Example 1
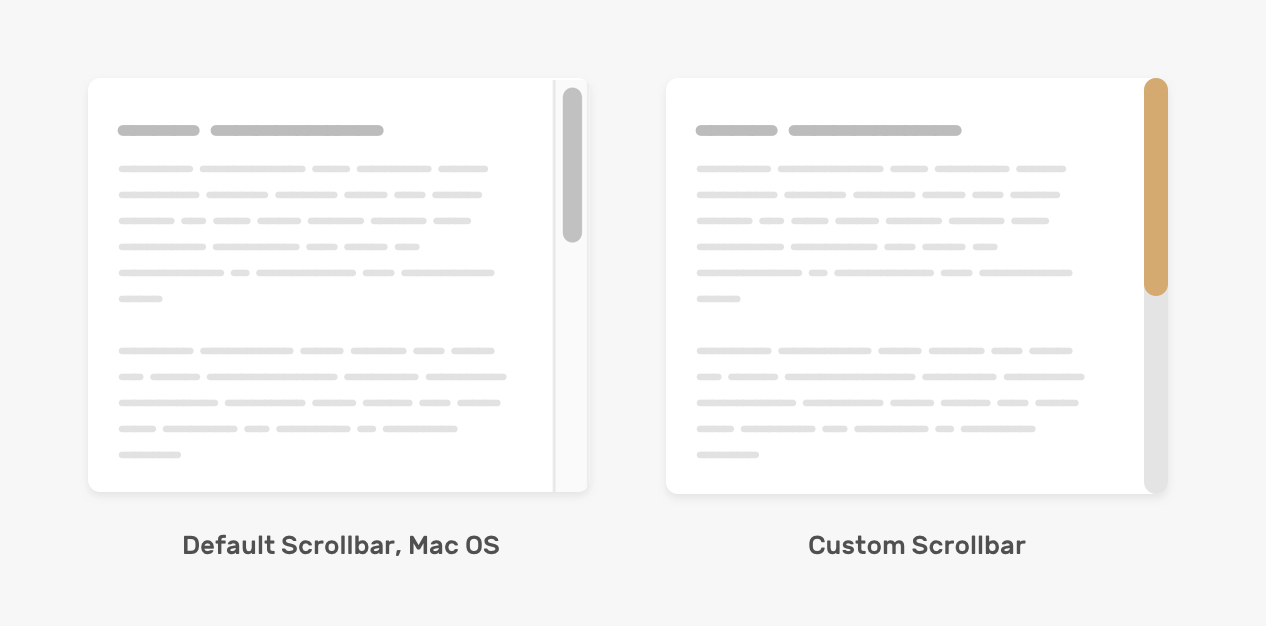
Before diving into customizing the scrollbar, it’s worth talking about the default style in Mac OS. Here is how it looks:
- The scrollbar track has a border on the left and right sides, with a solid background color.
- The scrollbar thumb is rounded and with space around it from the left and right sides.
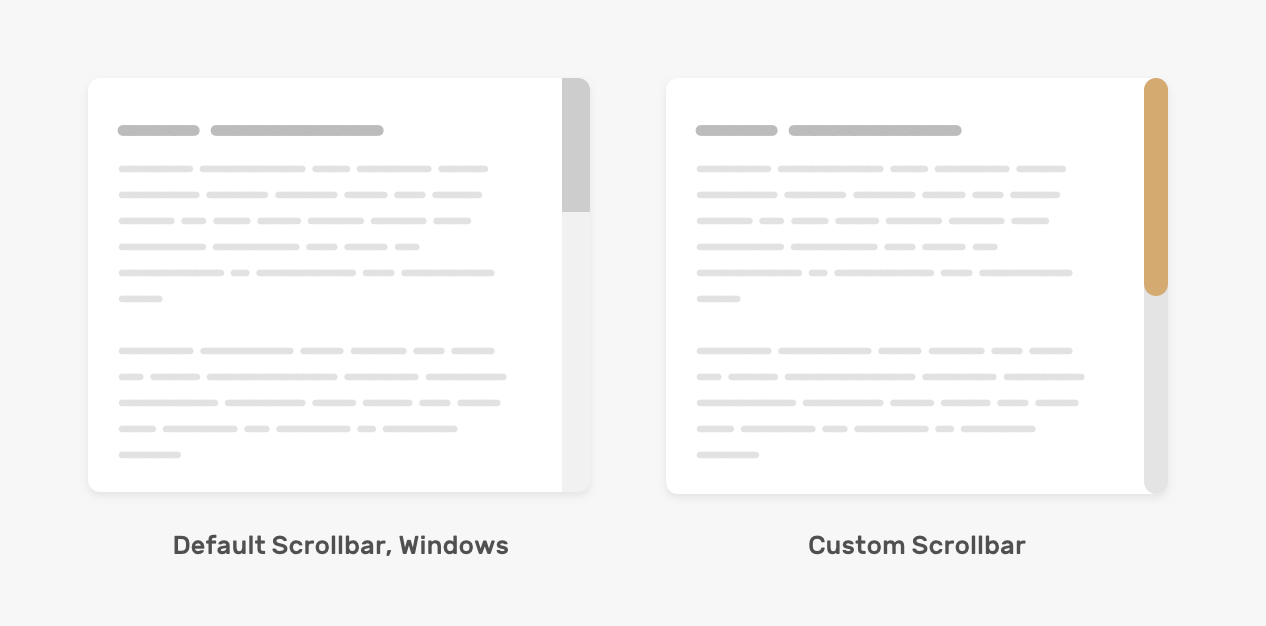
For windows, it’s a bit different.
Here is how we can customize the scrollbar based on the mockup above.
Adding the border-radius for both the track and thumb is necessary, as it won’t work on the ::webkit-scrollbar .
With the new syntax, we can’t adjust the width of the scrollbar, and what’s only possible is to change the track and thumb background color.
Note: the next examples only work with the webkit syntax. For a real-life project, you can add both the webkit and the new syntax.
Example 2
For this example, the design is a bit heavier as it contains gradients and shadows. Is that doable? Yes, we can apply inner shadows and gradients to mimic that effect. Let’s see how!

Example 3
We can also add borders to the thumb and track, which can help us with some tricky designs.
Based on the same example, we can reset the top and bottom borders to zero and get an interesting effect for the thumb. Notice those little elements at the top and bottom of the thumb.

Example 4
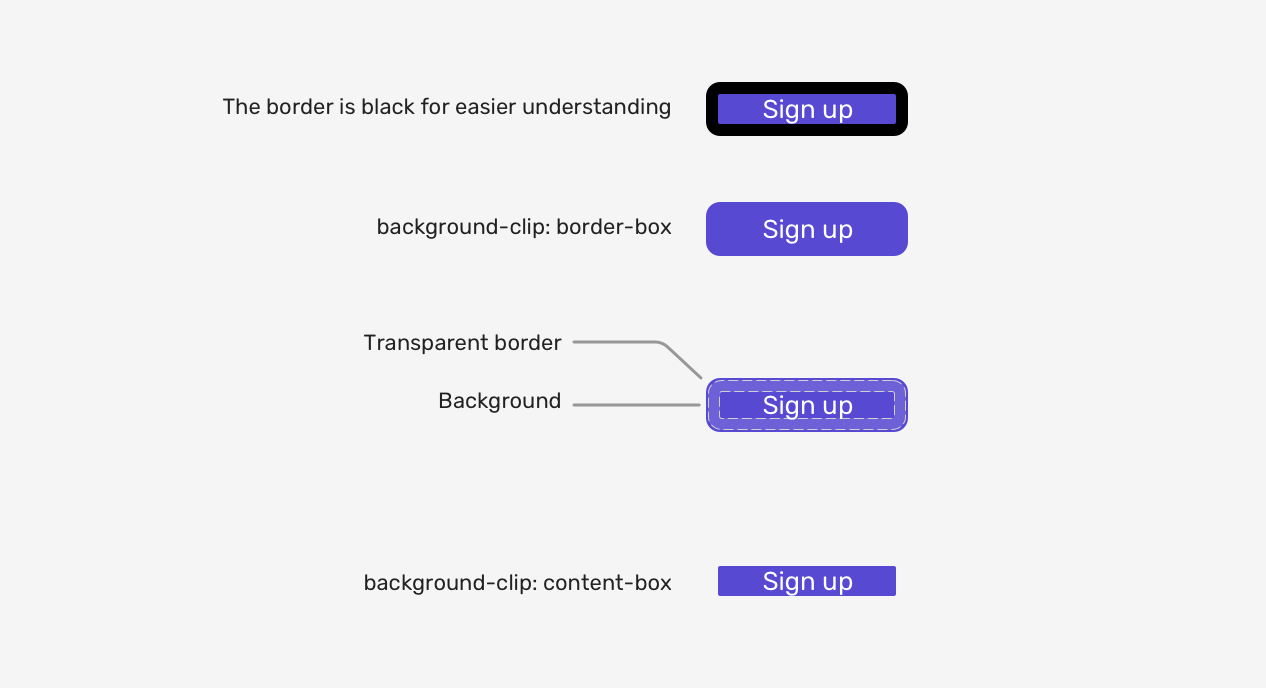
In this example, we want the scrollbar thumb to have an offset from all sides. Since it’s not possible to use padding with the scrollbar properties, we need a hack around that using CSS borders and background-clip . I learned about this idea from this great article by Gabriel Romualdo.
By default, when an element has a background and border, the browser will clip the border-box .
Consider the following example:

We have a button with a 6px black border. It doesn’t have padding for the sake of explaining the concept. Suppose that box-sizing is set to border-box , the border will be included within the size of the button. As a result, the border is appearing above the background.
Now, when we apply background-clip: content-box , the background will only appear around the content.
I hope the idea is clear. Let’s get back into the scrollbar thumb. To mimic the effect, we need to add the following:
With that, we have explored how to customize different scrollbar designs. For Firefox, we can use the new syntax but again, it’s limited only to the thickness and solid colors.
Can we add hover effects?
Yes, we can add a hover effect to the scrollbar thumb for the old and new syntax.
With the new syntax, we can add transitions, whereas with the old one, we cannot. This isn’t a big deal to me.
Show the scrollbar when it’s needed
Creating a scrollable element is possible by adding a value other than visible to the overflow property. It’s recommended to use the auto keyword as it will only show the scrollbar if the content exceeds its container.
Accessibility concerns
While customizing a scrollbar design, please keep in mind to have good contrast between the thumb and the track, so it can be easy to be noticed by the user.
Consider the following “bad” example for a custom scrollbar.

The thumb color is barely noticeable. This is not good for the user as it will make it harder in case they are used for scrolling via the thumb.
CSS Scrollbar Styling Tutorial – How to Make a Custom Scrollbar

Charles M.
Have you ever visited a website with a custom scrollbar and wondered how they did it? After reading this article you will understand just about everything there is to know about customizing and styling scrollbars using CSS.
In this tutorial you will:
- Learn the native CSS properties available for styling a scrollbar in the browser
- Create four unique scrollbars using CSS
- Learn about some external libraries that give cross-browser support for custom scrollbars
Video Tutorial
If you prefer video tutorials to reading, you can watch instead. You can also use the video to leave comments/questions and post links to your own custom scrollbars using something like CodePen so others can see your work.
Pros and Cons of a Custom Scrollbar
Before jumping into the code, I think it’s worth looking at some potential tradeoffs that come with creating a custom scrollbar for your website or app.
The upside is that it can give your website a chance to standout compared to the millions of websites using the browser default scrollbar. Anything that can make your website even a little bit more memorable to visitors will benefit you long term.
On the other hand, many UI designers believe that you should never interfere with «standardized» UI components like the scrollbar. If you modify your scrollbar too much, it may confuse people using your website or app.
If you are doing this for your own personal website you probably don’t need to worry about it as long as you like how it looks.
On the other hand if you are thinking about implementing a custom scrollbar at work or some project where you want to make money, you should try A/B testing and make a data driven decision based on the results.
At the end of the day most of us are writing code to drive revenue for a business, so you always need to keep that in mind.
Getting Started
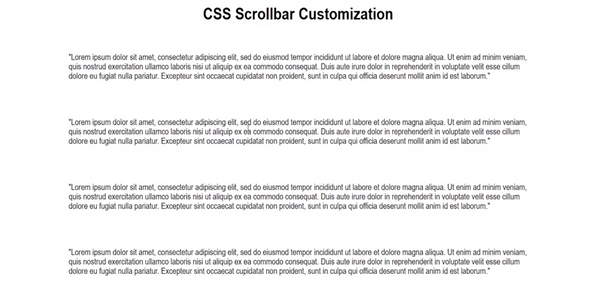
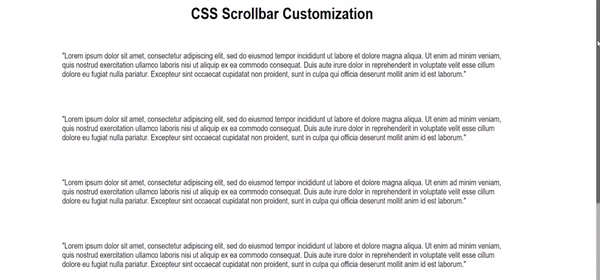
The first thing you need to do is create a basic layout so the page is large enough to actually show a scrollbar in your web browser:
Nothing fancy here, just a basic div container with the class name container for our layout, a header for a title, and a bunch of paragraphs with the class name para to fill out our page.
Here’s the CSS to make things look a little fancier:
Your page should look something like this:
How to Create Custom Scrollbars with CSS
With our setup out of the way, we can jump into the fun part of the tutorial. The first part of this section will be learning the various CSS properties available to use for styling.
In the second part we’ll implement four different types of scrollbars to give you some ideas for making your own scrollbars.
CSS properties available for styling scrollbars
Unfortunately we still don’t have any standardized cross-browser support for styling scrollbars with CSS. Firefox and Webkit-based browsers like Chrome, Edge, and Safari have different properties for styling.
This tutorial will mainly focus on Webkit browsers, because they offer more options for styling, but we will briefly cover Firefox as well.
Webkit CSS styling properties for scrollbars
- ::-webkit-scrollbar – the entire scrollbar
- ::-webkit-scrollbar-track – the entire progress bar area of the scrollbar
- ::-webkit-scrollbar-thumb – the draggable section of the scrollbar
The below properties are available but are less commonly used:
- ::-webkit-scrollbar-button – the up/down buttons at each end of the scrollbar
- ::-webkit-scrollbar-track-piece – part of scrollbar not covered by the thumb
- ::-webkit-scrollbar-corner – bottom corner where horizontal and vertical scrollbars meet
Firefox CSS styling properties for scrollbars
There are currently two available CSS properties for styling scrollbars in Firefox
- scrollbar-width – controls width of scrollbar, with only two options available being auto or thin
- scrollbar-color – takes two colors which are used for the coloring of the thumb and track of the scrollbar in that order
Now that you know your options for customizing scrollbars, let’s put it into practice with some examples.
Dark Theme Scrollbar
Dark theme websites are all the rage right now. Sticking with the default browser scrollbar could come off as jarring to users because it doesn’t fit all that well with a dark themed website.
Let’s use our newfound knowledge of CSS to create a dark theme scrollbar with a rounded border inspired by CSS Tricks’ website:
The result is a little hard to see in the screenshot, but the track is black and the thumb is a darkish gray color.
Minimalist Scrollbar
For this example you’ll be making a minimalist scrollbar. This type of scrollbar would work well if you are going for a simple, elegant style for your website.
The most important thing to note is that you have the ability to use hover and active pseudo-elements from CSS to further style your scrollbar. In this case the scrollbar will turn a darker gray when you hover and drag on the thumb.
Patterned Scrollbar
In this section, the focus is on using a repeating linear gradient to create a pattern effect on our scrollbar track. The same could be done for the scrollbar thumb as well.
Another thing to notice is that you can style the scrollbar thumb with a border, which you can use to create a number of cool effects. In this case I made the background color of the thumb transparent so that you can see the scrollbar track pattern as we scroll.
«Animated» Gradient Scrollbar
This example uses a linear gradient and a trick with box shadow to make it look like the scrollbar is changing color as you move up and down the page. What’s really happening is that the background of the scrollbar track is being revealed beneath the thumb.
It works because the box-shadow takes up all the space of the scrollbar except for where the thumb is. Because the thumb is transparent the gradient color of the background shows through.
Custom Scrollbar Limitations and Alternatives
There are clearly some problems with creating custom scrollbars. The first would be the lack of cross-browser support. Other issues would be the lack of ability to add transitions or animations to the scrollbar and the fact your custom scrollbar won’t appear on mobile devices.
An alternative is hiding the default scrollbar and using a library, but this may effect performance when used as main scrollbar for your page. And there are other potential usability issues because these libraries rely on JavaScript to imitate the native scrollbar behavior.
Below I’ll go over two popular open-source libraries for making scrollbars.
SimpleBar Library
As the name tells you, SimpleBar is all about making it easy to create custom scrollbars. The only real downside here is that it doesn’t support usage as the main scrollbar for your website or for table, text area, or select HTML elements.
The main purpose of SimpleBar would be for creating custom scrollbars for things like dynamic chat applications or any other type of internal page element where you want scrolling.
Overlay Scrollbars Library
Overlay Scrollbars is very similar to SimpleBar but has the added benefit of supporting the HTML body element. This means that you can use it for the main scrollbar of your website in addition to all the other features you would expect like cross-browser and mobile support.
Conclusion
Hopefully this article gave you a solid understanding of how styling CSS scrollbars works.
If you have any questions you can leave a comment on the YouTube video and I’ll try to help you out. Also feel free to leave links to your own designs so other people can check them out.
Scrollbar в современном CSS
Если вдруг кому интересно то я веду телеграм канал по фронтенду где выкладываю интересные статьи на разные темы а так же сам периодически пишу шорт-риды которые могут быть вам полезны.

Scrollbar это больше, чем принято считать
Всем привет! Начнем с того что scrollbar это очень обыденный элемент, присутствующий на всех веб-сайтах и в каждом приложении. Исторически сложилось так, что его было трудно кастомизировать и поэтому разработчики старались обходить стороной работу с ним если того четко не требовало ТЗ, но все же, как мне кажется, мы должны уделять им немного больше внимания. Давайте посмотрим, что мы можем сделать в 2022 году, чтобы улучшить возможности прокрутки для наших пользователей.
Основы
Когда содержимое элемента слишком велико и не помещается в нем, то, чтобы сделать его прокручиваемым, мы можем использовать overflow: auto . Это нужно, чтобы полосы прокрутки отображались по умолчанию.
Что касается стилизации scrollbar-a, то вы можете использовать свойства scrollbar с префиксом -webkit в сочетании со стандартными свойствами ширины: scrollbar-width и цвета: scrollbar-color. На эту тему есть множество публикаций, поэтому я не буду вдаваться в подробности. Если вы еще не знакомы с этими свойствами, я рекомендую вам ознакомиться с руководством, составленным Ахмадом Шейдидом.
Так же я хочу упомянуть плагин postcss-scrollbar , который генерирует свойства полосы прокрутки с префиксом -webkit из стандартных свойств, что позволяет вам получить кросс-браузерные стили только с помощью допустим такого кода:
Выглядит достаточно просто. А теперь перейдем к более интересным моментам.
Scrollbar и темы
Если вы все еще хотите использовать стили scrollbar по умолчанию, это ваше право. Но вам нужно учитывать, если ваш сайт поддерживает темную тему. На многих сайтах при переключении на темный режим полосы прокрутки застревают в светлом. Вот как выглядят документы remix.run в Windows в темном режиме:

Это можно исправить с помощью свойства color-scheme. Прибегать к ним вам придется в разных ситуациях, в том числе – не связанных со scrollbar. У Томаса Штайнера есть отличная статья на web.dev, если вы хотите узнать об этом больше.
Особенности полосы прокрутки в различных операционных системах
В данном разделе я буду размышлять о различных окружениях, поведении в них полос прокрутки и проблемах, связанных с тем или иным поведением, а также выскажу некоторые свои предположения. Если вас интересует только код, смело прокручивайте этот раздел до конца.
Windows
Как я продемонстрировал в предыдущем разделе, Windows всегда отличалась самыми уродливыми полосами прокрутки, по сравнению с другими платформами. Windows 10 имеет наиболее неприглядные полосы прокрутки во всех браузерах. Даже если выбрать правильную цветовую схему, они все равно выглядят излишне квадратными и толстыми.
В Windows 11 попытались модернизировать полосы прокрутки, сделав их тоньше и накладывая друг на друга. Что касается браузеров, Firefox загружает их в таком виде всегда, в то время как Edge или Chrome – модифицируют в той или иной форме.
Особенно мне не нравится реализация Firefox, потому что полоса прокрутки тонкая и исчезает, если вы активно не взаимодействуете с ней. Что еще хуже, кажется, что нет никакого способа изменить это поведение программным путем. Firefox поддерживает опцию «Всегда показывать полосы прокрутки» только в Windows 11, но она отключена по умолчанию, и естественно большинство пользователей не догадаются ее включить. Я очень надеюсь, что этот момент будет учтен в следующем обновлении браузера. Но пока мы ничего сделать с этим не в состоянии.
В Chromium все проще, там у нас гораздо больше возможностей повлиять на scrollbar, хотя бы с теми же стилями -webkit-scrollbar .
macOS
Полосы прокрутки в macOS выглядят менее безобразными, но они имеют свои недостатки.
Возможно, я слишком придирчив, но я разочарован, что не могу просто переместить курсор на правый край окна браузера и использовать его для прокрутки. Это связано с тем, что macOS резервирует края для изменения размера или перемещения окна, даже если курсор все еще находится на бегунке полосы прокрутки. Это неизбежно делает и без того тонкую полосу прокрутки еще тоньше (хотя и только для прокрутки окна просмотра).
Вторая проблема более актуальна: автоматически исчезающие полосы прокрутки. Они могут способствовать созданию приятного и не загроможденного интерфейса, но. это в том случае если пользователь знает, что часть страницы является прокручиваемой. Недавно у меня был случай, когда я буквально не мог найти билет на конференцию, потому что он был скрыт за пределами обозримой области, а полоса прокрутки была невидимой. Другими словами, исчезновение полос прокрутки может в буквальном смысле стоить вам денег. Чтобы обойти эту проблему, нужно высоту полосы прокрутки сделать такой, чтобы последний элемент был наполовину виден. Или же – использовать JavaScript для определения положения прокрутки и добавления тени прокрутки.
Но есть и хорошие новости, обе эти проблемы можно избежать путем задания пользовательского стиля.
Android, iOS и сенсорные экраны
У сенсорных устройств такие же тонкие, накладные и исчезающие полосы прокрутки, которые я назвал проблемой в macOS, но используются они совершенно по-другому: пользователь не взаимодействует напрямую с полосой прокрутки, а просто проводит пальцем по экрану. Кроме того, поскольку сенсорный экран обычно более маленький, на нем умещается меньше информации, и ожидается, что пользователь будет прокручивать намного чаще, чтобы просмотреть контент. Именно потому существуют специальные функции, такие как (1) прокрутка на основе импульса (инерция) и (2) визуальная подсветка или пружинная анимация при достижении края прокручиваемого контейнера. Android еще более внимательно относится к этому и показывает полосу прокрутки при первом появлении прокручиваемого элемента, а затем переключается на обычное автоматическое исчезновение полос после того, как пользователь прокрутил хотя бы один.
Мне очень нравится поведение по умолчанию этих scrollbar-ов и я хотел бы сохранить его. Это достижимо с помощью медиа-запроса pointer , который позволит нам условно стилизовать полосы прокрутки в зависимости от того, использует ли пользователь мышь или сенсорный экран.
Я много где это использовал и мне честно говорят результат очень понравился.
Предотвращение поехавшей верстки
Одна из проблем с overflow: auto заключается в том, что оно показывает полосу прокрутки только в том случае, если содержимое переполнено. Это означает, что внезапное появление полосы прокрутки может вызвать небольшое смещение верстки. Эту проблему можно убрать с помощью overflow: overlay (в Chrome), чтобы полоса прокрутки никогда не занимала место, и / или с помощью overflow: scroll , чтобы она всегда была на месте.
В настоящее время мы можем указать браузеру, чтобы он зарезервировал место для полос прокрутки, используя scrollbar-gutter: stable . Он поддерживается в Chrome и Firefox. Если вы используете невидимый scrollbar, то этот резервный вариант должен работать так же, как scrollbar-gutter.
Здесь стоит отметить, что если вы хотите, чтобы scrollbar-gutter находилась в области просмотра, то работать с <body> ее заставить сложно, и, возможно, будет проще переместить ее в дочерний элемент.
Еще больше возможностей для scrollbar в современном CSS
Хотя это не связано напрямую со стилем полосы прокрутки, я хочу кратко упомянуть еще несколько свойств, которые могут помочь улучшить прокрутку.
scroll-padding
scroll-padding позволяет создать смещение по краю области прокрутки. Это полезно, когда используется фиксированный заголовок (sticky header), способный закрывать заголовки фрагментов, которые прокручиваются на странице с помощью ссылок перехода или URL-адресов.
scroll-behavior
scroll-behavior позволяет включить плавную прокрутку, которая также очень удобна для переходов по ссылкам-якорям внутри страницы.
scroll-padding
Overscroll-behavior выполняет совершенно иную функцию: позволяет предотвратить цепочку прокрутки во вложенных областях прокрутки. Удобно в некоторых местах, таких как диалоговые окна и боковые панели, где вы не хотите, чтобы базовая страница начинала прокручиваться, когда вы достигаете конца текущего контейнера прокрутки.
Scroll snapping
Представленная некоторое время назад в CSS scroll snapping претерпела многочисленные улучшения и исправления. Сегодня это достаточно надежный и оптимальный способ создания чего-то вроде галереи или компонента stories с почти нулевым использованием JavaScript.
Заключение
Благодарю за прочтение публикации и надеюсь, что она вдохновит вас идти по пути улучшения scrollbar на ваших проектах. А на этом собственно все.
How To Style Scrollbars with CSS
![]()
Have you ever visited a website with a custom scrollbar and wondered how they did it?
After reading this article you can understand everything about customizing and styling scrollbars using CSS.
Pros and Cons of a Custom Scrollbar
Before jumping into the code, I think it’s worth looking at some potential tradeoffs that come with creating a custom scrollbar for your website or app.
The upside is that it can give your website a chance to stand out compared to the millions of websites using the browser default scrollbar. Anything that can make your website even a little bit more memorable to visitors will benefit you long term.
On the other hand, many UI designers believe that you should never interfere with “standardized” UI components like the scrollbar. If you modify your scrollbar too much, it may confuse people using your website or app.
If you are doing this for your own personal website you probably don’t need to worry about it as long as you like how it looks.
On the other hand, if you are thinking about implementing a custom scrollbar at work or some project where you want to make money, you should try A/B testing and make a data-driven decision based on the results.
At the end of the day, most of us are writing code to drive revenue for a business, so you always need to keep that in mind.
In September 2018, W3C CSS Scrollbars defined specifications for customizing the appearance of scrollbars with CSS.
As of 2020, 96% of internet users are running browsers that support CSS scrollbar styling. However, you will need to write two sets of CSS rules to cover Blink and WebKit and also Firefox browsers.
In this tutorial, you will learn how to use CSS to customize scrollbars to support modern browsers.
Prerequisites
Before following this article, you will need :
- Familiarity with the concepts of vendor prefixes, pseudo-elements, and graceful degradation.
“Vendor prefixes” are a way for your browser to support new CSS features before they become fully supported in all browsers.
“Graceful degradation” is a strategy of handling web page design for a variety of different browsers, both old and new.
“Pseudo elements” are keywords added to a selector that lets you style a specific part of the selected element(s).And below these are some of the “pseudo-elements” you should use for Chrome, Safari :
- ::-webkit-scrollbar : the background of the bar itself.
- ::-webkit-scrollbar-button : the directional buttons on the scrollbar.
- ::-webkit-scrollbar-track : the empty space “below” the progress bar.
- ::-webkit-scrollbar-track-piece : the top-most layer of the progress bar is not covered by the thumb.
- ::-webkit-scrollbar-thumb : the draggable scrolling element resizes depending on the size of the scrollable element.
- ::-webkit-scrollbar-corner : the bottom corner of the scrollable element, where two scrollbars meet.
- ::-webkit-resizer : the draggable resizing handle that appears above the scrollbar corner at the bottom corner of some elements.
Styling Scrollbars in Chrome, Edge, and Safari
Currently, styling scrollbars for Chrome, Edge, and Safari is available with the vendor prefix pseudo-element -webkit-scrollbar .
Here is an example that uses ::-webkit-scrollbar , ::-webkit-scrollbar-track , and ::webkit-scrollbar-thumb pseudo-elements:
Here is a screenshot of the scrollbar that is produced with these CSS rules:
This code works in the latest releases of Chrome, Edge, and Safari.
Unfortunately, this spec has been formally abandoned by W3C and will likely be depreciated over time.
Styling Scrollbars in Firefox
Currently, styling scrollbars for Firefox is available with the new CSS Scrollbars.
Here is an example that uses scrollbar-width and scrollbar-color properties:
Here is a screenshot of the scrollbar that is produced with these CSS rules:
This specification shares some commonalities with the -webkit-scrollbar specification for controlling the color of the scrollbar. However, there is presently no support for modifying the padding and roundness for the “track thumb”.
Building Future-Proof Scrollbar Styles
You can write your CSS in a way to support both -webkit-scrollbar and CSS Scrollbars specifications.
Here is an example that uses scrollbar-width , scrollbar-color , ::-webkit-scrollbar , ::-webkit-scrollbar-track , ::webkit-scrollbar-thumb :
Blink and WebKit browsers will ignore rules they do not recognize and apply -webkit-scrollbar rules. Firefox browsers will ignore rules they do not recognize and apply CSS Scrollbars rules. Once Blink and WebKit browsers fully deprecate the -webkit-scrollbar specification, they will gracefully fall back to the new CSS Scrollbars specification.
Conclusion
In this article, you were introduced to using CSS to style scrollbars and how to ensure these styles are recognized in most modern browsers.
It is also possible to simulate a scrollbar by hiding the default scrollbar and using JavaScript to detect height and scroll position. However, these approaches run into limitations with reproducing experiences like inertia scrolling (e.g., decaying motion when scrolling via trackpads).
If you’d like to learn more about CSS, check out the below links for exercises and programming projects.