Как сделать чат

Думаю, что каждый из Вас знает, что такое чат. И очень часто на сайтах можно встретить либо маленькие чаты, либо достаточно большие и сложные. В этой статье я опишу принцип создания чата. Обратите внимание, что в этой статье не будет готового кода «скопировал-вставил«, а только алгоритм, с помощью которого Вы, обладая необходимыми знаниями, сможете сделать чат.
Ключевая особенность чата в том, что его содержимое обновляется автоматически. Отсюда и возникают все трудности.
Для начала разберём с Вами структуру таблицы в базе данных. Вот те поля, которые обязательно потребуются:
- id — уникальный идентификатор.
- name — имя, оставившего сообщение. Здесь также может быть, например, user_id, означающий id пользователя из другой таблицы.
- message — сам текст сообщения.
- date — дата отправления сообщения.
Безусловно, это только пример. Вы можете добавлять ещё массу других полей, тем самым, расширяя возможности Вашего чата.
Теперь необходимо вывести HTML-код:
В данном коде опять же всё как пример. Можно всё смело менять, но принцип должен быть тем же: есть место, где выводятся сообщения, причём они выводятся в одинаковом виде. Вместе с полем, где выводятся сообщения, есть текстовое поле и кнопка «Отправить«.
Обязательно для блока chat поставьте фиксированную высоту, чтобы при добавлении новых сообщений, у Вас этот блок не вырастал, также поставьте полосу прокрутки у него, чтобы можно было просмотреть все сообщения. Всё это делается с помощью CSS.
Теперь займёмся JavaScript:
<script type=»text/javascript»>
function send() <
var message = document.getElementById(«message»).value;
var name = «Гость»;
/* Здесь блок отправки POST-запроса с данными (например, через Ajax) */
>
function update() <
/* Здесь отправка запроса на получение всех сообщений (например, через Ajax) */
/* Здесь вывод сообщений в определённом формате прямо в HTML-код с использованием DOM, либо JQuery. */
>
setInterval(«update()», 1000); // Обновление окна чата каждую секунду
</script>
И, наконец, PHP-код (добавление новых сообщений):
<?php
/* Получаем данные, полученные из JavaScript */
$message = $_POST[«message»];
$name = $_POST[«name»];
$date = date(); // Узнаём текущее время и дату
/* Здесь добавляем в таблицу новую запись */
?>
И последний файл, которые потребуется — это получение всех сообщений из таблицы:
<?php
/* Вытаскиваем все записи из таблицы */
/* Получаем двумерный массив из полученных данных */
/* Преобразуем массив в json-формат и возвращаем его в javascript, где он уже будет выводиться */
?>
Всё, круг замкнулся, и чат заработал. Как видите, сделать чат достаточно сложно и нужно обладать большим багажом знаний. Но я надеюсь, что данная статья здорово облегчит Вам эту задачу. Абсолютно любой чат, какой бы он сложный ни был, основан на принципах, описанных в данной статье, поэтому смело можете его использовать как каркас.

Копирование материалов разрешается только с указанием автора (Михаил Русаков) и индексируемой прямой ссылкой на сайт (http://myrusakov.ru)!
Добавляйтесь ко мне в друзья ВКонтакте: http://vk.com/myrusakov.
Если Вы хотите дать оценку мне и моей работе, то напишите её в моей группе: http://vk.com/rusakovmy.
Если Вы не хотите пропустить новые материалы на сайте,
то Вы можете подписаться на обновления: Подписаться на обновления
Если у Вас остались какие-либо вопросы, либо у Вас есть желание высказаться по поводу этой статьи, то Вы можете оставить свой комментарий внизу страницы.
Порекомендуйте эту статью друзьям:
Если Вам понравился сайт, то разместите ссылку на него (у себя на сайте, на форуме, в контакте):
Она выглядит вот так:
Комментарии ( 25 ):
Спасибо за статью, Михаил! Но ведь можно сделать и без применения js?
Можно, с применением frame. Но это очень плохой вариант в том плане, что, во-первых, будет "моргать" экран, поскольку обновляется целиком весь блок, особенно это будет заметно на медленных компьютерах. Также очень сильно ограничена функциональность и многое нельзя будет сделать.
Spasiba za statiu Mixail..Vapros: Shtob Sozdat Chatik na znat PHP ? i JavScript? obizatelna ? a mojna li vot suda postavit http://remzi.mail2k.ru/ ? Zarane spasiba ..
Можно взять готовый скрипт чата. Минусов масса, но если ничего не знаете, то это единственный вариант.
Михаил а как сделать так чтоб аякс запрос, проверял есть ли новые сообщения, если есть то уже подгружает, а если нет то нет. как вот сделать эту проверку? Сама структура запроса не ясна. пожалуйста обьясните.
Отправлять вместе с запросом id последнего сообщения, например. Если новое появилось, то возвращать результат.
А лучше ли будет передавать хэш id ? или лучше будет сделать специально отдельно колонку в таблице, с рандомным значением (и сделать и его хэш)чтоб исключить подстановку?!
Если беспокоитесь о безопасности, то можете и так сделать. Как альтернатива, можете передавать не id, а время последнего обновления. Тогда выводить только сообщения, отправленные позже этого времени.
Можно сделать асинхронную подгрузку сообщений если не беспокоетесь о нагрузке
Я сделал чат по такому же принципу, только я не знал как обновлять и узнал здесь. Спасибо.
Михаил, а как сделать так, чтобы при обновлении страницы все сообщения из окна чата исчезали? Т.е. каждый новый пользователь не видел сообщений старых. И если это вообще возможно, то где хранить сообщения в БД или в файлах… Спасибо
Можно хранить в cookie дату первого посещения чата и выводить сообщения только, отправленные позже этого времени.
у меня вопрос) я не разбирал код честно говоря, просмотрел поверхностно) но как быть в случае когда нужно показывать 100 сообщений, тогда контент страницы требует прокрутку) и вид вовсе не компактный, как решить эту проблему? просто не хочу курить форумы))
Через CSS у блока можно поставить максимальную высоту и прокрутку.
спасибо) просто не сталкивался с прокруткой) обязательно попробую)
Михаил, вы пишите статьи для людей или для поисковиков?
В первую очередь, для людей. Для поисковиков только <b> ставлю.
Михаил, спасибо за статью. Вопрос: мне нужно установить, уже готовый чат Mibew Messenger.Все понятно, но там нужно создать БД MySQL и БД пользователя, где это создавать и как? управление сайта через самописную cms. В примере БД создаются в phpMyAdmin.
Live Support Chat with AJAX, PHP and MySQL
In this tutorial, we’ll be developing an interactive and fluid live support chat app with AJAX (JavaScript), PHP and MySQL. We’ll leverage AJAX to receive and send messages in real-time without having to reload the page.
Have you ever seen the chat icon that appears on many websites in the bottom-right corner? We’ll be developing a live support chat app identical to what you’ll find on those websites.
Contents
1. Introduction
In this day and age, implementing live support into your website is essential as it will provide a sense of trust between the consumer and business, whether you sell physical or virtual goods. For a business to build integrity, it must provide solid support to its consumers, which is a basic fundamental for any business.
Furthermore, when consumers inquire about products they’re hesitant on purchasing, it could potentially lead to sales and therefore increasing business profit because with the live chat support, you can respond to inquiries in a timely manner.
With the advancement of web technology, we can leverage modern methods to develop a real-time and fluid chat app.
2. Getting Started
Before we start coding our live support chat app, we need a working web server and install tools that will help us develop the app.
2.1. Requirements
- I highly recommend you download and install XAMPP on your development environment. However, keep in mind that XAMPP is only used for development purposes and isn’t recommended to be used for production.
- Ensure your web server is running PHP >= 5.5 and MySQL >= 5.6. The latest version of XAMPP will come pre-built with the latest components and therefore shouldn’t be an issue.
- Download and install a code editor. You can use Notepad to edit the files, but I don’t recommend it. Instead, install one of the following: Notepad++, Visual Studio Code, or Atom.
2.2. What You Will Learn in this Tutorial
- AJAX Implementation — Leverage AJAX to update conversations in real-time.
- Populate SQL Records — Retrieve messages from the database and populate them accordingly.
- Fluid Design with CSS3 — Transition between chat tabs seamlessly.
- Authentication — Authenticate operators and create accounts for guests.
- Smart Search — Automatically find operators and guests with intelligent algorithms.
2.3. File Structure & Setup
We need to start our web server and create the directories and files we’re going to use for our live support chat app. If you’ve installed XAMPP, follow the instructions below.
- Open XAMPP Control Panel
- Next to the Apache module, click Start
- Next to the MySQL module, click Start
- Navigate to XAMPP’s installation directory (C:\xampp)
- Open the htdocs directory
- Create the following directories and files:
File Structure
\— livesupportchat
|— style.css
|— authenticate.php
|— conversation.php
|— conversations.php
|— find_conversation.php
|— main.php
|— post_message.php
|— index.html
Each file will consist of the following:
- style.css — The stylesheet (CSS3) for our live support chat app, which is used to format our structured (HTML) content.
- authenticate.php — Will be used in conjunction with the login form, which will authenticate the user based on the email address provided.
- conversation.php — The conversation file will retrieve messages from the MySQL database that are associated with the sender and receiver.
- conversations.php — The conversations file will retrieve all the conversations associated with the user and populate them based on the date.
- find_conversation.php — The find conversation file will connect the user with an operator, but only if both users clicked the «New Chat» button.
- main.php — The main file will contain global functions that we’ll use throughout our other files, such as database connection code, is_loggedin function, and more.
- post_message.php — The post message file will be used to submit messages and insert them into the database.
3. Creating the Database
The MySQL database will store all our messages, conversations, accounts, and other app-related data. We can use the database to store, update, insert, and retrieve data.
To get started, follow the below instructions.
- Navigate to phpMyAdmin in your browser: http://localhost/phpmyadmin/
- Click the Databases tab in the top navigation menu
- Under the Create Database section, enter phpsupportchat as the database name and utf8_general_ci as the collation
- Click the Create button
- Select the newly created database in the left-side panel
- Click the SQL tab
- Execute the below SQL statement
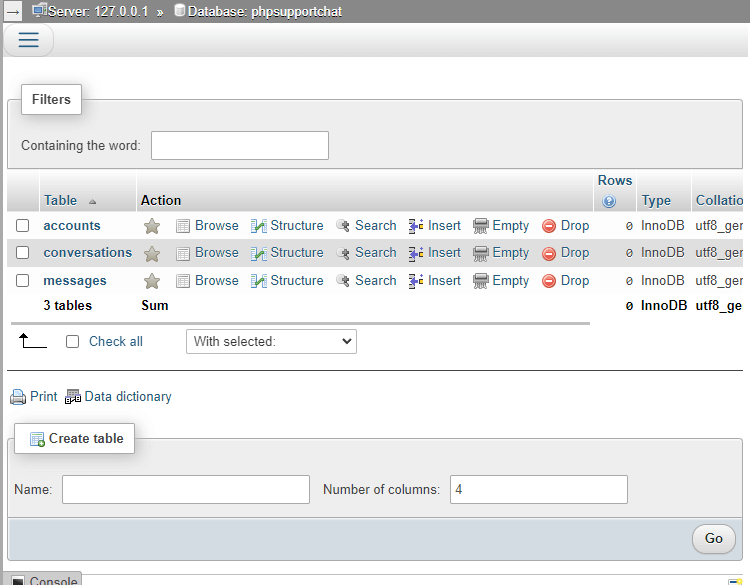
The above SQL statement will create the following tables:
- accounts — this table will store all our guests and operators.
- id — The ID column will auto-increment and therefore each new column will have a unique integer.
- email — The email address associated with the user.
- password — The password field required for operators.
- full_name — The full name associated with the user.
- role — The role column will determine whether the user is a guest or operator.
- secret — A secret unique code which is required to automatically authenticate guests and operators.
- last_seen — The last date the user triggered an action.
- status — The status of the user, which can either be Occupied (chatting with user), Waiting (finding a new conversation), or Idle.
- id — Unique ID.
- account_sender_id — The account ID of the sender, which will be associated with the accounts table.
- account_receiver_id — The account ID of the receiver, which will be associated with the accounts table.
- submit_date — The date the conversation was created.
- id — Unique ID.
- conversation_id — The conversation ID, which will be associated with the conversations table.
- account_id — The account ID of the sender, which will be associated with the accounts table.
- msg — The submitted message.
- submit_date — The date the message was created.
In addition to the above, the SQL statement will create an operator account, which we can later use when testing the chat widget.
In phpMyAdmin, the database structure should look like the following:
4. Creating the Stylesheet (CSS3)
The CSS file will style and layout our live support chat app. With stylesheets, we can apply styles to particular elements, such as changing the font size, colors, animations, and anything design related.
Edit the style.css file and add:
That should be enough to make our app look elegant. The transitions added to the stylesheet will modernize our app and will enable the user to navigate between chat widget tabs seamlessly.
5. Creating the Index File
Do not consider the index file a fundamental part of the live support chat app because the JS code we add to this file can be implemented to any file or webpage. We’ll be using this file as a base to work with.
Edit the index.html file and add:
We’ll implement the JS and AJAX code at a later stage. The FontAwesome library is included to add the messages icon to our chat widget.
Before we implement the JS code, we need to add the button that will open our chat widget.
The button will appear in the bottom-right corner. As you can see, we use the Font Awesome library to display the icon.
The above code will be the template for our chat widget, which will subsequently open when the button declared previously is clicked.
The chat widget will consist of three tabs:
- Tab 1 — Will be used to display the authentication form (name, email, password, etc.).
- Tab 2 — Will contain the list of conversations associated with the user.
- Tab 3 — Will be the conversation containing messages from the sender and receiver.
Each tab will contain a transition that will animate the direction on the X-axis. It’s so we can switch between tabs smoothly.
6. Creating the Main File
The main file will contain functions and database connection code that will be required in our other PHP files. There is no need to implement the same code in every file.
Edit the main.php file and add:
We’ll be leveraging sessions to determine whether our users are logged-in or not. In addition, the secret cookie will automatically authenticate our users if it’s declared.
Did you know?The password_hash() function is a strong one-way hashing algorithm and therefore is extremely difficult for an attacker to try and decrypt the hashed string.
Make sure to update the database variables to reflect your own. If you encounter a database connection error, it’s most likely due to incorrect credentials provided.
7. Implementing Authentication
In this section, we’ll implement code that will validate the user, whether it be a guest or operator, and provide a response on the front-end with AJAX.
Edit the authenticate.php file and add:
The above code will validate the captured form data, which is sent from the client as a POST request. POST requests enable us to transfer data from the client to the server using input elements.
The above code will retrieve the account associated with the captured email address. To prevent SQL injection, we leverage prepared statements.
That will check whether the account exists or not. Now, we must add code that will authenticate the user and provide a response.
The above code will authenticate the user, but only if the user meets one of the specified conditions. The session variables will be remembered on the server and will basically act like browser cookies — all variables are associated with a session ID.
As mentioned before, we created two roles for our users:
- Operator — they are required to enter a password as their data will need to be preserved in the database.
- Guest — password is not essential as it will be too tedious for the user and they’ll feel reluctant to use the live support chat app.
PHP TipThe exit() function will stop the script and prevent further execution. If the param is specified, it will output the string to the browser.
Finally, the above code will create an account if one doesn’t exist in the database. In addition, the user will be automatically authenticated.
The output responses will be used in our AJAX code to determine the authentication state.
Now, we can go back to our index file and implement the AJAX code for the login form.
Edit the index.html file and after:
The code above will declare the variables we’re going to use in our script. The currentChatTab variable will update when the user navigates between the chat widget tabs, which we can subsequently leverage to update the active tab in real-time. The converstaionId variable is the ID of the conversation and will update when the user engages in a new conversation. The status variable is the user’s current status, which also updates when the user navigates between tabs.
The above code will add the OnClick event handler to the open chat widget button we declared earlier and will execute the initChat function when it’s clicked.
The initChat function will consist of event handlers and AJAX code that will authenticate the user and fetch the conversations list.
Initially, we add code that will open the chat widget and subsequently add code that will initiate a new POST AJAX request when the user submits the login form. In the AJAX code, we retrieve the response in the callback and determine what should happen next.
In addition, if the user is an operator, the password field will be appended to the login form because operators are required to enter a password.
So now, if we navigate to the index page over localhost and click the open chat widget button in the bottom-right corner, we should see the following:
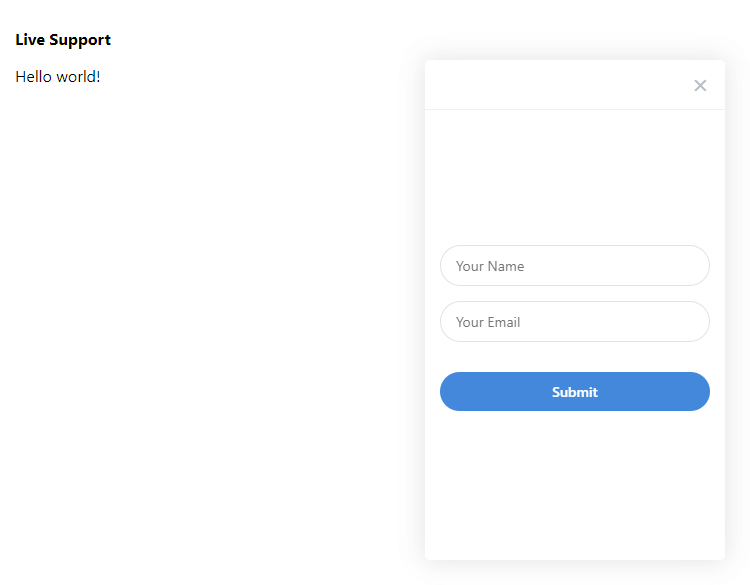
If we input both fields, we should encounter a successful response that will be displayed on the login form. If you receive no response, check the browser developer console for errors and ensure you haven’t missed any of the code.
8. Populating Conversations
Now that we’ve implemented the authentication, we can implement AJAX code that will populate conversations retrieved from the database, which are associated with the account ID.
The conversations tab will enable the user to see all the conversations they’ve exchanged between the operator/guest. We’ll populate the list based on the most recent message, so the conversation with the most recent message will always appear at the top.
Edit the conversations.php file and add:
Like before, we need to make sure the user is authenticated before they can proceed. The user status is updated to Idle, which basically means the user isn’t doing anything.
With the above code, we execute a query to retrieve all the conversations that correspond with the user’s account ID. After, we leverage the usort function to sort the retrieved results by the most recent message date.
The above code is the template for our conversations list. We use a foreach function to iterate the results and output them accordingly.
PHP TipThe htmlspecialchars() function will escape HTML entities and therefore preventing XSS attacks.
Now, we need to go back to our index page and implement the AJAX code that will retrieve the conversations from the above file.
Edit the index.html file and add the following function to the JS script:
The above function will select the specified chat widget tab and update the global variables we declared earlier on. If the user is on the login form tab, we add code that will remove the authenticated cookie, which is the chat_secret cookie we declared in the update_secret PHP function.
The next function we need to add to the JS script is the conversationHandler function, which will add the event handlers to the conversations.
Add below the above function:
And now we can go back to the code that handles the login responses and replace the following line:
So now, when the user successfully logs in, they’re transitioned to the conversations tab, which will populate all the conversations the user is associated with.
But wait! What if the user reloads the page, will they need to be re-authenticated? Right now, yes, but if we add the following code to the initChat function:
They will be automatically authenticated and transitioned to the conversations tab, but only if the user is logged in. We have implemented the Regex code to determine whether the secret authentication code exists or not. If exists, execute the AJAX request.
To navigate back to a previous tab, we can leverage the selectChatTab we implemented. Add the following code to the initChat function:
When the user clicks the previous button in the chat widget header, they’re transitioned to the login form tab.
If we log in to the chat widget using the operator credentials we included in the SQL statement (email: operator@example.com, password: operator), we should see the following:
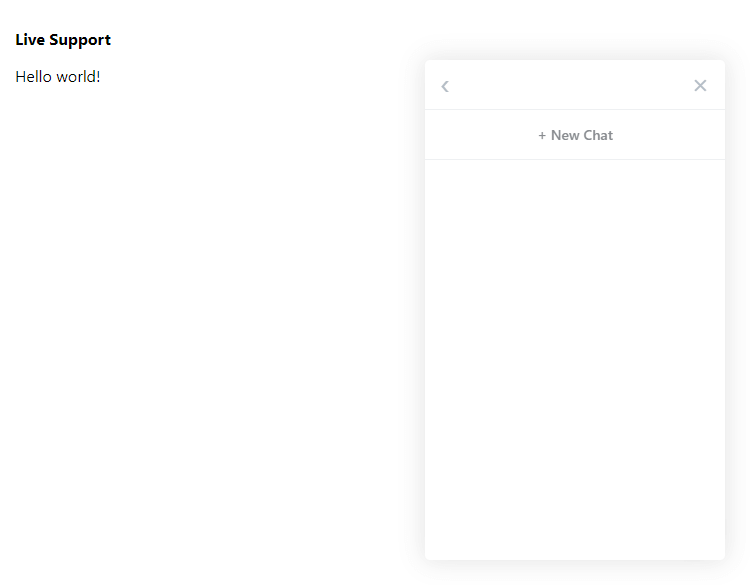
We have yet to initiate a conversation with a guest and therefore no conversations will appear in the tab. We’ll do that in the next section when we implement the conversation code.
9. Conversation Handling
In this section, we’ll implement code that will populate all the messages between the receiver and sender and include the form that will enable the user to send messages. In addition, we’ll add validation to ensure the user belongs to the correct conversation — we wouldn’t want the user to hijack a conversation.
9.1. Retrieve Conversation and Implement Validation
Edit the conversation.php file and add:
In the above code, we ensure the user is logged in and the GET ID parameter exists because without the ID parameter, how will we know which conversation to retrieve from the database?
Subsequently, the conversation is retrieved from the database based on the ID parameter and the session account ID. The session account ID will ensure the conversation belongs to that user. If the conversation doesn’t exist, end the script and output an error.
9.2. Populating Messages
To populate the messages accordingly, we need to retrieve them from the database based on the GET ID param and use a foreach loop to sort the messages by the submission date.
Add the following to the conversation.php file:
Finally, we can add the template that will populate the messages:
In the above code, we iterate the messages and output them accordingly along with the date that will appear above the grouped messages. In addition, we have included the input message that will submit messages to the post_message.php file, which we will create later on.
9.3. Capturing Messages
Capturing messages will enable us to submit messages and store them in our MySQL database.
Edit the post_message.php file and add:
In the above code, we add validation to ensure the user is associated with the conversation they’re submitting the message. Like before, we’re leveraging the isset() function to ensure the GET request data exists.
Finally, if the user manages to get past the validation, the message will be inserted into the database.
9.4. Connecting Users
Now, this is where it can get sophisticated because we need to implement code that connects two users, one being the guest and the other being an operator. In this case, we can leverage the last_seen and status columns to determine if the user is eligible.
Edit the find_conversation.php file and add:
First, we update the status to Waiting as it will be a key factor in finding a connection. After we check whether there was already a conversation created within the last minute and if so, output the conversation ID, which will later be used to connect the user with a guest/operator.
The above query will be the most important factor in finding a new connection and therefore we need to set important conditions. We only want to find users online within the last minute and have their status set to Waiting. Also, the above code will only connect users with the role Guest with Operators and vice-versa.
The final step to connecting users is to check whether a conversation already exists between the users. If the conversation doesn’t exist, create one and output the conversation ID.
9.5. Implementing the JS Code
In this part, we’re going to implement AJAX code to handle each file accordingly, so we’ll need to go back to our index file.
Edit the index.html file and add the following function to the JS script:
With the above function, we now have the ability to retrieve a conversation along with its messages based on the ID of the conversation. Furthermore, we have included the AJAX code that will submit a message and append it to the conversation.
When the user submits a message, the input element will reset and the scrollbar will always start from the bottom.
And now we can replace the following line in the conversationHandler function:
When navigating to the conversation tab (assuming you’re connected with someone), it will look similar to the following:
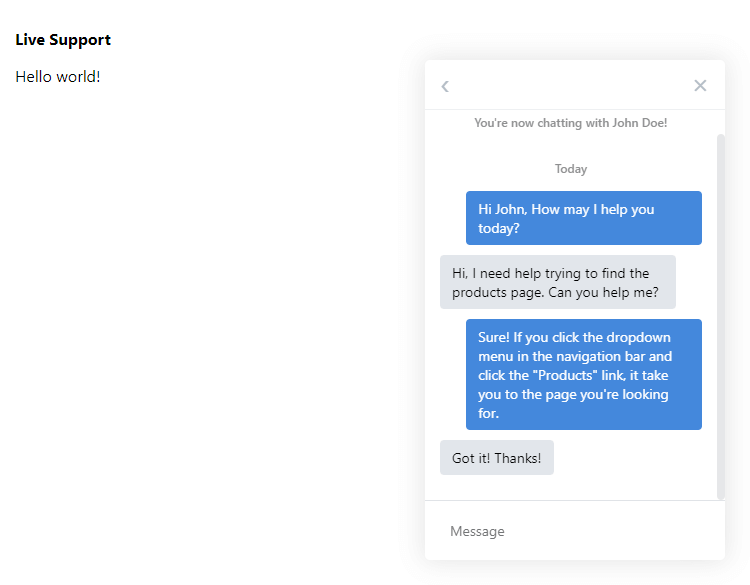
In the conversations tab, it will appear as the following:
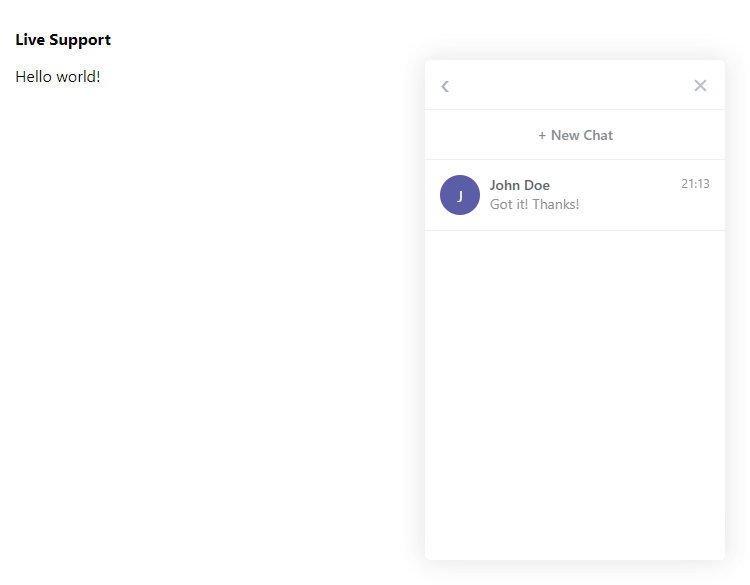
You’re probably thinking — that’s great, David! But how do we update the chat widget in real-time? I will show you exactly how in the next section.
10. Real-time Communication
Finally (and thank goodness!), we are going to implement code that will execute AJAX requests at a particular interval. What we set the interval to depends entirely on how much bandwidth we’re willing to allocate to the chat widget. We can execute AJAX requests at 100 milliseconds, but if our server cannot handle the requests, it will slow down dramatically, so always be cautious and experiment.
Edit the index.html file and add the following to the JS script:
We’re taking advantage of the setInterval function to execute the AJAX requests and update the chat widget content. The callback function binded to setInterval will execute every 5 seconds — feel free to lower the number but please experiment before doing so.
Which content we update depends on the current chat tab, so if the user is on tab 2 (conversations list), it’s unnecessary to update the content on tab 3 and will save us a lot of bandwidth.
The setInterval approach is much slower than WebSockets which are used in traditional messaging applications, but it doesn’t require any dependencies and will work on any website with PHP and MySQL support, so it’s much more convenient.
Conclusion
If you’ve made it to the end, congratulations! There are many fundamentals involved when developing a chat application and therefore you must understand every aspect that has been outlined in the tutorial.
If you’ve enjoyed reading the article, hit the share buttons below and help our website strive for success! The more exposure we receive, the more quality content we can release.
Thanks for reading and have fun coding! 🙂
If you would like to support us, consider purchasing the advanced package below. It will greatly help us create more content and keep our website sustainable. Your support will be much appreciated!
Текстовый чат для сайта
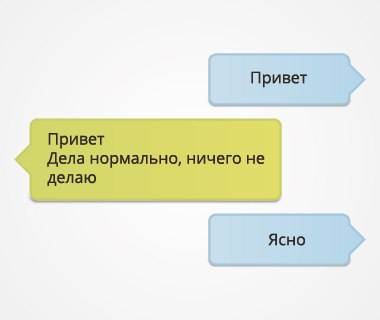
Хочу поделиться опытом создания текстового чата на основе nginx-push-stream-module модуля Nginx, PHP и Javascript. Этот модуль функционирует по принципу long polling и может быть использован как для обмена мгновенными сообщениями между пользователями, так и для системы push–уведомлений.
Добавление модуля Nginx
Будем считать, что у вас уже установлен Nginx. Поэтому для начала нужно скачать и добавить модуль nginx-push-stream-module и пересобрать Nginx вручную. Подробное руководство по добавлению модуля можно найти здесь и здесь, думаю, нет смысла писать повторно.
Конфигурация
Для осуществления поддержки long polling, в конфигурации Nginx объявим точку публикации сообщений (в данном примере publish) и точку подписки для получения сообщений (в данном примере subscribe).
Внутри блока http нужно указать директиву push_stream_shared_memory_size, то есть размер выделяемой памяти.
Отправка сообщений в PHP
В PHP сообщения отправляем обычным POST методом.
Получение сообщений в Javascript (Jquery)
Есть несколько способов подписаться на канал, самый простой – Ajax запрос методом GET.
На этом все. Такой чат является кроссбраузерным, не требует наличия дополнительных плагинов у пользователей и подойдет для проектов любого масштаба. Вот видеочат, использующий данный текстовый чат.
Как создать простое приложение веб-чата
В этом уроке мы будем создавать простое приложение веб-чата с помощью PHP и jQuery. Утилита такого типа прекрасно подойдет для системы онлайн-поддержки вашего сайта.
Введение


Приложение чата, которое мы сегодня построим, будет довольно простым. Оно будет включать в себя систему входа и выхода, возможности в AJAX-стиле, а также предложит поддержку нескольких пользователей.
Шаг 1: HTML разметка
Мы начнем этот урок с создания нашего первого файла index.php.
- Мы начнем наш html с обычных DOCTYPE, html, head, и body тагов. В таг head мы добавим наш заголовок и ссылку на нашу таблицу стилей css (style.css).
- Внутри тага body, мы структурируем наш макет внутри блока — обертки #wrapper div. У нас будет три главных блока: простое меню, окно чата и поле ввода нашего сообщения; каждый со своим соответствующим div и id.
- Блок меню #menu div будет состоять из двух абзацев. Первый будет приветствием пользователю и поплывет налево, а второй будет ссылкой на выход и поплывет направо. Мы также включим блок div для очистки элементов.
- Блок чата #chatbox div будет содержать лог нашего чата. Мы будем загружать наш лог из внешнего файла с использованием ajax-запроса jQuery.
- Последним пунктом в нашем блоке-обертке #wrapper div будет наша форма, которая будет включать в себя текстовое поле ввода для сообщения пользователя и кнопку отправки.
Шаг 2: Создание стиля CSS
Теперь мы добавим немного css, чтобы заставить наше приложение чата выглядеть лучше, чем стиль браузера по умолчанию. Код, указанный ниже будет добавлен в наш файл style.css.
В вышеуказанном css нет ничего особенного, кроме того факта, что некоторые id или классы, для которых мы устанавливаем стиль, будут добавлены немного позже.


Как вы можете видеть выше, мы закончили строить пользовательский интерфейс чата.
Шаг 3: Используем PHP, чтобы создать форму входа.
Теперь мы реализуем простую форму, которая будет спрашивать у пользователя его имя, перед тем, как пустить его дальше.
Функция loginForm(), которую мы создали, состоит из простой формы входа, которая спрашивает у пользователя его/ее имя. Затем мы используем конструкцию if else, чтобы проверить, ввел ли пользователь имя. Если человек ввел имя, мы устанавливаем его, как $_SESSION[‘имя’]. Так как мы используем сессию, основанную на cookie, чтобы хранить имя, мы должны вызвать session_start() перед тем, как что-нибудь выводить в браузер.
Есть одна вещь, на которую вы возможно захотите обратить особое внимание — то, что мы использовали функцию htmlspecialchars(), которая конвертирует специальные символы в HTML сущности, тем самым защищая имя переменной, чтобы оно не стало жертвой межсайтового скриптинга (XSS). Мы также добавим эту функцию позже к текстовой переменной, которая будет опубликована в логе чата.
Отображение формы входа
Для того, чтобы показать форму логина в случае, если пользователь не вошел в систему, и следовательно, не сессия не создалась, мы используем другую инструкцию if else вокруг блока-обертки #wrapper div и тагов скрипта в нашем исходном коде. В противоположном случае, если пользователь вошел в систему и создал сессию, этот код спрячет форму входа и покажет окно чата.


Приветствие и меню выхода из системы
Мы еще не закончили создавать систему входа для этого приложения чата. Нам еще нужно дать пользователю возможность выйти из системы и закончить сессию чата. Как вы помните, наша исходная HTML разметка включала в себя простое меню. Давайте вернемся назад и добавим некоторый PHP код, который придаст меню больше функциональности.
Прежде всего, давайте добавим имя пользователя в сообщение приветствия. Мы сделаем это, выводя сессию имени пользователя.


Для того, чтобы позволить пользователю выйти из системы и завершить сессию, мы прыгнем выше головы и кратко используем jQuery.
Код jquery, приведенный выше просто показывает диалог подтверждения, если пользователь кликнет по ссылке выхода #exit. Если пользователь подтвердит выход, тем самым решив закончить сессию, мы отправим его в index.php?logout=true. Это просто создаст переменную с именем logout со значением true. Мы должны перехватить эту переменную с помощью PHP:


Теперь мы увидим, существует ли get переменная ‘logout’, используя функцию isset(). Если переменная была передана через url, такой, как ссылка, упомянутая выше, мы переходим к завершению сессии пользователя с текущим именем.
Перед уничтожением сессии пользователя с текущим именем с помощью функции session_destroy() мы хотим выводить простое сообщение о выходе в лог чата. В нем будет сказано, что пользователь покинул сессию чата. Мы сделаем это, используя функции fopen(), fwrite() и fclose(), чтобы манипулировать нашим файлом log.html, который, как мы увидим позднее, будет создан в качестве лога нашего чата. Пожалуйста, обратите внимание, что мы добавили класс ‘msgln’ в блок div. Мы уж определили стиль css для этого блока.
Проделав это, мы уничтожаем сессию и перенаправляем пользователя на ту же страницу, где появится форма входа в систему.
Шаг 4: Поддержка пользовательского ввода данных
После того, как пользователь подтвердил свои действия в нашей форме, нам нужно захватывать его ввод с клавиатуры и писать его в лог нашего чата. Для того, чтобы сделать это, мы должны использовать jQuery и PHP, чтобы работать синхронно на стороне сервера и на стороне клиента.
jQuery
Практически все, что мы собираемся делать с jQuery для обработки наших данных, будет вращаться вокруг запроса на jQuery post.
- Перед тем, как мы что-то начнем делать, мы должны захватить пользовательский ввод, или то, что он напечатал в поток ввода #submitmsg. Этого можно достигнуть функцией val(), которая берет значение, установленное в поле формы. Теперь мы сохраняем это значение в переменную clientmsg.
- Вот и наступает самая важная часть: запрос jQuery post. Она отправляет запрос POST в файл post.php, который мы создадим через мгновение. Он отправляет ввод клиента, или то, что было сохранено в переменную clientmsg.
- В конце мы очищаем ввод #usermsg, очищая атрибут значения.
Пожалуйста обратите внимание, что код, указанный выше, пойдет в наш таг скрипта, где мы поместили jQuery код выхода из системы.
PHP — post.php
На данный момент мы имеем данные POST, отправляемые в файл post.php каждый раз, когда пользователь отправляет форму и посылает новое сообщение. Наша задача теперь захватить эти данные и записать их в лог нашего чата.
- Прежде чем мы что-либо сделаем, мы должны начать файл post.php с помощью функции session_start(), так как мы будем использовать сессию по имени пользователя в этом файле.
- Используя логическую isset, мы проверим, существует ли сессия для ‘name’, перед тем, как что-то делать дальше.
- Теперь мы захватим данные POST, которые jQuery послал в этот файл. Мы сохраним эти данные в переменную $text.
- Эти данные, так же, как и вообще все данные, вводимые пользователем, будут храниться в файле log.html. Чтобы сделать это, мы откроем файл в режиме ‘a’ функции fopen, который согласно php.net открывает файл только для записи; помещает указатель файла на конец файла. Если файл не существует, попытаемся создать его. Затем мы запишем наше сообщение в файл, используя функцию fwrite().
- Сообщение, которое мы будем записывать, будет заключено внутри блока .msgln div. Он будет содержать дату и время, сгенерированную функцией date(), сессию имени пользователя и текст, которые также будет окружен функцией htmlspecialchars(), чтобы избежать XSS.
И наконец, мы закрываем наш файл с помощью fclose().
Шаг 5: Отображение содержимого лога чата (log.html)
Все, что пользователь разместил, обработано и опубликовано с помощью jQuery; оно записано в лог чата с помощью PHP. Единственное, что осталось сделать — это показать обновленный лог чата пользователю.
Чтобы сэкономить нам немного времени, мы предварительно загрузим лог чата в блок #chatbox div, как если бы он что-то содержал.
Мы используем процедуру, похожую на ту, что мы использовали в файле post.php, но на этот раз мы только читаем и выводим содержимое файла.
Запрос jQuery.ajax
Запрос ajax — это ядро всего, что мы делаем. Этот запрос не только позволяет нам посылать и принимать данные через форму без обновления страницы, но также и позволяет нам обрабатывать запрошенные данные.
Мы завернем наш ajax запрос в функцию. Вы увидите, зачем, прямо сейчас. Как вы можете видеть выше, мы использовали только три из объектов запроса jQuery ajax.
- url: Строка URL для запроса. Мы используем имя файла лога нашего чата log.html.
- cache: Это предотвратит кэширование нашего файла. Это обеспечит нам то, что всегда, когда мы посылаем запрос, мы будем иметь обновленный лог чата.
- sucess: Это позволит нам прикрепить функцию, которая передаст запрошенные нами данные.
Как вы видите, затем мы перемещаем запрошенные нами данные (html) в блок #chatbox div.
Автопрокрутка
Как мы, возможно, видели в других приложениях чатов, содержимое автоматически прокручивается вниз, если контейнер лога чата (#chatbox) переполняется. Мы воплотим простую и похожую возможность, которая будет сравнивать высоту полосы прокрутки контейнера до и после того, как мы выполним ajax запрос. Если высота полосы прокрутки стала больше после запроса, мы используем эффект анимации jQuery, чтобы прокрутить блок #chatbox div.
- Сначала мы сохраним высоту полосы прокрутки блока #chatbox div в переменную oldscrollHeight перед выполнением запроса.
- После того, как наш запрос вернет успех, мы сохраним высоту полосы прокрутки блока #chatbox div в переменную newscrollHeight.
- Затем мы сравним высоту полосы прокрутки в обеих переменных, используя конструкцию if. Если newscrollHeight больше, чем oldscrollHeight, мы используем эффект анимации, чтобы прокрутить блок #chatbox div.
Постоянное обновление лога чата
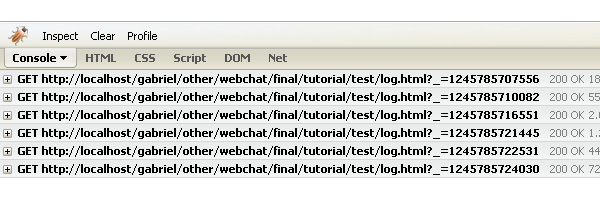
Теперь может возникнуть вопрос, как часто мы будем обновлять новые данные, переданные между пользователями. Или перефразируя вопрос, с какой регулярностью мы будем отправлять постоянные запросы на обновление данных?
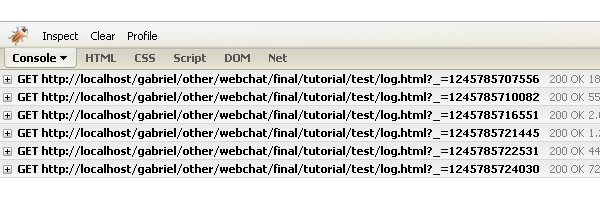
Ответ на наш вопрос находится в функции setInterval. Эта функция будет запускать нашу функцию loadLog() каждые 2,5 секунды, которая будет запрашивать обновленный файл и делать автопрокрутку блока.
Закончили
Мы закончили! Я надеюсь, что вы изучили, как работает базовая система чата, и, если у вас есть какие-либо пожелания, я с радостью их приветствую. Это максимально простая система чата, которую вы можете создать как приложение чата. Вы можете оттолкнуться от нее и построить множественные чат комнаты, добавить админку, эмотиконы и т.д. Здесь ваш предел — это небо.
Ниже привожу несколько ссылок, которые вы возможно захотите посмотреть, если задумаетесь о расширении этого приложения чата: