Introduction
Get started with Bootstrap, the world’s most popular framework for building responsive, mobile-first sites, with jsDelivr and a template starter page.
Quick start
Looking to quickly add Bootstrap to your project? Use jsDelivr, a free open source CDN. Using a package manager or need to download the source files? Head to the downloads page.
Copy-paste the stylesheet <link> into your <head> before all other stylesheets to load our CSS.
Many of our components require the use of JavaScript to function. Specifically, they require our own JavaScript plugins and Popper. Place one of the following <script> s near the end of your pages, right before the closing </body> tag, to enable them.
Bundle
Include every Bootstrap JavaScript plugin and dependency with one of our two bundles. Both bootstrap.bundle.js and bootstrap.bundle.min.js include Popper for our tooltips and popovers. For more information about what’s included in Bootstrap, please see our contents section.
Separate
If you decide to go with the separate scripts solution, Popper must come first (if you’re using tooltips or popovers), and then our JavaScript plugins.
Modules
If you use <script type="module"> , please refer to our using Bootstrap as a module section.
Components
Curious which components explicitly require our JavaScript and Popper? Click the show components link below. If you’re at all unsure about the general page structure, keep reading for an example page template.
- Alerts for dismissing
- Buttons for toggling states and checkbox/radio functionality
- Carousel for all slide behaviors, controls, and indicators
- Collapse for toggling visibility of content
- Dropdowns for displaying and positioning (also requires Popper)
- Modals for displaying, positioning, and scroll behavior
- Navbar for extending our Collapse plugin to implement responsive behavior
- Toasts for displaying and dismissing
- Tooltips and popovers for displaying and positioning (also requires Popper)
- Scrollspy for scroll behavior and navigation updates
Starter template
Be sure to have your pages set up with the latest design and development standards. That means using an HTML5 doctype and including a viewport meta tag for proper responsive behaviors. Put it all together and your pages should look like this:
For next steps, visit the Layout docs or our official examples to start laying out your site’s content and components.
Important globals
Bootstrap employs a handful of important global styles and settings that you’ll need to be aware of when using it, all of which are almost exclusively geared towards the normalization of cross browser styles. Let’s dive in.
HTML5 doctype
Bootstrap requires the use of the HTML5 doctype. Without it, you’ll see some funky incomplete styling, but including it shouldn’t cause any considerable hiccups.
Responsive meta tag
Bootstrap is developed mobile first, a strategy in which we optimize code for mobile devices first and then scale up components as necessary using CSS media queries. To ensure proper rendering and touch zooming for all devices, add the responsive viewport meta tag to your <head> .
You can see an example of this in action in the starter template.
Box-sizing
For more straightforward sizing in CSS, we switch the global box-sizing value from content-box to border-box . This ensures padding does not affect the final computed width of an element, but it can cause problems with some third-party software like Google Maps and Google Custom Search Engine.
On the rare occasion you need to override it, use something like the following:
With the above snippet, nested elements—including generated content via ::before and ::after —will all inherit the specified box-sizing for that .selector-for-some-widget .
Reboot
For improved cross-browser rendering, we use Reboot to correct inconsistencies across browsers and devices while providing slightly more opinionated resets to common HTML elements.
Community
Stay up to date on the development of Bootstrap and reach out to the community with these helpful resources.
- Read and subscribe to The Official Bootstrap Blog.
- Chat with fellow Bootstrappers in IRC. On the irc.libera.chat server, in the #bootstrap channel.
- Implementation help may be found at Stack Overflow (tagged bootstrap-5 ).
- Developers should use the keyword bootstrap on packages that modify or add to the functionality of Bootstrap when distributing through npm or similar delivery mechanisms for maximum discoverability.
You can also follow @getbootstrap on Twitter for the latest gossip and awesome music videos.
Начать работу с Bootstrap
Bootstrap — это мощный, многофункциональный интерфейсный инструментарий. Создавайте что угодно — от прототипа до продакшена — за считанные минуты.
Быстрый старт
Начните с включения готовых CSS и JavaScript Bootstrap через CDN без каких-либо шагов по сборке. Посмотрите это на практике с помощью этой демонстрации Bootstrap CodePen.
Создайте новый файл index.html в корне вашего проекта. Включите также тег <meta name="viewport"> для правильного отзывчивого поведения на мобильных устройствах.
Включите CSS и JS Bootstrap. Поместите тег <link> в <head> для нашего CSS и тег <script> для нашего пакета JavaScript (включая Popper для позиционирования раскрывающихся списков, всплывающие сообщения и всплывающие подсказки) перед закрывающим </body> . Узнайте больше о наших ссылках CDN.
Вы также можете включить Popper и наш JS отдельно. Если вы не планируете использовать раскрывающиеся списки, всплывающие окна или всплывающие подсказки, сэкономьте несколько килобайт, не включая Popper.
Привет мир! Откройте страницу в выбранном вами браузере, чтобы увидеть страницу с начальной загрузкой. Теперь вы можете начать сборку с помощью Bootstrap, создав свой собственный макет, добавив десятки компонентов и используя наши официальные примеры.
CDN ссылки
В качестве справки, вот наши основные ссылки CDN.
| Описание | URL-адрес |
|---|---|
| CSS | https://cdn.jsdelivr.net/npm/bootstrap@5.3.0-alpha3/dist/css/bootstrap.min.css |
| JS | https://cdn.jsdelivr.net/npm/bootstrap@5.3.0-alpha3/dist/js/bootstrap.bundle.min.js |
Вы также можете использовать CDN для получения любой из наших дополнительных сборок, перечисленных на странице Содержание.
Следующие шаги
Узнайте больше о некоторых важных глобальных настройках среды, которые использует Bootstrap.
Прочитайте о том, что включено в Bootstrap, в нашем разделе содержания и списке компонентов, для которых требуется JavaScript ниже.
Нужно немного больше энергии? Рассмотрите возможность сборки с помощью Bootstrap, включив исходные файлы с помощью диспетчера пакетов.
Хотите использовать Bootstrap в качестве модуля с <script type="module"> ? Пожалуйста, обратитесь к нашему разделу использование Bootstrap как модуля.
JS компоненты
Любопытно, какие компоненты явно требуют нашего JavaScript и Popper? Щелкните ссылку «Показать компоненты» ниже. Если вы совсем не уверены в общей структуре страницы, продолжайте читать пример шаблона страницы.
- Уведомления (Alerts) для отклонений
- Кнопки (Buttons) для переключения состояний и функциональности флажка/радио
- Карусель (Carousel) для всех режимов слайдов, элементов управления и индикаторов
- Коллапс (Collapse) для переключения видимости содержимого
- Выпадающие списки (Dropdowns) для отображения и позиционирования (также требуется Popper)
- Модальные окна (Modals) для отображения, позиционирования и поведения прокрутки
- Панель навигации (Navbar) для расширения наших плагинов Collapse и Offcanvas для реализации адаптивного поведения
- Навигация (Navs) с плагином Tab для переключения панелей содержимого
- Offcanvases для отображения, позиционирования и поведения прокрутки
- Отслеживание прокрутки (Scrollspy) для поведения прокрутки и обновлений навигации
- Тосты (Toasts) для отображения и отклонения
- Всплывающие подсказки (Tooltips) и Всплывающие окна (Popovers) для отображения и позиционирования (также требуется Popper)
Важные глобальные переменные
Bootstrap использует несколько важных глобальных стилей и настроек, почти исключительно направленных на нормализацию кросс-браузерных стилей. Давайте погрузимся.
HTML5 doctype
Bootstrap требует использования типа документа HTML5. Без него вы увидите причудливый и незавершенный стиль.
Viewport meta
Bootstrap разработан сначала для мобильных устройств, стратегия, в которой мы сначала оптимизируем код для мобильных устройств, а затем масштабируем компоненты по мере необходимости, используя медиа-запросы CSS. Чтобы обеспечить правильный рендеринг и сенсорное масштабирование для всех устройств, добавьте метатег адаптивного окна просмотра в свой <head> .
Вы можете увидеть пример этого в действии в быстром старте.
Box-sizing
Для более простого определения размера в CSS мы переключаем глобальное значение box-sizing с content-box на border-box . Это гарантирует, что padding не повлияет на окончательную вычисленную ширину элемента, но может вызвать проблемы с некоторыми сторонними программами, такими как Google Maps и Google Custom Search Engine.
В редких случаях вам нужно переопределить его, используйте что-то вроде следующего:
В приведенном выше фрагменте вложенные элементы, включая сгенерированный контент с помощью ::before и ::after , будут наследовать указанный box-sizing для этого .selector-for-some-widget .
Reboot
Для улучшения кросс-браузерного рендеринга мы используем Reboot для исправления несоответствий между браузерами и устройствами, обеспечивая при этом несколько более самостоятельный сброс общих элементов HTML.
Сообщество
Будьте в курсе развития Bootstrap и обращайтесь к сообществу с помощью этих полезных ресурсов.
Как сверстать веб-страницу. Часть 2 — Bootstrap
Уважаемый читатель, эта статья является второй частью цикла статей, посвященных вёрстке.
В первой части мы верстали шаблон Corporate Blue от студии Pcklaboratory с помощью стандартных средств на чистом HTML и CSS. В данной статье мы попробуем сверстать этот же шаблон, но с помощью CSS фреймворка Bootstrap 3.
Преимущество использования CSS фреймворков заключается в том, что верстальщику не нужно думать о многих нюансах верстки, которые за него уже продумали создатели фреймворков. К таким нюансам относятся кроссбраузерность, поддержка различных разрешений экранов и многое другое. Верстальщик лишь указывает, что, как и когда нужно показать, остальное фреймворк делает сам. Данный подход может сильно ускорить вёрстку сайта. К преимуществам Bootstrap относится и его популярность. Это означает, что другому верстальщику будет проще поддерживать ваш код.
Недостатком использования фреймворков является тот факт, что странице придется целиком «нести» за собой лишние стили фреймворка, даже если она использует лишь их малую часть. Фреймворк является отличным инструментом для прототипирования и создания страниц, для которых дизайн вторичен, например страницы администрирования. Если же у вас есть очень специфический дизайн, то сверстать его с помощью фреймворка может оказаться сложнее, чем нативными средствами. Тем не менее, и это возможно.
Об использовании Bootstrap
В настоящее время есть несколько способов работы со стилями Bootstrap.
Без использования LESS
Для новичков сам Bootstrap рекомендует следующий подход: нужно скачать с сайта скомпилированный Bootstrap и положить его в свой проект, ничего не изменяя. Затем нужно создать свой пустой CSS файл и подключить его после bootstrap.css.
После этого, для того чтобы изменить стили Bootstrap вам нужно перебить их в своем styles.css примерно в таком виде:
Очевидным минусом данного подхода является то, что вам придется вручную искать нужные стили, которые требуется перебить и не всегда это будет тривиально, т.к. некоторые параметры Bootstrap применяются ко многим селекторам в изменённом виде, например через формулы. Небольшую помощь здесь может оказать инструмент Customize, он поможет скомпилировать правильно ваши изменения, но только один раз. Если в будущем вы захотите изменить какой-то параметр, то придется заново вбивать изменненные значения для всех полей, чтобы скомпилировать свои стили.
С использованием LESS
Данный способ подразумевает, что все переменные Bootstrap хранятся в .less файлах. Разработчик работает с этими переменными и по необходимости вручную или автоматически компилирует их в CSS файлы, а сам HTML подключает только скомпилированные CSS файлы. Именно этот вариант и будет рассматриваться в статье, как самый гибкий.
Существует большое количество способов скомпилировать LESS файлы и Bootstrap оставляет это на усмотрение разработчика. Сам Bootstrap использует для компиляции Grunt, вы можете предпочесть плагин для продуктов JetBrains, а мы, поскольку статья ориентирована на новичков, посмотрим в сторону более простых решений. Такими решениями являются программы WinLess для Windows, SimpLESS для Mac или Koala для Linux. Все эти программы делают примерно одно и то же: получают на вход папку с LESS файлами и слушают изменения в них. Как только вы вносите изменения в любой файл – тут же он компилируется в указанный CSS файл. Таким образом вам нет необходимости запускать компиляцию руками после каждого изменения. Вы изменяете LESS файл, сохраняете его и тут же видите изменения на сайте в уже скомпилированном, сжатом виде.
Создание проекта
- Создаем папку с названием проекта, например whitesquare-bootstrap.
- В ней нужно создать две вложенные папки: src – для исходных файлов и www – для файлов конечного сайта.
- В папке www создаем пустую папку images и пустой файл index.html.
- Затем нужно скачать сам Bootstrap и скопировать содержимое архива в папку www нашего проекта.
- Поскольку мы решили использовать LESS в нашем проекте, то придется еще скачать исходники Bootstrap и скопировать оттуда папку less в папку src нашего проекта.
- Рядом с появившейся папкой less/bootstrap создадим два пустых файла styles.less и variables.less. В них мы будем перебивать переменные Bootstrap и описывать свои стили. Такой подход позволит потом быстро обновить Bootstrap.

Предварительный осмотр
- Как будут нарезаться изображения?
- Какие будут использоваться компоненты?
- Какими будут основные стили?
- Какой макет страницы у нас получится?
Общие изображения
На данном этапе нужно нарезать и сохранить только общие изображения, которые будут на всех страницах сайта и не относятся к контенту. В нашем случае это будет светло-серый фон страницы, фон заголовка, изображение карты, два логотипа и кнопки социальных сетей.
Сохраняем изображение карты:
Сохраним логотипы следующим образом:
Повторяющиеся фоновые изображения необходимо вырезать минимальным кусочком достаточным для образования полного изображения повторением по вертикали и горизонтали.
Иконки социальных сетей с одинаковыми размерами удобно сохранить в один файл и использовать как спрайты для более быстрой загрузки. Более подробно про склейку изображений описано в первой части. В итоге получится два файла:
Компоненты
Основное отличие вёрстки с помощью Bootstrap от вёрстки нативными средствами заключается в том, что Bootstrap вводит такое понятие, как компоненты. Компоненты представляют из себя часто используемые готовые HTML блоки с предопределенными стилями. Иногда компоненты используют JavaScript. Верстальщик может использовать как готовый компонент, так и определить свой внешний вид для него. Для этого часто нужно лишь поменять значение переменных в Bootstrap. Если нужны более гибкие изменения, верстальщик всегда может изменить HTML и CSS по своему усмотрению.
- Для верстки колонками — сеточная система (row, col)
- Для поиска – инлайновая форма (form-inline), сгруппированные контролы (input-group), кнопка (btn)
- Для навигации — навигационная панель (navbar) и сама навигация (nav)
- Для отображения подменю – группированный список (list-group)
- Для блока карты – визуальная панель (panel)
- Для отображения большого центрального блока – jumbotron
- Для отображения рамок фотографий – миниатюры (thumbnail)
Основные стили
В Bootstrap все стили по умолчанию уже заданы, нам нужно только их перебить, если они отличаются от нашего дизайна. Сделаем это в файле src/less/variables.css.
В первую очередь нужно добавить переменные, которых нет в настройках Bootstrap для того, чтобы можно было их использовать в дальнейшем. У нас это только специфический шрифт дизайна.
Если вы хотите использовать шаблон для русских сайтов, то шрифт Oswald можно попробовать заменить на наиболее близкий Cuprum, который поддерживает кириллицу.
А теперь заменим настройки Bootstrap на свои:
Все переменные, которые есть в Bootstrap можно посмотреть на странице http://getbootstrap.com/customize/
После того, как мы закончили с переменными, давайте начнем прописывать стили нашего дизайна в файле styles.less. Сначала подключим сам Bootstrap и наши переменные:
Не все стили, заданные Bootstrap по умолчанию можно изменить переменными, давайте сделаем это вручную:
Здесь мы убрали тень у элементов формы, а текстам в кнопках указали специфический шрифт страницы.
Затем опишем фон страницы и верхнюю полоску:
Далее в тексте не будет указываться в какой файл пишутся стили. Просто запомните, что все переменные мы сохраняем в файл variables.less, а CSS стили будем хранить в styles.less.
Каркас HTML
Вёрстку сайта начинаем традиционно с каркаса HTML. Вставляем в файл index.html код простейшего шаблона со страницы Getting started, предварительно убрав всё лишнее:
В этом блоке создается HTML5 структура документа. В title указываем название нашей страницы – Whitesquare. Метатегом viewport указываем, что ширина страницы на мобильных устройствах будет равна ширине экрана и начальный масштаб будет 100%. Затем подключается файл стилей. И для версий Internet Explorer меньше девятой подключаем скрипты, позволяющие правильно отображать нашу верстку.
Макет
В данном случае, мы видим, что сайт состоит из двух частей: основного контейнера с содержимым, который центрируется на экране и тянущегося футера. Основной контейнер состоит из двух колонок: основного контента и сайдбара. Над ними находится шапка (header), навигация (nav) и название страницы (.heading).
Давайте добавим в body следующий код:
Здесь нам встречается первый компонент Bootstrap – колонки. Родительскому элементу колонок задается класс «row», а классы колонок начинаются с префикса «col-», затем идет размер экрана (xs, sm, md, lg), а заканчиваются относительной шириной колонки.
Колонке можно задавать одновременно различные классы со значениями для экранов, например col-md-8». Эти классы просто задают ширину колонке в процентах для определенного размера экрана. Если колонке не задан класс определенного экрана, то применится класс для минимально определенного экрана, а если и он не указан – то никакая ширина не применится и блок займет максимально возможную ширину.
У нас классы «col-md-7» и «col-md-17» указывают, что блоки представляют из себя колонки шириной 7 и 17 относительно родительского контейнера. По умолчанию сумма ширин колонок в Bootstrap равняется 12, однако мы увеличили это число вдвое для достижения нужной нам гибкости.
Далее опишем нужные нам отступы:
Данную конструкцию мы поместили внутрь body. Синтаксис LESS позволяет вкладывать правила друг в друга, которые потом скомпилируются в такие конструкции:
Такой подход позволяет видеть структуру HTML прямо внутри CSS и дает некую «область видимости» правилам.
Логотип

Вставляем логотип в тег header:
Дополнительных стилей не требуется.
Поиск

Для того чтобы создать поиск, нам понадобятся следующие компоненты Bootstrap: инлайновая форма, сгруппированные контролы и кнопка.
В теге header создаем инлайновую форму, выровненную по правому краю. Поля такой формы обязательно должны иметь класс «form-control» и label.
В форму мы помещаем компонент «сгруппированные контролы». Группировка контролов позволяет убрать отступ между вводом текста и кнопкой и как бы слить их в единый элемент.
Он представляет из себя div с классом «input-group» и полями, а кнопка такого компонента помещается в блок с классом «input-group-btn».
Поскольку нам не нужно показывать label для поля поиска — скроем его классом «sr-only». Это нужно для специальных устройств чтения с экрана.
Кнопке добавляется класс «btn-primary», означающий, что это первичная кнопка данной формы.
Всё, что нам осталось — это задать в стилях ширину форме поиска.

Для отображения меню возьмем компонент «навигационная панель» и поместим в него компонент «навигация», которая представляет из себя список со ссылками. Для навигации добавляется класс «navbar-nav», который применяет специальные стили навигации внутри навигационной панели.
Для того, чтобы привести это меню к нашему дизайну зададим следующие значения переменным:
Помимо настраиваемых параметров, опишем дополнительные в стилях – это текст в верхнем регистре и наш специфический шрифт:
Заголовок страницы

Заголовок страницы помещается в div с классом «heading».
И имеет следующие стили:
Здесь мы рисуем серую полоску фоном на div’e, и в нее вкладываем инлайновый h1 с нужным шрифтом и фоном цвета страницы, чтобы создалось впечатление прозрачного фона для h1.
Подменю

При создании подменю, мы не будем использовать компонент «навигация», так как по стилям он нам не очень подходит, гораздо больше нам подойдет компонент «группированный список». Каждый элемент такого компонента имеет класс «list-group-item».
Подменю нужно разместить в теге aside. Список ссылок создаем аналогично главному меню.
В настройках компонента укажем, что все группированные списки нужно показывать с фоном и рамкой компонента «панель»:
И применяем к подменю следующие стили:
Сначала возвращаем элементам списка стандартные стили, так как Bootstrap их перебил на свои. Добавляем отступ снизу. Для подменю применяется более тонкий шрифт и квадратные маркеры. А для ссылок задаем цвета, верхний регистр и убираем подчеркивание. Амперсанд в коде «&.active» по синтаксису LESS во время компиляции заменится на родительский селектор: «.submenu li.active».
Контент сайдбара
В контенте сайдбара помимо подменю располагается также изображение с расположением офисов.

Для его отображения нам подойдет компонент «панель», а точнее его вариация «основная панель» (panel-primary) для раскраски заголовка. Этот компонент содержит блок заголовка (panel-heading) и блок содержания панели (panel-body). Изображению карты добавляем класс «img-responsive», который позволит картинке уменьшаться при маленькой ширине экрана.
В переменных Bootstrap мы уже задали цвет для фона панели (panel-bg), а теперь укажем, что «primary» панель будет иметь серую рамку дефолтной панели, а не голубую, как задано по умолчанию:
Теперь в стилях сайта нужно изменить стандартные настройки панелей, которые не изменяются через переменные:
Здесь мы убрали тень у панелей, поставили свои отступы и задали свой шрифт заголовка.
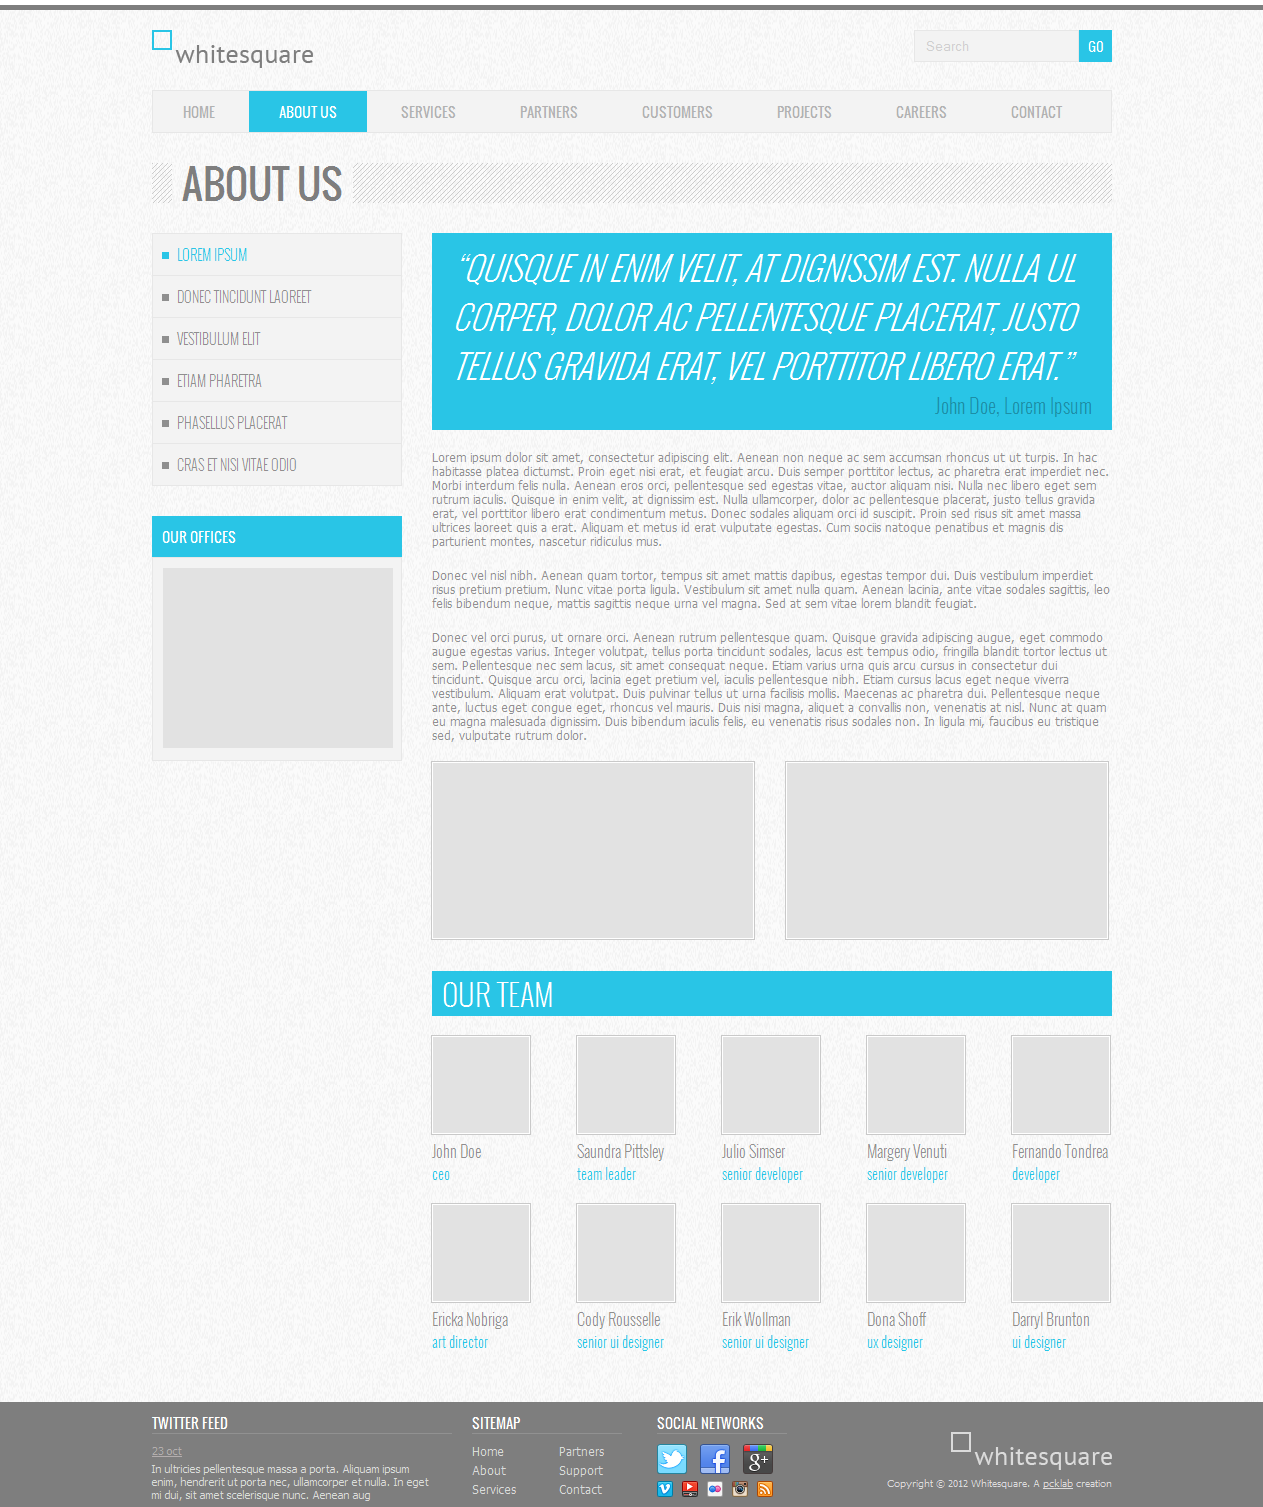
Цитата
Вёрстку контента начнём с добавления цитаты.

Этот элемент страницы больше всего похож на компонент Jumbotron. Добавим его в колонку контента:
Через переменные для компонента jumbotron зададим белый цвет текста и брэндовый голубой фон:
И опишем наши стили:
В них мы убираем скругление углов, отступы компонента и декорации цитаты, заданные Bootstrap по умолчанию. Также добавим стили наших шрифтов.
Контент
Все стили для текста контента мы уже добавили. Поэтому остается добавить только три параграфа с самим текстом.
Следующим шагом нужно добавить два изображения, которые находятся в конце текста контента. Делается это с помощью двух колонок:
Класс «thumbnail» превращает изображения в компонент «миниатюра». Он сделает за нас всю работу по стилизации изображений. Единственное, что нам осталось — это установить свой отступ и цвет рамки в переменных для этого компонента:
Блок «Our team»
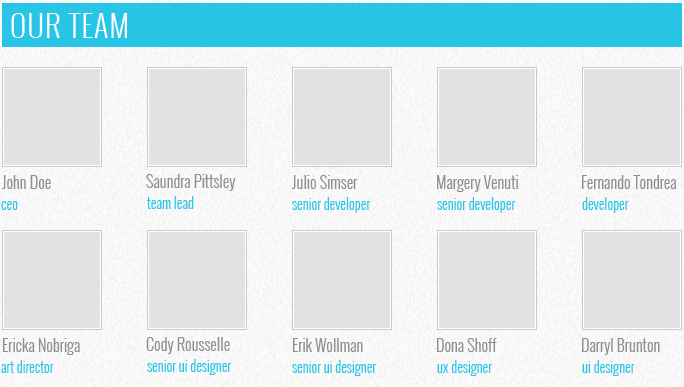
При верстке этого блока добавим сначала заголовок:
А затем добавим блок с классом «team», который состоит из двух строк, содержащих карточки сотрудников. Каждая карточка – это колонка. Карточка имеет ширину равную четырем колонкам нашей сетки. Все карточки кроме первой в строке имеют отступ слева, который создается классом «col-md-offset-1». Содержимое карточки состоит из изображения и описания (.caption)
После создания разметки зададим этим элементам следующие стили:
Помимо отступов и стилей шрифтов, которые тут задаются, мы изменили класс «col-md-offset-1». Ему пришлось задать отступ 3.7%, т.к. стандартный отступ был слишком большой.
Футер
Футер состоит из четырёх больших блоков: ленты Твиттера, карты сайта, социальных ссылок и логотипа с копирайтом.

Для начала создадим контейнер футера с этим блоками:
И применим к нему оформление:
Тег footer задает серую область по всей ширине экрана, а контейнер внутри него отображает область по центру на больших экранах и задает высоту и отступ футера. Для выравнивания блоков внутри футера мы используем колонки.
Лента Твиттера
Верстаем содержимое ленты Твиттера:

Для всех заголовков футера задаем шрифты и отступы, а также делаем подчеркивание через нижнюю рамку. Для параграфов указываем отступ. Ссылке, отображающую дату, задаем цвет и подчеркивание.
Карта сайта
Карта сайта представляет собой две равные колонки со ссылками:
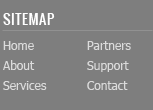
Ссылкам задаем цвет, шрифт и отступ между ними.
Социальные ссылки

Вставляем набор ссылок в блок с классом «social».
Здесь мы применили технику спрайтов – когда один файл с изображением применяется для разных картинок. Все ссылки разделились на большие иконки (.social-icon) и маленькие (.social-icon-small). Мы задали этим классам отображение в виде инлайнового блока с фиксированными размерами и одинаковым фоном. А затем с помощью CSS сдвинули этот фон так, чтобы на каждой ссылке отобразилось соответствующее изображение.
Копирайт
Блок с копирайтом и логотипом – это картинка со ссылкой и параграф с текстом под ней.
Стили делают аналогично предыдущим блокам с той лишь разницей, что блок прибивается к правому краю и выравнивание внутри него так же по правому краю:
How-to… Bootstrap
Get Started, Learn the Grid, Components, Build Themes, etc…
![]()
![]()
Learn Bootstrap 4!
If you are here, you’ve certainly heard about “The world’s most popular front-end component library”___ Bootstrap
I’ve worked with Bootstrap a lot since the 2013 release of Bootstrap 3.0. I’ve contributed to the Bootstrap docs, and rank first for Bootstrap on Stack Overflow. I feel more than prepared to tell you everything you need to know about it. With this article, I hope to demystify Bootstrap in a clear and understandable way.
BUT First, let’s talk about you. I hope that if you’re reading this you have a good understanding of HTML and CSS. If you haven’t built any Websites, don’t know what CSS Specificity is, or don’t know the difference between using #abc and .abc in CSS, this is NOT the article for you. Instead you should learn the basics of HTML and CSS.
“I’ve tried using Bootstrap, but it seems like getting anything to work is difficult or impossible.”
I hear ya. You’re not alone. I’ve answered over 2,000 Bootstrap related questions on Stack Overflow, have seen many frustrated Bootstrap users. Do yourself a huge favor: Read this article, the documentation, and don’t try to force things. I will show you that Bootstrap is easy, elegant and sensible.
What’s Covered in this Article:
- What is Bootstrap and Why Would I Use It?
- How to Get Started with Bootstrap
- How to Use Bootstrap CSS including the Navbar
- How to Use the Bootstrap Grid
- How to Responsive Design with Bootstrap
- How to Use Bootstrap JavaScript Components
- How to Customize Bootstrap
From here on, this article can be read on an as-needed basis. Feel free to scroll past sections that are glaringly newbie to you, but please don’t overlook the important details that will help you utilize “Bootstrap the right way”.
What is Bootstrap? Why Would I Use It?
Bootstrap consists of CSS and JavaScript files. It’s a framework (a.k.a — “library” or “toolkit”) that makes Website development faster and easier.
Bootstrap helps with creating Websites that are…
Consistent__ Foremost, Bootstrap provides a consistent, uniform appearance and design. With very little effort, Bootstrap can be used to transform a hodgepodge site into a professional, visually appealing design.
Responsive__ Sites created with Bootstrap are designed to look & function well on any device including desktops, laptops, tablets and smartphones. Bootstrap is “mobile-first” which means the design for smaller mobile devices is considered before that of larger screen devices. Responsive-ness is based on screen width, not height. This is because Bootstrap utilizes width-based CSS Media Queries.
Compatible__ Bootstrap is a mature, tested code-base that is entirely based on standards and cross-browser compliance. Sites that properly utilize what Bootstrap offers will also benefit from this compatibility.
If you don’t understand what I’m talking about, that’s okay! Let’s look at a super simple Bootstrap example.
A Basic “before & after” Bootstrap example.
Before Bootstrap:
After Bootstrap:
As you can see, once Bootstrap is added, the Web page instantly gets a new look. You simply reference any of Bootstrap’s reusable CSS classes in the HTML markup. In this example, I used text-center …
Of course, I could have accomplished the same thing without using Bootstrap. I could have created my own CSS classes for the same effect:
This would have been fine for this simple example. But, for more complex pages would I want to keep writing CSS classes for every style change that is needed? Would that CSS be re-usable, and tested across multiple browsers? Would I want to add CSS definitions to make the design “responsive” for different device widths? The likely answer is “No”, and that’s why I’m here writing about the very popular Bootstrap.
How to Get Started with Bootstrap.
Some people will ask or explain “How to install Bootstrap”. Well, you don’t really “install” it. Using Bootstrap is a matter of referencing the appropriate CSS and/or JS files.
You might have a build process or development environment that utilizes tools such as NPM or Nuget in which case you’ll want read the docs on adding Bootstrap and its’ dependencies.
For this article, you only need to know how to reference Bootstrap on CDN. As shown in the official starter template, the Bootstrap files can be referenced on BootstrapCDN. Just add the link to Bootstrap CSS in the HTML <head> tag for you Web page(s)…
Then, the optional Bootstrap Javascript is added to a <script> tag before the closing </body> tag. Bootstrap 4 also requires jQuery and Popper.js which need to be included before the Bootstrap JS.
Quick Start
For this article, I’m going use Bootstrap 4 on Codeply since the Bootstrap files are automatically included in Codeply’s editor. This is the fastest option if you’re looking to quickly get started, learn the basics, and prototype Web designs using Bootstrap.
How to Use Bootstrap CSS.
Earlier, I said “Bootstrap consists of CSS and JavaScript files”. For now I’m going to focus on the CSS part.
The CSS is the most essential part of Bootstrap. The Bootstrap CSS can be used alone, without the Bootstrap JavaScript components. Generally speaking, Bootstrap’s CSS provides two things…
- Element Styles
Buttons, fonts, colors, badges, typography, progress bars, alerts, etc… - The Bootstrap Grid
Layout helpers with “rows” and “columns”.
Reminder: If you don’t know what “CSS Specificity” means, or don’t know the difference between using #abc and .abc in CSS, this is NOT the article for you. Instead you should go back to basics. This article will show you “How-to Bootstrap”, but isn’t meant to teach you basic HTML and CSS.
Now I’ll explore all of the “tools” that Bootstrap provides to “make Website development faster and easier”.
How to Use Bootstrap CSS “Styles”.
Remember that simple Bootstrap example I showed you earlier?
Let’s understand what Bootstrap really does to the Web page.
Reboot
First of all, the Bootstrap CSS includes Reboot which “normalizes” the Web page styles. Web browsers have different, somewhat ugly, styles that are applied to Web pages by default.
Since each browser’s defaults are a little different, Bootstrap uses Reboot to override the browser defaults, and provide the same “elegant, consistent baseline” to build upon, regardless of the browser.
This means that if the Web page is viewed on Safari, Chrome, Firefox or IE it will start out with the same baseline CSS styles.
Fonts (Typeface)
Text readability and scale are an important consideration in Web design. Bootstrap took this into consideration when selecting the native font stack for Bootstrap 4:
The Bootstrap CSS makes the text look like this…
Colors
No one gets too excited about a Web page that lacks color. Color is often used to convey meaning, and highlight specific page content. Bootstrap provides 8 contextual colors that can be easily applied to HTML elements. You’ll see that colors are named to convey meaning.
Additionally, Bootstrap CSS can be used to style and format any page content such as Tables, Forms, Images and Figures.
Components
Take a quick look at the following examples of the Bootstrap Components. These are all the “things” that can be easily “plugged-in” to your Web pages when using Bootstrap…
Usage
Using any of these Bootstrap Components is very easy. It’s just a matter of referencing the appropriate Bootstrap CSS class in the HTML markup. For example, here’s how we use Bootstrap’s primary colored button on a Web page…
As you can see in the picture above, the “Primary” button has a different color than the normal Bootstrap blue color. That’s because this Web page also includes a “ theme.css ” stylesheet after the “ bootstrap.min.css ”.
The CSS styles (or rules) defined in “ theme.css ” are overriding the default Bootstrap CSS styles, such as the definition of the .btn-primary color. I will explain Bootstrap theming and customization a little later in this article.
Let’s look a little closer at how I used Bootstrap’s “Primary” button.
The HTML markup is…
So, the buttons’ style comes from the CSS “rules” for the .btn and .btn-primary CSS selectors. Here are the relevant rules in the Bootstrap CSS…
You might be wondering…
_Why does the button have 2 classes: . btn + . btn-primary ?
“Bootstrap’s components are built with a base-modifier class approach. This means the bulk of the styling is contained to a base class (e.g., .btn ) while style variations are confined to modifier classes (e.g., .btn-danger ).”
— Bootstrap Documentation
This base-modifier approach in Bootstrap’s CSS makes customizing Bootstrap much easier which I will explain later in this article.
Now let’s look at more examples using the Bootstrap Components:
Badges
Breadcrumbs
Buttons
Cards
Forms & Inputs
Jumbotron
Pagination
Progress
_How do I know the correct HTML markup & structure to use for Bootstrap Components?
This is where developing with Bootstrap does require some “leg work”. The CSS toolkit is there at your finger tips, but you do need to know and use the correct HTML structure when utilizing any of the Bootstrap Components.
When using Components like the Button (.btn .btn-primary) shown earlier, the HTML markup is straight-forward.
But, for other Components like the Navbar, Modal or Carousel, determining the correct HTML structure is more complex, and will vary according to use-case and the desired implementation.
When using these more complex Bootstrap Components, you must start with examples. The best resource is the Official Bootstrap Documentation. The docs have many examples, and a “How it Works” section for each Component.
There are also tools like Codeply (that’s the one I wrote), and Bootstrap.build that include example Bootstrap code snippets that you can easily drop in an editor and play around with. For example, here’s the Navbar picked from the Codeply’s Bootstrap 4 Components list…
Navbar
While most of the Bootstrap Components are self-explanatory and well-documented, I think the Navbar requires a full explanation. Along with the Grid, the Navbar is one of the most popular Bootstrap Components.
Content, Structure and Alignment
Only use supported content inside the Navbar. The Navbar can contain:
- Logo/brand
- Nav links, buttons, or dropdowns
- Inline forms
- Text
Don’t use Grid Rows/Columns inside the Navbar. There’s really no reason to since Utility classes can be used to align Navbar content. For example, here the ml-auto (left auto margin) class is used to align the 2nd Nav to the right:
Breakpoints
By default, the Navbar is designed for smaller screen widths on Mobile devices. Therefore the Navbar will stack vertically in a column, unless overridden with a “expand” class make the Navbar to remain horizontal above specified breakpoint widths. There are 5 breakpoints…
- navbar-expand = always expanded (remains horizontal)
- navbar-expand-sm = expands on sm widths >576px
- navbar-expand-md = expands on md widths >768px
- navbar-expand-lg = expands on lg widths >992px
- navbar-expand-xl = expands on xl widths >1200px
Check out this Codeply to see the different Navbar breakpoints.
Light or Dark Background Color
The Navbar uses the navbar-light and navbar-dark classes to determine the foreground colors of the brand, links and toggler (hamburger) icon. Make sure you use the appropriate classes to make the Navbar content display.
- Use navbar-dark to for darker colored backgrounds
- Use navbar-light to for lighter colored backgrounds
To give the Navbar a background color, use one of the contextual colors (e.g. bg-primary ) otherwise the Navbar is transparent.
Utility Classes
Of course, Bootstrap is the Swiss army knife of the Web design & development world. Bootstrap encompasses many widely used CSS properties in handy “utility” classes. This eliminates the need to write the same CSS over-and-over again to apply styles to different HTML elements. You many know it as D.R.Y.
So instead of writing this…
You simply utilize Bootstrap’s text-center alignment class wherever it’s needed…
Now that you understand the basics of using Bootstrap’s styling Components, next I will explain Bootstrap’s powerful, responsive Layout Component__ the Grid system.
What’s the Bootstrap “Grid”?
The Bootstrap Grid System is used for layout, specifically Responsive Layouts. Understanding how it works is vital to understanding Bootstrap. The Grid is made up of groupings of Rows & Columns inside 1 or more Containers.
The Bootstrap Grid can be used alone, without the Bootstrap JavaScript and other CSS Components. You just need to download and reference the “ bootstrap-grid.css ” which contains the Grid and Flexbox classes. More info on only using the Bootstrap Grid CSS is here in the docs.
Here’s the most basic example of using the Grid:
Which gives us one big “column” horizontally across the viewport…
2 Columns…
3 Columns…
Note: The light gray border lines around the columns in the examples above were added so that you can visualize the outline of each column. See the working layouts on Codeply.
Basic Grid concepts are quickly understood, but you may be wondering why all of this HTML markup is necessary. You might have some questions like…
__Why do I need a Container?
__Can I make one Column wider than the others?
I will address Grid questions like these in a little while. But, first I want to take a step back to explain something very important about using the Grid. Do you remember the frustrated Bootstrap user earlier that said…
“I’ve tried using Bootstrap, but it seems like getting anything to work is difficult or impossible.”
Trust me. Understanding the “Rules of the Grid” will save you a lot of time and frustration. Read them carefully…
The Rules of the Grid:
- Columns must be the immediate child of a Row.
- Rows are only used to contain Columns, nothing else.
- Rows should be placed inside a Container.
Those rules are very IMPORTANT. The Rows & Columns always work together, and you should never have one without the other.
Bad stuff will happen if you don’t follow those 3 simple Grid rules, exactly. I’ve answered countless Bootstrap questions on Stack Overflow by simply applying those rules. At first this might sound complicated, but it’s really easy once you understand how the Grid works.
How to Use the Bootstrap Grid __The Right Way.
Container
In the basic example before you may have noticed that I used the .container to wrap the .row . The Container is the root (a.k.a: top-level, outermost) element of the Bootstrap Grid.
The Container can be used to hold any elements and content. It’s not only used for the Grid Rows & Columns. For example, this is perfectly valid Bootstrap markup:
At first, the Container may seem trivial or unnecessary, but it’s very important to control width of the layout. The Container is also used to evenly align the left and right edges of the layout within the browser’s viewport.
FYI: Viewport — The visible area inside the browser window.
Bootstrap 4 has 2 types of Containers. In my examples I used .container , but there is also the full-width .container-fluid . You can use either one:
1 — Fixed-width container to center your layout in the middle:
2 — Full-width container for a layout the spans the entire width:
The .container scales down in width responsively (as the screen width narrows) so that eventually it becomes full-width like the . container-fluid on smaller devices.
Reminder: A Container can be used to contain any content, not just the Grid Rows & Columns. But, if you do utilize the Grid Rows & Columns, the Rows should be placed inside a Container. Try the Container demo on Codeply
When utilizing the Grid, one more Rows will be placed inside the Container. You can have multiple Rows in a Container, and you can have multiple Containers on one page. It all depends on what layout you’re trying to accomplish, but don’t get too concerned with that yet.
It’s important that a Container is used to contain grid Rows ( .row ).
Rows have a negative left/right margins of -15px. The Container padding of 15px is used to counteract the negative margins of the Row. If you don’t put a Row in a Container, the Row will overflow it’s container, causing an undesirable horizontal scroll.
Rows & Columns
For a while now I’ve wished that the Bootstrap .row wasn’t actually named “row”. The name “row” is often misleading, and obscures the actual purpose of the .row .
When you think “row”, you probably think horizontal line, which is okay, BUT, it’s better to think of the .row simply as a parent of columns.
Think of the Row as a group of Columns
This is because columns inside the .row aren’t always laid-out horizontally across the viewport. Some times we want the column layout to be horizontal, while other times we want the columns to layout vertically down the viewport. The concept of horizontal vs. vertical layout is the essence of Responsive Design. The sole purpose of the “row” is to contain 1 or more “columns”.
DON’T PUT CONTENT DIRECTLY INSIDE THE ROW!
Columns, and only columns, are placed inside the Row.
Content is placed inside the Columns.
It’s also important to mention that the .row is display:flex . As Flexbox children, the Columns in each row are the same height. Because of Flexbox, horizontal and vertical alignment (align right, center, bottom, etc..) is easily accomplished using Bootstrap 4’s Flex and Auto-margin Utility classes.
Now it’s time to look deeper at Rows & Columns, and exactly how they work together. There are different “types” of Columns, and different ways to use them in your layout. They are like magic.
Happiness is, Columns…
- Create horizontal divisions across the viewport.
- Can have different defined widths.
- Can change in width at different screen widths.
- Layout horizontally left-to-right, then vertically up-and-down.
- Can change position (re-order) relative to siblings in the same row.
- Are the same height as other siblings in the same row.
- Can “grow” or “shrink” in width.
- Can automatically “wrap” or “stack” vertically as needed, or at different screen widths.
- Can contain more Rows & Columns__ nesting.
All you need to know about Bootstrap Columns.
Just dont’ forget that columns must be the direct child of a Row.
Columns create horizontal divisions across the viewport. The space between the columns is called the “gutter”.
The classic Bootstrap grid has 12 column units:
Note for Dummies: Columns aren’t actually light pink. That is only used for you to see the left/right boundaries of the Columns. In most cases you’re not going to use all 12 individual columns as illustrated above. Instead you’ll be using some combination of the 12 to contain page content…
So, the columns can be evenly divided up into factors of 12. For example, 6 columns (12/6 = 2):
And, you can do the math…
The columns can be split-up using any part of the 12 units. And, it’s okay to use less than 12. It’s also okay to use more than 12 which I’ll show you later.
With all of this flexibility, the layout possibilities are seemingly endless…
But, the Grid is not always about 12. Thanks to Flexbox, Bootstrap 4 has a new “Auto-layout” Columns. These unit-less columns give you even more flexibility when it comes to designing layouts.
Now you know how to use Columns to create a horizontal layout. But wait, there’s more! Let’s talk about some fancier things Columns can do.
As you just saw above, Columns can be different widths:
Did you know that, Column width can change depending on screen width?
This is called Responsive Design, and I will tell you exactly how it works a very soon. But, first things first, I need to finish telling you about Columns. Remember before when I said “It’s okay to use more than 12 Columns in a Row”?
Columns in the same Row layout horizontally across, and then stack vertically down. This vertical “stacking” or “wrapping” occurs when the Column units in a single Row exceed 12. This is known as “Column Wrapping”…
Columns in the same Row wrap to the next line every 12 units:
Column width and “wrapping” can be controlled using different Responsive Grid Tiers (a.k.a “Grid Breakpoints”):
Columns can change position (re-order) relative to siblings in the same Row:
Columns can contain baby Rows & Columns. This is called “Nesting”:
Columns can “grow” or “shrink” in width. These are Auto-layout Columns:
How to Responsive Design with Bootstrap.
Grid Tiers, Media Queries and Breakpoints, Oh My!
I’m not done talking about Rows & Columns yet, because they’re the star of the show when it comes to Responsive Design.
It’s all about width.
Bootstrap 4 has 5 Responsive Tiers (a.k.a. “Breakpoints”) that you may have noticed in some of the previous Column examples (ie; col-lg-4 , col-md ).
Responsive Breakpoints, based on screen width:
- (xs) — screen width < 576px (This is the “default” tier)
- sm — screen width ≥ 576px
- md — screen width ≥ 768px
- lg— screen width ≥ 992px
- xl — screen width ≥ 1200px
Aside: Why did I put (xs) in parenthesis, and not the other breakpoints? Since xs (extra-small) is the default breakpoint, the -xs infix that was used for Bootstrap 3.x is longer used in Bootstrap 4.x. So instead of using col-xs-6 , it’s simply col-6 .
Bootstrap uses CSS media queries to establish these Responsive Breakpoints. They enable you to control Column behavior at different screen widths.
For example: here are 2 columns, each 50% width:
The col-sm-6 means use 6 of 12 columns wide (50%), on a typical small device width (greater than or equal to 768 px):
On less than 768px, the 2 columns become 100% width and stack vertically:
This is because (xs) is the default or implied breakpoint. Since I didn’t specify a default Column width, the 50% width was only applied on 768px and wider for the sm breakpoint.
Mobile-first!
Since (xs) is the default breakpoint, the col-12 is implied. So, this:
Works the same way as this:
Larger breakpoints, override Smaller breakpoints.
xs (default) >
overridden by sm >
overridden by md >
overridden by lg >
overridden by xl
Or, in reverse…
xl > overrides lg > overrides md > overrides sm > overrides ( xs )
Therefore, col-sm-6 really means 50% width on small-and-up. For the same column width on all tiers, just set the width for the smallest tier that’s desired. For example:
For a different column width on a larger tier, use the appropriate larger breakpoint to override the smaller breakpoint. For example, 3 columns wide on sm, and 4 columns wide on md-and-up:
The Bootstrap 4 auto-layout columns also work responsively. Because of their simplicity, I prefer them over the classic 12-unit columns. The auto-layout columns are perfect for any layout scenarios where equal-width columns are required. But, don’t forget, the 12-unit columns can be mixed-in as needed.
Take a look at a few auto-layout Grid examples…
3 equal-width columns. The `cols` remain horizontal at all widths, and don’t stack vertically because the xs breakpoint is the default:
3 equal-width columns (responsive). In this example, the `cols` remain horizontal until the sm breakpoint of 576px, and then stack vertically:
Remember, you can switch out sm for whatever breakpoint ( md , lg , xl ) is needed.
2 columns, left sidebar & right. Here’s an example of combining the classic defined-width columns, with the auto-layout columns. The right column will automatically grow to fill the width. The sidebar will stack on top at the sm breakpoint of 576px:
Key points on Breakpoints and Columns:
- Columns will stack vertically (and become full-width) at the smaller screen widths unless you use a specific col-* class in your HTML markup. Use a specific col-* to prevent that vertical stacking.
- The smaller grid classes also apply to larger screens unless overridden specifically for larger screen width. So, <div > is effectively the same as <div col-lg-6"></div> . Therefore, you only need to use the class for the smallest width you want to support.
- Rows are display:flex, and therefore Columns are equal height in the same row. Use auto-margins or Flexbox align-items and justify-content for horizontal or vertical alignment (centering, bottom, right, etc..).
How to Use Bootstrap’s JavaScript.
Next I will focus on the JavaScript part of Bootstrap.
The Bootstrap documentation, has a very large “Components” section that includes most of the stylized CSS Components that I explained before. However, there’s overlap between the Bootstrap CSS and JavaScript Components. CSS is used to style Components, while JavaScript is used to make Components functional.
Some Bootstrap Components only provide CSS-driven formatting and style so they don’t utilize JavaScript. These CSS-only Components were explored earlier in the Bootstrap CSS section: Badges, Breadcrumbs, Buttons, Cards, Form inputs, Jumbotron, Pagination.
But, most Components have JavaScript-driven behaviors:
You might also know that Bootstrap requires jQuery. This is because all of the Bootstrap JavaScript Components are implemented as jQuery Plugins. There are 2 ways to set options for (configure) any of the Bootstrap JavaScript Components.
Data Attributes
The preferred method is using Data Attributes. This method doesn’t require you to add additional JavaScript/jQuery code since the data- attribute can be used directly in the HTML markup. For example,
jQuery
The other way to use Bootstrap’s JavaScript Components is jQuery. Use the appropriate jQuery selector the element, and an Object containing the appropriate Options for the Component. The Options for each Component are described in the Bootstrap docs.
As you can see the Component Options align with the data-attributes. Most Components are automatically initialized by simply using the appropriate Bootstrap data-toggle=”…” attribute and classes. Two exceptions are the Popover and Tooltip which must be manually initialized with jQuery. For example:
JavaScript Component Usage is clearly described in the Documentation which is the best reference and constantly maintained. Don’t rely on 3rd party tutorials and sites like W3Schools are they tend to get outdated quickly, and you’ll end-up wondering “Why is my Bootstrap not working?”.
How to Customize Bootstrap.
First I want to address why, you’d want to customize Bootstrap. Developers want to customize Bootstrap for one or all of these reasons:
- Change some aspect of the look or styles__ color palette, fonts, border widths, etc..
- Change some functional aspect__ change breakpoints, increase the gutter width, or add more grid columns.
- Extend Bootstrap__ add new colors, breakpoints and extend other existing Bootstrap classes.
In general, there are 2 methods used to customize Bootstrap:
1. Simple CSS Overrides
For maintainability, CSS customizations should be put in a separate custom.css file, so that the bootstrap.css remains unmodified. The reference to the custom.css follows after the bootstrap.css for the overrides to work.
Just add whatever changes are needed in the custom CSS. For example, say I wanted to remove rounded borders from Cards, Buttons and Form Inputs. I add the CSS rule in the custom.css …
With this simple CSS change, the Cards, Buttons and Form Inputs now have square corners…
Note: There’s no need to use !important in the custom CSS, unless you're overriding one of the Bootstrap Utility classes. CSS specificity always works for one CSS class to override another.
2. Customize using SASS
If you’re familiar with SASS (and you should be to use this method), you can customize Bootstrap with your own custom.scss . There is a section in the Bootstrap docs that explains this, however the docs don't explain how to utilize existing variables in your custom.scss .
The overrides and “customization” are defined in a custom.scss file (you can name it whatever you want) that is separate from the Bootstrap SASS source files. This way any changes you make don't impact the Bootstrap source, which makes future changes and upgrades much easier.
1. Consider Bootstrap’s SASS folder structure, alongside your custom.scss .
2. In your custom.scss , import the Bootstrap files that are needed for the overrides. (Usually, this is just variables.scss . In some cases, with more complex cutomizations, you may also need the functions , mixins , and other Bootstrap files.). Make the changes, then @import "bootstrap" . It's important to import Bootstrap after the changes.
For example, let’s change the body background-color to light-gray #eeeeee , and change the blue primary contextual color to Bootstrap's $purple variable.
2a (optional). Also, you can extend existing Bootstrap classes after the @import "bootstrap"; to create new custom classes. For example, here is a new .row-dark class that extends (inherits from) the Bootstrap .row class and then add a background-color…
3. Build with SASS. The CSS output will contain the custom overrides! Don’t forget to check the includePaths if your @imports fail. For a full list of variables you can override, see the variables.scss file. There are also these global variables.
Remember, with SASS you must @import “bootstrap” after the customizations in custom.scss to make them work! Once the SASS is compiled to CSS (this is done using a server-side SASS compiler/processor), the resulting CSS is the customized Bootstrap.
In summary, here’s how the SASS customizations work:
1_ First, when the custom.scss file is processed using SASS, the !default values defined in the bootstrap/variables.scss .
2_ Next, our custom values are set, which will override any of the variables that had !default values set in bootstrap/variables.scss .
3_ Finally, Bootstrap is imported ( @import "bootstrap" ) which enables the SASS processor (A.K.A. compiler) to generate all the appropriate CSS using both the Bootstrap defaults and the custom overrides. Customization is important since not everyone wants that overly recognizable Bootstrap look.
How to Create Custom Bootstrap Themes.
As I explained before, customizing Bootstrap is a matter of finding the correct Bootstrap SASS variables to override, and re-building Bootstrap with a SASS processor.