How to add CSS to HTML (With Link, Embed, Import, and Inline styles)
Adding CSS to HTML can be confusing because there are many ways to do it.
Please enable JavaScript
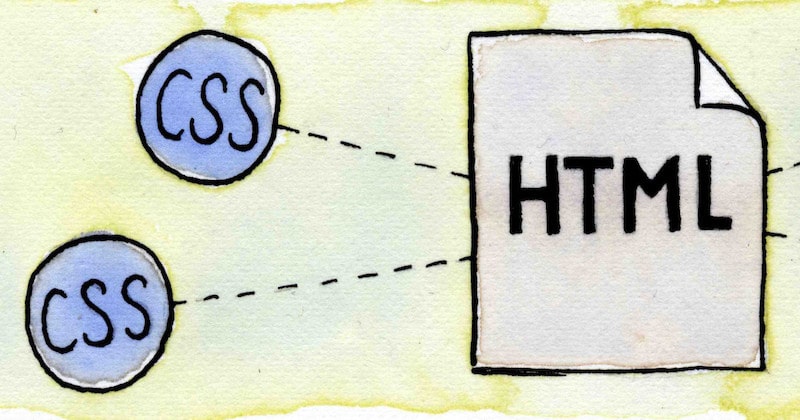
CSS can be added to HTML by linking to a separate stylesheet file, importing files from existing stylesheets, embedding CSS in a style tag, or adding inline styles directly to HTML elements. Many of these methods can also be done with javascript.
Today we're going to explore the pros and cons of each CSS method, see how they work, and learn when to use each one.
We'll also cover some of the common questions developers have when inserting CSS into HTML documents:
Let's get started.
1. Link to a Stylesheet File
This is the most common method of attaching CSS rules to HTML documents.
With this method, all your style rules are contained in a single text file that's saved with the .css extension. This file is saved on your server and you link to it directly from each HTML file. We use a link tag which is a simple line of HTML that you put in the head section of your HTML document, it looks like this:
The rel attribute is set to stylesheet to tell the browser that the linked file is a Cascading Style Sheet (CSS).
If you're using HTML5, the type attribute is not required, you can remove it and save a few bytes per page.
The href attribute is where you specify the path to your CSS file.
If the CSS file is in the same folder as your HTML file then no path is required, you only need to specify the filename like in the example above.
If it's saved in a folder, then you can specify the folder path relative to the HTML file like this:
You can also specify a path relative to the root of your domain by prefixing with a forward slash like this:
Absolute URLs also work:
The media attribute in a link tag specifies when the CSS rules are to be applied. Here are the most common values:
- screen indicates for use on a computer screen.
- projection for projected presentations.
- handheld for handheld devices (typically with small screens).
- print to style printed web pages.
- all (default value) This is what most people choose. You can leave off the media attribute completely if you want your styles to be applied for all media types.
Advantages of linking to a separate CSS file
Changes to your CSS are reflected across all pages: You only need to make a CSS change once in your single CSS file and all website pages will update.
Changing your website theme is easy: You can replace your CSS file to completely change the look of your website. Check out CSS Zen Garden for the best example of this.
Site speed increases for multiple page requests: When a person first visits your website their browser downloads the HTML of the current page plus the linked CSS file. When they navigate to another page, their browser only needs to download the HTML of the new page, the CSS file is cached so doesn't need to be downloaded again. This can make a big difference particularly if you have a large CSS file.
Disadvantages
- An additional HTTP request is required for each linked CSS file: Excess HTTP requests can delay the rendering of your page. We'll cover the solution to this problem shortly.
You can include as many CSS files in your HTML document as you like by adding multiple link tags, just remember, each file requires an additional HTTP request.
2. Embed CSS With a Style Tag
You can embed CSS rules directly into HTML documents by using a style tag. Here's what this looks like:
Similar to the link tag, the type attribute can be omitted for HTML5, and the media value controls when your styles are applied (leave it off to default to all devices).
Add your CSS rules between the opening and closing style tags and write your CSS the same way as you do in stand-alone stylesheet files.
CSS rules are render-blocking so it's recommended to add style tags into the <head> of the HTML document so they download as soon as possible. We'll discuss render-blocking CSS shortly.
Advantages of embedded style tags
Faster loading times: Because the CSS is part of the HTML document, the whole page exists as just one file. No extra HTTP requests are required. I use this method on my responsive columns demo layouts so when people view the source of the page they can see the HTML and the CSS code together.
Works great with dynamic styles: If you're using a database to generate page content you can also generate dynamic styles at the same time. Blogger does this by dynamically inserting the colors for headings and other elements into the CSS rules embedded in the page. This allows users to change these colors from an admin page without actually editing the CSS in their blog templates.
Disadvantages
- Embedded styles must be downloaded with every page request: These styles cannot be cached by the browser and re-used for another page. Because of this, it's recommended to embed a minimal amount of CSS as possible.
3. How to Add Inline Styles to HTML Elements With the Style Attribute
Style rules can be added directly to any HTML element. To do this, simply add a style attribute to the element then enter your rules as a single line of text (a string of characters) for the value.
Here's an example of a heading with inline styles:
Advantages of inline styles
Inline styles override external styles: This is because inline styles have a higher specificity than external CSS.
Faster pages: Just like embedded CSS, no extra HTTP requests are required.
You can change styles without editing the main CSS file: Sometimes you might need to change a style rule but you don't have access to the main website stylesheet, with this method you can add rules directly to each element instead.
Great for dynamic styles: For example, you can add a background-image URL as an inline style if it's different for each element.
Useful for HTML emails: EDMs (Electronic Direct Marketing) can be tricky to get right in all email clients, often the best way is to use inline styles everywhere.
Disadvantages
Excess styles can bloat your page: If you're specifying the same styles over and over your page weight will grow.
Maintenance can be tricky: Site-wide style changes will need to be made on every page, this can be tedious.
4. Load a Stylesheet File With the @import Rule
Another interesting way to add CSS to an HTML page is with the @import rule. This rule lets us attach a new CSS file from within CSS itself. Here's how this looks:
Just change "newstyles" to the name of your CSS file and be sure to include the correct path to the file too. Remember the path is relative to the current CSS file that we are in, if the CSS is embedded into the HTML page then the path is relative to the HTML file.
Advantages of the @import rule
- Adding new CSS files without changing HTML markup: Let's imagine we have a 1000 page website and we link to a CSS file from every page on the site. Now let's imagine we want to add a second CSS file to all of those pages. We could edit all 1000 HTML files and add a second CSS link or we could import the second CSS file from within the first file. We just saved ourselves many hours of work!
Disadvantages
Extra HTTP requests required: Every imported CSS file requires an additional HTTP request which can slow down page rendering.
Slow serial HTTP requests: If you import a CSS file from an existing external CSS file then the browser cannot begin downloading the second file until after it has received the first file and read its contents. You want to avoid serial CSS requests whenever possible.
5. Inject CSS With Javascript
Sometimes we need to apply CSS from within Javascript. We can do this in the following ways:
Inject an external stylesheet file with javascript
To do this we create a link element, add our CSS file path as the href attribute value, then inject it into the page with javascript:
Want to inject CSS into a shadow DOM? See the instructions in my article: Style Blocker: How To Prevent CSS Cascade With Shadow DOM
Insert a block of rules into a page with javascript
This method creates a style element, inserts our CSS rules as a string, then attaches the element to the HTML head.
Add inline styles to individual elements with javascript
In this method we first get a handle on the element(s) we want to change, then we add CSS properties.
Important note: In Javascript, multi-word CSS properties have their hyphens replaced with camel case, so background-color becomes backgroundColor (notice the capital 'C').
CSS and Page Performance
So now we've covered all the methods of adding CSS to HTML the next step is to learn how to put them all together and improve your website speed.
How to minify CSS to speed up your website
CSS in its hand-written state is quite verbose. We can reduce its file size by a process of minification.
What is CSS minifying?
Minifying CSS is the process of removing redundant data without affecting the browser's rendered output, this includes removing whitespace, line breaks, comments, unused code, and switching to shorthand properties to save space.
I recommend using CSS minifyer, it's a free online tool. Just make sure you keep a copy of your unminified CSS as your source code.
How to Inline Your Above-The-Fold CSS to Improve Page Rendering Time
If you want your page to load fast then you need to prioritize your above-the-fold content.
Above-the-fold content is any content that is visible in the viewport before you scroll down the page, naturally, this will be different for different sized devices and screens.
There is no exact answer to where the 'fold' is — you need to decide how far down the page is right for you based on the screen sizes of your website visitors. Check your site statistics for insights on this.
Once you've made a call on your page fold, identify all elements that appear above it, then inline that CSS in a style tag.
Next, link to your main stylesheet in a non-render-blocking way. For most modern browsers you can do this by adding the following attributes to your link tag:
Check async CSS loading on icanuse.com for the latest support stats.
If you need to support older browsers, use the loadCSS polyfill which does the same thing with javascript.
This method works by utilizing browser caching for the main stylesheet and maximizes rendering speed by inlining CSS that's required for the initial page load, very neat!
Use Minimal CSS for Additional Speed Gains
The most important thing you can do to stop CSS from slowing down your website is to use as little as possible. It's surprising how little CSS you need to make a beautiful-looking website.
I aim for a stylesheet small enough to be inlined on every page eliminating extra HTTP requests. This ensures my pages load with a single request (not including images).
Conclusion
So now you've learned all the methods of adding CSS to HTML and you've seen how they can work together to speed up your website.
I hope you've found this tutorial valuable.
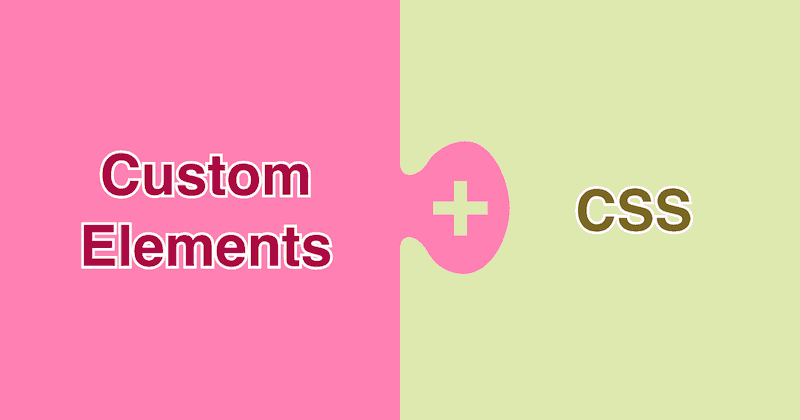
Do you use <div> tags to structure your website? Read this first: Replace Divs With Custom Elements For Superior Markup
Are you building a responsive website? The following articles may help you:
Are IDs or classes better? See my guide for the answer: ID vs Class: Which CSS Selector Should You Use? (6 Examples).
“I've been developing websites professionally for over two decades and running this site since 1997! During this time I've found many amazing tools and services that I cannot live without.”
— Matthew James Taylor

I highly Recommend:
Canva — Best Graphic Design Software
Create professional graphics and social media imagery with an intuitive online interface.
SiteGround — Best Website Hosting
Professional WordPress hosting with 24/7 customer support that is the best in the industry, hands down!
Ezoic — Best ad network for publishers
Earn more than double the revenue of Google Adsense. It's easy to set up and there's no minimum traffic requirements.
Squarespace — Best Website Hosting For Non-Developers
Easy-to-edit website templates, no coding needed. Full commerce and marketing features to run your business online.


 Web design
  Architecture
  Life drawing
  Art gallery
  Synesthesia
  Comics

report this ad
Link to CSS and JavaScript in an HTML File
The purpose of this tutorial is to teach you how to link to CSS and JavaScript files within an HTML file. It is possible to write CSS and JavaScript directly inside an HTML document, but it is generally best to keep these three languages in their own separate files.
Contents
- Directory and File Structure
- HTML
- CSS
- JavaScript
1. Directory and File Structure
It is a good idea to keep your HTML, CSS, and JavaScript files in separate directories. Create a directory for your project called css-and-js . Inside this directory, create three additional directories. Call them html , css , and javascript .
Inside your html directory, create a file called css-and-js.html . Inside your css directory, create a file called styles.css . And inside your javascript directory, create a file called script.js .
2. HTML
In order to link to your CSS and JavaScript files, you will need an HTML document within which to work. Open css-and-js.html and enter the following HTML:
Be sure to save your work any time you add code to your files. In the next two sections, we will go over what you need to add to your HTML document in order to link to your CSS and JavaScript.
3. CSS
First, you will need to add something in the body of your HTML to apply styling to. On the next line after the opening <body> tag, indent and add the following:
As it stands, this text will appear in the color defined as the root color in the browser’s default stylesheet – usually black. In order to change the color of the text, open your styles.css file and add:
The final step in this section is to link to the CSS file inside your HTML document. Enter the following in the <head> section on the line after the closing </title> tag:
The <link> element must be placed in the <head> section of the document. Notice that the <link> element is an empty element, so it does not need a closing tag.
The rel attribute defines the relationship between the resource and the HTML document. The href attribute points to your CSS file.
Since the file is located in another directory, you must specify the path by going up one directory using two dots ( .. ), followed by a slash ( / ), the directory your CSS file is in ( css ), another slash, and then your CSS file name ( styles.css ): href=‘../css/styles.css’ .
This is what your HTML document should look like so far:
4. JavaScript
Next, you will need to add some code to your JavaScript file. Open script.js and add:
Save your work and navigate back to your HTML document. The final step is to link to the JavaScript file inside your HTML document. Enter the following in the <body> section on the line after the <h1> element:
It is considered the best practice to place the <script> element in the <body> section just before the closing </body> tag.
The src attribute points to your JavaScript file.
Since the JavaScript file is located in another directory, you must specify the path in the src attribute: src=’../javascript/script.js’ .
That’s the last bit of code you will need to enter. This is what your HTML document should look like:
Be sure to save your work in each of your three files. Now it’s time to see if the links work. Open your css-and-js.html file in the browser of your choice. When you open the file in your browser, you should first encounter an alert box with the message you wrote in your JavaScript file. After clicking OK, the text you entered in the <body> of your HTML should appear red.
If the alert box does not appear or if the <body> text is not red, go back through the steps in this tutorial to ensure everything is entered exactly as shown here.
Congratulations! You’ve now linked to CSS and JavaScript files within an HTML document.
Как связать Html с Css?
Я никак не могу связать страницу с таблицей, созданной в CSS.
![]()
Полагаю, необходим обобщающий ответ, чтобы новички, пришедшие сюда за ответом, получили полную информацию с примерами.
Имеется 4 способа.
1. Встроенные стили
Подключение встроенных или inline стилей заключается в применении атрибута style к определённому тегу на странице. В этом случае значением атрибута является одно или несколько (через точку с запятой) свойств CSS с соответствующими значениями. Как правило, такой способ используется в тех случаях, когда надо изменить характеристики конкретного элемента на одной странице.
2. Внутренние стили
Внутренние стили указываются между тегами <head></head> и подключаются с помощью тега <style> . В этом случае CSS воздействует уже не на один элемент, а на все указанные в стилях элементы, которые имеются на данной странице. Обычно данный способ применяется, когда необходимо изменить стили сразу у нескольких одинаковых элементов в пределах одной HTML-страницы.
3. Внешние стили
Внешние стили подключаются отдельным файлом при помощи тега <link> . В этом случае все стили располагаются в обычном текстовом файле с расширением .css и влияют на элементы всех страниц, к которым этот файл подключается. Обычно создание стилей сайта начинается именно этим способом, так как только с его помощью ощущаются все плюсы CSS, ведь изменяя данные всего в одном файле можно управлять отображением сразу большого числа страниц. А уже в процессе работы над сайтом добавляются внутренние или встроенные стили, если это необходимо.
В первом блоке содержимое файла style.css , находящегося в папке style :
4. Через правило @import
Это правило служит для объединения нескольких таблиц стилей в одну. Чтобы правило @import правильно работало, оно обязательно должно указываться в самом начале таблицы стилей, единственное исключение — правило @charset .
Способы интеграции CSS в HTML

1805


Введение
Привычный нам HTML позволяет задавать структуру веб-документа, изменять внешнее отображение контента с помощью специальных тегов форматирования. Но представьте ситуацию, когда возникает потребность изменить параметры однотипных элементов на сайте, для решения которой придется редактировать все страницы, на которых встречаются вышеупомянутые элементы, с целью изменения описывающих их тегов.
Для решения проблемы целесообразней использовать CSS от Cascading Style Sheets. При этом стилем называют набор правил форматирования, которые будут применены к определенному элементу документа для изменения правил его отображения. При этом если у вас возникает необходимость быстро изменить внешний вид элементов на разных страницах сайта, созданного с помощью одного из стилей, вам достаточно изменить стиль единожды и все элементы поменяют свой внешний вид.
Кроме этого, использование CSS дает вам намного больше возможностей тонкой настройки форматирования, чем в простом HTML. Также поскольку стили можно хранить во внешних, подключаемых файлах, которые в большинстве случаев кэшируются браузерами , их использование позволит ускорить загрузку вашего сайта на пользовательской машине.
Тема связана со специальностями:
Что касается интеграции CSS на html-страницу, существует три разных способа, которые отличаются между собой не только возможностями, но и приоритетом выполнения инструкций.
Способ 1. Внутренние стили
Частный способ использования атрибута style, при котором правила оформления элемента распространяются лишь на тег, в котором данный атрибут указан. Стоит отметить, что значения атрибута style задаются с учетом особенностей языка таблицы стилей.
< p style =" color :#0094ff; font-family :'Segoe UI'; font-size :45px"> Hello My World! p >
< p > Первый простой пример p >

Когда используете внутренние стили, будьте готовы к тому, что для изменения ряда элементов придется внести поправки в каждый из открывающихся тегов. Это должно натолкнуть вас на мысль, что внутренние стили предпочтительно использовать лишь в одиночных тегах, тех, которые встречаются лишь раз, или не использовать данный способ, так как он не придерживается концепции структурного документа, когда .html-документ задает структуру текущей веб-страницы, а .css-документ описывает ее оформление.
Способ 2. Таблицы глобальных стилей – в заглавии самого документа.
При таком варианте использования стили определяются непосредственно в веб-документе и определяются между тегами < head > … < / head > веб-страницы внутри тега < style > , можно смело сказать, что этот способ намного превосходит предыдущий в гибкости и по своим возможностям, кроме того он упрощает работу с большим числом стилей на странице.