Написание змейки для Android на Kivy, Python
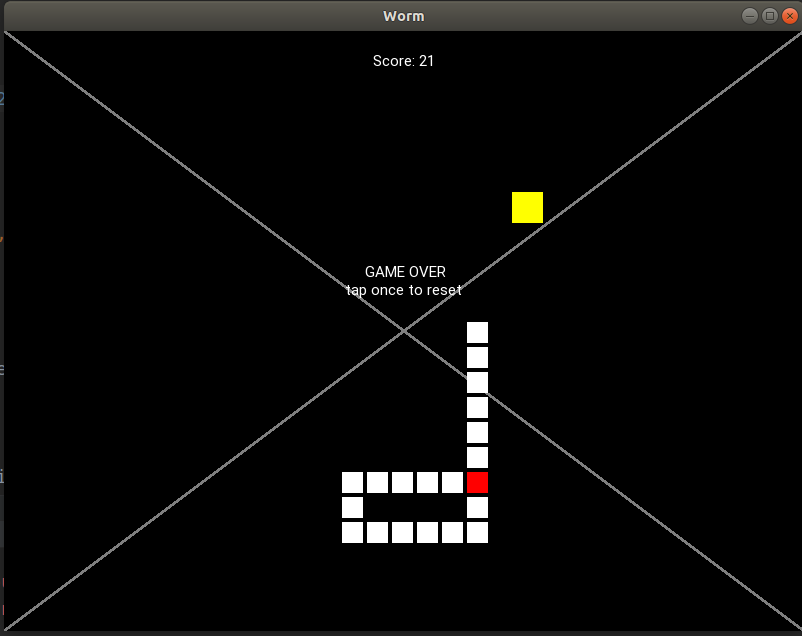
Если вы — питонист, и хотите начать разработу простых игр под андроид, вы должно быть уже загуглили «змейка на андроиде» и нашли это (Eng) или ее перевод (Рус). И я тоже так сделал. К сожалению, я нашел статью бесполезной по нескольким причинам:
Плохой код
- Использование «хвоста» и «головы» по отдельности. В этом нет необходимости, так как в змее голова — первая часть хвоста. Не стоит для этого всю змею делить на две части, для которых код пишется отдельно.
- Clock.schedule от self.update вызван из… self.update.
- Класс второго уровня (условно точка входа из первого класса) Playground объявлен в начале, но класс первого уровня SnakeApp объявлен в конце файла.
- Названия для направлений («up», «down», . ) вместо векторов ( (0, 1), (1, 0)… ).
- Динамичные объекты (к примеру, фрукт) прикреплены к файлу kv, так что вы не можете создать более одного яблока не переписав половину кода
- Чудная логика перемещения змеи вместо клетка-за-клеткой.
- 350 строк — слишком длинный код.
Статья неочевидна для новичков
Это мое ЛИЧНОЕ мнение. Более того, я не гарантирую, что моя статья будет более интересной и понятной. Но постараюсь, а еще гарантирую:
- Код будет коротким
- Змейка красивой (относительно)
- Туториал будет иметь поэтапное развитие
Результат не комильфо

Нет расстояния между клетками, чудной треугольник, дергающаяся змейка.
Знакомство
Первое приложение
Пожалуйста, удостовертесь в том, что уже установили Kivy (если нет, следуйте инструкциям) и запустите
buildozer init в папке проекта.
Запустим первую программу:
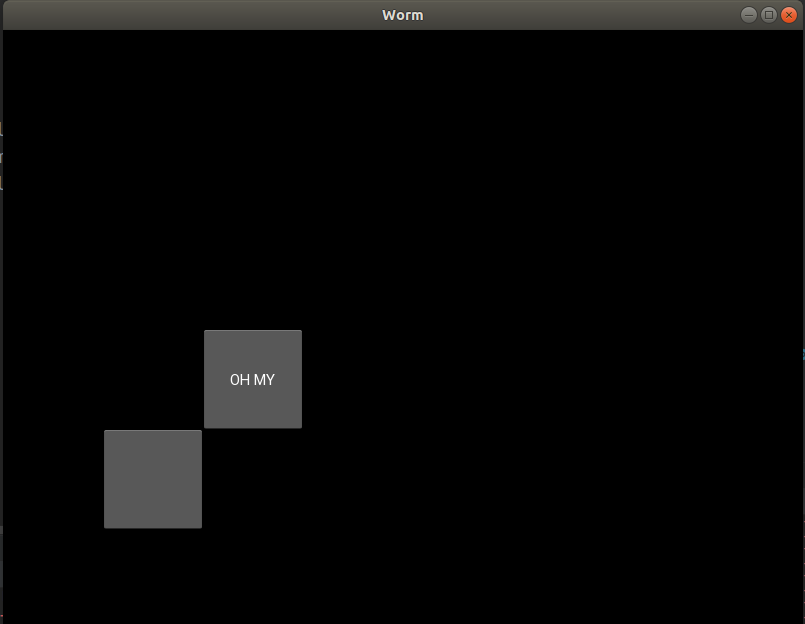
Мы создали виджет. Аналогично, мы можем создать кнопку или любой другой элемент графического интерфейса:

Ура! Поздравляю! Вы создали кнопку!
Файлы .kv
Однако, есть другой способ создавать такие элементы. Сначала объявим нашу форму:
Затем создаем «worm.kv» файл.
Что произошло? Мы создали еще одну кнопку и присвоим id but_id. Теперь but_id ассоциировано с but2 формы. Это означает, что мы можем обратиться к button с помощью but2:
Графика
Далее создадим графический элемент. Сначала объявим его в worm.kv:
Мы связали позицию прямоугольника с self.pos и его размер с self.size. Так что теперь эти свойства доступны из Cell, например, как только мы создаем клетку, мы можем менять ее размер и позицию:
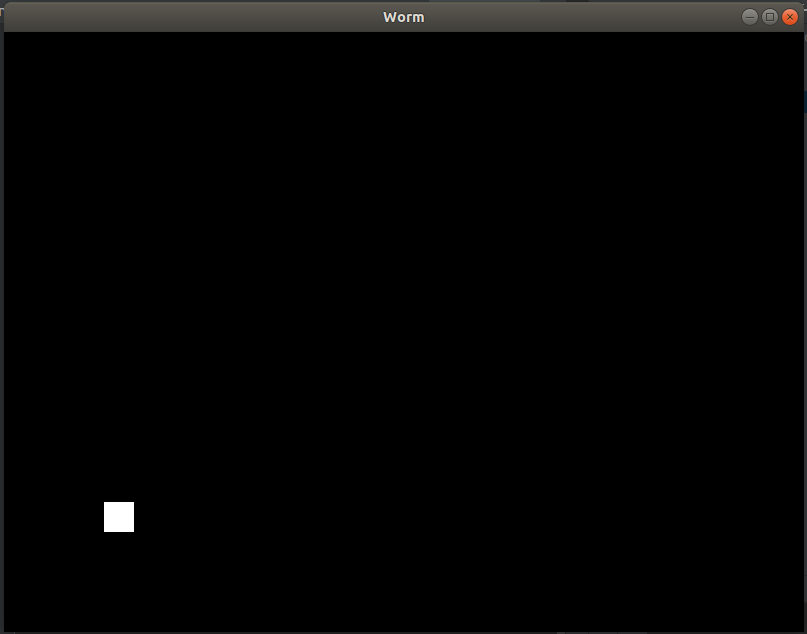
Окей, мы создали клетку.
Необходимые методы
Давайте попробуем двигать змею. Чтобы это сделать, мы можем добавить функцию Form.update и привязать к расписанию с помощью Clock.schedule.
Клетка будет двигаться по форме. Как вы можете видеть, мы можем поставить таймер на любую функцию с помощью Clock.
Далее, создадим событие нажатия (touch event). Перепишем Form:
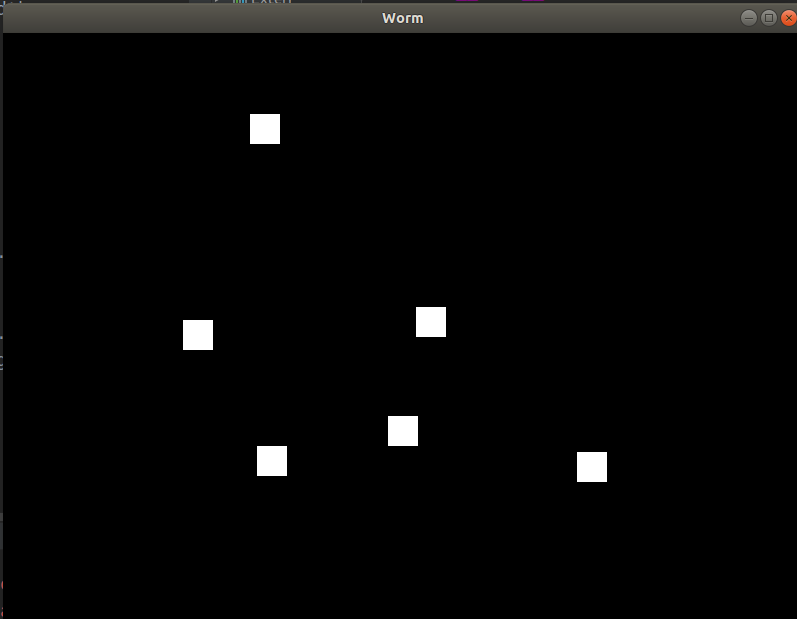
Каждый touch_down создает клетку с координатами = (touch.x, touch.y) и размером = 30. Затем, мы добавим ее как виджет формы И в наш собственный массив (чтобы позднее обращаться к нему).
Теперь каждое нажатие на форму генерирует клетку.
Няшные настройки
Так как мы хотим сделать красивую змейку, мы должны логически разделить графическую и настоящую позиции.
Много причин делать это. Вся логика должна быть соединена с так называемой настоящей позицией, а вот графическая — есть результат настоящей. Например, если мы хотим сделать отступы, настоящая позиция будет (100, 100) пока графическая — (102, 102).
P. S. Мы бы этим не парились если бы имели дело с on_draw. Но теперь мы не обязаны перерисовать форму лапками.
Давайте изменим файл worm.kv:
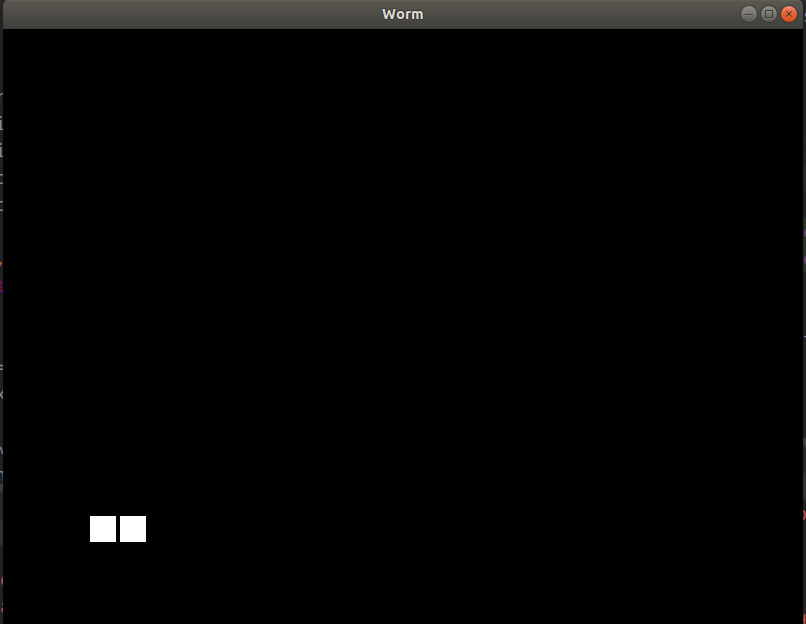
Появился отступ, так что это выглядит лучше не смотря на то, что мы создали вторую клетку с X = 130 вместо 132. Позже мы будем делать мягкое передвижение, основанное на расстоянии между actual_pos и graphical_pos.
Программирование червяка
Объявление
Инициализируем config в main.py
(Поверьте, вы это полюбите!)
Затем присвойте config приложению:
Перепишите init и start:
Надеюсь, это было более менее понятно.
Давайте создадим нашего червячка.
Движение
Теперь подвигаем ЭТО.

Оно живое! Оно живое!
Управление
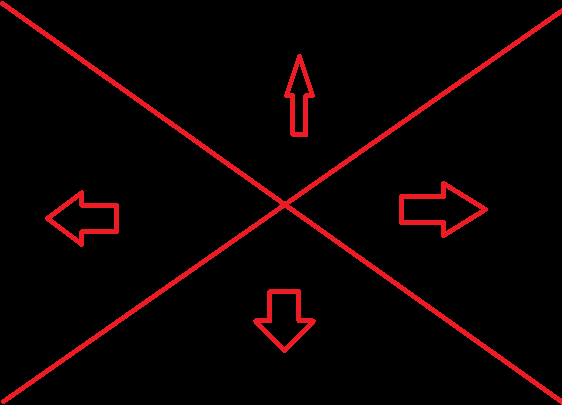
Как вы могли судить по первой картинке, управление змеи будет таким:

Создание фрукта

Теперь мы должны объявить несколько методов Worm:
Кстати, после того, как мы объявили gather_positions, мы можем улучшить fruit_dislocate:
На этот моменте позиция яблока не сможет совпадать с позиции хвоста
… и добавим проверку в update()
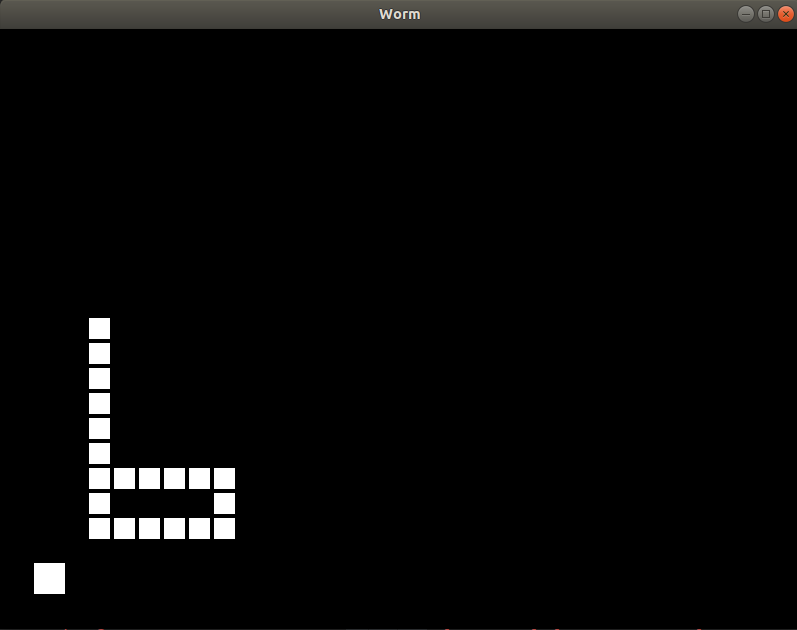
Определение пересечения головы и хвоста
Мы хотим узнать та же ли позиция у головы, что у какой-то клетки хвоста.
Раскрашивание, декорирование, рефакторинг кода
Начнем с рефакторинга.
Перепишем и добавим
Теперь если червяк мертв (заморожен), если вы нажмете на экран, игра будет начата заново.
Теперь перейдим к декорированию и раскрашиванию.

Раскрасим. Перепишем Cell in .kv:
Добавим это к Cell.__init__:
и это к Form.start
Превосходно, наслаждайтесь змейкой

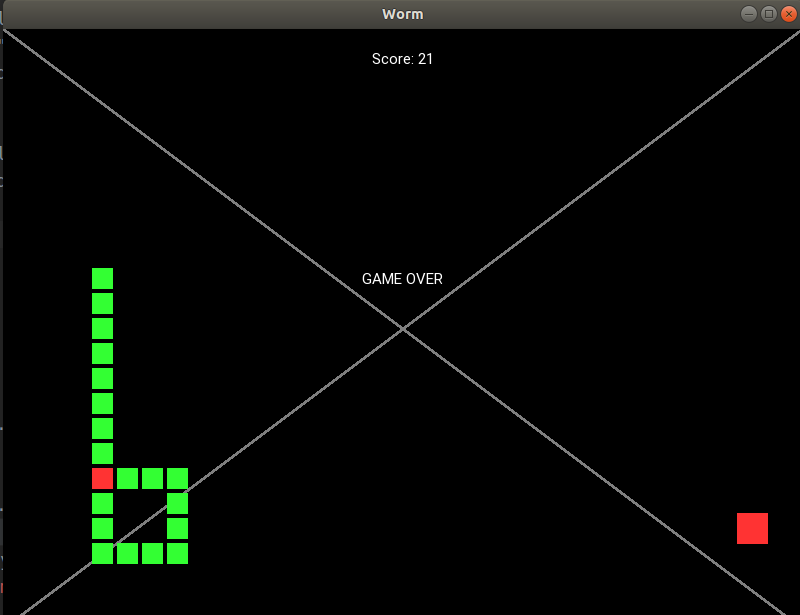
Наконец, мы создадим надпись «game over»
И зададим «раненой» клетке красный цвет:
Вы еще тут? Самая интересная часть впереди!
Бонус — плавное движение
Так как шаг червячка равен cell_size, выглядит не очень плавно. Но мы бы хотели шагать как можно чаще без полного переписывания логики игры. Таким образом, нам нужен механизм, который двигал бы наши графические позиции (graphical_pos) но не влиял бы на настоящие (actual_pos). Я написал следующий код:
Пишем «Змейку» под Android на Python и Kivy
В этой статье мы напишем классическую «Змейку» на Python с помощью инструмента для создания GUI Kivy.
Знакомимся с Kivy
Kivy — это популярный инструмент для создания пользовательских интерфейсов, который отлично подходит для разработки приложений и несложных игр. Одним из основных достоинств Kivy является портируемость — возможность безболезненного переноса ваших проектов с одной платформы на другую. Наша «Змейка» будет работать на платформе Android.
Kivy эффективно использует Cython — язык программирования, сочетающий в себе оптимизированность C++ и синтаксис Python — что положительно сказывается на производительности. Также Kivy активно использует GPU для графических процессов, освобождая CPU для других вычислений.
Рекомендуемые ресурсы для начала работы с Kivy:
Устанавливаем Kivy
Зависимости
Прим. перев. Код проверен на Ubuntu 16.04, Cython 0.25, Pygame 1.9.4.dev0, Buildozer 0.33, Kyvi 1.10.
Для правильной работы Kivy нам требуется три основных пакета: Cython, pygame и python-dev. Если вы используете Ubuntu, вам также может понадобиться библиотека gstreamer, которая используется для поддержки некоторых видеовозможностей фреймворка.
Устанавливаем зависимости pygame:
Добавляем репозиторий Kivy:
Buildozer
Этот пакет нам понадобится для упрощения процесса установки нашего Android-приложения:
Нам также понадобится Java JDK. И если вы используете 64-битную систему, вам понадобятся 32-битные версии зависимостей.
Устанавливаем Java JDK:
Устанавливаем 32-битные зависимости:
Оно работает?
Прежде чем начать писать нашу «Змейку», давайте проверим, правильно ли у нас все установилось. Иначе в дальнейшем может обнаружиться, что проект не компилируется из-за какого-нибудь недостающего пакета.
Для проверки напишем старый добрый «Hello, world!».
Приступим к созданию проекта. Нужно перейти в рабочую папку и выполнить команду:
Теперь откроем файл с расширением .spec в любом текстовом редакторе и изменим следующие строки:
- имя нашего приложения title = Hello World ;
- название пакета package.name = helloworldapp ;
- домен пакета (нужен для android/ios сборки) package.domain = org.helloworldapp ;
- закомментируйте эти строки, если они ещё не закомментированы:
- строка version = 1.0.0 должна быть раскомментированной.
Создайте файл main.py и добавьте в него следующий код:
Теперь все готово к сборке. Вернемся к терминалу.
Примечание В случае возникновения каких-либо ошибок установите значение log_level = 2 в файле buildozer.spec. Это даст более развернутое описание ошибки. Теперь мы точно готовы приступить к написанию «Змейки».
Прим. перев. Обратите внимание, что в проекте используется один файл и в статье разбираются лишь куски кода из этого файла. Весь исходный код вы можете просмотреть, перейдя по ссылке на страницу проекта в gitHub.
В этой части урока мы напишем игровой движок нашей «Змейки». И под созданием игрового движка подразумевается:
1. Написание классов, которые станут скелетом нашего приложения.
2. Предоставление им правильных методов и свойств, чтобы мы могли управлять ими по своему усмотрению.
3. Соединение всего в основном цикле приложения.
Классы
Теперь давайте разберем нашу игру на составные элементы: змея и игровое поле. Змея состоит из двух основных элементов: головы и хвоста. И надо не забыть, что змее нужно что-то есть.
Таким образом нам потребуется организовать следующую иерархию виджетов:
Мы объявим наши классы в файлах main.py и snake.kv , чтобы отделить дизайн от логики:
Свойства
Теперь, когда мы реализовали классы, можно задуматься о содержимом.
Playground — это корневой виджет. Мы разделим его на сетку. Эта матрица поможет позиционировать и перемещать объекты по полю. Представление каждого дочернего виджета будет занимать одну клетку. Также нужно реализовать возможность сохранения счета и изменения частоты появления фруктов.
И последнее, но не менее важное: нужно реализовать управление вводом, но сделаем мы это в следующем разделе.
Объект змеи не должен содержать ничего, кроме двух ее деталей: головы и хвоста.
Для головы мы должны знать текущее положение и направление движения для правильного графического представления: если змея движется направо — рисуем треугольник повернутый вправо, если змея движется влево — рисуем треугольник повернутый влево.
Позиция и направление будут соответствовать определенным инструкциям рисования. Для рисования треугольника нам нужно шесть точек (две координаты на одну вершину). Эти координаты будут не ячейками сетки, а определенными пикселями на холсте
Наконец, нам надо хранить информацию об объекте, нарисованном на холсте, чтобы удалить его позже (например, для перезапуска игры). Мы добавим логическую переменную, указывающую, должен ли объект быть нарисован на холсте:
Теперь хвост. Он состоит из блоков (изначально трех), занимающих одну ячейку. Когда «Змейка» будет двигаться, мы будем убирать самый последний блок хвоста и добавлять новый на предыдущую позицию головы:
Фрукт
Поведение фрукта похоже на поведение змеиной головы. Нам понадобится отслеживать его позицию, состояние и интервал появления:
В классе SnakeApp будет происходить запуск нашего приложения:
Кое-что еще: нужно задать размеры виджетов. Каждый элемент будет занимать одну ячейку поля. Значит:
- высота виджета = высота поля / количество строк сетки;
- ширина виджета = ширина поля / количество колонок сетки.
Также нам нужно добавить виджет отображающий текущий счет.
Теперь snake.kv выглядит так:
Методы
Начнем с класса змеи. Мы хотим устанавливать ее в начальное положение и получать информацию о том, где она находится и как взаимодействует с объектами поля:
Мы назвали ряд методов. Теперь давайте их реализуем. Начнем с remove() и add_block() :
Теперь работаем с головой. Она будет иметь две функции: move() и remove() :
А что там с фруктами? Мы должны уметь помещать их в заданные координаты и удалять, когда нам это понадобится:
Почти готово, не сдавайтесь! Теперь нужно организовать весь игровой процесс, который будет происходить в классе Playground . Рассмотрим логику игры: она начинается с того, что змея помещается в случайные координаты. Игра обновляется при каждом перемещении змеи. Во время обновлений мы проверяем направление змеи и ее положение. Если змея сталкивается сама с собой или выходит за пределы поля — мы засчитываем поражение и игра начинается сначала.
Как будет осуществляться управление? Когда игрок касается экрана, мы сохраняем координаты касания. Когда палец будет перемещаться, мы будем сравнивать новое положение с исходным. Если позиция будет изменена на 10 % от размера экрана, мы будем определять это как инструкцию и обрабатывать ее:
Основной цикл
Здесь происходят процессы, устанавливающие положение фрукта, управляющие движением змеи и определяющие проигрыш:
Нужно добавить обработчик для события сброса игры:
Теперь мы можем протестировать игру.
Одна важная деталь. Чтобы приложение запустилось с правильным разрешением экрана, нужно сделать так:
И вуаля! Теперь вы можете запустить приложение. Остается только упаковать его с помощью buildozer и загрузить на устройство.
Создаем экраны
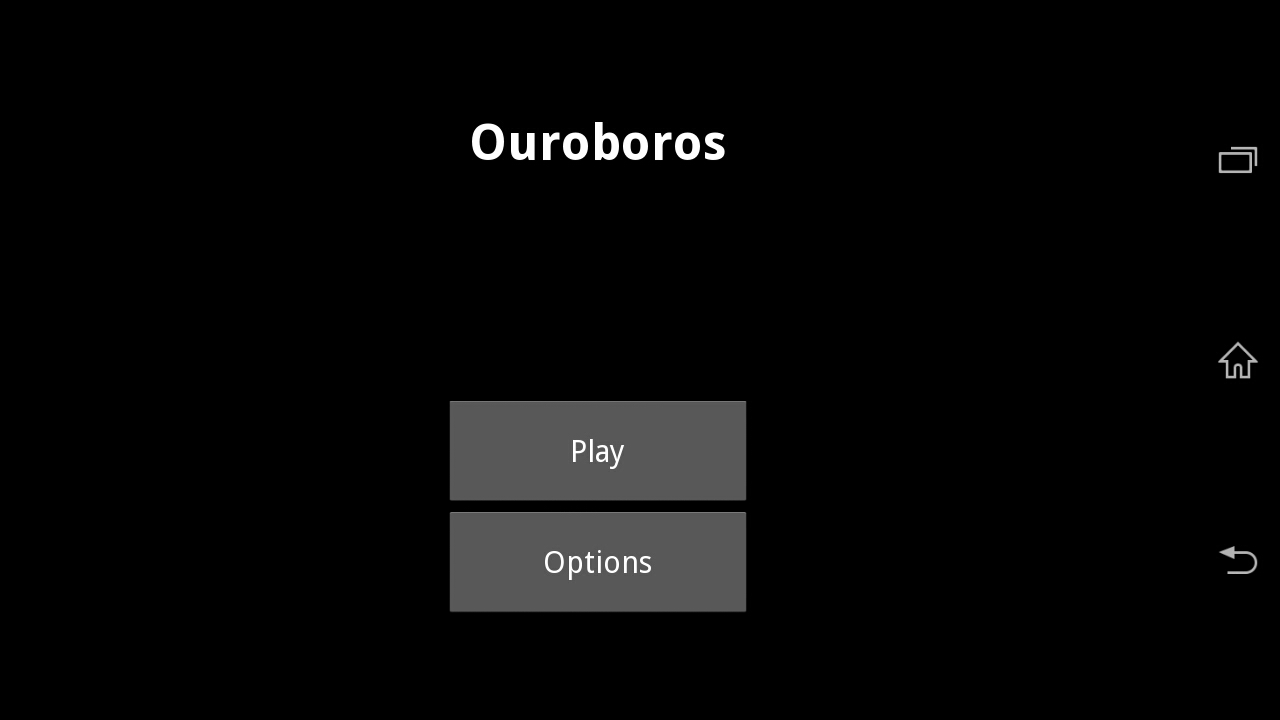
В приложении будет два экрана: приветствия и игровой. Также будет всплывающее меню настроек. Сначала мы сделаем макеты наших виджетов в .kv-файле, а потом напишем соответствующие классы Python.
Внешняя оболочка
PlaygroundScreen содержит только игровое поле:
Основной экран будет состоять из трех встроенных виджетов: название приложения, кнопки запуска игры и кнопки вызывающая меню настроек:
Всплывающее окно будет занимать ¾ экрана приветствия. Оно будет содержать виджеты, необходимые для установки параметров, и кнопку «Сохранить».
Классы
На экране приветствия требуется только метод show_popup() , который будет вызываться при нажатии кнопки настроек на главном экране. Нам не нужно определять что-либо еще для кнопки включения игры, потому что она будет использовать способность своего родителя обращаться к диспетчеру экрана:
Теперь нужно сделать так, чтоб экран приветствия показывался при запуске игры, а игра начиналась только тогда, когда будет показано игровое поле:
Также нам нужно подготовить класс окна настроек, иначе привязка будет работать не правильно:
Теперь добавим ScreenManager в приложение и зарегистрируем два экрана:
Теперь нужно сказать кнопкам, что делать, когда на них нажимают:
После проигрыша нужно возвращаться обратно на экран приветствия:
Добавляем настройки
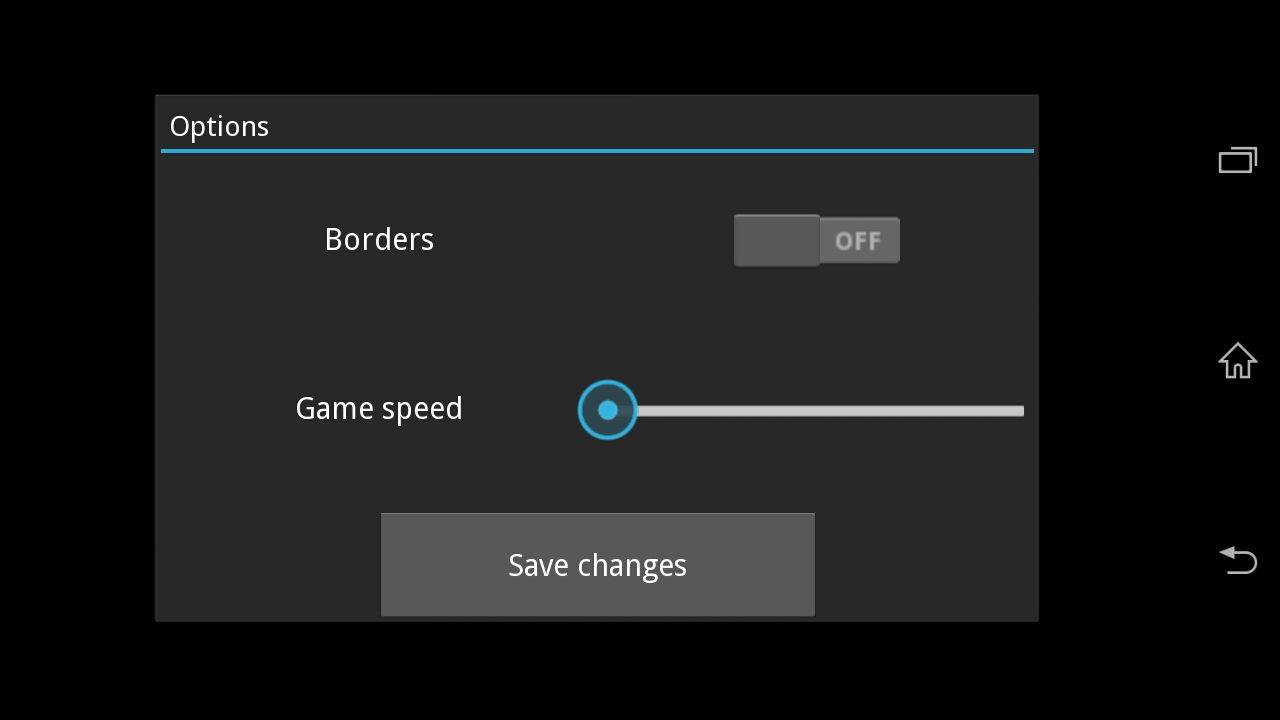
У нас будет всего два параметра:
- Включение/отключение границ. Если границы включены, при выхождении змеи за пределы экрана засчитывается проигрыш. Если границы выключены, змея будет появляться на другой стороне, если выходит за пределы.
- Скорость змеи.
Добавляем необходимые виджеты во всплывающее окно:
Теперь подготовим классы, чтобы они могли изменяться вместе с настройками. Если границы включены, будем рисовать очертание игрового поля. Также добавим возможность изменения частоты обновления:
Kivy Basics
Kivy depends on many libraries, such as SDL2, gstreamer, PIL, Cairo, and more. They are not all required, but depending on the platform you’re working on, they can be a pain to install. To ease your development process, we provide pre-packaged binaries for Windows, macOS and Linux.
Have a look at one of these pages for detailed installation instructions:
Alternatively, instructions for the development version can be found here:
Create an application
Creating a kivy application is as simple as:
sub-classing the App class
implementing its build() method so it returns a Widget instance (the root of your widget tree)
instantiating this class, and calling its run() method.
Here is an example of a minimal application:
You can save this to a text file, main.py for example, and run it.
Kivy App Life Cycle
First off, let’s get familiar with the Kivy app life cycle.
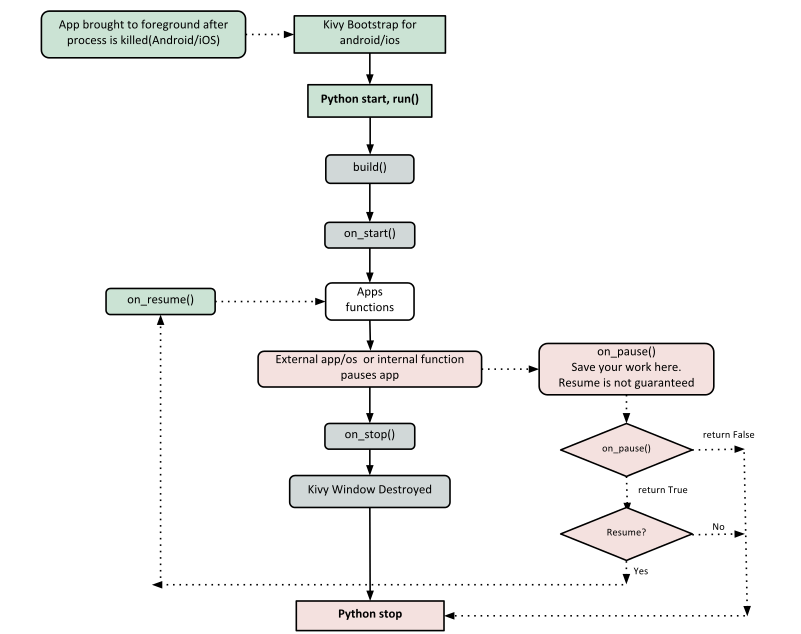
As you can see above, for all intents and purposes, our entry point into our App is the run() method, and in our case that is “MyApp().run()”. We will get back to this, but let’s start from the line:
It’s required that the base Class of your App inherits from the App class. It’s present in the kivy_installation_dir/kivy/app.py.
Go ahead and open up that file if you want to delve deeper into what the Kivy App class does. We encourage you to open the code and read through it. Kivy is based on Python and uses Sphinx for documentation, so the documentation for each class is in the actual file.
Similarly on line 5:
One important thing to note here is the way packages/classes are laid out. The uix module is the section that holds the user interface elements like layouts and widgets.
Moving on to line 8:
This is where we are defining the Base Class of our Kivy App. You should only ever need to change the name of your app MyApp in this line.
Further on to line 10:
As highlighted by the image above, show casing the Kivy App Life Cycle , this is the function where you should initialize and return your Root Widget . This is what we do on line 11:
Here we initialize a Label with text ‘Hello World’ and return its instance. This Label will be the Root Widget of this App.
Python uses indentation to denote code blocks, therefore take note that in the code provided above, at line 11 the class and function definition ends.
Now on to the portion that will make our app run at line 14 and 15:
Here the class MyApp is initialized and its run() method called. This initializes and starts our Kivy application.
Running the application
To run the application, follow the instructions for your operating system:
For Windows, Linux, macOS, or the RPi. From the terminal where you installed Kivy simply run:
For Android or iOS, your application needs some complementary files to be able to run. See Create a package for Android or See Create a package for iOS for further reference.
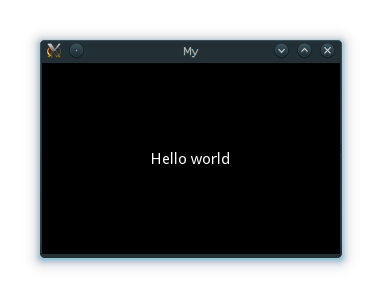
A window should open, showing a single Label (with the Text ‘Hello World’) that covers the entire window’s area. That’s all there is to it.
Customize the application
Lets extend this application a bit, say a simple UserName/Password page.
At line 2 we import a Gridlayout :
This class is used as a Base for our Root Widget (LoginScreen) defined at line 7:
At line 9 in the class LoginScreen, we override the method __init__() so as to add widgets and to define their behavior:
One should not forget to call super in order to implement the functionality of the original class being overloaded. Also note that it is good practice not to omit the **kwargs while calling super, as they are sometimes used internally.
Moving on to Line 11 and beyond:
We ask the GridLayout to manage its children in two columns and add a Label and a TextInput for the username and password.
Running the above code will give you a window that should look like this:
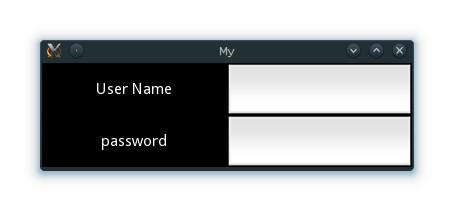
Try re-sizing the window and you will see that the widgets on screen adjust themselves according to the size of the window without you having to do anything. This is because widgets use size hinting by default.
The code above doesn’t handle the input from the user, does no validation or anything else. We will delve deeper into this and Widget size and positioning in the coming sections.
Build a Mobile Application With the Kivy Python Framework
These days, developers are highly likely to be working on a mobile or web application. Python doesn’t have built-in mobile development capabilities, but there are packages you can use to create mobile applications, like Kivy, PyQt, or even Beeware’s Toga library.
These libraries are all major players in the Python mobile space. However, there are some benefits you’ll see if you choose to create mobile applications with Kivy. Not only will your application look the same on all platforms, but you also won’t need to compile your code after every change. What’s more, you’ll be able to use Python’s clear syntax to build your applications.
In this tutorial, you’ll learn how to:
- Work with Kivy widgets
- Lay out the UI
- Add events
- Use the KV language
- Create a calculator application
- Package your application for iOS, Android, Windows, and macOS
This tutorial assumes you’re familiar with object-oriented programming. If you’re not, then check out Object-Oriented Programming (OOP) in Python 3.
Let’s get started!
Free Download: Get a sample chapter from Python Tricks: The Book that shows you Python’s best practices with simple examples you can apply instantly to write more beautiful + Pythonic code.
Understanding the Kivy Framework
Kivy was first released in early 2011. This cross-platform Python framework can be deployed to Windows, Mac, Linux, and Raspberry Pi. It supports multitouch events in addition to regular keyboard and mouse inputs. Kivy even supports GPU acceleration of its graphics, since they’re built using OpenGL ES2. The project uses the MIT license, so you can use this library for free and commercial software.
When you create an application with Kivy, you’re creating a Natural User Interface or NUI. The idea behind a Natural User Interface is that the user can easily learn how to use your software with little to no instruction.
Kivy does not attempt to use native controls or widgets. All of its widgets are custom-drawn. This means that Kivy applications will look the same across all platforms. However, it also means that your app’s look and feel will differ from your user’s native applications. This could be a benefit or a drawback, depending on your audience.
Installing Kivy
Kivy has many dependencies, so it’s recommended that you install it into a Python virtual environment. You can use either Python’s built-in venv library or the virtualenv package. If you’ve never used a Python virtual environment before, then check out Python Virtual Environments: A Primer.
Here’s how you can create a Python virtual environment:
This will copy your Python 3 executable into a folder called my_kivy_project and add a few other subfolders to that directory.
To use your virtual environment, you need to activate it. On Mac and Linux, you can do that by executing the following while inside the my_kivy_project folder:
The command for Windows is similar, but the location of the activate script is inside of the Scripts folder instead of bin .
Now that you have an activated Python virtual environment, you can run pip to install Kivy. On Linux and Mac, you’ll run the following command:
On Windows, installation is a bit more complex. Check out the official documentation for how to install Kivy on Windows. (Mac users can also download a dmg file and install Kivy that way.)
If you run into any issues installing Kivy on your platform, then see the Kivy download page for additional instructions.
Working With Kivy Widgets
A widget is an onscreen control that the user will interact with. All graphical user interface toolkits come with a set of widgets. Some common widgets that you may have used include buttons, combo boxes, and tabs. Kivy has many widgets built into its framework.
Running a “Hello, Kivy!” Program
To see how Kivy works, take a look at the following “Hello, World!” application:
Every Kivy application needs to subclass App and override build() . This is where you’ll put your UI code or make calls to other functions that define your UI code. In this case, you create a Label widget and pass in its text , size_hint , and pos_hint . These last two arguments are not required.
size_hint tells Kivy the proportions to use when creating the widget. It takes two numbers:
- The first number is the x size hint and refers to the width of the control.
- The second number is the y size hint and refers to the height of the control.
Both of these numbers can be anywhere between 0 and 1. The default value for both hints is 1. You can also use pos_hint to position the widget. In the code block above, you tell Kivy to center the widget on the x and y axes.
To make the application run, you instantiate your MainApp class and then call run() . When you do so, you should see the following on your screen:

Kivy also outputs a lot of text to stdout :
This is useful for debugging your application.
Next, you’ll try adding an Image widget and see how that differs from a Label .
Displaying an Image
Kivy has a couple of different image-related widgets to choose from. You can use Image to load local images from your hard drive or AsyncImage to load an image from a URL. For this example, you’ll stick with the standard Image class:
In this code, you import Image from the kivy.uix.image sub-package. The Image class takes a lot of different parameters, but the one that you want to use is source . This tells Kivy which image to load. Here, you pass a fully-qualified path to the image. The rest of the code is the same as what you saw in the previous example.
When you run this code, you’ll see something like the following:

The text from the previous example has been replaced with an image.
Now you’ll learn how to add and arrange multiple widgets in your application.
Laying Out the UI
Each GUI framework that you use has its own method of arranging widgets. For example, in wxPython you’ll use sizers, while in Tkinter you use a layout or geometry manager. With Kivy, you’ll use Layouts. There are several different types of Layouts that you can use. Here are some of the most common ones:
- BoxLayout
- FloatLayout
- GridLayout
You can search Kivy’s documentation for a full list of available Layouts. You can also look in kivy.uix for the actual source code.
Try out the BoxLayout with this code:
Here, you import BoxLayout from kivy.uix.boxlayout and instantiate it. Then you create a list of colors, which are themselves lists of Red-Blue-Green (RGB) colors. Finally, you loop over a range of 5, creating a button btn for each iteration. To make things a bit more fun, you set the background_color of the button to a random color. You then add the button to your layout with layout.add_widget(btn) .
When you run this code, you’ll see something like this:

There are 5 randomly-colored buttons, one for each iteration of your for loop.
When you create a layout, there are a few arguments you should know:
- padding : You can specify the padding in pixels between the layout and its children in one of three ways:
- A four-argument list: [ padding_left , padding_top , padding_right , padding_bottom ]
- A two-argument list: [ padding_horizontal , padding_vertical ]
- A singular argument: padding=10
- spacing : You can add space between the children widgets with this argument.
- orientation : You can change the default orientation of the BoxLayout from horizontal to vertical.
Adding Events
Like most GUI toolkits, Kivy is mostly event-based. The framework responds to user keypresses, mouse events, and touch events. Kivy has the concept of a Clock that you can use to schedule function calls for some time in the future.
Kivy also has the concept of Properties , which works with the EventDispatcher . Properties help you do validation checking. They also let you fire events whenever a widget changes its size or position.
Let’s add a button event to your button code from earlier:
In this code, you call button.bind() and link the on_press event to MainApp.on_press_button() . This method implicitly takes in the widget instance , which is the button object itself. Finally, a message will print to stdout whenever the user presses your button.
Using the KV Language
Kivy also provides a design language called KV that you can use with your Kivy applications. The KV language lets you separate your interface design from the application’s logic. This follows the separation of concerns principle and is part of the Model-View-Controller architectural pattern. You can update the previous example to use the KV language:
This code might look a bit odd at first glance, as it creates a Button without setting any of its attributes or binding it to any events. What’s happening here is that Kivy will automatically look for a file that has the same name as the class in lowercase, without the App part of the class name.
In this case, the class name is ButtonApp , so Kivy will look for a file named button.kv . If that file exists and is properly formatted, then Kivy will use it to load up the UI. Go ahead and create this file and add the following code:
Here’s what each line does:
- Line 1 matches the Button call in your Python code. It tells Kivy to look into the instantiated object for a button definition.
- Line 2 sets the button’s text .
- Line 3 sets the width and height with size_hint .
- Line 4 sets the button’s position with pos_hint .
- Line 5 sets the on_press event handler. To tell Kivy where the event handler is, you use app.on_press_button() . Here, Kivy knows will look in the Application class for a method called .on_press_button() .
You can set up all of your widgets and layouts inside one or more KV language files. The KV language also supports importing Python modules in KV, creating dynamic classes, and much more. For full details, check out Kivy’s guide to the KV Language.
Now you’re ready to create a real application!
Creating a Kivy Application
One of the best ways to learn a new skill is by creating something useful. With that in mind, you’ll use Kivy to build a calculator that supports the following operations:
- Addition
- Subtraction
- Multiplication
- Division
For this application, you’ll need a series of buttons in some kind of layout. You’ll also need a box along the top of your app to display the equations and their results. Here’s a sketch of your calculator:

Now that you have a goal for the UI, you can go ahead and write the code:
Here’s how your calculator code works:
- In lines 8 to 10, you create a list of operators and a couple of handy values, last_was_operator and last_button , that you’ll use later on.
- In lines 11 to 15, you create a top-level layout main_layout and add a read-only TextInput widget to it.
- In lines 16 to 21, you create a nested list of lists containing most of your buttons for the calculator.
- In line 22, you start a for loop over those buttons . For each nested list you’ll do the following:
- In line 23, you create a BoxLayout with a horizontal orientation.
- In line 24, you start another for loop over the items in the nested list.
- In lines 25 to 39, you create the buttons for the row, bind them to an event handler, and add the buttons to the horizontal BoxLayout from line 23.
- In line 31, you add this layout to main_layout .
The next step is to create the .on_button_press() event handler. Here’s what that code looks like:
Most of the widgets in your application will call .on_button_press() . Here’s how it works:
Line 41 takes the instance argument so you can access which widget called the function.
Lines 42 and 43 extract and store the value of the solution and the button text .
Lines 45 to 47 check to see which button was pressed. If the user pressed C , then you’ll clear the solution . Otherwise, move on to the else statement.
Line 49 checks if the solution has any pre-existing value.
Line 50 to 52 check if the last button pressed was an operator button. If it was, then solution won’t be updated. This is to prevent the user from having two operators in a row. For example, 1 */ is not a valid statement.
Lines 53 to 55 check to see if the first character is an operator. If it is, then solution won’t be updated, since the first value can’t be an operator value.
Lines 56 to 58 drop to the else clause. If none of the previous conditions are met, then update solution .
Line 59 sets last_button to the label of the last button pressed.
Line 60 sets last_was_operator to True or False depending on whether or not it was an operator character.
The last bit of code to write is .on_solution() :
Once again, you grab the current text from solution and use Python’s built-in eval() to execute it. If the user created a formula like 1+2 , then eval() will run your code and return the result. Finally, you set the result as the new value for the solution widget.
Note: eval() is somewhat dangerous because it can run arbitrary code. Most developers avoid using it because of that fact. However, since you’re only allowing integers, operators, and the period as input to eval() , it’s safe to use in this context.
When you run this code, your application will look like this on a desktop computer:

To see the full code for this example, expand the code block below.
Complete Code Example Show/Hide
Here’s the full code for the calculator:
It’s time to deploy your application!
Packaging Your App for Android
Now that you’ve finished the code for your application, you can share it with others. One great way to do that is to turn your code into an application that can run on your Android phone. To accomplish this, first you’ll need to install a package called buildozer with pip :
Then, create a new folder and navigate to it in your terminal. Once you’re there, you’ll need to run the following command:
This will create a buildozer.spec file that you’ll use to configure your build. For this example, you can edit the first few lines of the spec file as follows:
Feel free to browse the rest of the file to see what else you can change.
At this point, you’re almost ready to build your application, but first, you’ll want to install the dependencies for buildozer . Once those are installed, copy your calculator application into your new folder and rename it to main.py . This is required by buildozer . If you don’t have the file named correctly, then the build will fail.
Now you can run the following command:
The build step takes a long time! On my machine, it took 15 to 20 minutes. Depending on your hardware, it may take even longer, so feel free to grab a cup of coffee or go for a run while you wait. Buildozer will download whatever Android SDK pieces it needs during the build process. If everything goes according to plan, then you’ll have a file named something like kvcalc-0.1-debug.apk in your bin folder.
The next step is to connect your Android phone to your computer and copy the apk file to it. Then you can open the file browser on your phone and click on the apk file. Android should ask you if you’d like to install the application. You may see a warning since the app was downloaded from outside Google Play, but you should still be able to install it.
Here’s the calculator running on my Samsung S9:

The buildozer tool has several other commands you can use. Check out the documentation to see what else you can do.
You can also package the app using python-for-android if you need more fine-grained control. You won’t cover this here, but if you’re interested, check out the project’s quickstart.
Packaging Your App for iOS
The instructions for building an application for iOS are a bit more complex than Android. For the most up-to-date information, you should always use Kivy’s official packaging documentation. You’ll need to run the following commands before you can package your application for iOS on your Mac:
Once those are all installed successfully, you’ll need to compile the distribution using the following commands:
If you get an error that says iphonesimulator can’t be found, then see this StackOverflow answer for ways to solve that issue. Then try running the above commands again.
If you run into SSL errors, then you probably don’t have Python’s OpenSSL setup. This command should fix that:
Now go back and try running the toolchain command again.
Once you’ve run all the previous commands successfully, you can create your Xcode project using the toolchain script. Your main application’s entry point must be named main.py before you create the Xcode project. Here is the command you’ll run:
There should be a directory named title with your Xcode project in it. Now you can open that project in Xcode and work on it from there. Note that if you want to submit your application to the App Store, then you’ll have to create a developer account at developer.apple.com and pay their yearly fee.
Packaging Your App for Windows
You can package your Kivy application for Windows using PyInstaller. If you’ve never used it before, then check out Using PyInstaller to Easily Distribute Python Applications.
You can install PyInstaller using pip :
The following command will package your application:
This command will create a Windows executable and several other files. The -w argument tells PyInstaller that this is a windowed application, rather than a command-line application. If you’d rather have PyInstaller create a single executable file, then you can pass in the —onefile argument in addition to -w .
Packaging Your App for macOS
You can use PyInstaller to create a Mac executable just like you did for Windows. The only requirement is that you run this command on a Mac:
This will create a single file executable in the dist folder. The executable will be the same name as the Python file that you passed to PyInstaller. If you’d like to reduce the file size of the executable, or you’re using GStreamer in your application, then check out Kivy’s packaging page for macOS for more information.
Conclusion
Kivy is a really interesting GUI framework that you can use to create desktop user interfaces and mobile applications on both iOS and Android. Kivy applications will not look like the native apps on any platform. This can be an advantage if you want your application to look and feel different from the competition!
In this tutorial, you learned the basics of Kivy including how to add widgets, hook up events, lay out multiple widgets, and use the KV language. Then you created your first Kivy application and learned how to distribute it on other platforms, including mobile!
There are many widgets and concepts about Kivy that you didn’t cover here, so be sure to check out Kivy’s website for tutorials, sample applications, and much more.
Further Reading
To learn more about Kivy, check out these resources:
To see how you might create a desktop application with another Python GUI framework, check out How to Build a Python GUI Application With wxPython.
Watch Now This tutorial has a related video course created by the Real Python team. Watch it together with the written tutorial to deepen your understanding: Build Cross-Platform GUI Apps With Kivy
Get a short & sweet Python Trick delivered to your inbox every couple of days. No spam ever. Unsubscribe any time. Curated by the Real Python team.
About Mike Driscoll
Mike has been programming in Python for over a decade and loves writing about Python!
Each tutorial at Real Python is created by a team of developers so that it meets our high quality standards. The team members who worked on this tutorial are:


Master Real-World Python Skills With Unlimited Access to Real Python
Join us and get access to thousands of tutorials, hands-on video courses, and a community of expert Pythonistas:
Master Real-World Python Skills
With Unlimited Access to Real PythonJoin us and get access to thousands of tutorials, hands-on video courses, and a community of expert Pythonistas:
What Do You Think?
What’s your #1 takeaway or favorite thing you learned? How are you going to put your newfound skills to use? Leave a comment below and let us know.
Commenting Tips: The most useful comments are those written with the goal of learning from or helping out other students. Get tips for asking good questions and get answers to common questions in our support portal. Looking for a real-time conversation? Visit the Real Python Community Chat or join the next “Office Hours” Live Q&A Session. Happy Pythoning!