How to Fix Fatal Error: max_execution_time Exceeded Error in WordPress
Are you getting a Fatal Error: max_execution_time exceeded message while using WordPress? No worries. It simply means that the PHP script you run takes longer to complete than the limit allows. Read on to find out how to debug this WordPress issue.
Solving Max Execution Time WordPress Error
There are three methods that you can use to fix the max execution time error in WordPress: editing the .htaccess file, changing the time limit via the control panel, and installing a plugin.
Manually Editing .htaccess File
By default, the max_execution_time is usually set to 30 seconds. If your PHP scripts need more time, then you need to edit the value in the .htaccess file.
Here’s how to do it:
- Open the File Manager in Hostinger’s hPanel and navigate to the public_html directory.
- Double-click the .htaccess file.
- Insert the following code into the bottom of your .htaccess file:
- Press Save and Close.
Pro Tip
If you’re still getting the same error, you can try increasing the value to 120-180 seconds
Changing max_execution_time value via hPanel
You can also increase the WordPress max_execution_time directly from PHP Configurations in hPanel.
- Login to Hostinger’s hPanel and navigate to PHP Configurations under the Advanced section.
- Select the PHP Options tab and scroll down until you find the max_execution_time option.
- Increase the default value as needed and click Save.
That’s it — you have successfully increased the WordPress max_execution_time limit of your PHP script!
Installing a Plugin to Increase Execution Time Limit
An easy way to fix the WordPress max_execution_time error is by using a plugin. We recommend using Google Pagespeed Insights as it is straightforward and the developer updates it regularly.
-
for Google Pagespeed Insights from your WordPress dashboard and activate it.
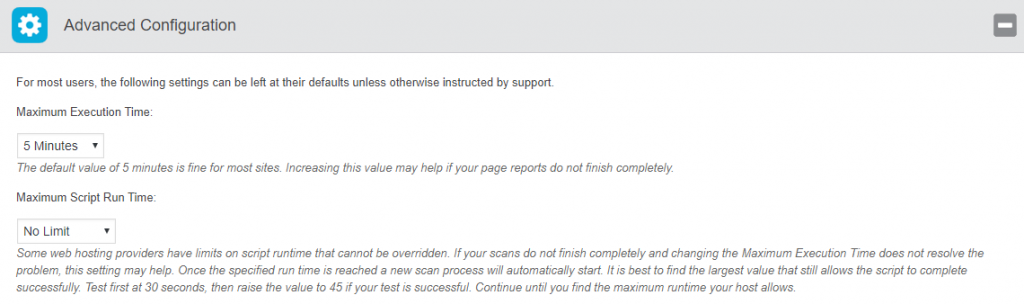
- Navigate to Tools -> Pagespeed Insights. Scroll down, find Advanced Configuration, and change the maximum execution time as needed. However, we recommend using the default settings as they will work fine on most websites.
- Click Save Options and the plugin will automatically modify the .htaccess file.
Should you want to undo any changes, simply deactivate the plugin and all the changes made to .htaccess will be removed.
Conclusion
You’ve learned three easy ways to fix the WordPress max_execution_time error. Here’s a quick recap of those methods:
- Insert the php_value max_execution_time 60 code into the .htaccess file.
- Extend the limit directly through PHP Configurations in hPanel.
- Increase the time limit by using Google Pagespeed Insights plugin.
There you have it, easy and quick fixes! If you’re using shared hosting services and none of the solutions worked for you, contact your hosting provider and ask if it’s possible to increase the maximum execution time. Good luck!
Learn How to Solve WordPress Errors
Elvinas is a senior server administrator at Hostinger. He monitors the infrastructure’s well-being and keeps the uptime at a maximum. Besides server management, web development has always been one of his biggest passions.
How To Change PHP Time Limit WordPress?
In this article we will show you how to change PHP time limit WordPress to fix this «Fatal error: Maximum execution time of 30 seconds exceeded» error.
This issue typically arises when a PHP code in WordPress runs slowly and exceeds the allotted time limit established by your WordPress hosting server. The time restriction is crucial since it helps stop the exploitation of server resources.
Table of Contents
What Is The PHP Time Limit?
The PHP Time Limit determines how long an action will take on your site before clocking out. An operation will produce a fatal error when it exceeds the time limit set, as seen below:

On the majority of hosts, the PHP Time Limit’s default setting is 30 seconds.
Why Does the Maximum Execution Time Error Occur?
PHP is primarily used in the coding of WordPress. There is a time restriction specified for how long a PHP script may execute in order to safeguard web servers against misuse.
Although the exact time restriction varies across hosting providers, it is often set between 30 and 60 seconds because that is typically long enough for a reliable PHP script to operate.
The error message «maximum execution time exceeded» appears when a script exceeds its allotted execution time.
Each WordPress site has a limit on the amount of time it can take to execute server requests. Its goal is to reduce server misuse. This restriction checks each PHP script currently active on your website and disables those that exceed the time limit.
WordPress site files mostly employ PHP, thus it’s critical to monitor PHP scripts to detect whether they run for an excessively lengthy time or consume an excessive amount of server resources. It’s not unusual for malicious assaults to use endless PHP scripts to slow down the website.
In addition, certain WordPress plugins, themes, or other components might tax server resources if they take too long to load. This error message appears to be generated by plugins more frequently than by other components, which is probably due to the fact that WordPress users install plugins more frequently than they do themes or edit code. Additionally, because plugins come from a variety of developers, it might be challenging to identify the excellent ones that are supported by reliable code and regular updates.
There is a maximum execution time restriction since there aren’t many reasons for a PHP script to execute for a long period of time, regardless of the reason. This cap is often established at the server level by your hosting provider.
Contact your provider
The procedure for increasing the PHP Time Limit is complicated and varies from host to host. Therefore, it is usually preferable to have it done by a specialist. Simply contact CyberPanel support team, and they will be happy to assist you.
How to increase PHP time limit using the CyberPanel Dashboard
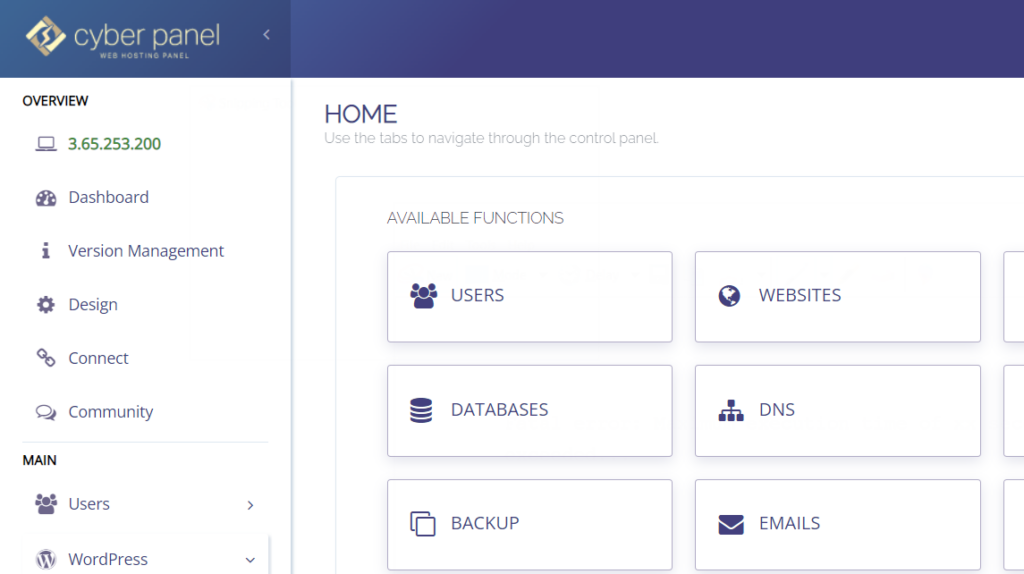
Go to your CyberPanel dashboard

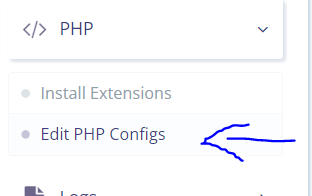
Click on PHP -> Edit PHP Configs from the left hand side menu
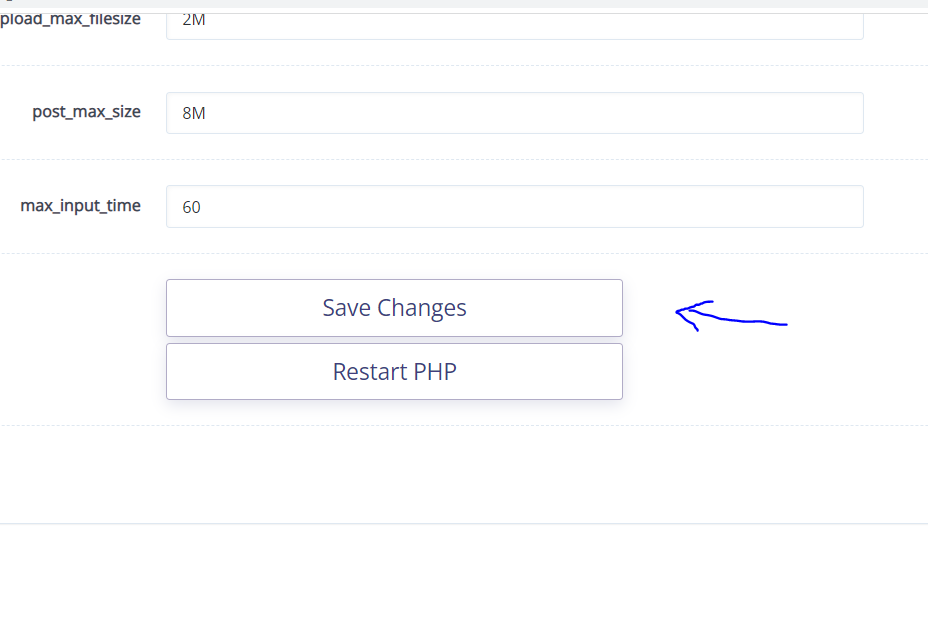
Select your PHP and set your max_execution_time to 300 or whatever limit you need it to be

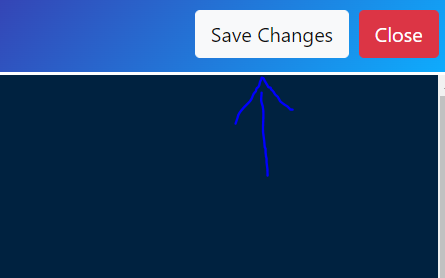
Click on Save Changes.
How to increase PHP time limit using wp-config.php?
The most popular technique is this one. You need to edit the wp-config.php file on your WordPress site as it located in your WordPress site’s file manager.
Go to your CyberPanel dashboard
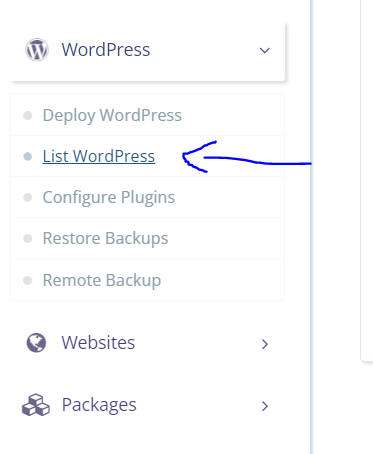
Click on WordPress -> List WordPress from the left hand side menu. This will take you to the List of WordPress Sites page
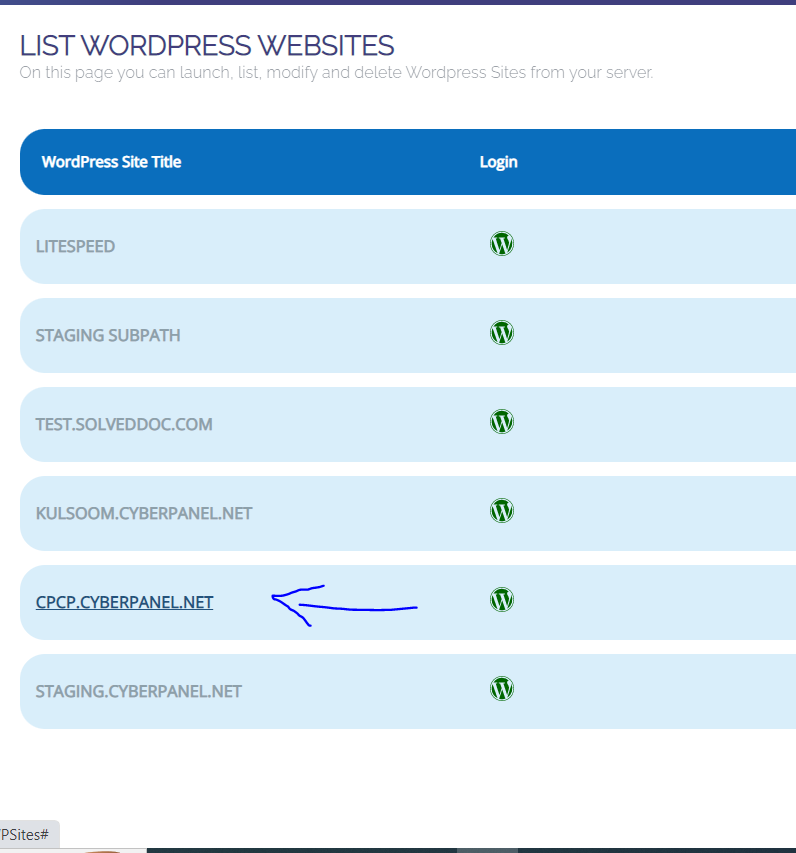
Click on your site from this list
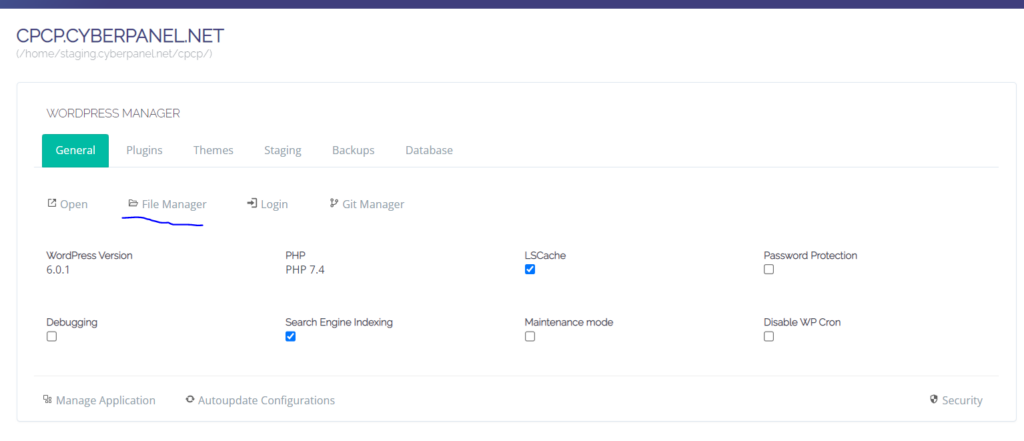
This is your WordPress Manager for your WordPress site. Click on File Manager from here.
Right click on wp-config.php and click on Edit with Code Mirror
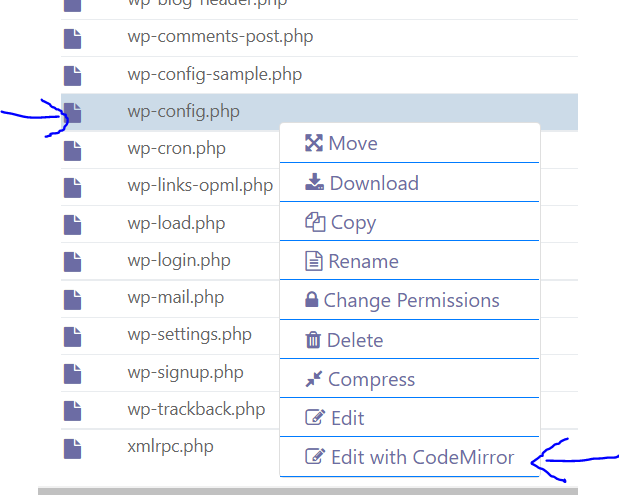
After it says «That’s all, stop editing! Happy publishing«, paste the following code
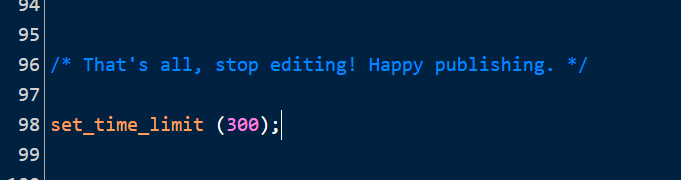
Click on Save Changes. This code instructs the server to set the PHP timeout to 300 seconds
How to increase PHP time limit using .htaccess?
This can also be done via .htaccess if you aren’t comfortable with wp-config.php.
Go to your CyberPanel dashboard
Click on WordPress -> List WordPress from the left hand side menu. This will take you to the List of WordPress Sites page
Click on your site from this list
This is your WordPress Manager for your WordPress site. Click on File Manager from here.
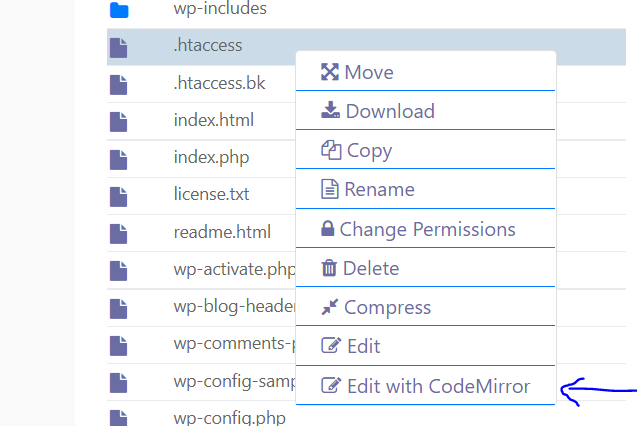
Right click on .htaccess and click on Edit with Code Mirror
At the very end of the file, enter the following code
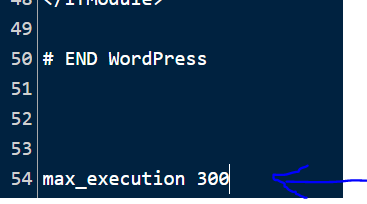
Click on Save Changes and Refresh your site.
Conclusion
Experiencing errors because of the short PHP time restriction might be annoying. The time limit is essential because it prevents the overuse of server resources. The solutions discussed above will enable you to modify the PHP time limit.
One comment on “How To Change PHP Time Limit WordPress?”
[…] ArticlesEasiest Way to Automatically Add Internal links on WordPressHow To Change PHP Time Limit WordPress?How does Varnish Cache + NGINX Reverse Proxy WorksWhich Report Indicate How Traffic Arrived At A […]
Fix Fatal Error: Maximum Execution Time Exceeded In WordPress
![]()
No doubt that a WordPress website is somehow overwhelming if you’re a techie person.
There are many common errors which can be seen from which, you can get a fatal error: maximum execution time exceeded.
It’s a type of error which occur when the default time execution limit exceeded.
Suppose you’re updating or installing a plugin and after a few seconds you receive an error message.
What would you do? If you’re thinking about your web hosting then you can’t run every time you face any problem.
The Reason To Get Such Fatal Error
WordPress is an amazing platform which consists mainly PHP codes. It’s plugins and themes are also coded in PHP.
You may see execution time exceeded error while updating or install a plugin. The same can happen while handing a WordPress theme.
And why do you get this error? Well, every web hosting has a script which has a fixed execution time limit for the PHP scripts.
It’s important to save their server. If you’re using a shared web hosting and you install a poorly coded plugin which takes so much time to get executed then it may conflict other users.
So they set an execution time and if the PHP scripts cross this limit then you receive such error.
Fixing this Error Using the .htaccess File
You just have to increase the execution time limit and it will get fixed. For different web hostings, the time limit will vary.
Some web hostings have 30 seconds limit whereas others have 60 seconds. Depending on this limit, you will receive the error message.
You have to edit the .htaccess file using your web hosting account.
Go to cPanel>>file manager>>root directory and search for the .htaccess file. If you’re using Yoast SEO plugin then you can edit it from your WordPress admin panel only.
How to Increase PHP Time Limit for a WordPress Site?
The PHP Time Limit is the amount of time that your site will spend on a single operation before timing out. When an operation reaches the time limit set, then it will return a fatal error that looks like this:
The default value for PHP time limit on most hosts for the PHP Time Limit is 30 seconds. You can increase this limit by following any of the methods mentioned below.
1. Most Recommended: Just Contact Your Host
Increasing the PHP Time Limit is complex and the process that differs from hosts to hosts. So it is always better to get it done from someone who knows it well. So just get in touch with your hosting company and they will be happy to do it for you.
2. Increasing PHP Time Limit via PHP.ini file
Many small shared hosted servers do not allow users to access the PHP.ini file. If you are granted access, you can directly increase the PHP Time limit through this file. If you wish to extend the limit to 300 seconds, you can enter the following line of code or update if it exists already:
3. Alternative to editing PHP.ini through wp-config.php
This is another alternative to the PHP.ini method. Simply add / edit the following line in the wp-config.php of your WordPress
4. Modifying the .htaccess file
Some of you might have the .htaccess file where you can simply add / edit this line of code to increase the time limit.