Как установить PuTTy в Linux
PuTTy — это популярный клиент SSH и telnet с открытым исходным кодом, который широко используется веб-разработчиками и системными администраторами по всему миру. Хотя он обычно используется в среде Windows, он также хорошо известен среди администраторов Linux. На самом деле, часто люди предпочитают использовать PuTTy вместо стандартного клиента ssh, доступного в каждой системе Linux, из-за его простоты использования и знакомости, если вы уже использовали его в Window. Но PuTTy не доступен по умолчанию в системах Linux.
Как установить PuTTy в Linux
Ниже описаны шаги по установке PuTTy в различных дистрибутивах Linux.
Установка PuTTy в Ubuntu
Сначала нужно добавить репозиторий universe в вашу систему. Затем нужно обновить систему, чтобы получить доступ к пакетам PuTTy. Наконец, мы устанавливаем его с помощью команды apt, как показано ниже.


Установка PuTTy в Debian
Как и в Ubuntu, вы можете установить PuTTy на системы Debian, выполнив следующую команду.

Установка PuTTy в Redhat, CentOS, Fedora, SUSE Linux
Перед установкой, необходимо подключить репозиторий epel.
Вы также можете установить PuTTy на RHEL, CentOS, Fedora и SUSE Linux, как показано ниже.

Установка PuTTy из исходного кода
Если вы не используете ни один из вышеперечисленных дистрибутивов Linux или хотите установить PuTTy из исходного кода, то вот команды, которые необходимо выполнить. Вы можете изменить URL загрузки в соответствии с вашими требованиями.
Заключение
В этой статье мы узнали, как установить PuTTy на различные дистрибутивы Linux.
How to Install PuTTY on Linux
PuTTY is a free and open-source cross-platform SSH and telnet client that even after being around for over 20 years remains one of the most popular SSH clients being used especially on the Windows platform.
Linux distros ship with SSH capabilities built into their terminal but in real-world environments, I have seen PuTTY being used instead of the default Linux systems more times than I cared to count.
The quickest reasons that come to mind for such scenarios include:
- Familiarity: users are more comfortable using an SSH client they got familiar with while using Windows.
- Debug mode: Connection to serial pots and raw sockets is more user-friendly with PuTTY.
- Convenience: PuTTY has a GUI that undeniably makes it easier to use especially by SSH and/or terminal newbies.
It is possible for your own reasons for wanting to use PuTTY on GNU/Linux are different. It doesn’t really matter. Here are the steps to take in order to install PuTTY on the Linux distro of your choice.
How to Install PuTTY on Linux
PuTTY is available to install from the default official repositories in most Linux distributions. For instance, you can install PuTTY on Ubuntu and its derivative distros via the universe repository.
Install PuTTy on Ubuntu and Linux Mint
First, you’ll have to enable the universe repository so that you can access its packages, update your system to recognize its new access rights, and then run the install command.
Launch PuTTY to see that its UI mirrors that of the windows version. Happy you 🙂

Install PuTTy on Debian
Just like for Ubuntu, PuTTY is available for Debian and all its distros via aptitude (i.e. using apt-get) as shown.
Install PuTTy on Arch Linux
Arch Linux and its derivatives can also install PuTTY from the default repositories.
Install PuTTy on CentOS, RHEL, Fedora, Rocky & AlmaLinux
PuTTY is available to install via the distro’s default package manager.
Install PuTTy from Source Code in Linux
It’s possible that you want to get your hands ‘dirty‘ and build the SSH client from scratch yourself. You’re in luck because it is open-source and the source code is available to download putty from the official putty website using the following wget command.
That’s all folks! You’re now equipped with the knowledge to install PuTTY on any Linux distro, in any environment. Now learn how to use putty with these useful putty tips and tricks.
Do you use a different SSH or telnet client? Tell us about it in the comments section below.
How to Install PuTTY on Ubuntu
PuTTY was developed for Windows as an open-source SSH and Telnet client, available outside Windows as well. Since it is open source, it has gained popularity among Linux users as well.
PuTTY supports a wide range of protocols, including serial connection, rlogin, SFTP, SCP, Telnet and SSH.
This guide shows how to install PuTTY on Ubuntu.

- A machine running Ubuntu
- A user account with sudo privileges
Install PuTTY on Ubuntu
The easiest way to install PuTTY on Ubuntu is via the terminal. Follow the steps below to install PuTTY.
Step 1: Enable Universe Repository
PuTTY is available in the Ubuntu Universe repository. To enable the repository:
1. Open a terminal window (Ctrl + Alt + T) and enable the Universe repository on your system by running:
2. Enter your password when asked and press Enter.
If the universe repository is already enabled on your machine, the output states so. Otherwise, it enables the Universe repository on your machine.

Step 2: Update Package Repository
Update your system package repository before installing PuTTY to make sure you install the latest program version.
Note: Updating the repository is essential before installing new software because it makes sure your package lists from all repositories and PPAs are up to date. That way, you are installing the latest stable program version.

Step 3: Install PuTTY
Install PuTTY by running the following command:
Note: Specifying the -y flag automatically answers YES to any questions during the installation process. If you would rather review them, leave out the -y flag.
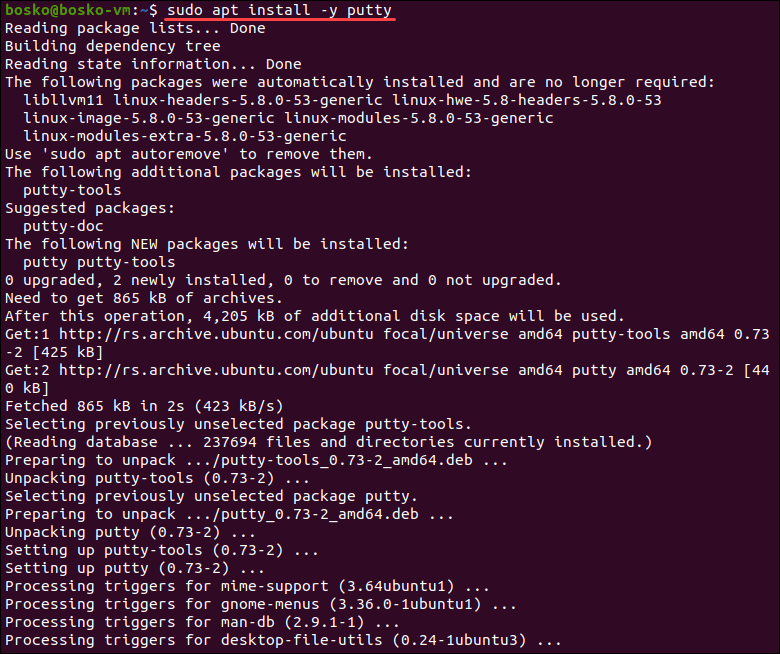
Installing the PuTTY package also grants access to several command-line tools:
- pscp . A PuTTY tool for copying files via the SCP protocol.
- psftp . A PuTTY tool for managing files via SFTP. This allows you to securely copy, delete, transfer, and list files.
- puttygen . RSA and DSA key generator.
Step 4: Verify Installation
After the installation completes, you can verify it and check the program version by running:
The output shows the program release version and other details.

Run PuTTY
Run PuTTY in two ways:
- Enter the app name in the terminal and press Enter:
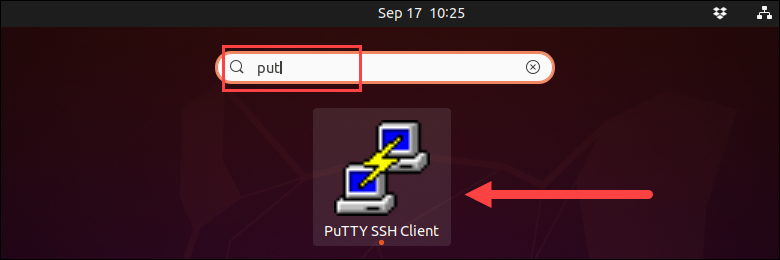
- Another way to run PuTTY is to find it in the Application menu by typing ‘putty’ and launching the tool.
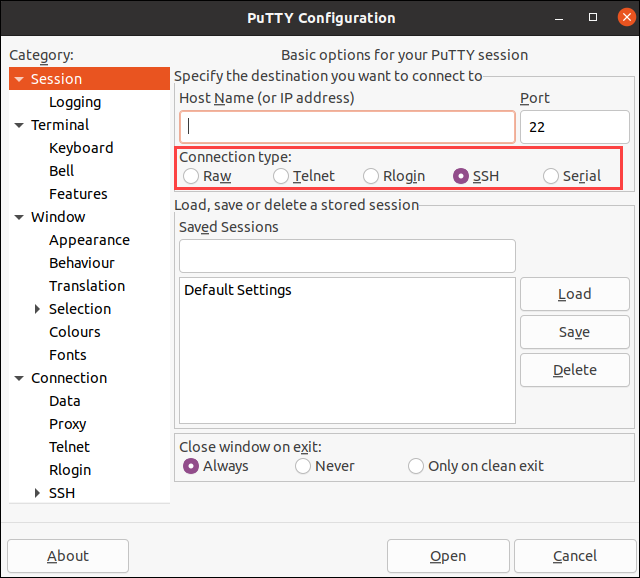
After running PuTTY, the configuration options allow you to choose the connection type. Choose between raw, Telnet, rlogin, SSH, or serial connection. Enter a port number, a server hostname or IP address, and start a new session.
Note: If you are looking to use a different Telnet and SSH client, read about popular PuTTY alternatives.
You should now have PuTTY installed on your Ubuntu system and ready to use.
Feel free to test out PuTTY, as it has various benefits. Apart from its session management, PuTTY offers several other great customization features that allow you to find and fix bugs, access serial ports, etc.
For Windows and Mac installation guides, check out our articles on installing PuTTY on Windows and installing PuTTY on Mac.
Как установить Putty в Ubuntu 20.04 LTS

В этом руководстве мы покажем вам, как установить Putty в Ubuntu 20.04 LTS. Для тех из вас, кто не знал, Putty — это наиболее широко используемый клиент SSH и telnet для операционных систем Microsoft Windows. Версия Putty Linux — это программа графического терминала, которая поддерживает различные сетевые протоколы, включая SSH, telnet, SCP, rlogin и т. Д.
В этой статье предполагается, что у вас есть хотя бы базовые знания Linux, вы знаете, как использовать оболочку, и, что наиболее важно, вы размещаете свой сайт на собственном VPS. Установка довольно проста и предполагает, что вы работаете с учетной записью root, в противном случае вам может потребоваться добавить ‘ sudo ‘ к командам для получения привилегий root. Я покажу вам пошаговую установку клиента Putty SSH на Ubuntu 20.04 (Focal Fossa). Вы можете следовать тем же инструкциям для Ubuntu 18.04, 16.04 и любого другого дистрибутива на основе Debian, например Linux Mint.
Установите Putty на Ubuntu 20.04 LTS Focal Fossa
Шаг 1. Во-первых, убедитесь, что все ваши системные пакеты обновлены, выполнив следующие apt команды в терминале.
Шаг 2. Установка Putty в Ubuntu 20.04.
Теперь мы добавляем репозиторий юниверсов в вашу систему Ubuntu:
После включения репозитория юниверса вы должны обновить Ubuntu и установить его с помощью этой команды:
Вы можете проверить установку, используя следующую команду:
Шаг 3. Доступ к Putty в Ubuntu Linux.
После успешной установки запустите его из терминала, используя « putty » в качестве команды, или из Dash:
Поздравляю! Вы успешно установили Putty. Благодарим за использование этого руководства для установки клиента Putty SSH в системе Ubuntu 20.04 LTS Focal Fossa. Для получения дополнительной помощи или полезной информации мы рекомендуем вам посетить официальный сайт Putty .