Explanation

Nessus is a proprietary vulnerability scanner developed by Tenable, Inc.
This is a walkthrough of the initial setup and first scan of Nessus free edition using Kali Linux 2020.
Environment
- Kali Linux 2020
- Nessus: 8.10.1
Solution
1. Installation
Since we can’t install it with apt-get , we have to download the deb package from the website and install manually.
For the Kali linux, we can use the following version. 
Click the filename and accept the license agreement. To install the deb package, we can use dpkg
To run Nessus, we can use the following command.
2. Gaining activation code
Go to Obtain an Activation Code.
This time, select free edition and push “Register Now”. 
After that, fill out the personal information like full name and mail address.
The activation code will be sent to the registered email address.
3. Setting up
Go to https://localhost:8834 .
Select Nessus Essential . 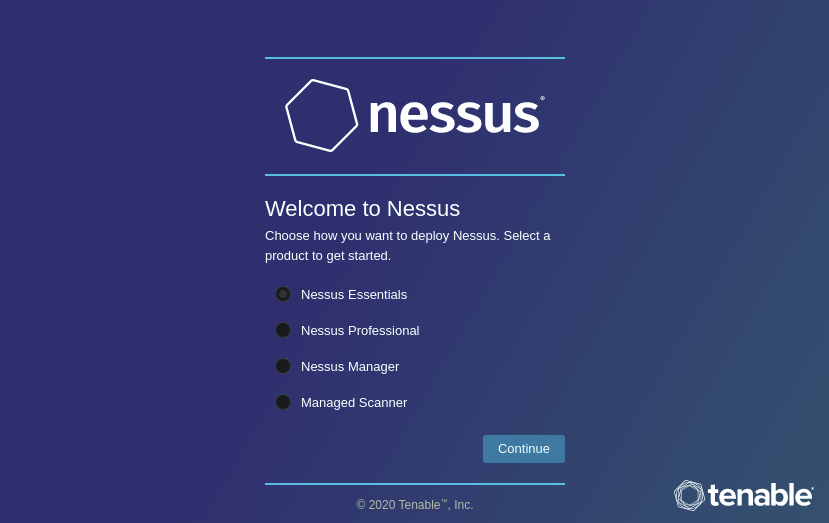
We can skip the next step because we already have an active code. 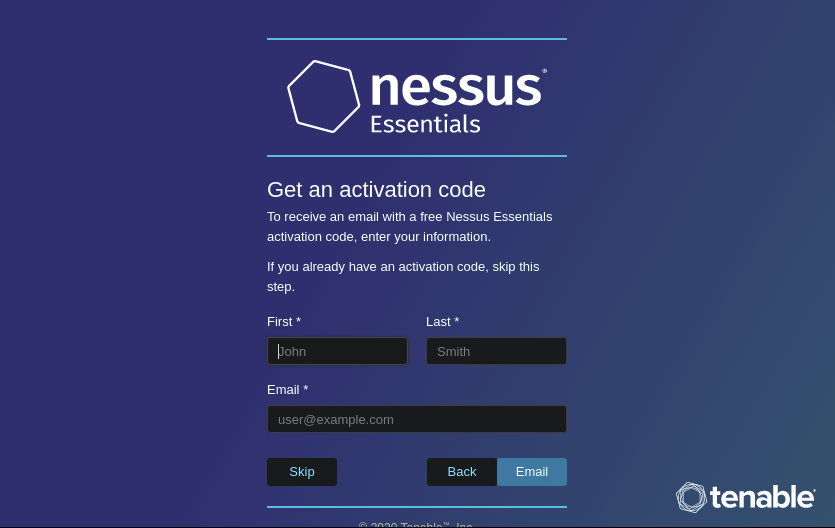
Then, create an username and password. 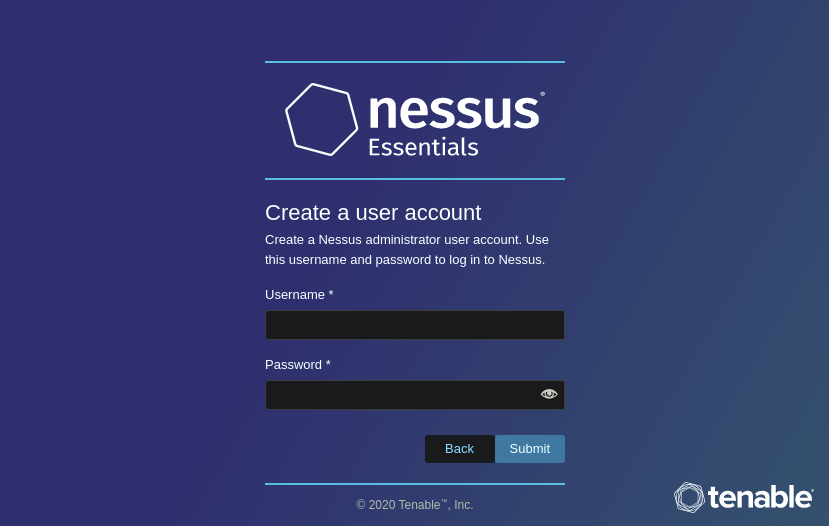
After that, it takes some time to finish the initialization. 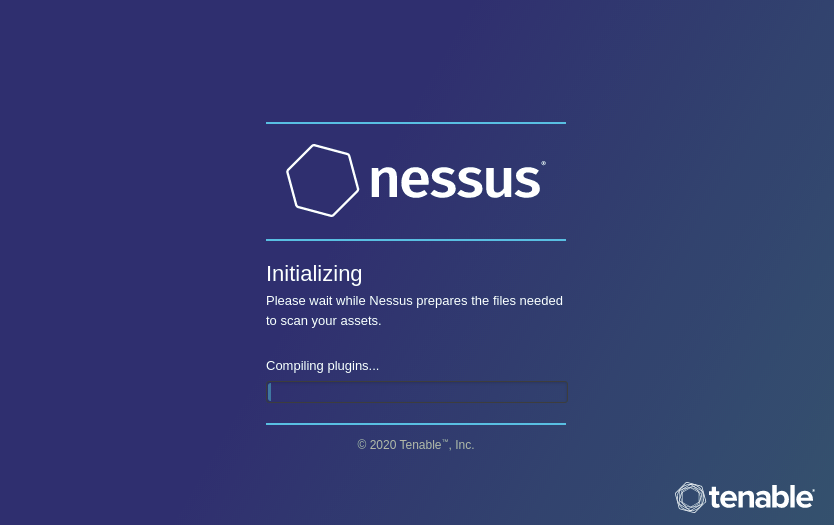
4. Creating a new scan
We have Scans Tab on console. Click and select New Scan on the right side. 
After that, we need to choose the scan template. 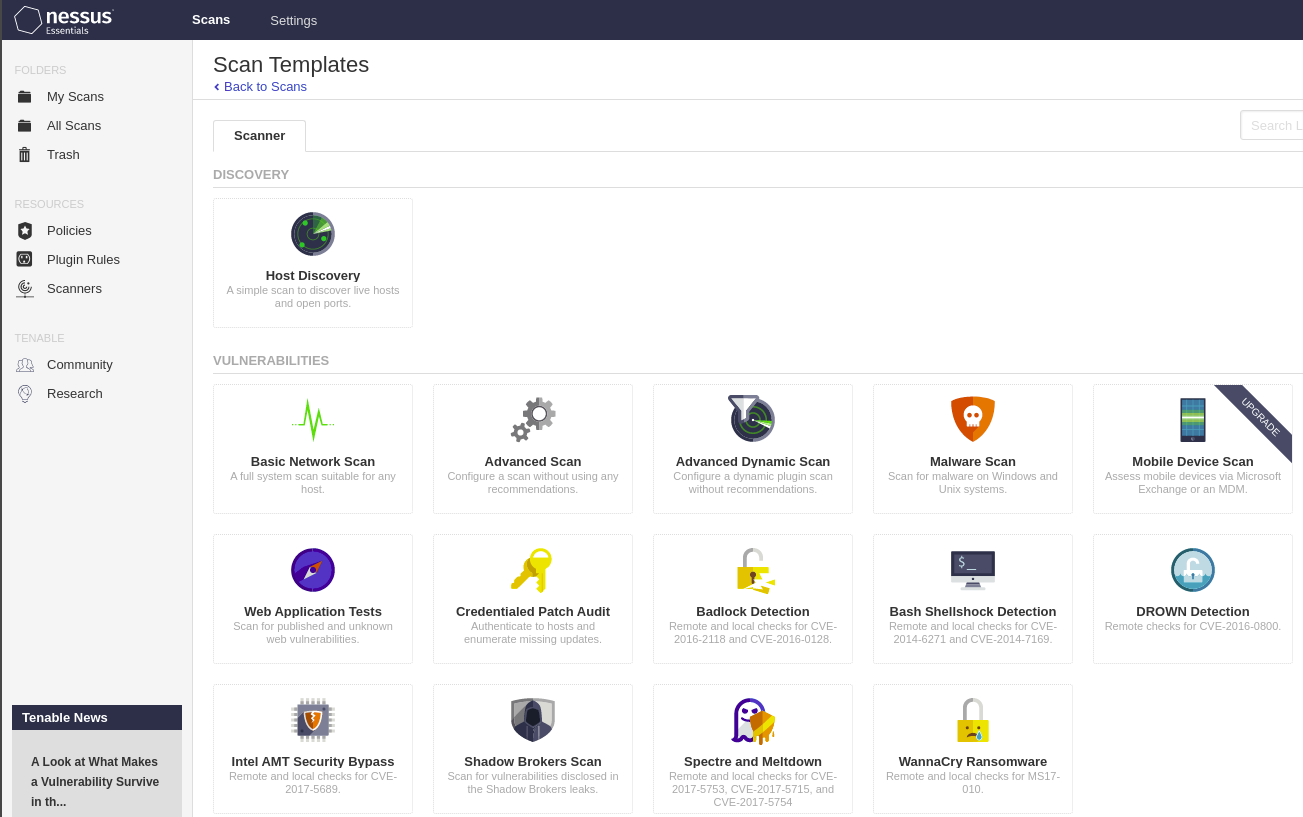
Then, setting up the target machine.
For the “Settings” tab, at least we need to specify the scan name and IP address. 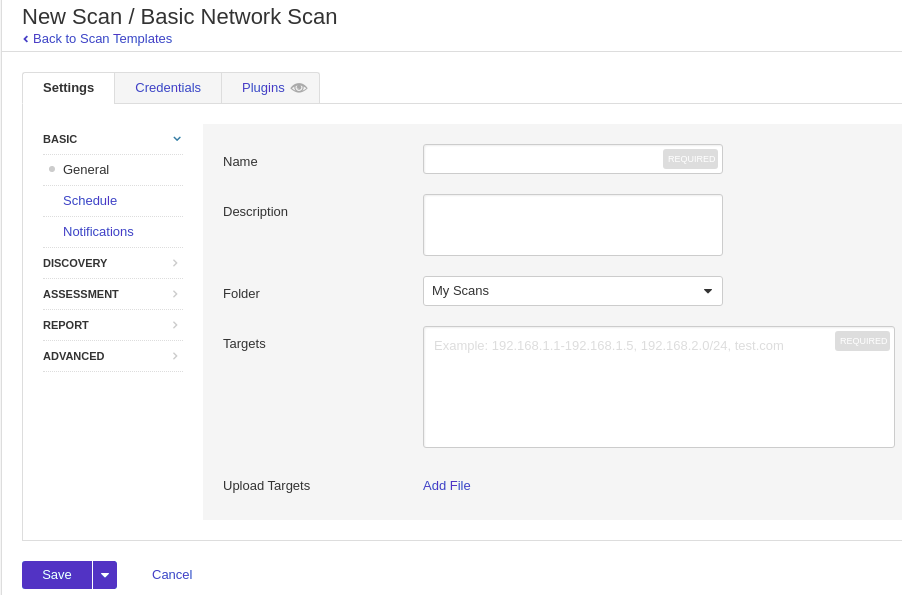
On the “Credential” tab, we can specify the username and password for each service. 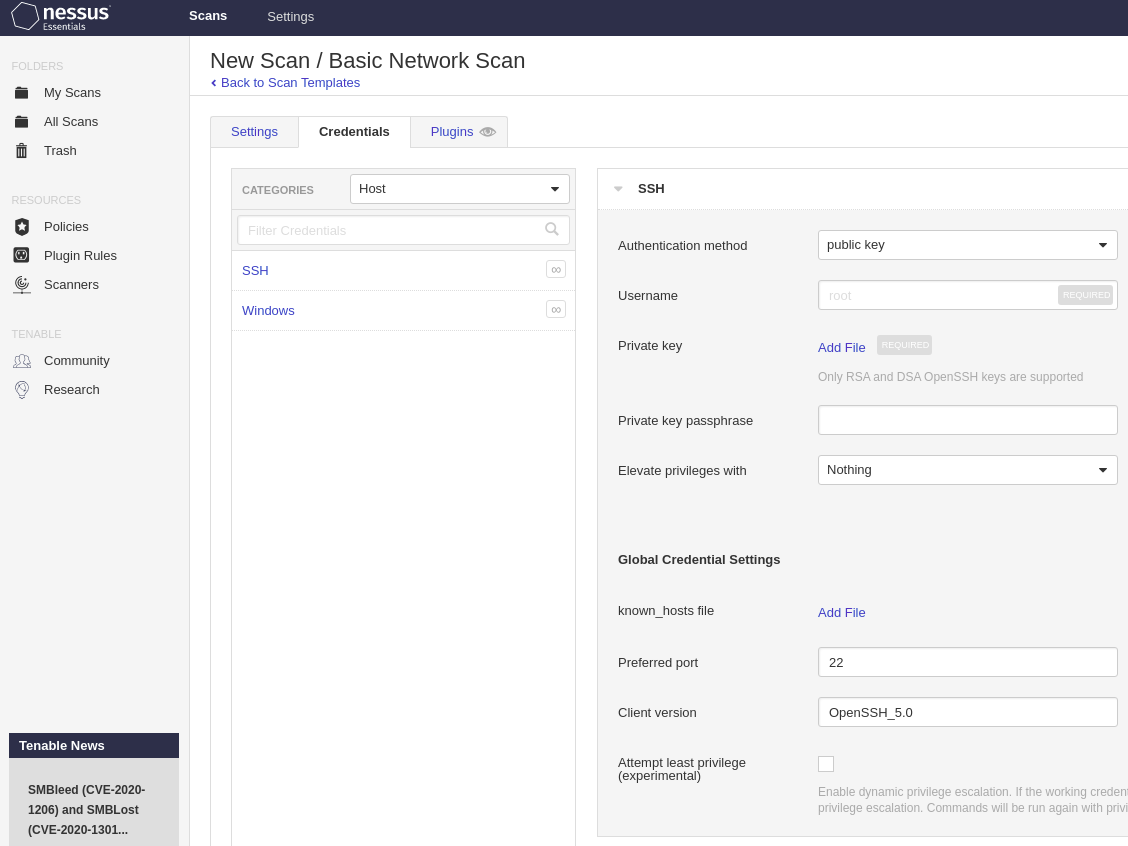
On the “Plugins” tab, we can select plugins to be enabled. 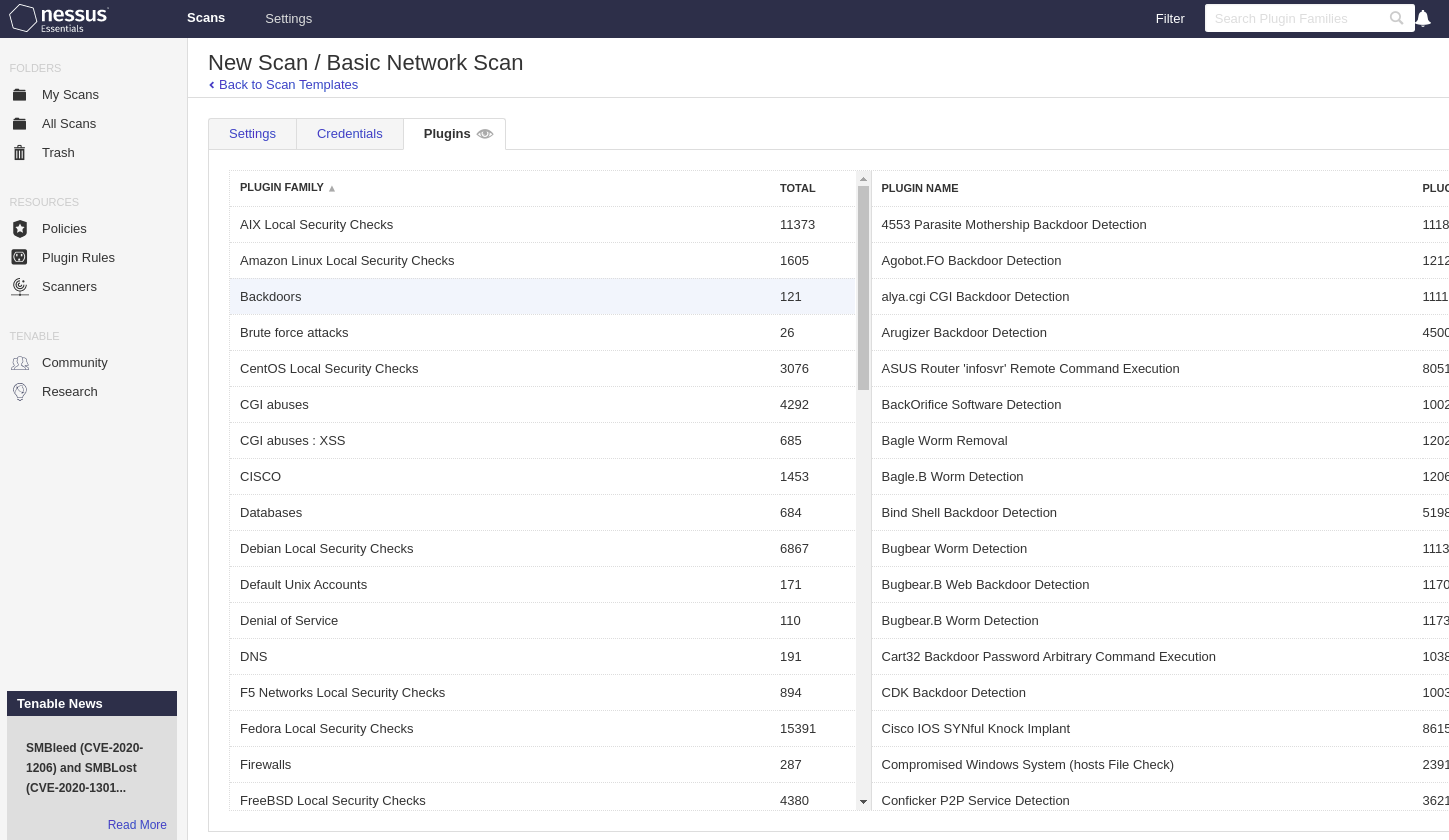
When finished the configuration, push “save” and go to “My Scans”.
On the right side, we have an icon to launch a scan.
5. Scan result
Click the scan and go to “Vulnerabilities”. We can see the information about vulnerabilities. 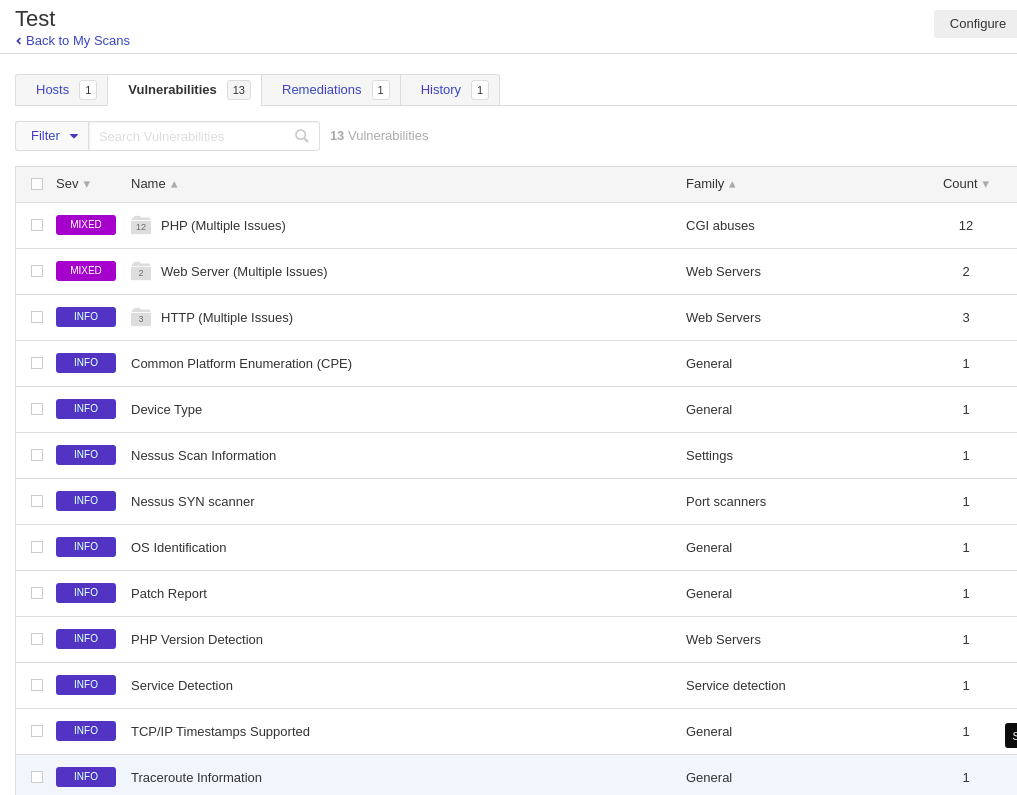
We have “Remediations” tab as well. According to vulnerability info, it suggests how to improve the security. 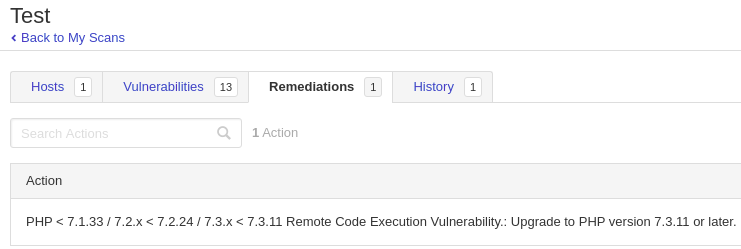
Как установить и настроить сканер уязвимостей Nessus в Kali Linux
«Ничто во вселенной не безотказно», это верно и для информационных систем. Будь то компьютерные системы, мобильные приложения, веб-сайты или устройства IoT, все они окружены неотъемлемым риском. Уязвимости возникают каждый день со специалистом по безопасности. которые занимаются их исправлением, и хакеры, работающие над их использованием. Специалисты по безопасности используют специализированное программное обеспечение, называемое сканерами уязвимостей, которое сканирует системы на наличие недостатков и уязвимостей в системе безопасности. На рынке доступно множество инструментов для сканирования уязвимостей. Примером такой системы является Nessus.
Для чего используется Nessus?
Nessus — один из самых популярных инструментов для сканирования уязвимостей, который когда-то занимал первое место в контрольном списке инструментов безопасности Nmap Software LLC. Хотя теперь он опустился на третью позицию в списке, он по-прежнему является мощным инструментом удаленного сканирования безопасности. Он доступен для основных дистрибутивов Linux, Mac OS X и Windows 7, 8 и 10. Кроме того, Nessus можно использовать с Docker. Вам нужно только вытащить его образ докера отсюда.
Что мы будем освещать?
В этом руководстве мы увидим, как установить Nessus на Kali Linux. Давайте начнем с установки и настройки Nessus.
Предпосылки
- Учетная запись пользователя с правами администратора.
- Подключение к Интернету для загрузки различных файлов.
Установка Nessus на Kali Linux
Nessus выпускается в трех вариантах: Nessus Essentials, Nessus Professional и Tenable.io. Nessus Essentials можно использовать бесплатно, но он ограничен сканированием 16 IP-адресов. Мы будем использовать этот вариант для этого руководства. Приступим к процессу установки:
Шаг 1. Перейдите на страницу продуктов Tenable для Nessus и нажмите кнопку загрузки под описанием «Nessus Essentials».

Шаг 2. Теперь, прежде чем двигаться дальше, нам сначала нужно зарегистрироваться с корпоративной электронной почтой:

Шаг 3. Когда вы зарегистрируетесь, вы получите ссылку на свой адрес электронной почты для кода активации. Этот код активации проверит продукт для установки. А пока просто нажмите «Загрузить» на новой странице, чтобы продолжить:

Примечание. Приведенный выше код активации является одноразовым. Каждый раз, когда вы устанавливаете Nessus, вам нужно будет его получить.
Шаг 4. На следующей странице выберите версию, подходящую для вашей системы. В нашем случае мы выбираем вариант Kali Linux.


$sudo dpkg -i Nessus-10.0.1-debian6_amd64.deb

Чтобы включить автоматический запуск службы при следующей загрузке, используйте следующую команду:
$sudo systemctl включить nessusd
Проверьте статус службы, используя:
$sudo systemctl статус nessusd

Шаг 8. Хорошо, теперь мы настроены на настройку Nessus из веб-браузера. Нам понадобится код активации, который мы получили от Tenable, так что держите его под рукой. Теперь откройте веб-браузер и перейдите по URL-адресу:
Порт пользовательского интерфейса по умолчанию в Nessus — 8834. Убедитесь, что он не используется какой-либо другой службой.
Если вы видите окно с предупреждением, подобное приведенному ниже, просто нажмите кнопку «Дополнительно…» и нажмите «Принять риск и продолжить». Это предупреждение возникает из-за того, что Firefox не доверяет сертификатам, предоставленным Nessus. Это нормальное поведение. Чтобы обойти это предупреждение SSL, можно использовать настройки браузера.

Шаг 10. В следующем окне вам будет предложено ввести некоторые данные, чтобы получить код активации. Поскольку мы уже получили его, мы можем смело пропустить этот шаг.


Шаг 12. После того, как вы отправите информацию об учетной записи пользователя, начнется загрузка различных необходимых плагинов:

Надеюсь, ваша установка прошла успешно, теперь мы можем двигаться дальше. Теперь вы увидите окно входа в систему, введите данные своей учетной записи здесь:

Заключение
Сетевая безопасность является важной частью организации для защиты ее ИТ-активов. С помощью таких инструментов, как Nessus, мы можем выявлять угрозы и уязвимости до того, как они будут использованы злоумышленником. Это помогает уменьшить поверхность атаки и повысить общую безопасность сети. Чтобы эффективно использовать эти инструменты, мы рекомендуем пройти соответствующее обучение, прежде чем использовать их в реальной среде. Tenable также проводит обучение по запросу для эффективного использования своего продукта.
Sorry, you have been blocked
This website is using a security service to protect itself from online attacks. The action you just performed triggered the security solution. There are several actions that could trigger this block including submitting a certain word or phrase, a SQL command or malformed data.
What can I do to resolve this?
You can email the site owner to let them know you were blocked. Please include what you were doing when this page came up and the Cloudflare Ray ID found at the bottom of this page.
Cloudflare Ray ID: 7d99e546087c2d97 • Your IP: Click to reveal 88.135.219.175 • Performance & security by Cloudflare
How to Install Nessus Scanner on Kali Linux
![]()
Hey there! This is a quick walkthrough on how to install Nessus on your Kali Linux machine. First off, let’s chat a little about what Nessus is and what it is used for. Nessus is a proprietary vulnerability scanner developed by Tenable. Nessus is a remote security scanning tool, which scans a computer and raises an alert if it discovers any vulnerabilities that malicious hackers could use to gain access to any computer you have connected to a network. (source) There is an interface that displays the results and rates the findings based on severity. The software is installed on your local machine and accessed through your browser on your localhost. It has a variety of features and allows you to create custom scans to find vulnerabilities within a variety of systems. The software is expensive, so we are going to be using the free version in this walkthrough.
Alright. Now that you have a basic understanding of what Nessus is, let’s get Nessus installed and working on your machine. The first step is to visit Nessus’s download page.
Download Nessus Here: Download Link
In this example, I am installing Nessus on my Kali VM. If you are downloading it on a different OS, then you will need to find the corresponding ISO to fit your OS’s architecture. Download the most recent version; the current version at the time of this walkthrough for Kali is 8.13.1.
The file will download and a registration prompt will appear. For the trial version, you will need an activation code. Enter your information in the register form as shown below.
You will receive an email with the activation code. Keep this email open because you will need to use the activation code shortly.
Now it is time to install the downloaded ISO file on your VM. Open a terminal window and go to the directory where your Nessus file was downloaded. My file is the root directory.
Run the following command to install the Nessus package to your machine.
sudo dpkg -i package_file.deb
Run the next command to start the Nessus service.
sudo /bin/systemctl start nessusd.service
You now have Nessus downloaded, installed, and running on your machine. Open a web browser and navigate to the following address.
A warning window will appear → click “advanced” → click “Accept the Risk and Continue”
For this example, we are going to be using the “Nessus Essentials” product.
Copy and past your activation code that you received earlier to activate the software.
Create a username and password for your account.
Go take a break and come back in
20 minutes! It takes a while for Nessus to initialize and compile all the plugins. Make sure you have enough hard drive space allocated to your VM.
Now that you are refueled and ready, it is time to log in to your Nessus account.
Once you are logged on, you can begin scanning by entering your host’s IP address range, or you can → click “cancel” and do a custom scan depending on your needs.
There are certain tools that are accessible using the free version, but there are others that require the professional version.
Nessus is installed! Good luck, and happy hacking! I hope this walkthrough made it quick and easy to install Nessus and will help you along in your journey of becoming a better security professional.