How to Install Armitage on Kali Linux
Armitage is a graphical user interface (GUI) for Metasploit, the command line pentesting framework. This is a good alternative for users who refuse to interact with the command line and want to execute pentesting actions.
After reading this tutorial, you will be able to install and get started with Armitage by following a few instructions.
This content is optimized both for Metasploit experienced users and inexperienced users. Also, it is valid for all Debian-based Linux distributions with Metasploit already installed. If your system has not installed Metasploit yet, follow the instructions described here to install Metasploit before continuing with Armitage.
All steps explained in this article include screenshots, making it easy for every Linux user to understand and follow them.
Installing Armitage on Kali Linux (And Debian-Based Distributions)
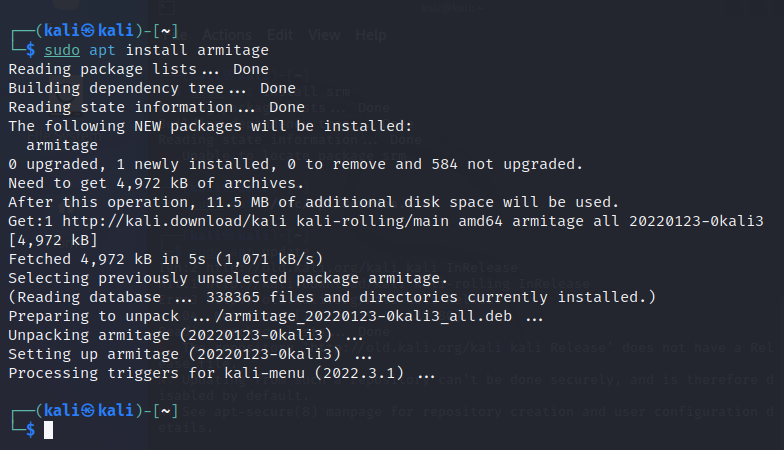
To begin, install Armitage using the apt packages manager, as shown in the following screenshot.
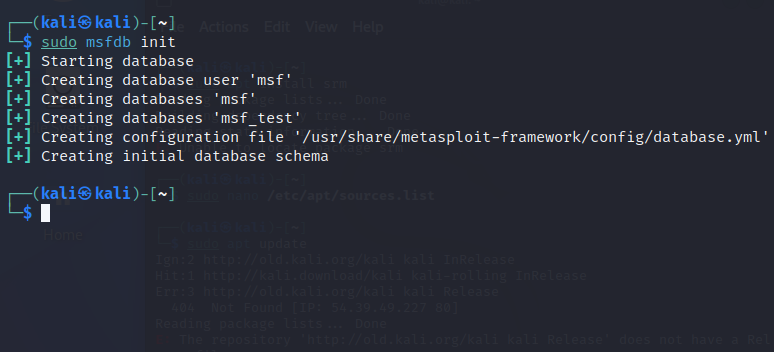
After the installation ends, start the Metasploit database by running the following command.
Once the database is initialized, start Armitage with privileges, as shown in the figure below.
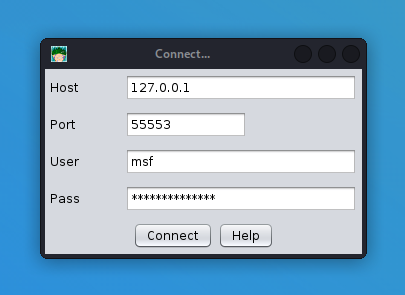
You will be requested to fill in the database host, port, user, and password. You can leave them as default.
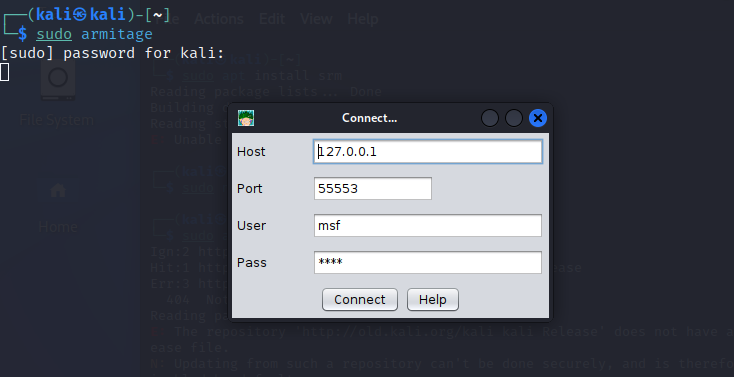
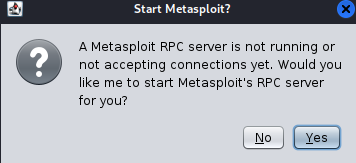
You will be asked if you want Armitage to initialize the RPC server. The Metasploit RPC server is not mandatory, you can run it if you want Metasploit to interact with external applications, or you can leave it disabled.
Wait until the database connects.
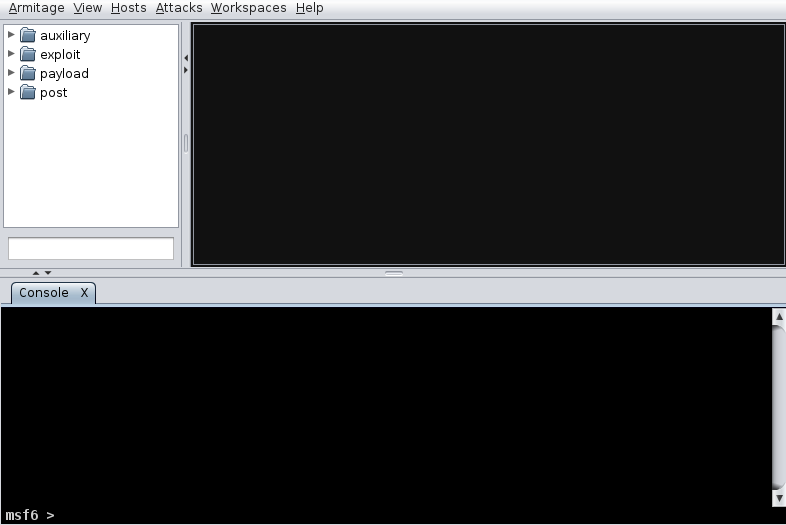
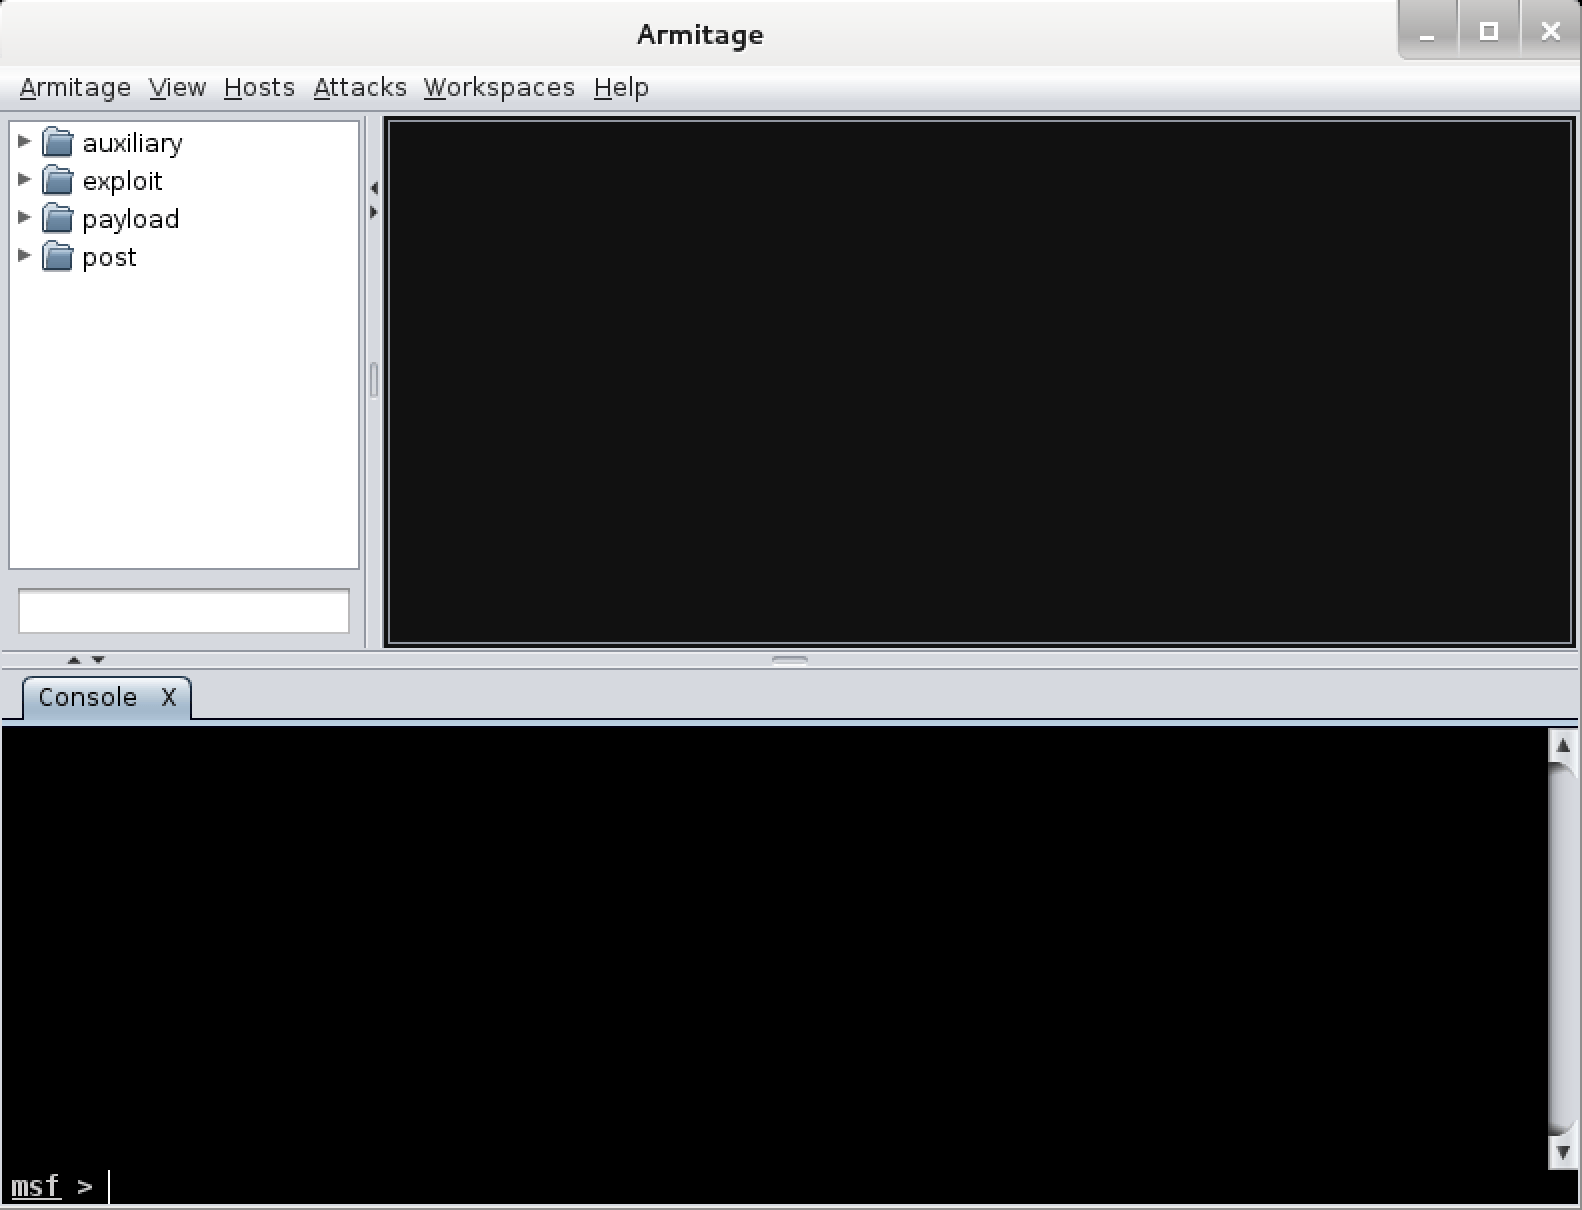
After connecting, the Armitage GUI will show up, as shown in the following figure.
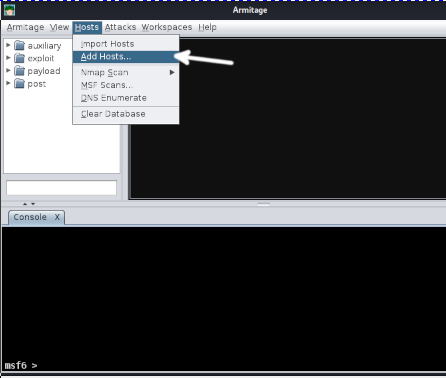
You can start by adding a host (Target) to scan.
To add a host, press the Hosts option on the top menu bar and then press Add Hosts, as shown in the image below. Optionally, if you have a file with hosts to import, you can press the first option.
Type the IP address or hostname of your target (In the screenshot, it was blurred). Then press the Add button.

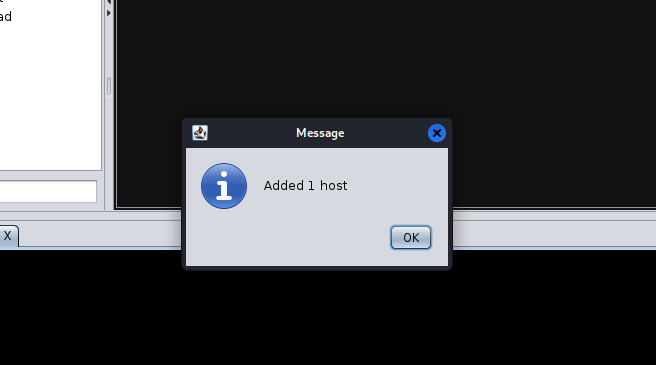
If the host was added successfully, a dialog box would show up; press OK. A computer representing the host will show up in the hosts’ section.
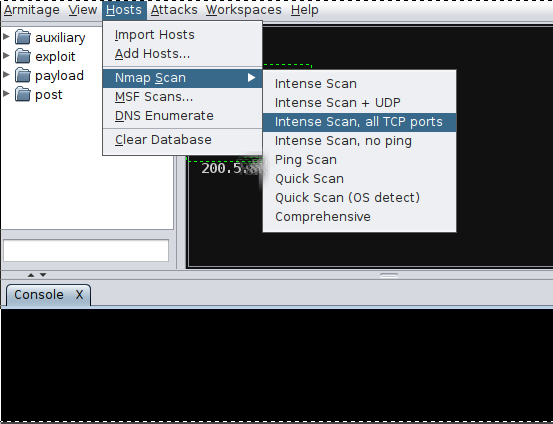
Once you add a host, you can start a scan. To do it, press Hosts, again, and then press Nmap Scan. Press the scan type you want. For this example, I selected an intense scan on all TCP ports.
You will be asked to accept the shown target or type the correct one. If you add only a host, by default, it will show up. Then press OK.

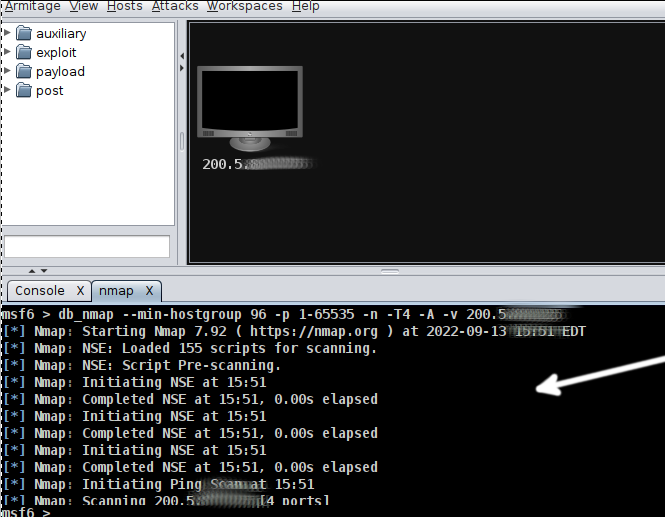
The scan process will begin; wait until it ends. If you selected an intense scan, it might take hours.
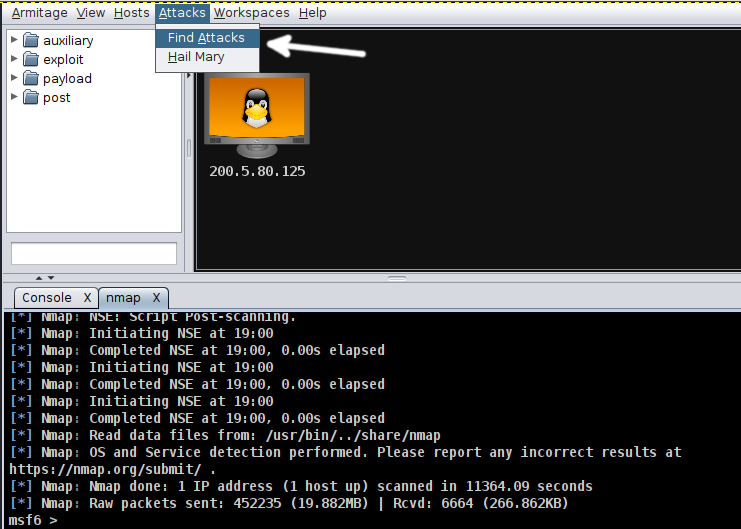
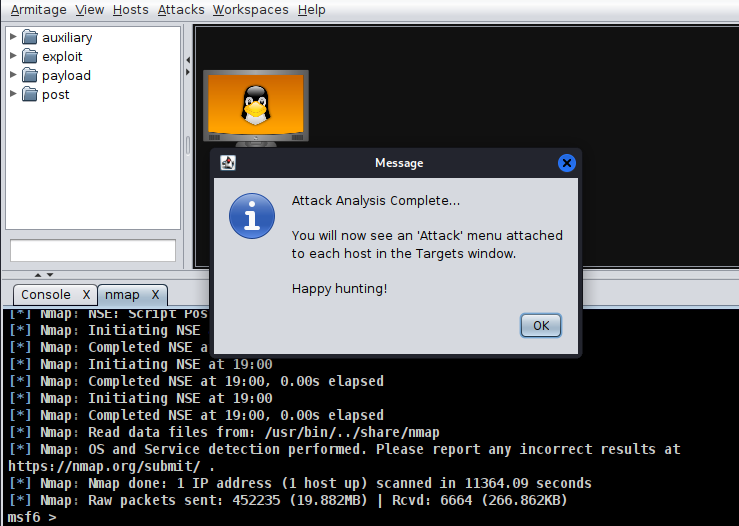
A dialog box, as shown below, will notify you the scan has been completed. It also will instruct you to press the Attacks menu and Find Attacks.

Press Attacks and Find Attacks, as shown in the following figure.
Armitage will start finding exploits in accordance with the previous scan results.
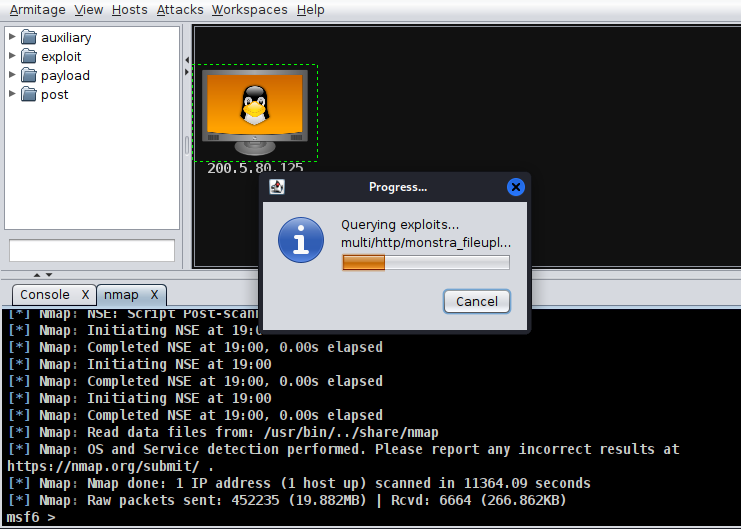
A new dialog box will inform you the attack analysis was completed.
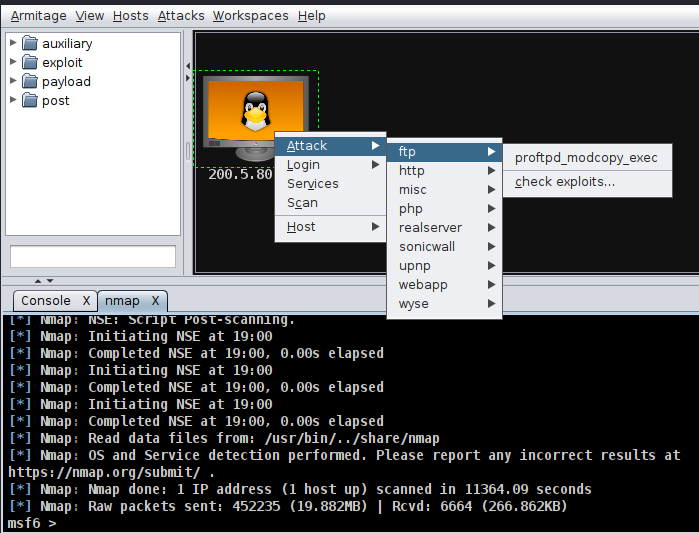
After the analysis ends, right-click the host and press on Attack to display exploits compatible with the scan results. Choose any exploit you want to try.
Troubleshooting: Attack Menu Doesn’t Show Up in Armitage
Many users complain that after the exploits analysis, the Attack menu doesn’t show up. That’s because Armitage, by default, only shows exploits with excellent possibilities to work.
You can instruct Armitage not to be 100% exact and keep an error margin to show exploits with medium to low success possibilities. That’s what I did in this tutorial.
To do it, just press Armitage on the top menu, then press Set Exploit Rank and select the rank you want to test.

If you select the Poor option, a lot of exploits will show up, many of them useless. If you choose the Excellent option, only functional exploits against the specified target will show up.
Conclusion
Armitage is a great option for users who are not familiar with the Linux console. The graphical interface is very intuitive and easy to use, contrary to Metasploit, which requires the user to learn specific commands.
As you can see, installing Armitage on Kali Linux and Debian-based Linux distributions is pretty easy and can be done by any Linux user independently of their knowledge level. This allows even inexperienced users to test their system or network security. Yet, it is recommended for users to learn the command line version since not all systems include a graphical interface (X Window Manager).
Thank you for reading this tutorial explaining how to install Armitage on Kali Linux and how to get started with it. Keep following us for additional high-quality Linux content.
About the author
David Adams
David Adams is a System Admin and writer that is focused on open source technologies, security software, and computer systems.
Как установить armitage в kali linux
Armitage is a GUI frontend for Metasploit that makes it possible to use a mouse to attack and exploit systems.
In this article, I will provide a step-by-step guide on how to install and get Armitage up and running. This is intended to help students struggling with the Intro to C2 room on TryHackMe.
Installation
With Kali 2022.02, the installation of Armitage is very simple because it is a part of the Kali package repo, ready for quick and easy installation.
After the installation is completed everything you need to run Armitage can be called using global terminal commands on your attack box.
Start teamserver
Armitage uses a central C2 (Command and Control) server that you can connect to using the Armitage GUI. If you run Armitage locally you start the teamserver, and make it listen for connections to an IP address you define yourself. Please note that you should not start the teamserver on an interface that is publically accessible. To access the teamserver port forwarding should be used.
Initiate MSF database
Preapare the DB Armitage will use
Start Armitage
Connect to teamserver, and start working
This will open a connection prompt. Type in the management IP address of your team server, and supply the password you just defined when starting the teamserver.
Please note that if you started the teamserver on a non-loopback eg. real IP address, you must use that IP address to connect. In other words, if you started a teamserver on 127.0.0.1, you must connect to that IP address. Please note that you cannot start teamserver on a public-facing IP address..
Connect to teamserver
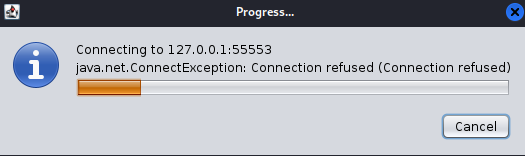
After you clicked connect, you will be prompted with a question to start a Metasploit RPC server. Click «yes». After a short loading period, including a «Connection refused» status below the progress bar, Armitage will load.
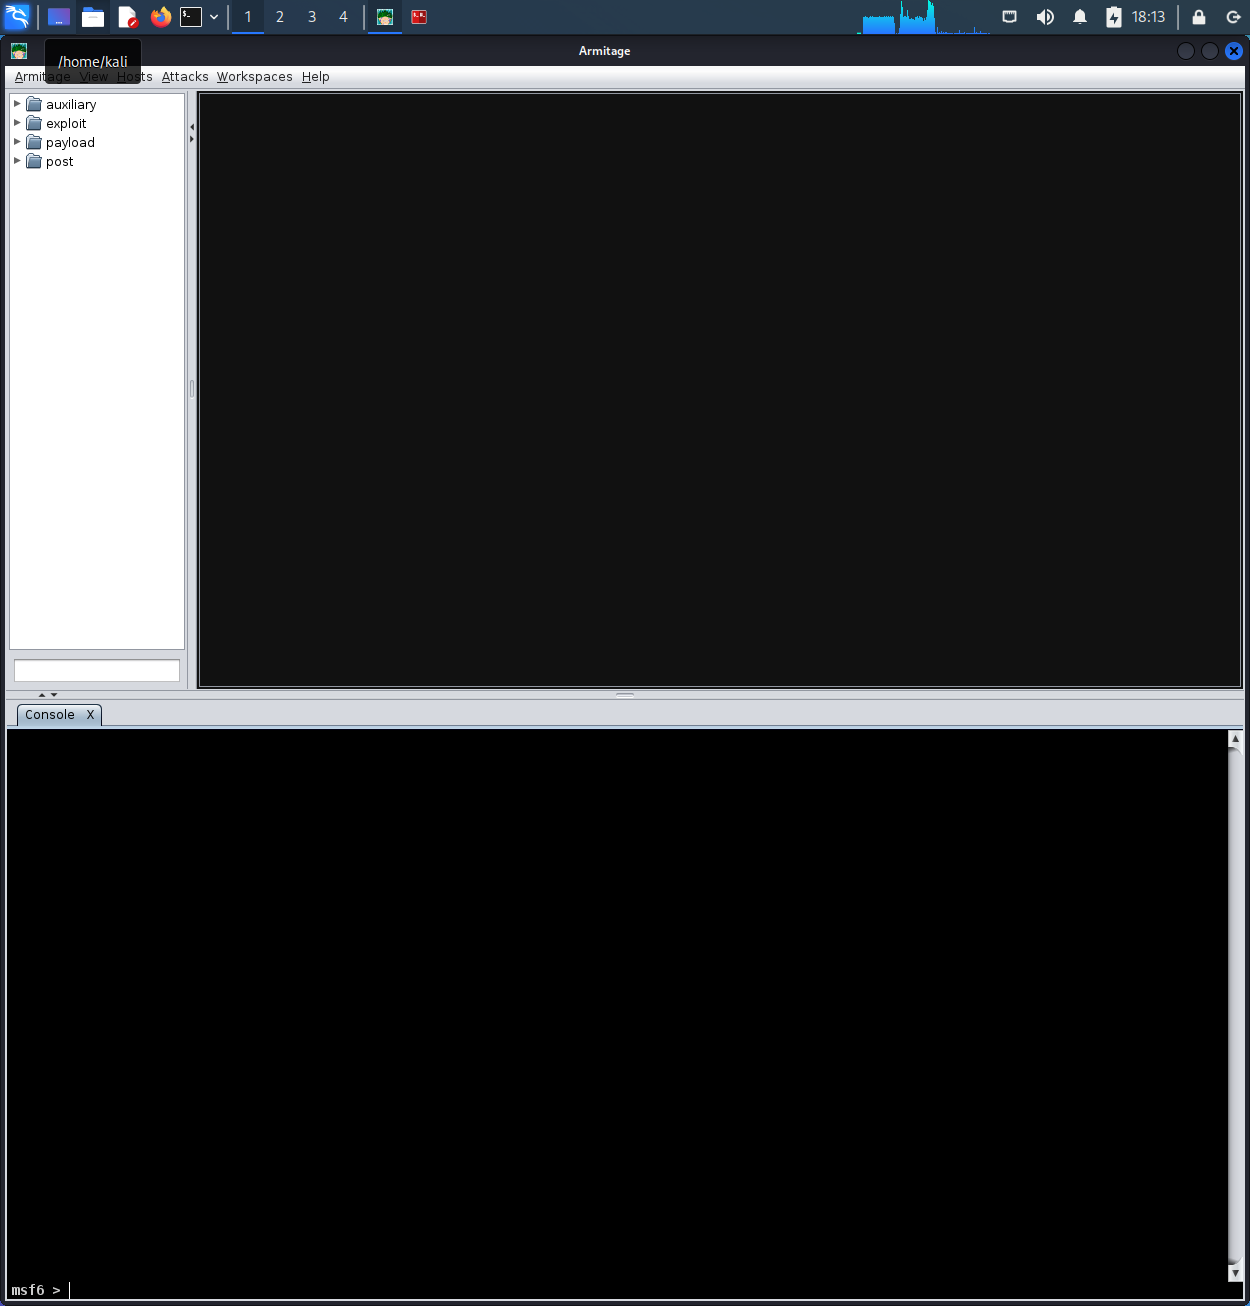
Successfully loaded Armitage
Congratulations, you now a running instance of Armitage in your lab 🎉
Tool Documentation:
Start teamserver on the external IP ( 192.168.1.202 ) and set the server password ( s3cr3t ):
Packages and Binaries:
armitage
Armitage is a scriptable red team collaboration tool for Metasploit that visualizes targets, recommends exploits, and exposes the advanced post- exploitation features in the framework.
Installed size: 10.95 MB
How to install: sudo apt install armitage
How To Install armitage on Kali Linux
In this tutorial we learn how to install armitage on Kali Linux.
What is armitage
Armitage is a scriptable red team collaboration tool for Metasploit that visualizes targets, recommends exploits, and exposes the advanced post- exploitation features in the framework.
There are three ways to install armitage on Kali Linux . We can use apt-get , apt and aptitude . In the following sections we will describe each method. You can choose one of them.
Install armitage Using apt-get
Update apt database with apt-get using the following command.
After updating apt database, We can install armitage using apt-get by running the following command:
Install armitage Using apt
Update apt database with apt using the following command.
After updating apt database, We can install armitage using apt by running the following command:
Install armitage Using aptitude
If you want to follow this method, you might need to install aptitude first since aptitude is usually not installed by default on Kali Linux. Update apt database with aptitude using the following command.
After updating apt database, We can install armitage using aptitude by running the following command:
How To Uninstall armitage on Kali Linux
To uninstall only the armitage package we can use the following command:
Uninstall armitage And Its Dependencies
To uninstall armitage and its dependencies that are no longer needed by Kali Linux, we can use the command below:
Remove armitage Configurations and Data
To remove armitage configuration and data from Kali Linux we can use the following command:
Remove armitage configuration, data, and all of its dependencies
We can use the following command to remove armitage configurations, data and all of its dependencies, we can use the following command:
References
Summary
In this tutorial we learn how to install armitage using different package management tools like apt, apt-get and aptitude.