Графический интерфейс Kali Linux для Windows 10 WSL2 (Подсистема Windows для Linux)

Уже некоторое время в Windows 10 присутствует возможность установить различные дистрибутивы Linux с помощью компонента «Подсистема Windows для Linux» или WSL, однако лишь в виде терминала без графического интерфейса. Начиная с Windows 10 2004 WSL обновился до версии 2.0, благодаря чему появились новые возможности и, в рамках этих возможностей появилась Kali Linux для WSL2 с поддержкой графического интерфейса или Win-Kex.
В этой инструкции подробно об установке графического интерфейса Kali Linux в Windows 10 версии 2004 или новее, а также дополнительная информация, например, о том, как включить русский язык интерфейса в установленной системе.
Установка Kali Linux с графическим интерфейсом в Windows 10
Порядок установки Kali Linux с графическим интерфейсом (GUI) для подсистемы Windows для Linux будет состоять из следующих шагов (напоминаю: необходима версия Windows 10 2004 или новее):
- Включите компонент «Подсистема Windows для Linux». Сделать это можно в Панель управления — Программы и компоненты — Включение или отключение компонентов Windows. После установки перезагрузите компьютер.

- Этот шаг можно пропустить, если у вас включены компоненты Hyper-V, иначе запустите Windows PowerShell от имени администратора (можно сделать через правый клик по кнопке «Пуск» и выполните команду
- Скачайте и установите обновление ядра Linux WSL2 со страницы https://docs.microsoft.com/ru-ru/windows/wsl/wsl2-kernel
- Перезагрузите компьютер, запустите PowerShell от имени администратора и выполните команду
- Зайдите в магазин приложений Windows Store, используйте поиск чтобы найти и установить Kali Linux.

- После завершения установки в PowerShell от имени администратора выполните команду:
- Запустите Kali Linux (пункт будет доступен в меню «Пуск»), выполните первоначальную настройку (имя пользователя и пароль), после чего по порядку выполните следующие команды (требуется подключение к Интернету, последний шаг может занять много времени.
- В ходе выполнения последней команды вам будет предложено выбрать клавиатуру. Я оставил значения по умолчанию, но, возможно, стоило выбрать русскую, так как в дальнейшем при включении русского языка интерфейса в ряде случаев кириллица не отрисовывается (не знаю, есть ли связь, лишь предположение).
- По завершении установки введите команду kex для запуска Kali Linux с графическим интерфейсом. При первом запуске вам будет предложено создать отдельный пароль, можно от этого отказаться.
В результате запустится Kali Linux с графическим интерфейсом в полноэкранном режиме. Для выхода из полноэкранного режима можете вызвать меню клавишей F8 и отключить опцию «Full Screen».
Если вам потребуется включить русский язык интерфейса для Kali Linux, у меня сработал следующий метод:

- В графическом интерфейсе Kali Linux запускаем терминал, вводим команду
- Выбираем ru_RU UTF-8 на двух экранах (отметку ставим пробелом, переключаемся на кнопку Ok клавишей Tab).
- Закрываем окно терминала и окно графического интерфейса, в терминале из которого мы запускали графический интерфейс вводим kex stop (если приглашение ввода не отображается, попробуйте изменить размер окна — у меня встретился такой баг).
- Снова запускаем kex — в результате интерфейс будет на русском языке.
А в целом, хотя я еще и не придумал, для чего мне это использовать (возможно, попробую запускать пакеты от bitnami для экспериментов с сайтами), но на первый взгляд всё работает исправно и быстро: быстрее, чем в виртуальной машине.
Install Kali Linux 2020.4 on Windows — Complete Beginner Guide
![]()
It is tradition on this blog to have an updated guide on how to Install Kali Linux in the easiest possible way and we haven’t had an updated guide for 2020.4 yet. In this guide I show you how to Install Kali Linux 2020.4 on VirtualBox in a complete, beginner friendly guide. We won’t skip any steps and I make sure to take you through step of the way.
Let’s get right started.
Installing VirtualBox
VirtualBox is a free to use tool to create virtual machines. It is also the top choice when it comes to installing Kali Linux. I personally use VirtualBox for the past several years.
Head to the VirtualBox website and download the latest version of VirtualBox and the also the VirtualBox Oracle VM VirtualBox Extension Pack.
Once you are done with that, install VirtualBox leaving everything as default. After that, install the VirtualBox Extension Pack. Now we are ready to Install Kali Linux 2020.4 on VirtualBox.
Install Kali Linux 2020.4
Before we can install Kali Linux, we have to download it.
Downloading Kali Linux 2020.4
Head over to the Kali Linux website and download the Kali Linux 64-bit VirtualBox Image. The advantage of this pre-configured image is that we don’t have to run through the initial installation process of Kali Linux. It also comes pre-loaded with all the necessary drivers we need to run Kali Linux on VirtualBox.
It makes the whole installation process way easier!
Importing Kali Linux 2020.4 to VirtualBox
Now we have everything that we need to install Kali Linux.
Open VirtualBox and click File → Import Appliance…
From here, choose the downloaded Kali-Linux-2020.4-vbox-amd64.ova file from your Downloads folder and click on Next.
Adjust the location where you want to store your Virtual Machine File if you don’t want to use the default location and click on Import. We are going to change things like CPU, RAM, etc later on.
Agree to the license agreement and wait for the import to finish.
Fine Tuning Kali Linux 2020.4
After the import is done, right-click your imported VM and select settings. Confirm any upcoming prompts from VirtualBox with yes, it might has to install some network drivers.
Changing the VM Name
In the General tab you can change the name to something less generic.
Adjusting Memory
Next click on the System tab and adjust the Base Memory. As long as you stay within the green area of the adjustment bar, you are fine. As a general rule of thumb, try not not use more than half of your host computer’s memory. So if you have 8GB RAM in your computer, assign 4GB to Kali Linux.
Adjusting Processors
Click on the Processor tab next. The same rule of thumb as with memory applies. Stay within the green area of the adjustment bar.
Everything else can stay as it is right now. Exit the Settings by pressing OK.
Starting Kali Linux 2020.4
Time to start our freshly imported Kali Linux 2020.4! Right-click the Kali VM and click on Start → Normal Start.
When you start Kali Linux for the first time, it might take a while for the initial boot up.
!In case Kali Linux is stuck in boot at the Kali Logo!
While writing this tutorial, I have encountered this problem myself. If Kali Linux 2020.4 is stuck at the Kali logo while booting, follow the steps below. This has to do with Windows Hyper-V feature.
This has worked for me:
Restart your computer afterwards. Then Kali should boot.
Some users have reported they also needed to run this command to make it work:
I suggest you try it with running the first one and reboot. If that doesn’t work, try the second one and reboot again.
Initial Login to Kali Linux
Now you are ready to login! The default login credentials are:
Username: kali
Password: kali
If you did everything right, you should be able to login and also be able to maximize your screen, as Guest Additions are already installed in this pre-configured image.
Next Steps
I won’t go over the next steps in this article as I have a complete dedicated article for that: The Top Things to do after Installing Kali Linux in 2021.
I highly suggest you follow at least the initial steps in this article, as I cover things like changing the default password and user and also show you my favorite Kali Linux tweaks.
Conclusion
I hope I could show you how to Install Kali Linux 2020.4 in an easy to follow way. Please check out the links below if you would like to stay up to date with my content!
Getting Kali distro environment on Windows for SecOps or DevOps
Today, I will be sharing an additional distro for Windows Subsystem for Linux (WSL) that targets SecOps more than DevOps and most likely will be my favourite distro that will be a permanent resident on my Windows.
Let me introduce to you, Kali Linux a Debian-derived linux distribution primarily for hacking and penetration testing. And probably one of the most advanced penetration testing distribution, ever.
This walk-through demonstrates on how you can enable the Windows Subsystem for Linux (WSL), maintain your linux distro environment and upgrade the linux distro instance to stay ahead. Let’s get started with command lines.
Getting Started with Kali on Windows Subsystem for Linux (WSL)
In this blog post, I will be documenting the basic steps in getting Bash and other common linux tools from Kali distro working on Windows 10 using Windows Subsystem for Linux (WSL) feature.
What is actually Windows Subsystem for Linux? In short, it is a Windows feature on Windows 10 that allows developers to run linux environment directly on Windows without deploying a virtual machine. That means you get to use Bash and many other tools that focus primarily on linux first to work on Windows.
Pre-requisite requirements
- Windows 10 Build 16215 or later
- Windows Server 1709 or later
Enable Windows Subsystem for Linux feature on Windows 10
To enable the Windows Subsystem for Linux Feature on Windows 10 and reboot the Windows 10 using PowerShell.
Note: A reboot of the Windows 10 operating system is required after enabling the Windows Subsystem for Linux feature
- Launch Windows PowerShell with elevated privileges
- Use the Enable-WindowsOptionalFeature PowerShell cmdlet to enable the feature
How to obtain Kali distro instance for Windows
Once you have verified that your current environment meets the pre-requisite requirements and you have enabled the Windows Subsystem for Linux feature.
Let’s get started with obtaining Kali distro instance with Windows Subsystem for Linux for Windows 10 or Windows Server.
Downloading Kali distro instance
In this example, we will use Invoke-WebRequest PowerShell cmdlet to download the linux distro application package to your home folder.
Installation for Windows 10
Natively, you can use Add-AppxPackage PowerShell cmdlet to add the linux distro application package to your Windows 10.
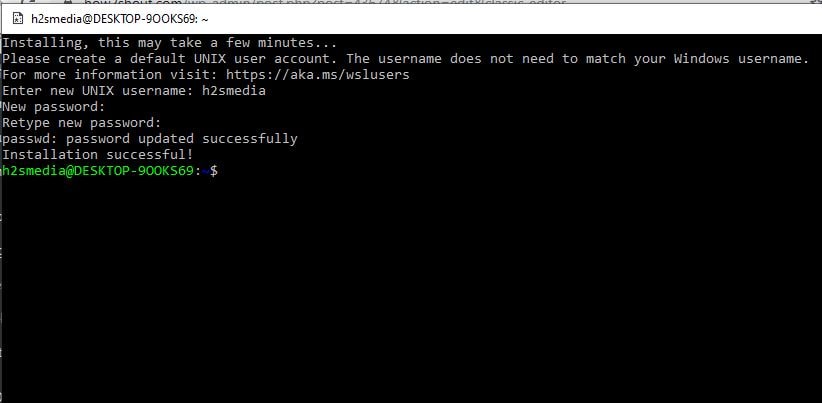
During your initial launch of Kali on Windows 10, you will be requested to configure your new UNIX username and password.
Note: This setup a normal non-administrative user account that will login by default when you launch the distro. The username and password does not require to be same as your Windows user account. To elevate privileges in the distro instance, use sudo and input your password. For more information, you are refer to this documentation here.
Installation for Windows Server
In this particular Kali distro package release, the process is slightly different from the other linux distro packages because it is packaged differently and you will immediately notice the differences in the compressed file content structure.
In order install into Windows Server, you will need to repeat the use of Rename-Item to rename the application package extension and execute Expand-Archive to uncompress the file process twice.
To start of on Windows Server, you will have use Rename-Item PowerShell cmdlet to rename the linux distro application package extension to a compressed file extension.
After the file has been renamed to a compressed file extension, you will use Expand-Archive PowerShell cmdlet to expand the compressed file to your temporary folder or
\AppData\Local\Temp\Kali user temporary folder location.
Next, you will have use Rename-Item PowerShell cmdlet to rename the DistroLauncher-Appx_1.1.4.0_x64.appx application package extension to a compressed file extension again and use Expand-Archive PowerShell cmdlet to expand the compressed file to your home folder or
\.wsl\distro\ custom home folder location.
After the file has been expanded to the destination, use the Start-Process PowerShell cmdlet to launch the executable to begin the initial configuration of the linux distro instance.
Once the kali.exe is running, the installation will begin and you will be requested to configure your new UNIX username and password.
Note: This setup a normal non-administrative user account that will login by default when you launch the distro. The username and password does not require to be same as your Windows user account. To elevate privileges in the distro instance, use sudo and input your password. For more information, you are refer to this documentation here.
How to update the Kali distro instance
When you switched into the linux distro for the first time, you will need to use the linux distro’s preferred package manager to update and upgrade those installed packages. This is because most of the linux distro are shipped with an empty/minimal package catalog.
For Debian-derived Kali Linux distribution, we will use apt update command to update the packages index and perform apt upgrade to upgrade those packages based on the up to date packages index. For more information about apt , you can refer to the documentation here.
Note: Microsoft does not maintain those linux distro and the linux distro instance running on Windows Subsystem for Linux are not maintained by Windows Updates.
How to validate Kali distro instance version
Because Kali Linux is a Debian-derived Linux distribution, you can check the Kali distro instance version, use the cat command on /etc/debian_version file.
By using cat command on /etc/debian_version file, you will get an output of the Kali release name.
If you are interested on the operating system release information, use the cat command on /etc/os-release file.
And you will obtain the the operating system release information as below.
How to perform an in-place upgrade of Kali
If you are still using Kali 2018.2 distro instance and wanted to test Kali 2018.3, you can use apt-get dist-upgrade command to upgrade your distro instance to Kali.
Note: At the time of this blog post publication, Kali Linux 2018.3 is the latest release.
Firstly, check your current sources list by using cat command on the /etc/apt/sources.list file.
The cat command will returns the current configured sources and validate the source list contains the following below.
Finally, perform an apt update to update the package lists followed by apt full-upgrade to install the packages and upgrade Kali older rolling version to Kali latest rolling version.
Once the upgrade has completed, check the Kali version.
You should get an output like below.
Next, you can check the release information.
And operating system release information should contains the followings below.
Conclusion
This definitely a lovely addition to Windows Subsystem for Linux (WSL) for those security folks out there.
Now, you can have a Kali Linux derived from Debian GNU/Linux operating system running on Windows Subsystem for Linux in Windows for hacking and penetration testing tool in your IT security arsenal.
If you find that this information useful, feel free to bookmark this or share it with your colleagues and friends.
References
Related Books
Categories: Blog
Updated: September 06, 2018
Share on
You May Also Enjoy
Troubleshooting Azure Virtual Desktop session host networking
I spent weeks and developed a Test-AzWvdRDBrokerLatency cmdlet to perform troubleshooting similar to psping from SysInternal.
Need an easier way to reboot or restart an Azure Application Gateway?
When your Azure Application Gateway Platform-as-a-Service (PaaS) has an issue and you need to reboot the AzApplicationGateway. I made a cmdlet instead.
How to reboot or restart an Azure Firewall?
When your Azure Firewall Platform-as-a-Service (PaaS) has an issue and you wish to reboot the AzFirewall. This is how to I did it with PowerShell.
Resolving Application Gateway frontend listener that is not listening
Have you encounter Azure Application Gateway listener stopped listening? How do you resolve such issue if no change in configuration had been made recently?
How to install Kali Linux on Windows 10 WSL
Windows 10 WSL (Windows Subsystem for Linux) is one of the amazing features from Microsoft implemented on Windows OS till now. With the help of it, we can install various mainstream Linux operating systems on our Windows 10 and Windows Server 2019. However, it would not be exactly like full-fledged, at least till now, because it runs using a compatibility layer to executes the Linux binary natively; thus, somewhat limited in terms of commands as compared to full-fledged Linux distros. However, WSL2 has been available for developers under Windows insider program to mitigate the limitations of WSL1, yet, not for common users.
Whatever, still WSL is enough to start learning Linux commands and other processes. Even the implementation of different Linux programs using a command line of WSL is possible. Moreover, if you want, the installation and access of the Linux GUI (Graphical user interface) on WSL can be done. Also see, how to use Linux GUI apps on WSL.
Today, here we will talk about the famous penetration testing and ethical hacking Linux distro that is Kali Linux. It is available on Windows store to install and run on Windows subsystem Linux. Hence, if you are new to WSL here are the steps to download and start using Kali Linux on Windows 10 subsystem for Linux.
Step 1: Install Windows subsystem for Linux
The installation of WSL on Windows 10 is quite simple:
- Go to Windows 10 search box.
- Type Turn Windows features off or on.
- Scroll down and find Windows Subsystem for Linux.
- Check the box given in front of it.
- Hit the OK button and wait for its installation.
- After that restart your PC.
For more information, you can see our previous guide on WSL installation along with screenshots.
Step 2: Download Kali Linux from Microsoft Store
Again type ‘Microsoft store’ in your Windows 10 search box, as it appears, click on it to run. On the left side of the store, a search icon is available, click on that and search for Kali Linux.
Now, click on the Get and then Install button to download and initiate Kali Linux on Windows 10.
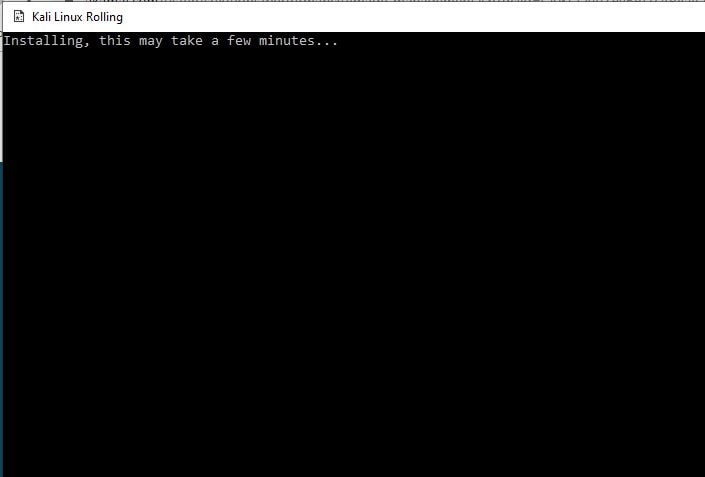
Step 3: Run Kali Linux and Setup root password
Open the Kali Linux WSL app from the programs of Windows 10 and wait for some times, as it initializing some other files required by it for proper working. Once that is completed, it will ask you to set a username and password to secure your WSL Kali. Just do that and now you can use the Kali to execute penetration testing commands and scripts.
You can switch to root use user by using sudo -i and your standard user password.