Connecting to a Wireless Network Through Linux CLI
The Kubernetes ecosystem is huge and quite complex, so it’s easy to forget about costs when trying out all of the exciting tools.
To avoid overspending on your Kubernetes cluster, definitely have a look at the free K8s cost monitoring tool from the automation platform CAST AI. You can view your costs in real time, allocate them, calculate burn rates for projects, spot anomalies or spikes, and get insightful reports you can share with your team.
Connect your cluster and start monitoring your K8s costs right away:
1. Overview
In this tutorial, we’ll describe how to connect a system to a wireless network using the command line from Linux. Even if they are command-line utilities, we’ll not consider nmcli, wpa_cli, or wifi_menu (from distributions like Arch Linux) because they may not be available in all systems.
We’ll begin with some preliminary steps before setting up the hardware and network interface. Then, the more insecure WEP wireless networks are presented (as they are easier to set up), followed by the more secure WPA/WPA2 networks. In the end, we’ll present some final steps to ensure that the process has been successful.
2. Preliminary Steps
There are three steps we need to undertake before setting up a wireless network. The first is that we have to know the name of our network interface. For that, let’s use the iwconfig command:
In the previous output, we see two interfaces: enp0s25 (which corresponds to an Ethernet connection without wireless extensions) and wlp3s0 (which is the network interface we’ll use).
After getting the interface name that we want to use, we need to activate it. In case it’s not already activated, we can use the ifconfig command:
To manage the network interfaces, we need super-user rights. Thus, the previous command and many of the following commands will be preceded by the sudo command.
Finally, we may also want to scan the surrounding wireless networks. If we already know the ESSID (Extended Service Set IDentifier), which is the network name, we can skip this step. Otherwise, we can scan with iwlist combined with the s mode and the name of the active network interface:
The use of grep is optional, but by using it, we can filter the dense output of iwlist. The more interesting content is the Address, the Quality and Signal level, the ESSID, and the wireless security type (under the IE section). For the following sections, we’ll assume a wireless network named WLAN_NAME with a password of WLAN_PASSWORD.
3. Connection to WEP Wireless Networks
The way we connect to a network depends on the network’s security. The WEP (Wired Equivalent Privacy) is a deprecated security algorithm for wireless networks. However, we can still find this type of network around.
The connection to these networks relies on the iwconfig command. If the network does not have a password, we can use:
However, if the network is protected, we need to specify the password, either in hexadecimal or ASCII format. The hexadecimal-format password is entered as:
The ASCII format requires to prepend the password with s: to indicate its format:
4. Connection to WPA/WPA2 Wireless Networks
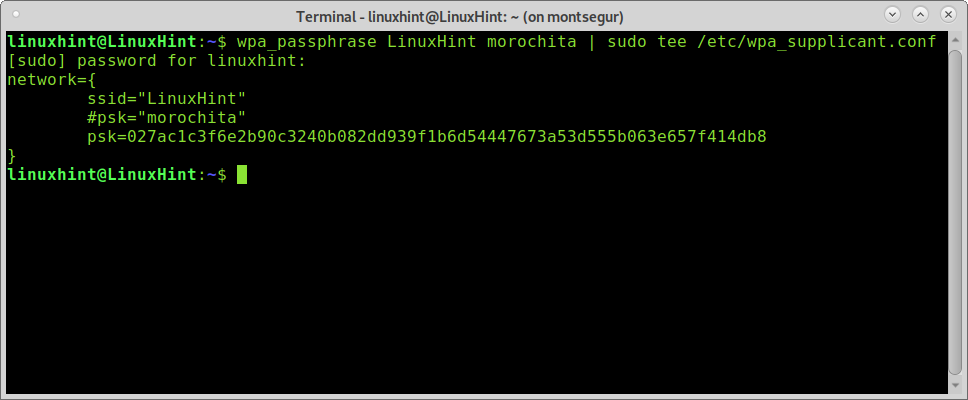
The newer WPA (Wi-Fi Protected Access) encryptions require a different connection process. The first step consists of storing the name of the wireless network and its password in a configuration file. To do so, let’s use the wpa_passphrase command with the WLAN_NAME and its WLAN_PASSWORD:
Although the file /etc/wpa_supplicant.conf usually stores this information, we can choose any other path. The functionality of the wpa_passphrase command is that it stores the name and password with a hash:
Once we have a file for a given wireless network, we need to know the drivers that our network interface can use. For that, we’ll run wpa_supplicant without any other arguments. This returns, among other information, the available drivers:
There are other drivers that may appear on other systems. However, the most common driver is wext, so it’s the one we’ll use. We should try different drivers if our systems don’t work with the generic ones.
Next, let’s can launch wpa_supplicant with the connection parameters to test that everything is working properly:
The -i flag serves to specify the network interface. The -c flag is used for the path of the configuration file. Finally, the -D flag precedes the driver’s name.
If the connection is successful, we can cancel the process (Ctrl+c) and execute it again with the -B flag to keep it running in the background:
5. Final Steps
After having connected our system to the wireless network, let’s run the dhclient command to assign a dynamic IP from the DHCP server:
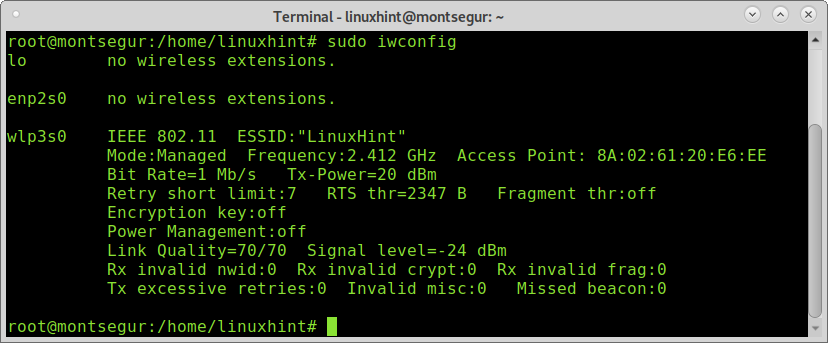
Finally, let’s run the iwconfig command to check if everything has been successful:
In the ESSID section, the wireless network name has replaced the off/any output from the call to iwconfig when there was no network connection.
6. Conclusion
In this article, we’ve presented how to connect to a wireless network through the Linux command line. We began by learning the commands to discover the name of our network interface and then activate it. Next, we discussed how to connect to both WEP and WPA/WPA2 networks. Finally, we included some closing commands to ensure that our connection is working.
3 Ways to Connect to WiFi from the Command Line on Debian
Before starting we need to know the essid or name of the network we want to connect to.
This tutorial shows how to use the Iwconfig command to scan available networks. Iwconfig is similar to the command ifconfig but to manage wireless interfaces. This command allows the user to edit the frequency or channel, to change the network device mode (Ad-hoc, Managed, Master, Repeater, Monitor, Secondary), to set an ESSID, etc.
NOTE: SSID/ESSID are network or router names or identifiers.
To check if the wifi card is properly detected first execute the command iwconfig as shown in the following screenshot:
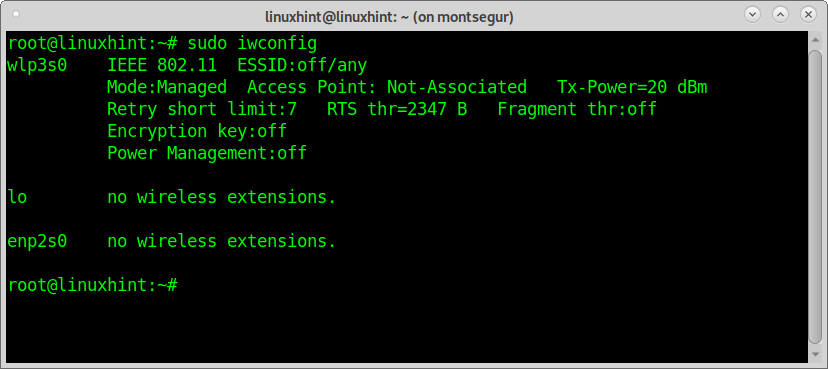
As you can see the output shows the loopback (lo) interface,the ethernet card (enp2s0) and the wifi card wlp3s0 which we’ll use to scan available networks using the command Iwlist.
The first line shows support for 802.11 standards and reveals the device isn’t connected. The second line shows the wifi card is in managed mode, not associated with an Access Point.
The third line includes Retry Short Limit which determines the number of attempts after a failed transmission and RTS Threshold defining the number of confirmations prior to a connection, Fragment Thr shows the maximum packet size your card will send.
Last two lines show there is no authentication and Power Management is off.
The command Iwlist provides additional information on wireless devices, including those which aren’t part of our computer. In this case we will scan available networks adding the argument scan. The output will display a list of Access Points with some information such as ESSID, signal quality, channel, mode, etc.
Run the following command to print a list of available networks:
NOTE: Replace wlp3s0 for your wireless card displayed when the command iwconfig was executed.
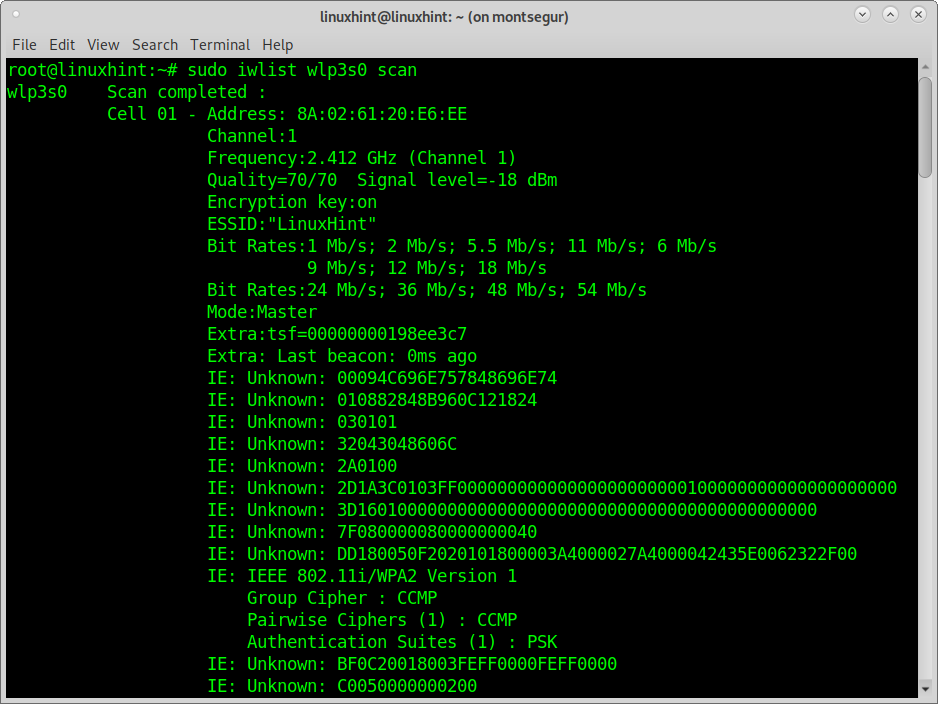
As you can see the output shows several networks including the LinuxHint Access Point, yet the format isn’t user friendly. If you only want to print the ESSID or names of available networks omitting the rest, run:
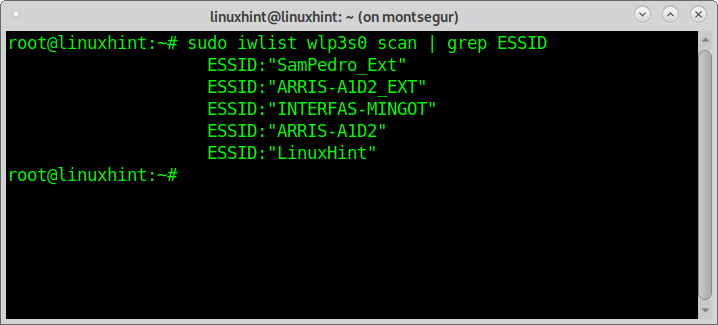
As you can see now the output is clear and limited to access point names (essid).
Connecting to wifi from the command line using nmcli:
NMCLI is a command line interface for the NetworkManager which can be used as an alternative to graphical managers. NMCLI allows the user to create, to edit and remove or to enable and disable connections as well as display device status.
The following syntax shows how to connect to the LinuxHint network (discovered with the previously used command Iwlist) by executing nmcli with the following arguments:
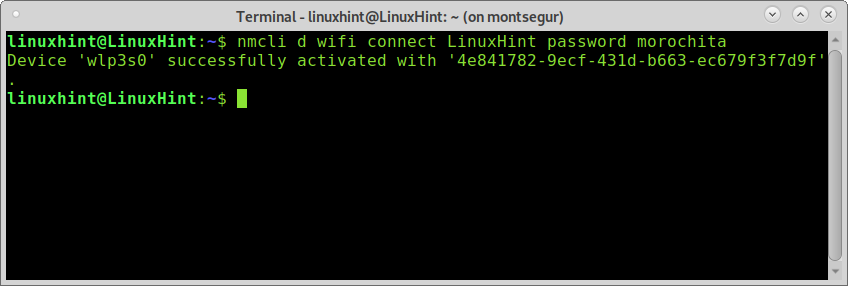
Where d wifi specifies the wireless device, connect LinuxHint specifies the essid and password morochita the password.
NOTE: Replace LinuxHint for your router ssid and morochita for your actual password.
You can get additional information on nmcli at https://linux.die.net/man/1/nmcli
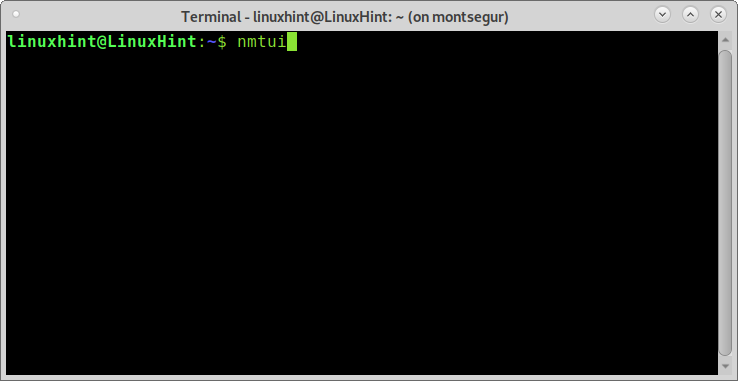
Connecting to wifi from the console using nmtui:
Nmtui is an interactive curses-based alternative to nmcli and Network Manager, on the console run:
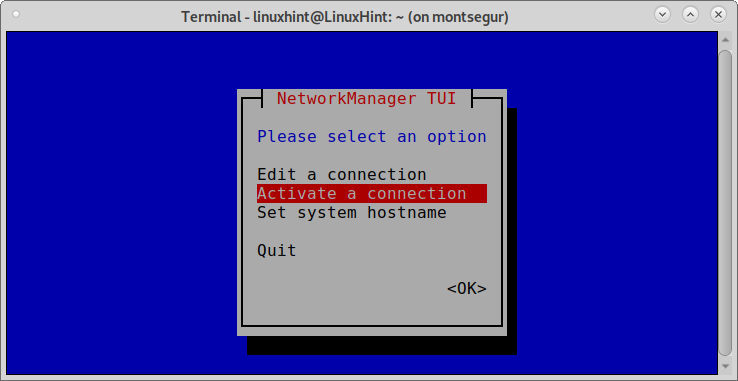
The first screen allows us to edit an existing connection, to activate a new connection and to edit our hostname. Choose the second option Activate a connection and press ENTER.
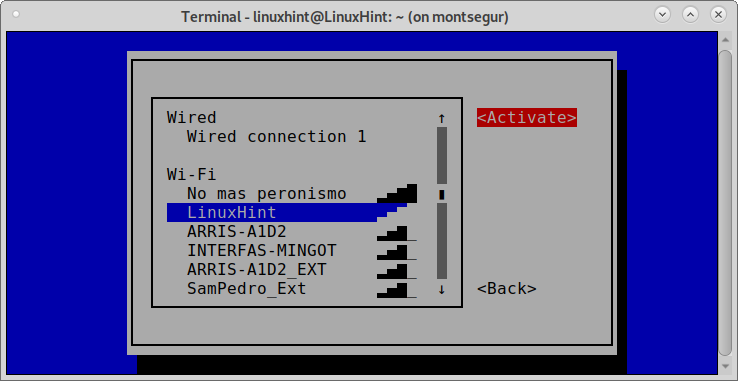
Nmtui will show both wired and wireless available networks. Select your Access Point and press ENTER.
Note: for this example the ESSID was changed from LinuxHint to LinuxH1nt to show the password request step.
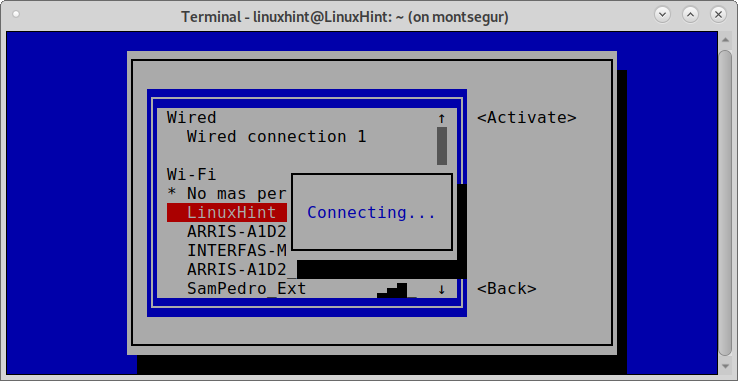
The next screen will ask for the password, fill it and press ENTER to continue.

And you’ll be connected.
You can get additional information on Nmtui on it’s man page at https://www.mankier.com/1/nmtui
Connect to wifi using wpa_supplicant:
Wpa_supplicant is a supplicant which allows the negotiation in the authentication process. Contrary to nmcli and nmtui, wpa_supplicant isn’t installed by default on Debian.
To install wpa_supplicant on Debian based systems run:

You need to edit the file /etc/wpa_supplicant.conf adding your Access Point essid and password, you can achieve it executing the following command:
NOTE: Replace LinuxHint for your essid and morochita for your actual password. You can use quotation marks for network names containing spaces.
Once wpa_supplicant.conf is edited, you can connect by executing the following command where -c specifies the configuration file and -i specifies the network interface:
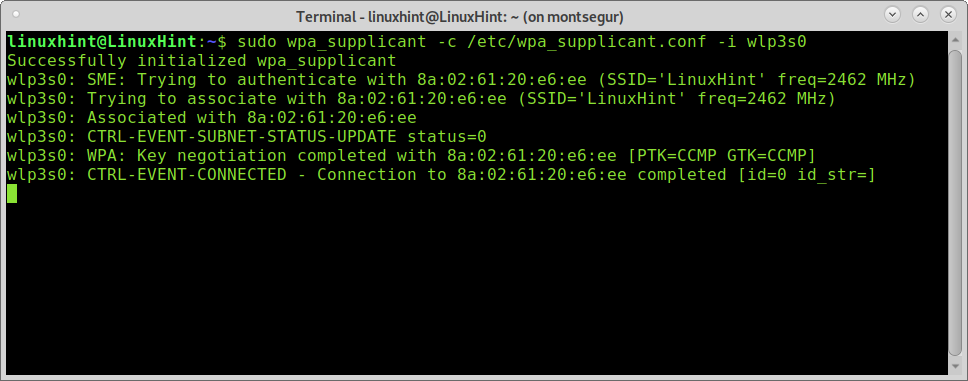
As you can see using iwconfig, now your wireless card is associated with the access point.
To connect, run the command dhclient as shown in the following screenshot to get a dynamic IP address:
NOTE: Replace wlp3s0 for your wireless card.
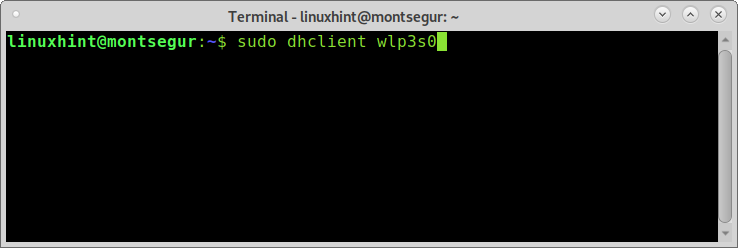
After executing dhclient, you should be connected to the internet through the associated access point.
You can get additional information on wpa_supplicant at https://linux.die.net/man/8/wpa_supplicant
I hope you found this tutorial useful to connect to wifi from the command line on Debian based systems. Keep following LinuxHint for more Linux tutorials and tips.
About the author
David Adams
David Adams is a System Admin and writer that is focused on open source technologies, security software, and computer systems.
How to connect to Wi-Fi from Terminal using wpa_supplicant on Void Linux
![]()
Yesterday I spent the evening installing and configuring Void Linux. I spent most of my time understanding how to connect to my Wi-Fi network from the terminal using wpa_supplicant. I had a lot of different problems then in the end, I was able to solve this problem. I have collected all the necessary steps to connect to Wi-Fi from the terminal using wpa_supplicant in this Medium blog post.
- The first thing we have to do is to check the name of our interface. Run this command:
In my case, “wlp1s0” is the name of the Wi-Fi interface.
- Now you have to create a configuration file to connect to Wi-Fi, execute the following command:
sudo touch /etc/wpa_supplicant/wpa_supplicant-wlp1s0.conf
- Now we have to add two lines to the file we have just created. Run the following command:
sudo vi /etc/wpa_supplicant/wpa_supplicant-wlp1s0.conf
- Write the following lines into the file and then save it:
- You have to add the information about your wireless network to the file we have just created. Run the following command:
wpa_passphrase SSID PASSWORD >> /etc/wpa_supplicant/wpa_supplicant-wlp1s0.conf
- Run this last command:
wpa_supplicant -B -i wlp1s0 -c /etc/wpa_supplicant/wpa_supplicant-wlp1s0.conf
MNorin.com
Блог про Linux, Bash и другие информационные технологии
Настройка WiFi из командной строки
Если вы пользуетесь какой-либо операционной системой на базе ядра linux, то скорее всего уже видели графические приложения для подключения к беспроводными сетям. Но если графического приложения еще нет, и для установки его требуется наличие сети, а для получения доступа к Интернету необходимо подключиться к беспроводной точке, то выход тогда только один — настройка WiFi из командной строки. Или еще пример — настроить сервер по ssh, чтобы он мог работать с беспроводным контроллером.
Установка необходимых пакетов
В первую очередь необходимо проверить, установлены ли пакет wpasupplicant и wireless-tools. Эти пакеты позволят вам подключаться к беспроводным сетям с WPA и WPA2 аутентификацией. В Debian и Ubuntu это делается командами
Если пакеты не установлены, то, возможно, поднять беспроводную сеть не получится, если у вас нет другого носителя. Пакеты устанавливаются следующей командой:
Кроме того, может понадобиться поставить микрокод (firmware) для устройства, установив соответствующий производителю пакет. Микрокод также называют прошивкой, но это не совсем правильно. Микрокод загружается в устройство перед началом работы с ним, а прошивка в устройстве находится постоянно. Для Intel это может быть, например, пакет firmware-iwlwifi из репозитория non-free. Микрокод часто лежит именно в этой ветке репозиториев. Либо это может быть пакет firmware-realtek, либо firmware-linux-free.
Проверка беспроводного контроллера
Перед тем, как пытаться подключаться, нужно убедиться, что система видит WiFi-контроллер и правильно его распознает, для просмотра списка устройств можно использовать команду lspci, в ее выводе должна быть строчка наподобие этой:
А в списке интерфейсов должен присутствовать соответствующий сетевой интерфейс, обычно это wlan0. Просмотреть список можно командой
Настройка WiFi из командной строки
Если устройство в системе найдено, можно переходить к настройке сети. Для начала просмотрим список доступных локальных сетей:
На экран будет выведен список доступных сетей в виде записей такого вида:
Из этой информации нам понадобится поле «ESSID», представляющее название точки доступа, в данном случае «wireless-net», а также строчки «IEEE 802.11i/WPA2 Version 1» и «Authentication Suites (1) : PSK». Эти два значения дают нам понимание того, что используется WPA2-PSK аутентификация.
Создаем файл /etc/wpa_supplicant/wpa_supplicant.conf:
И затем даем команду
После этого, если адрес не получен автоматически, вызываем DHCP-клиент:
После получения адреса Интернет может быть недоступен. Необходимо командой route проверить таблицы роутинга. Если шлюз по умолчанию отсутствует, то надо добавить его командой
Если адрес указан верно, то вы сможете получить доступ к Интернету. Но обычно DHCP-клиент получает шлюз по умолчанию автоматически
Изменение конфигурационных файлов
Теперь нам необходимо задать в конфигурационных файлах параметры беспроводной сети — название и ключ.