Your first look at JavaScript
Now it is time to get your hands dirty. This article provides a basic introduction to coding with JavaScript.
Introduction
In this article of the Web Standards Curriculum, we will cover the basics of JavaScript — how and where to use it, what problems to avoid, and general basics to get you started on your journey towards becoming a top-notch JavaScript developer.
What is JavaScript and how do you execute it?
JavaScript is a text-based language that does not need any conversion before being executed. Other languages like Java and C++ need to be compiled to be executable but JavaScript is executed instantly by a type of program that interprets the code called a parser (pretty much all web browsers contain a JavaScript parser).
To execute JavaScript in a browser you have two options — either put it inside a script element anywhere inside an HTML document, or put it inside an external JavaScript file (with a .js extension) and then reference that file inside the HTML document using an empty script element with a src attribute. We will look at both of these methods inside this section.
JavaScript does not have to stay inside browsers. To run JavaScript in console environment, please check out Mozilla Rhino; to run JavaScript in server environment, please check node.js.
Including your JavaScript inside your HTML document
The most basic inclusion of JavaScript inside your HTML page would look something like this:
You could put this anywhere inside your document and it would execute, but some places are definitely better than others — see the Where to put JavaScript section for guidance on this.
As there might be several different types of script available to use on web pages in the future, it makes sense to add the name of the script you are using as a MIME type:
Note: You will find script examples on the web that have a language="javascript" attribute. This is not part of any standard and is utterly useless; delete this where you can. This is a throwback to the bad old days, when VBScript was also in popular use on web pages. VBScript usage died however, as it only works in IE.
In the past there was a need to comment out JavaScript with an HTML comment to prevent browsers from showing the code as HTML. As this only applies to very old browsers you do not need to bother with that any longer. However, if you are using strict XHTML as your DOCTYPE, you need to enclose any JavaScript in a CDATA block to make it validate (do not worry about why — it is not really important at this stage in your learning):
However, for strict XHTML documents, it is much more sensible not to embed any JavaScript but instead keep it in an external document.
Linking to an external JavaScript file
In order to link to an external JavaScript (either on the same server or anywhere on the internet) all you have to do is to add a src attribute to your script element:
Upon meeting this element in a page, browsers will then load the file myscript.js and execute it. Any content inside the script element itself will be skipped when you provide a src attribute. The following example will load the file myscript.js and execute the code in it, but will not execute the alert inside the script element at all.
Keeping your code in an external JavaScript file makes a lot of sense:
- You can apply the same JavaScript functionality to several HTML documents and still keep maintenance easy: if there is a desired change in functionality all you need to do is change one single file.
- Your JavaScript will be cached by browsers. Caching means that browsers will take a copy of your JavaScript and store it on the computer of the visitors surfing on your site. The next time this user loads the same script it will not be taken from your server but from their own computers — thus loading much faster.
- You can easily find your script if you need to modify it, avoiding the need to scan through long HTML documents to find the place to fix a problem.
- Fixing errors becomes easier as a debugging tool or error console will tell you which file contains the error and reliably report the line number.
You can add as many JavaScript files as you want to a document, but there are several considerations to make before going down that route.
JavaScript and browser performance
Cutting up a lot of JavaScript into different files, each dealing with one task at a time, is a great idea to keep your functionality easy to maintain and allow for quick bug-fixing. For example, you could have several script blocks like these:
However, the development benefits of this are diminished by the effect this has on the performance of your document. This differs slightly from browser to browser but the worst-case scenario (which is sadly enough still the second most-used browser) does the following:
- Every time the browser encounters a script element, it will pause rendering (displaying) the document.
- It will then load the JavaScript file defined in the src attribute (if you use a script on another server you also have to wait until the browser finds that server).
- It then will execute the script before it goes on to accessing the next one.
All of this means that the display of your web site is slowed down until all of these steps happen for all the scripts you include. This can become annoying for your visitors.
One way around this is to use a backend script to create a single file from all the files you use. That way you have the benefit of keeping maintenance easy while simultaneously cutting down on delays to your web page display. There are several scripts like this on the web — one of them is written in PHP and available from Ed Eliot.
The delay in display also defines where you want to put your JavaScript in the document.
Where to put JavaScript
Technically you can put JavaScript anywhere in your document. The decision you have to make is to weigh performance against making it easy for developers to find your scripts and ensuring that your JavaScript enhancements work immediately for your visitors.
The classic best practice for placing scripts was in the head of the document:
This has the benefit of being a predictable location of scripts — developers know where to find them. It also has the benefit of ensuring that all JavaScript has been loaded and executed before the document is displayed.
The drawbacks are that your scripts delay the display of the document and that the script does not have access to the HTML in the document. You therefore need to delay the execution of any scripts that change the HTML of the document until the document has finished loading. This can be done with an onload handler or one of the various DOMready or contentAvailable solutions out there on the web — none of which are bullet-proof and most of which rely on browser-specific hacks.
Performance specialists have started to advocate placing your JavaScript at the end of the body instead:
This benefits your JavaScript by not delaying the display of the HTML and also means that any HTML you want to alter with JavaScript is already available.
You might confuse developers who maintain your code because this practice is not common yet. Another — more problematic — drawback is that the HTML becomes available before your JavaScript is loaded. While this is exactly what you want to achieve, it also means that visitors will start interacting with your interface before you get the chance to change it. Say for example you want to validate a form with JavaScript before it is submitted to the server — the form might get submitted before the script has been loaded. If you write your script as a mere enhancement (rather than relying on it) that is not a problem though — just an annoyance.
It is up to you to choose what fits the purpose of your website; you could even choose to do a mixture of both — put the scripts with very important functionality in the head , and call them in conjunction with the “nice-to-have” scripts at the end of the document.
Whatever you do, make sure that the order of your scripts is right, as browsers will load and parse them one after the other. This also brings us to another thing to consider when using JavaScript.
JavaScript security and the lack thereof
We cannot stress this enough. JavaScript is a wonderful language and can help you to build highly responsive and beautifully interactive web sites and applications, but where it falls down terribly is security. In short, there is no security model in JavaScript and you should not protect, encrypt, secure, or store anything vital or secret with it.
Every script on the page has the same rights — all of them can access each other, read out variables, access functions, and also override each other. If you have a function called init() in your first included script, and another one in your last included script, the original one will be overridden. We will come back to this problem in the best practices article of this course.
All of this would not be much of an issue if you never used other people’s scripts. However, seeing that most online advertising and statistics-tracking is done with JavaScript this will not be the case — you will use third party scripts all the time.
Scripts can also read cookies; using the prototype of a function you can override any native JavaScript function. Lastly, JavaScript can easily be turned off so you can forget about JavaScript protection being a good security measure.
JavaScript is always readily available for reading and analyzing by other developers. Of course you can pack (remove all unnecessary whitespace) and obfuscate (use random variable and function names) your scripts, but even those can be reverse-engineered; in this case the only person you stop from using your code easily is yourself. The availability of the source code and the ability to read and analyze it is possibility the main factor for the success of JavaScript — for years we learned by peeking at other people’s solutions. Nowadays this is luckily over as there are good books and tutorials available.
Whereas packing and obfuscation are useless as security measures, they are often done on medium and large scripts before the code is put live on the web as part of the publication process. This helps to cut down on the amount of bandwidth required to serve the site to its users. Saving a few bytes here and there may not seem significant on your blog about kittens, but it can add up to massive savings when you are dealing with a site with usage figures like those of google.com.
Techniques to avoid
The biggest problem with learning JavaScript is that there is a massive amount of outdated and possibly dangerous information out there. This is especially frustrating as a lot of this information is very well presented and gives a lot of beginners a “quick win” feeling of knowing JavaScript by copying and pasting some ready-made code.
As the environment JavaScript is being applied to is very much unknown (users can have any setup) and we do not know what decisions led to code we find on the web being created in a particular way, we should not point fingers at solutions. However, the following ideas are a thing of the past and you should only use them as a very last resort if you need them to support really old, bad browsers:
Link to CSS and JavaScript in an HTML File
The purpose of this tutorial is to teach you how to link to CSS and JavaScript files within an HTML file. It is possible to write CSS and JavaScript directly inside an HTML document, but it is generally best to keep these three languages in their own separate files.
Contents
- Directory and File Structure
- HTML
- CSS
- JavaScript
1. Directory and File Structure
It is a good idea to keep your HTML, CSS, and JavaScript files in separate directories. Create a directory for your project called css-and-js . Inside this directory, create three additional directories. Call them html , css , and javascript .
Inside your html directory, create a file called css-and-js.html . Inside your css directory, create a file called styles.css . And inside your javascript directory, create a file called script.js .
2. HTML
In order to link to your CSS and JavaScript files, you will need an HTML document within which to work. Open css-and-js.html and enter the following HTML:
Be sure to save your work any time you add code to your files. In the next two sections, we will go over what you need to add to your HTML document in order to link to your CSS and JavaScript.
3. CSS
First, you will need to add something in the body of your HTML to apply styling to. On the next line after the opening <body> tag, indent and add the following:
As it stands, this text will appear in the color defined as the root color in the browser’s default stylesheet – usually black. In order to change the color of the text, open your styles.css file and add:
The final step in this section is to link to the CSS file inside your HTML document. Enter the following in the <head> section on the line after the closing </title> tag:
The <link> element must be placed in the <head> section of the document. Notice that the <link> element is an empty element, so it does not need a closing tag.
The rel attribute defines the relationship between the resource and the HTML document. The href attribute points to your CSS file.
Since the file is located in another directory, you must specify the path by going up one directory using two dots ( .. ), followed by a slash ( / ), the directory your CSS file is in ( css ), another slash, and then your CSS file name ( styles.css ): href=‘../css/styles.css’ .
This is what your HTML document should look like so far:
4. JavaScript
Next, you will need to add some code to your JavaScript file. Open script.js and add:
Save your work and navigate back to your HTML document. The final step is to link to the JavaScript file inside your HTML document. Enter the following in the <body> section on the line after the <h1> element:
It is considered the best practice to place the <script> element in the <body> section just before the closing </body> tag.
The src attribute points to your JavaScript file.
Since the JavaScript file is located in another directory, you must specify the path in the src attribute: src=’../javascript/script.js’ .
That’s the last bit of code you will need to enter. This is what your HTML document should look like:
Be sure to save your work in each of your three files. Now it’s time to see if the links work. Open your css-and-js.html file in the browser of your choice. When you open the file in your browser, you should first encounter an alert box with the message you wrote in your JavaScript file. After clicking OK, the text you entered in the <body> of your HTML should appear red.
If the alert box does not appear or if the <body> text is not red, go back through the steps in this tutorial to ensure everything is entered exactly as shown here.
Congratulations! You’ve now linked to CSS and JavaScript files within an HTML document.
Правильно подключаем Javascript в HTML
Javascript (часто можно увидеть сокращенную для написания версию JS) это язык программирования, который очень часто применяется в web-разработке. В этой статье мы расскажем, как подключить javascript к html документу. Сделать это можно двумя способами: встроить js-код непосредственно в сам html файл, так и с помощью подключения внешнего файла javascript
Первый способ: вставляем js-код прямо в html
Вставить javascript-код можно просто добавив его в любое место вашей html страницы, внутри тега <script>
Например, вот так может выглядеть ваша html-страница с подключенным js-кодом:
Вот мы и вставили js-код прямо в html файл. Но такое решение приемлемо, когда вы вставляете небольшой код, который нужно выполнить именно на этой странице. Тогда он не будет сильно тормозить загрузку страницы. Но лучше всего прописывать js-код в отдельном файле, а затем подключать его в html.
Второй способ: подключаем внешний файл
У этого метода есть ряд преимуществ.
- Разделение файлов упрощает дальнейшую работу с ними. Представьте себе, когда у вас несколько тысяч строк js-кода, очень легко во всем этом потеряться.
- Файлы js можно закешировать и тогда ваш сайт будет грузиться быстрее.
- Вы можете загружать js-код только после того, как вся ваша верстка прогрузится.
Давайте предположим, что у вас вот такая структура:
Тогда, чтобы подключить js файл script.js вам нужно прописать в html следующее:
Выглядеть это будет вот так:
Если же у вас немного другая структура или вам нужно подключить js файл в html документе, который не находится в корне, а лежит, к примеру в папке templates, то используйте символы «./» чтобы задать вложенность.
Для наглядности, предположим у вас такая структура:
Тогда путь к файлу script.js из contact.html будет такой:
Вот так можно подключать js к html файлам.
Кстати, обратите внимание, что и в первом и во втором способе можно не указывать type=»text/javascript» для тега script. Это уже необязательно.
Знакомство с JavaScript. Подключение к странице

JavaScript (сокращённо JS) – это язык программирования , который изначально был придуман для браузера, чтобы придать страницам интерактивность и динамичность .
Программы написанные на JavaScript называются сценариями или скриптами . Добавление их на страницу выполняется через тег <script> . При этом их можно как непосредственно вставлять на веб-страницу, так и размещать в отдельном файле. Каждый браузер имеет интерпретатор JavaScript, с помощью которого он выполняет этот код.
Потребность в создании языка программирования для веб-браузера возникла в 90-е годы. В это время на веб-страницах хотелось делать уже намного больше, чем просто выводить статичный контент.
Данный язык изначально был создан Бренданом Айком в 1995 году для браузера Netscape и назывался он Mocha. Но после ряда переименований он обрёл окончательное имя – JavaScript . В начале он имел очень маленькую функциональность и в основном использовался для добавления на страницу интерактивности. Но со временем язык стал развиваться и позволять делать всё больше и больше.
В 1996 году язык JavaScript был стандартизован компанией Ecma, которая занимается стандартизацией информационных и коммуникационных технологий. Сама спецификация была названа ECMAScript или сокращённо ES. По сути, JavaScript является реализацией спецификации ECMAScript. Новые версии ECMAScript выходят ежегодно и добавляют в язык новые возможности.
- ECMAScript 1 – июнь 1997;
- ECMAScript 2 – июнь 1998;
- ECMAScript 3 – декабрь 1999;
- ECMAScript 5 – декабрь 2009;
- ECMAScript 5.1 – июнь 2011;
- ECMAScript 2015 (ES2015, ECMAScript 6, ES6) – июнь 2015;
- ECMAScript 2016 (ES2016, ECMAScript 7, ES7) – июнь 2016;
- ECMAScript 2017 (ES2017, ECMAScript 8, ES8) – июнь 2017;
- ECMAScript 2018 (ES2018, ECMAScript 9, ES9) – июнь 2018;
- ECMAScript 2019 (ES2019, ECMAScript 10, ES10) – июнь 2019;
- ECMAScript 2020 (ES2020, ECMAScript 11, ES11) – июнь 2020;
- ECMAScript 2021 (ES2021, ECMAScript 12, ES12) – июнь 2021.
ECMAScript – это стандарт JavaScript, который описывает полностью все функции JavaScript. Браузеры, Node.js применяют это стандарт и реализуют его поддержку.
Начиная с версии ES6 язык значительно преобразился, в нём появился новый синтаксис для написания сложных приложений (классы, модули, итераторы, циклы, генераторы в стиле Python, стрелочные функции, ключевые слова let , const и многое другое). С выходом версии ES6 весь код JavaScript принято делить на modern (современный) и классический (до ES6) .
В настоящее время JavaScript применяется не только в веб-браузере. С помощью него можно писать десктопные и мобильные приложения, использовать его на сервере (Node.js).
Язык JavaScript, как и другие языки программирования, имеет некоторые свои особенности. Среди основных – слабая типизация и динамическое приведение типов .
JavaScript – это не Java , хоть он и унаследовал некоторые синтаксические конструкции этого языка. Такое название данный язык получил в силу некоторых исторических причин. Одной из них являлось то, что изначально в качестве языка, который должен был быть доступным в браузере, хотели сделать Java . Но впоследствии компания Netscape отказалась от этой мысли, из-за того, что Java был слишком большим и сложным.
Виды браузеров и браузерных движков
В настоящее время существует большое количество браузеров . Любой современный браузер основывается на движке . Движок – это часть браузера, которая преобразует HTML, CSS, JavaScript, изображения и другую информацию в интерактивную картинку .
Основные современные движки и браузеры, которые их используют:
- Blink (Google Chrome, Opera, Яндекс.Браузер и др.);
- Gecko (Mozilla Firefox, Waterfox и др);
- WebKit (Safari, Maxthon, Vivaldi и др.);
- EdgeHTML (Microsoft Edge).
Подключение JavaScript к странице
Добавление JavaScript на страницу выполняется с помощью тега <script> .
Первый способ – это вставка кода непосредственно на страницу . Выполняется это между открывающим и закрывающим тегом <script> .
Второй способ заключается в использовании отдельного файла с расширением js . В данный файл необходимо поместить код JavaScript, а затем подключить его к странице с помощью <script> . Путь к файлу задаётся с помощью атрибута src .
С помощью этого способа можно подключить JavaScript к большому количеству HTML страниц. Это позволяет при изменении кода не править его на каждой странице.
<script> можно поместить внутрь любого элемента, но рекомендуется непосредственно в <head> или <body> :
Если подключить скрипт с помощью атрибута src и дополнительно ещё указать некоторый код между открывающим и закрывающим тегом script , то код, который вы указали непосредственно, будет проигнорирован, т.е. он не выполнится.
Как выполняются скрипты на странице?
Когда браузер читает страницу и встречает на ней script , он останавливает дальнейшую загрузку страницы и выполняет, подключенный с помощью этого элемента JavaScript. После чего приступает к дальнейшей загрузке страницы:
В этом примере используются 2 метода:
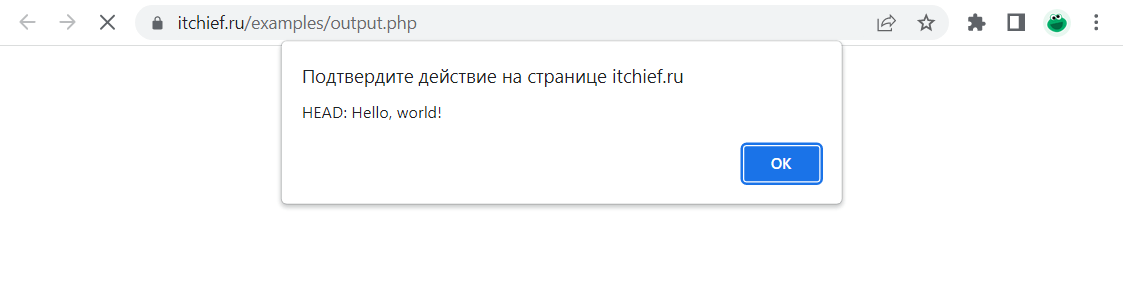
- alert() – для вывода на экран предупреждения с кнопкой «ОК»; данное предупреждение приостанавливает дальнейшую загрузку страницу;
- document.write() – для вывода текста в текущее место HTML, если страница ещё не загрузилась.
При загрузке этого документа, когда браузер встретит alert() , он выведет на экран предупреждение «HEAD: Hello, world!». Кроме этого, он приостановит дальнейшую загрузку страницы , пока пользователь не нажмёт на кнопку «ОК».
На этом этапе загрузки страницы:
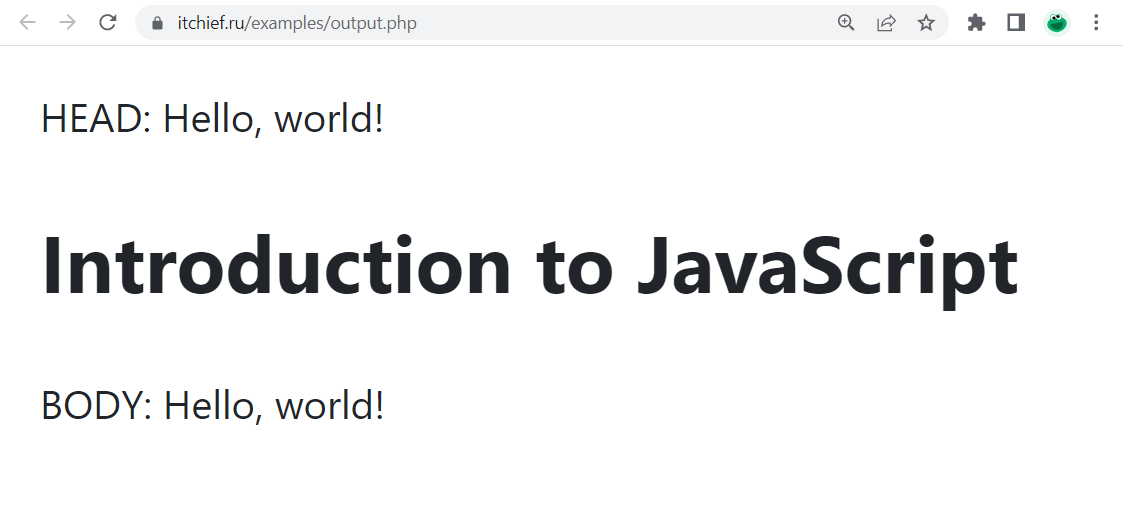
После нажатия на кнопку «ОК» браузер продолжит загрузку страницы. Он выполнит метод document.write() , который выведет значение, указанное в скобках сразу после открывающего тега <body> . Затем тег <h1> и в завершении выполнит метод document.write() , который выведет текст «BODY: Hello, world!».
async и defer
До появления этих атрибутов у нас не было возможности загружать JavaScript в фоне. Поэтому многие сайты, в которых JavaScript не использовался для формирования первоначальной структуры страницы, подключали его в самом конце, т.е. перед закрывающим тегом <body> . В основном это использовалось для того, чтобы пользователь мог как можно быстрее увидеть страницу и начать с ней взаимодействовать. А так как такой код взаимодействует с уже загруженной страницей, его в принципе и вставлять выше не имеет смысла.
async – атрибут для <script> , который используется для того, чтобы указать браузеру на то, что этот скрипт необходимо загрузить асинхронно, т.е. не останавливая основной поток чтения страницы. После загрузка скрипта, браузер сразу же его выполнит.
defer – это ещё один атрибут для <script> , похожий на async . Он также указывает, что скрипт необходимо загрузить в фоне. Но в отличие от async , он будет выполнен после загрузки страницы, а точнее DOM. Кроме этого, стоит отметить, что скрипты, заданные с атрибутом async , выполняются перед вызовом события DOMContentLoaded .
Ещё одно отличие defer от async в том, что defer сохраняет очередность их выполнения:
Т.е. вне зависимости от того какой скрипт загрузится быстрее, они всё равно будут выполнены браузером в том порядке, в котором они расположены в коде. В данном примере, сначала выполнится «script-1.js», а затем «script-2.js» даже если второй загрузится быстрее, чем первый.
Если для <script> одновременно указать два атрибута, т.е. сразу async и defer , то будет работать только async .
Атрибуты async и defer можно использовать только для скриптов, подключаемых на страницу с использованием src .