What Is a Slug in InDesign? a Simple Guide
Adobe InDesign is a powerful tool for designing and laying out print and digital media. It offers numerous features to streamline and enhance the design process, and one such feature is the “slug.”
The slug area in InDesign serves as a space for including important information about the document that is relevant to the production process but not visible in the final output.
In this article, we will explore the concept of a slug in InDesign, its purpose, and how to effectively use it in your design projects.
20,000+ InDesign Templates & More With Unlimited Downloads
Discover thousands of Adobe InDesign templates for your next project with an Envato Elements membership. It starts at $16 per month, and gives you unlimited access to a growing library of over 2,000,000 graphic templates, design assets, themes, photos, and more.
CV & Resume Templates
Stand Out in Style
Annual Reports
For All Businesses
Proposal Templates
Clean & Simple

Flyer Designs
Promote an Event

Brochure Templates
Varied Formats

Magazine Layouts
Modern & Stylish
Understanding Slugs in InDesign
A slug is an area outside the printable area of a page that contains additional information about the document, such as instructions, notes, or job details. It is typically used in a professional print production environment, where it serves as a space for communication between the designer and the printer or other collaborators.
The slug area is not visible in the final printed or exported version of the document, as it is automatically trimmed off during the printing or exporting process. However, it is an essential part of the design workflow, as it allows designers to include important details that help ensure a smooth and accurate production process.
Creating and Using Slugs in InDesign
To create and use a slug in InDesign, follow these steps:
- Create a new document or open an existing one: If you are starting a new project, go to File > New > Document or press Ctrl/Cmd + N. If you are working with an existing document, open it in InDesign.
- Set up the slug area: In the New Document or Document Setup dialog box, you will see fields for entering the dimensions of the slug area. Enter the desired width and height for the slug, and specify its position relative to the page edges. If you want the slug to appear on all sides of the page, check the “Make slug area uniform” option.
- Add content to the slug area: Once the slug area is set up, you can add text, graphics, or other elements to it using the standard InDesign tools. Remember that the content in the slug area will not be visible in the final output, so use it for information that is relevant only to the production process.
- Export or print the document with the slug: When you are ready to export or print your document, go to File > Print or File > Export, depending on your desired output format. In the Print or Export dialog box, make sure the “Include slug area” option is selected. This will ensure that the slug area is included in the output, allowing the printer or other collaborators to access the information contained within it.
Best Practices for Using Slugs
When using slugs in InDesign, consider the following best practices:
- Keep it concise: The slug area should contain only the most essential information for the production process. Avoid including unnecessary details that might clutter the slug and make it difficult to read.
- Use clear formatting: Format the text and other elements in the slug area clearly and legibly, so that the information is easily accessible to the printer or other collaborators.
- Update the slug as needed: As your project evolves, make sure to update the information in the slug area to reflect any changes in the production process or job details.
Conclusion
The slug feature in Adobe InDesign is a valuable tool for designers working in a professional print production environment. By understanding the purpose of a slug and how to use it effectively, you can improve communication between you and your printer or collaborators, ensuring a smooth and accurate production process.
In summary, the slug area in InDesign serves as a space for including important information about the document that is relevant to the production process but not visible in the final output. By following the steps outlined above for creating and using slugs, as well as adhering to best practices, you can leverage this feature to enhance your design workflow and create professional, high-quality documents.
By mastering the use of slugs in your InDesign projects, you can ensure clear communication between all parties involved in the production process, ultimately leading to a smoother and more efficient workflow. Embrace the power of slugs in InDesign, and elevate your design projects to new heights of professionalism and accuracy.
InDesign Templates
Get started using InDesign, compare it to other tools, and find the best InDesign templates to get a professional layout project started quickly!
Printer’s marks and bleeds
When you prepare a document for printing, a number of marks are needed to help the printer determine where to trim the paper, align separation films when producing proofs, measure film for correct calibration and dot density, and so on. Selecting any page-mark option expands the page boundaries to accommodate printer’s marks, bleed (the parts of text or objects that extend past the page boundary to account for slight inaccuracy when trimming), or slug area (an area outside the page and bleed that contains printer instructions or job sign-off information).
If you are setting crop marks and want the artwork to contain a bleed or slug area, make sure that you extend the artwork past the crop marks to accommodate the bleed or slug. Also make sure that your media size is large enough to contain the page and any printer’s marks, bleeds, or the slug area. If a document doesn’t fit the media, you can control where items are clipped by using the Page Position option in the Setup area of the Print dialog box.
If you select the Crop Marks option, fold marks are printed as solid lines when spreads are printed.
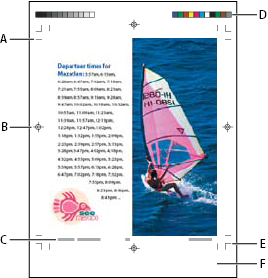
A. Crop marks B. Registration mark C. Page information D. Color bars E. Bleed marks F. Slug area
Adding Client Notes in PDFs From InDesign Using the Slug Area
The slug area in InDesign is one of the most underutilized and misunderstood features in the program. It’s not a particularly complex feature, it’s just that a lot of people don’t understand how to use it in their particular workflow.
What is a slug?
Let me first begin by saying that the term “slug” has many meanings within the printing industry. In traditional typesetting, it refers to a piece of lead used to add spacing between paragraphs. In the newspaper industry, it’s a term that refers to an article. Over the course of my career, I’ve heard many more uses of the term as well.
In InDesign however, the slug refers to an area outside of the boundaries of the document page that can be used for any number of things including job information, notes, and agency logos just to name a few. There are no rigid rules for what you can or can’t put in the slug area. In this article, we’ll focus on how to make the slug useful for conveying information to a client.
Defining a Slug in InDesign
Unless you’re looking for it, you may not even know where to define a slug in InDesign because it’s found in a somewhat inconspicuous location in the New Document dialog box. When you choose File > New Document, you’ll recognize the standard settings for page size, margins, etc. If you look towards the bottom of the dialog box however, you’ll see an area called Bleed and Slug. If you click the disclosure triangle in that section, it will show you the values that can be defined for both bleed and slug in your document.
For the slug values, you can set a slug to appear on the top, bottom, left, and right sides of a page in a non-facing page document, and top, bottom, inside, and outside in a facing-page document. The inside value is a bit deceiving because for a facing-page document, the inside slug can only appear on the first and last pages of a document due to the spine. Regardless, if you turn the preview on in the New Document dialog box, you’ll be able to see how the slug will appear on your document. The size is up to you and your purpose for the slug. For this example an outside slug was defined with a value of 2 inches.

This creates an area on the outside of each page of the document where any information can be added.

If you need to add a slug to an existing document, choose File > Document Setup, and define the desired slug value to add it to that document after the fact.
Adding Information to the Slug
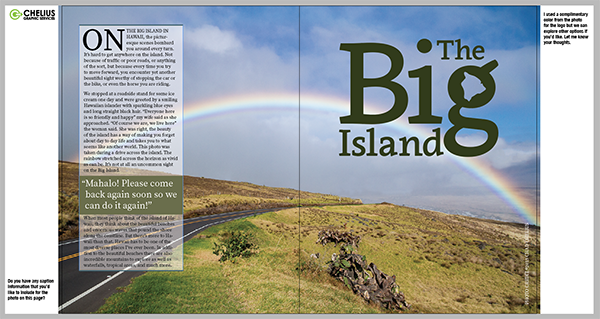
As a designer, you may need to convey or obtain information about the project from the client. Doing so verbally over the phone can sometime be a challenge. But putting this information in the slug allows both the designer and the client to see where questions or direction is needed. There’s no trick to adding information in the slug area, you can use any of the tools you normally do. Text, graphics, and native InDesign objects are all fair play! In the figure below, a logo and notes have been added in the slug area asking the client questions about the project.

Viewing the Slug Area
In Normal view, the slug area is clearly visible. However, if you switch to preview mode, it will hide the slug area and only display what will actually print in the document. If you click and hold on the preview button at the bottom of the Tools panel, you’ll notice a couple of additional views that are helpful when viewing a project.
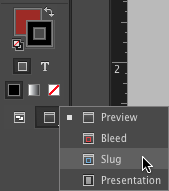
Bleed mode displays not only the artwork that will appear in the final product but also the bleed area that is defined in the document. Slug mode shows you the artwork that will appear in the final product along with the slug area defined in the document. This mode is helpful when you want to see what will actually print as well as the slug area, so you can continue to add information or modify information in the slug area. Once you choose the slug option, it will become the default preview mode when you click the preview button.
Printing and Exporting the Slug area
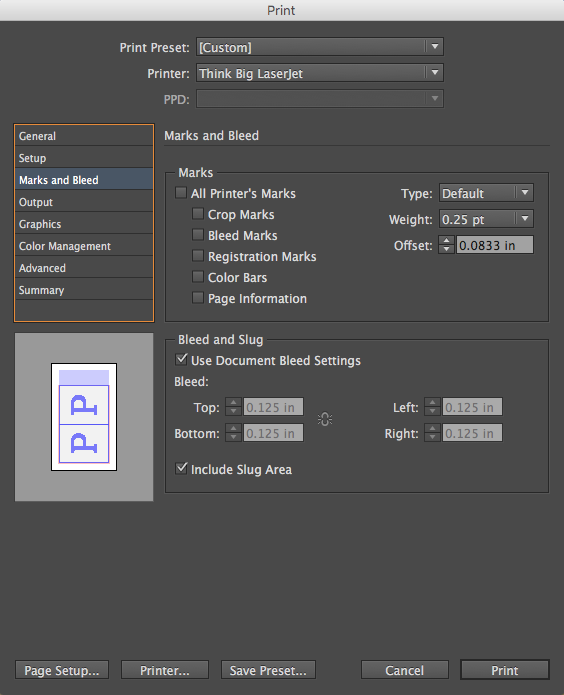
At some point you’ll want to include slug area information when you print to a desktop printer or when you export to a PDF file. Both of these output methods include an option for including the slug area. In the Print dialog box, you’ll find this option in the Marks and Bleed options. You’ll see a check box at the bottom of the dialog box to Include Slug Area. The preview area in the lower-left corner of the dialog box will show you the additional area that will be included when you print, so you’ll need to either scale down your print output or print on a larger piece of paper to fit the slug area.
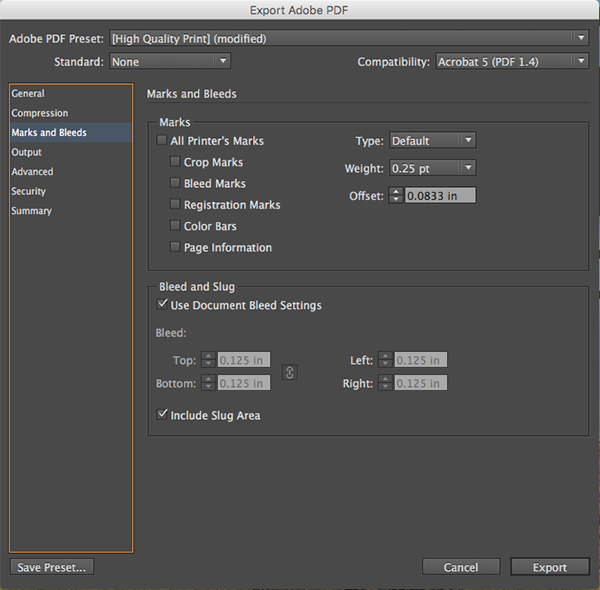
When Exporting to a PDF (Print), you’ll see the same check box in the Marks and Bleeds section of the Export Adobe PDF dialog box that allows you to include the slug area in the exported PDF file. Naturally, this will increase the page size of the PDF file, and it will also include any added slug information in the PDF as well.
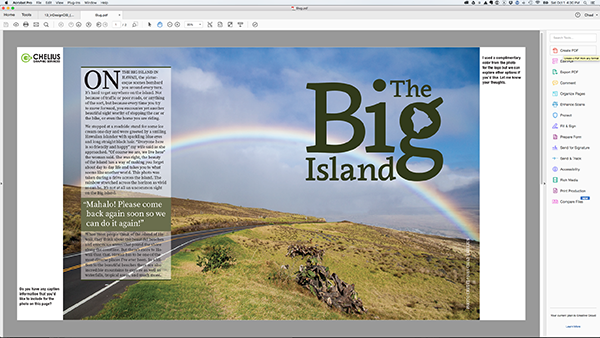
The final PDF opened in Adobe Acrobat.
Using the slug is a great way to convey notes and other information to a client, but you can adapt the slug for any number of uses and tailor it to your workflow. Once you try it, you’ll discover numerous ways that you can take advantage of InDesign’s slug area to fit your specific needs.
How have you used the slug area in your projects? Let us know in the comments!
What is Slug in Adobe InDesign?
Despite being a modern page layout application, InDesign is still inevitably filled with jargon from the world of typesetting – even when the terms don’t make a lot of sense in the current usage. This can sometimes make learning InDesign a bit more confusing than it needs to be, but there’s arguably a certain charm to it.
Table of Contents
Key Takeaways
- The slug, also known as slug area, is a printable section around the outer edges of an InDesign document.
- The slug is used for a range of purposes including registration marks, color sample bars, die-cut information, and sometimes for giving instructions to the printing press operator.
- Always make sure you consult your printer and follow their guidelines for the slug area, or you may spoil your print.
- Most print projects will never require the use of the slug area.
What is Slug in InDesign?
For reasons that are beyond my linguistic powers, the term ‘slug’ is surprisingly common in the world of typesetting and printing.
Outside of InDesign, it can refer to either a story in a newspaper, a piece of lead used to insert spaces between paragraphs in an old-style printing press, a single piece of printing lead containing an entire line of text, or even part of a website address.
When used in a modern document printing workflow, slug refers to an area at the extreme outer edges of an InDesign print document.
The slug area gets printed, but it is cut away during the page trimming process along with the bleed area, leaving the document at its final dimensions, also known as the document’s ‘trim size.’ So no, it’s not the same as bleed in InDesign.
Setting the Slug Area Dimensions in InDesign
If you want to add a slug area to your InDesign document, the simplest way to do so is to set the appropriate dimensions while creating a new document.
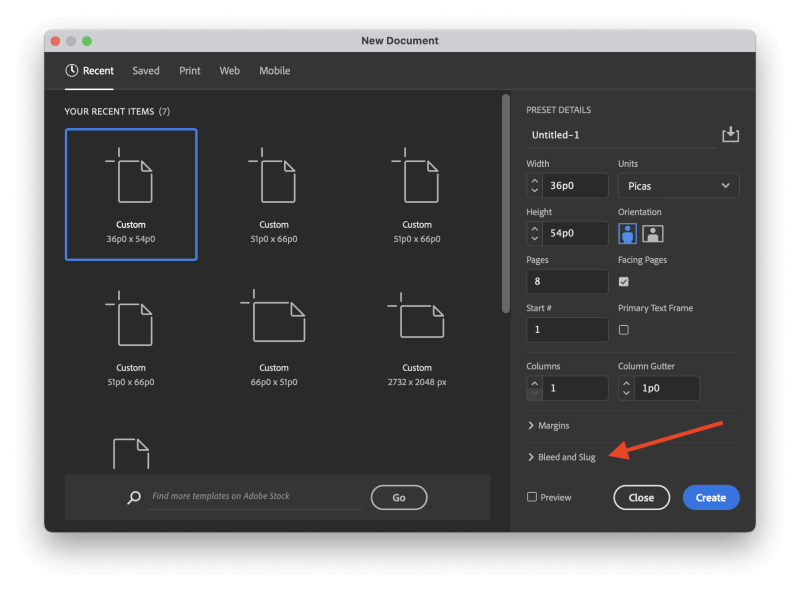
In the New Document window, look closely, and you’ll spot the expandable section labeled Bleed and Slug. Click the title to expand the section completely, and you’ll see a few text input fields that allow you to specify the size of the slug area for your new document.
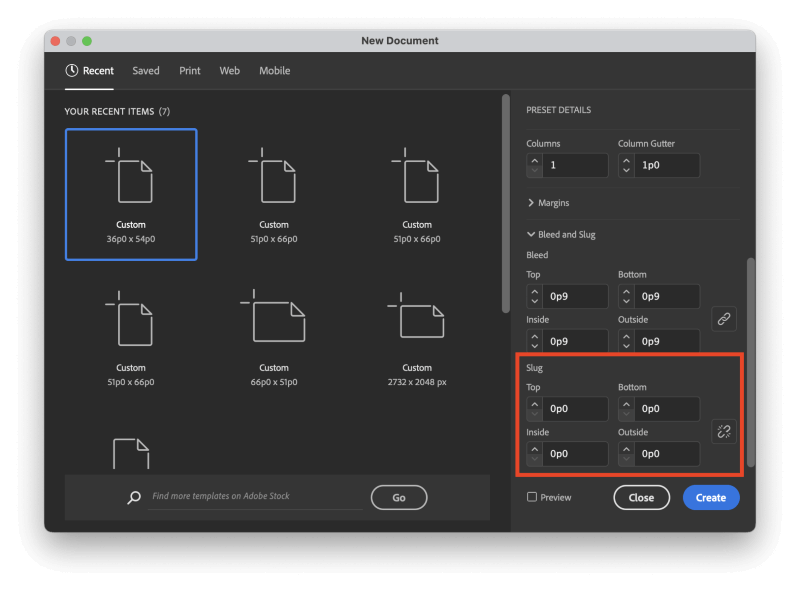
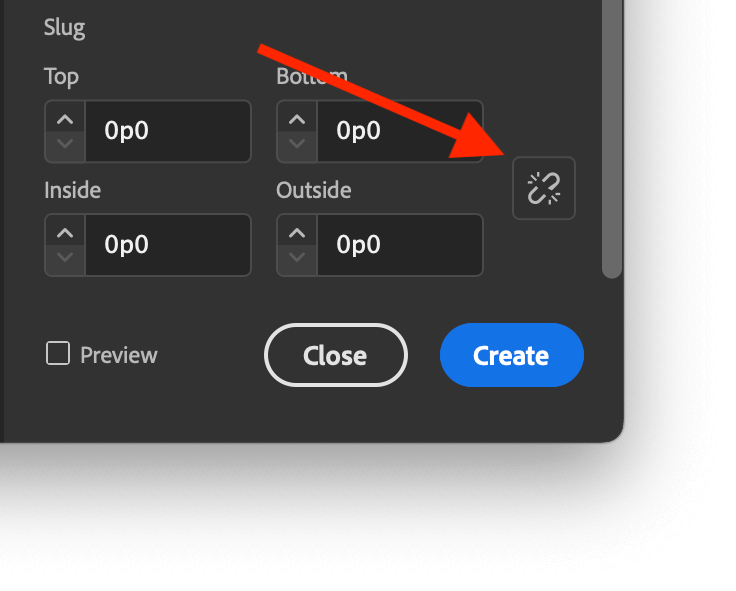
Unlike document bleed settings, slug dimensions are not linked equally by default, but you can enable linked dimensions by clicking the small ‘chain link’ icon at the right edge of the window (shown below).
If you’ve already created your document and you need to add a slug area, it’s not too late. Open the File menu and select Document Setup. You can also use the keyboard shortcut Command + Option + P (use Ctrl + Alt + P if you’re using a PC).
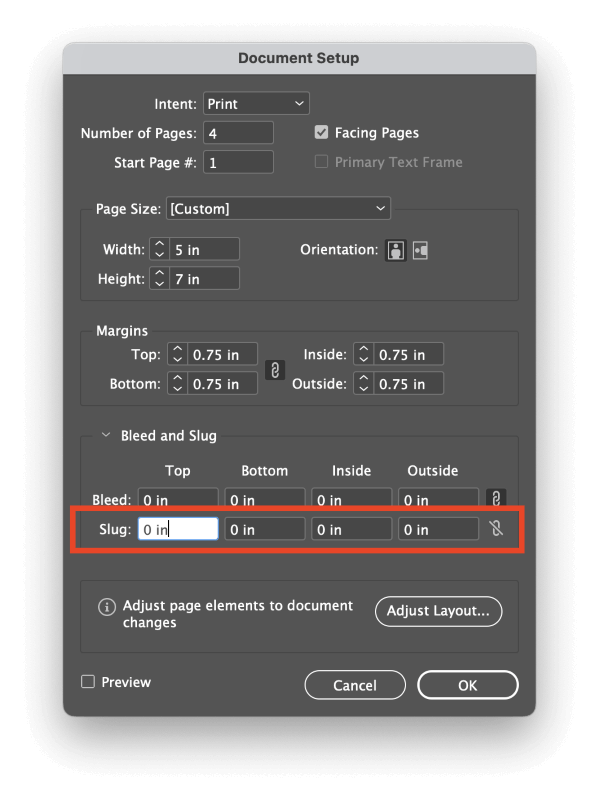
InDesign will open the Document Setup window (surprise, surprise), which gives you access to all the same settings that are available during the new document creation process. You may have to expand the Bleed and Slug section if you haven’t already configured a bleed area.
Why Use the Slug Area?
The slug area has a lot of uses, but most of the time, it’s used by the staff at your print house instead of as a part of their internal prepress process. Unless you have a very good reason to use it, it’s generally better to leave the slug area alone.
The staff at print shops have to deal with a lot of difficult issues (and difficult people), and it’s better not to add to their workload unnecessarily.
Some designers recommend using the slug area as a place to provide notes and commentary for client review.
While this is a creative use of the slug area, if you’re working on a print project, you might accidentally include the slug area while sending the final document for proofing, which could cause some confusion and delay your project.
If you really need an on-screen feedback method, the PDF format already has systems for adding annotations and client notes. It’s a better idea to get used to using the proper tools from the start and leave the slug area for its intended use.
Ever since the earliest days of movable type, printing has always been a slightly mysterious subject. Digital printing has only made things even more complex! Here are some of the most frequently asked questions about the slug in InDesign.
Where is the Slug in InDesign?
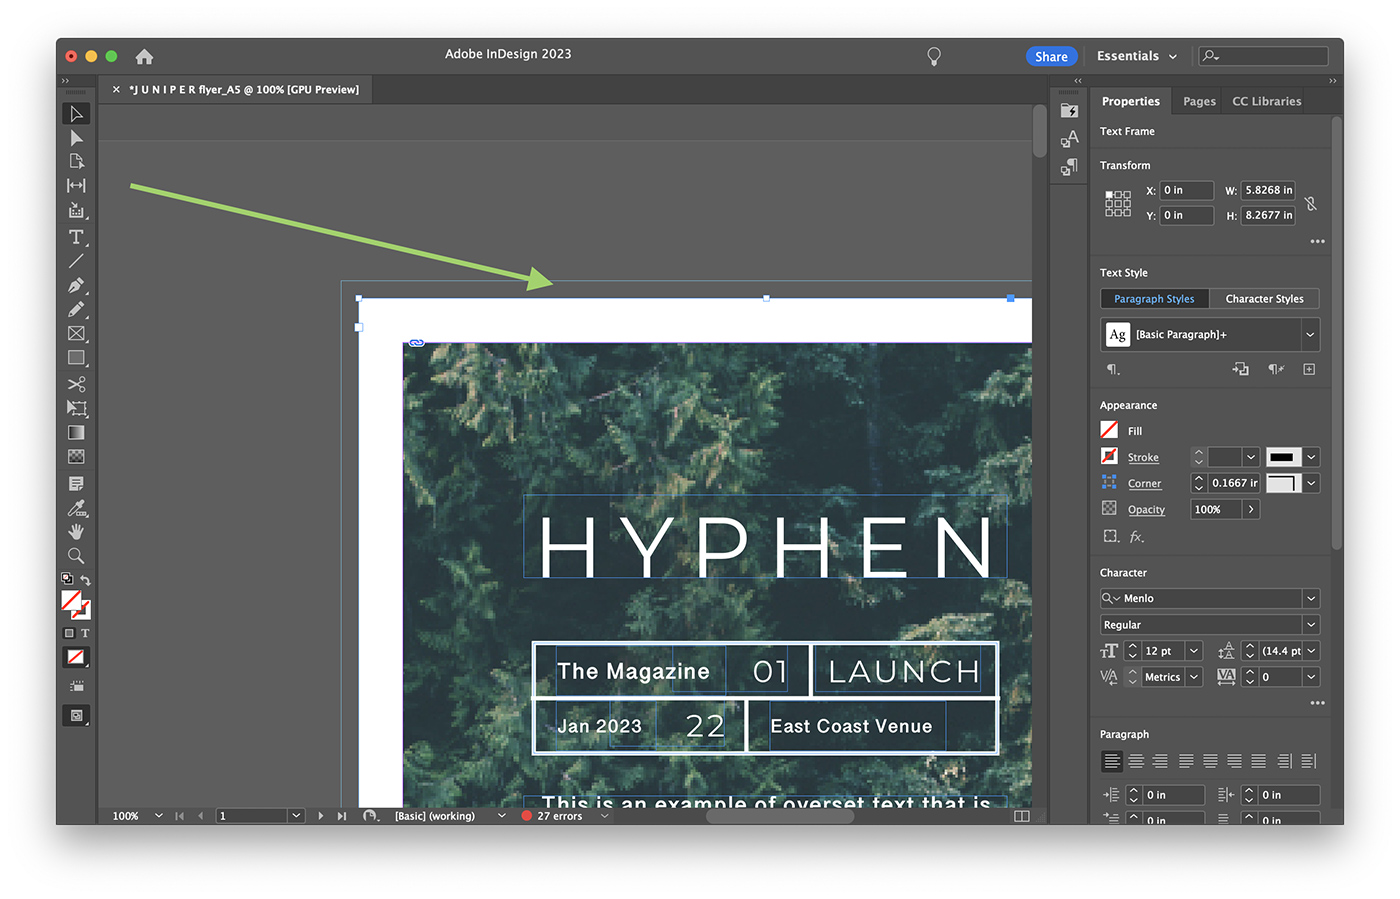
When viewing your document in the main document window, the slug area will only be visible if you are using the Normal or Slug screen modes. Normal screen mode will display a blue outline, while the Slug screen mode will display the printable area. The slug area will not display at all in either the Preview or Bleed screen modes.
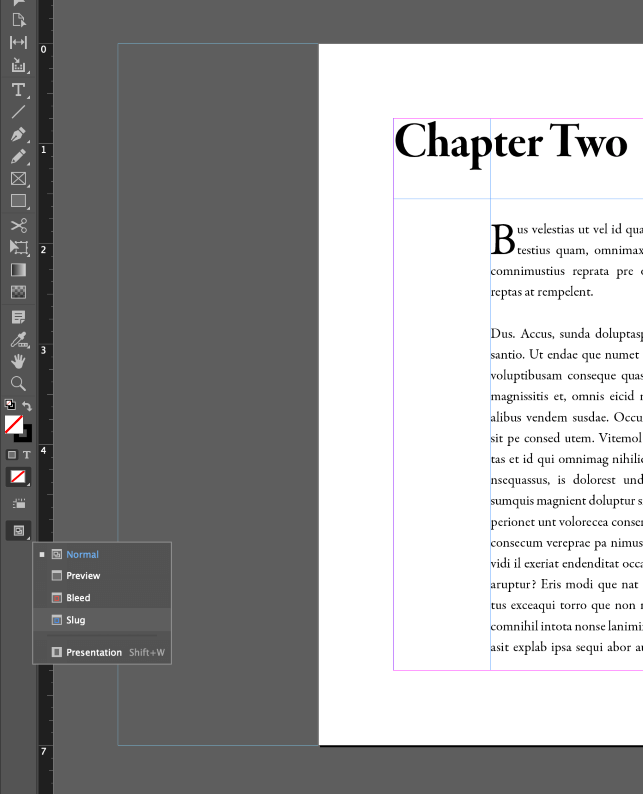
The Normal screen mode displays the slug area as a blue outline, in this case, 2 inches on the outside document edge
You can cycle between screen modes using the Screen Mode button at the bottom of the Tools panel, or you can open the View menu, select the Screen Mode submenu, and choose the appropriate screen mode.
What is the Difference Between Bleed and Slug?
The bleed area is a small printable space (usually just 0.125” or approximately 3mm wide) that extends beyond the edges of a document.
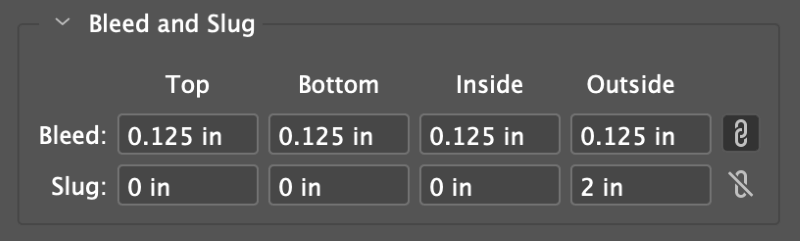
Modern printing processes usually print documents on a larger paper size than required, which is then cut down to the final ‘trim size’.
Because the trimming process has a margin of error, the bleed area ensures that all graphical elements extend fully to the document edges after trimming. If you don’t use a bleed area, slight variations in the trim blade placement can cause unprinted paper edges to appear in the final product.
The slug area is also printed and later trimmed away along with the bleed area, but the slug typically contains technical data or printing instructions.
A Final Word
That’s just about everything there is to know about the slug area in InDesign, as well as the wider world of printing. Remember that for most of your projects, you probably won’t have to use the slug area, but that doesn’t mean it should be used for client communications.