Align content with guides
Learn how to create margins and column guides and use them to position text and images.
This sample file is an Adobe Stock asset you can use to practice what you learn in this tutorial. If you want to use the sample file beyond this tutorial, you can purchase a license on Adobe Stock. Check out the ReadMe file in the folder for the terms that apply to your use of this sample file.
What you learned: How to create and use margins and column guides
Change margins and column guides
When you create a new file, you can specify the margins and columns in the New Document dialog box. You can also change margins and columns in an existing file.
Изменение полей в готовом документе Indesign
Возможно ли изменить размеры текстового блока в готовом документе Indesign не переделывая макет? Да, и сделать это не сложно. Поля располагаются внутри страницы и задают ограничение для текстового блока, который будет в них вставляться.
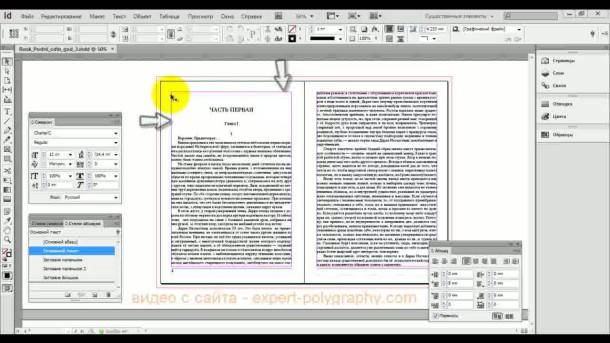
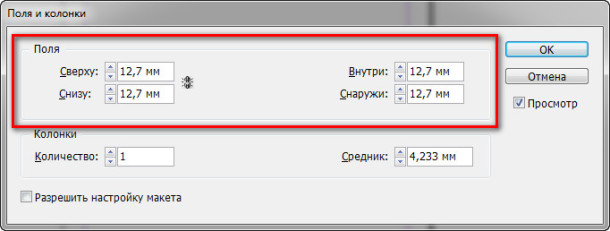
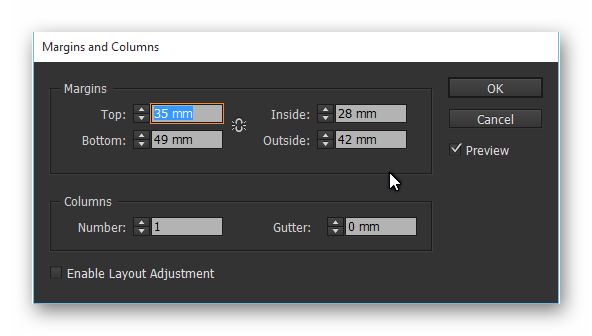
В начале нужно выбрать нужный шаблон страницы, для каждого отдельного шаблона поля могут быть разными, а затем нажать — макет/поля и колонки. (Layout -> Margins and Columns. ). В появившемся окошке впишите нужные значения:
После этого поля поменяются, но текстовый блок останется на своем месте, чтобы не править его на каждой странице вручную, можно удалить последующие страницы (со второй) и заново вставить удерживая клавишу Shift.
Не вместившийся текст вставиться на все страницы, но теперь уже в новый формат, не выходя за пределы полей.
Подробнее о том, как изменить поля в готовом документе Indesign в следующем видео уроке:
Наш канал на Youtube
Здравствуйте все, кто работает в Индизайне!
Извещаем вас о том, что на youtube.com работает канал «InDesign Мастерская вёрстки». Там уже размещены более 70 видео с полным описанием как работать с программой DoTextOK. Другие интересные темы, касающиеся работы …
Хитрости и секреты, приемы работы, уроки
Особенности новой версии Индизайна
Описание плагинов, информация о плагинах для работы с Adobe InDesign
Готовые к использованию скрипты для Adobe InDesign
Описание языка, приёмов и методов программирования для Adobe InDesign
Задание полей книги
При взгляде на раскрытую книгу мы воспринимаем не отдельные ее элементы, а всю систему разворота в целом. Каждое поле или полоса (запечатанная текстом часть страницы) не существуют сами по себе, а представляют отдельные, но неразрывно связанные между собой элементы единого целого. Разворот в целом представляет единую композицию, воспринимаемую глазом. Полоса на развороте не существует одна без другой. Но и две полосы не существуют абстрактно, без носящей их поверхности — страницы. Прямоугольники полос находятся в каком-то соотношении с прямоугольником раскрытой книги. Полосы обрамлены рамкой полей. Следовательно, прямоугольник бумаги, на котором тискается набор полос, является не просто отвлеченным носителем оттиска, но органически связанным с ним элементом.
О расчете полей книги по правилам гармонических пропорций мы давали материал на нашем сайте. В скрипте Михаила Иванюшина HarmonyLayout использовалось «правило Мильхзака», немецкого библиотекаря, исследовавшего целый ряд классических изданий и установившего на этом материале определенные пропорции. Сейчас мы продолжим тему и представим вам скрипт с другими классическими подходами определения пропорций элементов полосы. (Будет неплохо, если вы перед этим ознакомитесь с работой шведского типографа Маркуса Гарда «Сеточная система верстки».)
Скрипт Margins Calculator (автор Laurent Doucet) рассчитывет и устанавливает поля в документе Индизайна — верхнее, внешнее, внутренее, нижнее — по 5 классическим канонам — «Fine print», «Regular» и трем другим, базирующимся на геометрическом делении страницы на 6, 9 и 12. Ниже приведено диалоговое окно скрипта.
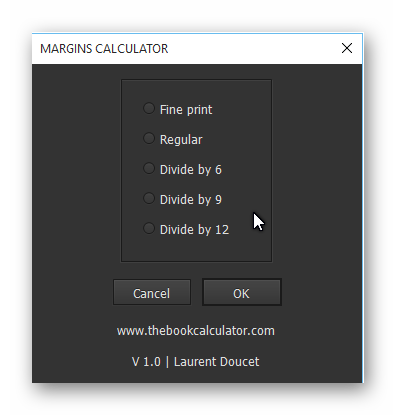
Диалоговое окно скрипта
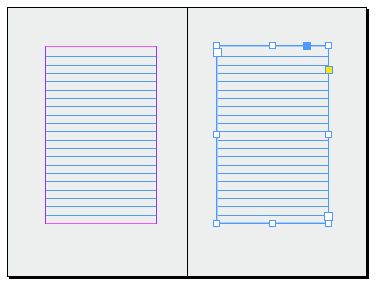
Установка скрипта ничем не отличается от установки других скриптов Индизайна — папку с распакованным скриптом надо поместить в папку пользовательских скриптов Scripts panel. Кроме самого скрипта в скачанном архиве вы найдете PDF-файл с руководством к нему. Там же приведены скриншоты разворотов, сделанных различными из этих методов. Например, результат расчета «Divide by 9» визуально выглядит так: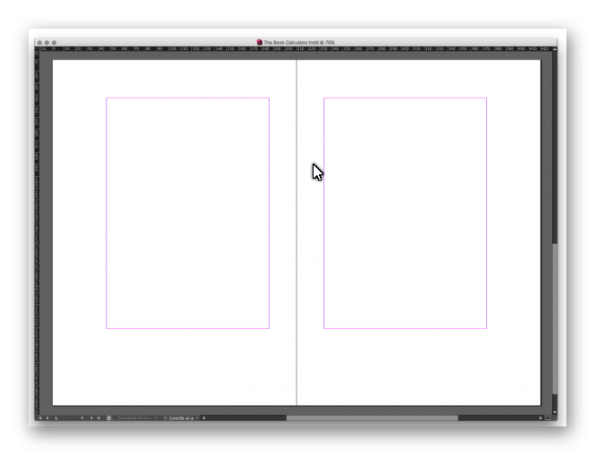
Кстати, рассчитать поля можно и на интернет-странице «The Book Calculator«, и не только для книг, но и для буклетов.
При разработке макета следует учитывать тот конкретный материал, который будет расположен на полосе. Едва ли во всяком альбоме или иллюстрированном журнале всякий разворот представляет собой единое целое по своему содержанию. Мы можем представить себе случай, когда две полосы разворота переходят одна в другую, представляя собой единое органическое целое по содержанию, а не на основе абстрактных композиционных соображений. Наоборот, мы можем себе представить и такую структуру материала, когда каждая из полос разворота посвящена трактовке самостоятельной темы, и тогда ничто не препятствует этим полосам «итти врозь». Абстрактно-композиционная аргументация единства разворота лишь приведет к насилию над содержанием оформляемого материала.
Давайте вспомним, как устанавливаются поля в Индизайне. Для этого мы заходим в меню Layout-> Margins and Columns
«Это не очень хороший способ — задавать поля!» — говорит наш иностранный коллега из Bookraft Solutions (www.Id-Extras.com) — «Ширина! Я хочу задавать ширину текстового фрейма напрямую. В дизайне книги, например, ширина текстового фрейма особенно важна, поскольку она определяет основную длину строки текста. Дизайнер указывает верстальщику точную ширину текста в книге. Поскольку InDesign заставляет нас вводить поля как расстояния от края страницы, если мы получили определенную ширину текстового фрейма, то это означает вычитание указанной ширины из ширины страницы (может потребоваться преобразование единиц измерения), деления на 2, и еще какие-либо коррективы (в случае, если поля не должны быть равными). Это, конечно, не конец света, но все-равно раздражает».
И далее: «Базовая сетка: если вы используете базовую сетку, может оказаться очень сложно рассчитать размер нижнего и верхнего полей таким образом, чтобы высота текстового фрейма была кратна базовой линии для текста! (Это важно, если вы хотите, чтобы графика легко выстраивалась в линию по базовой линии последней строки текста на странице. И если у вашего документа есть сноски, то это тоже существенно, иначе нижняя часть сносок не будет выровнена с последней строкой текста на соседней странице!).
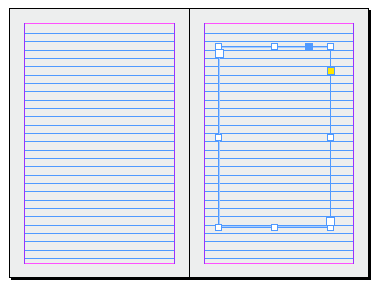
Для решения этих проблем был разработан скрипт Snap Margins to Text Frame, который по положению и размерам фрейма выстраивает поля.
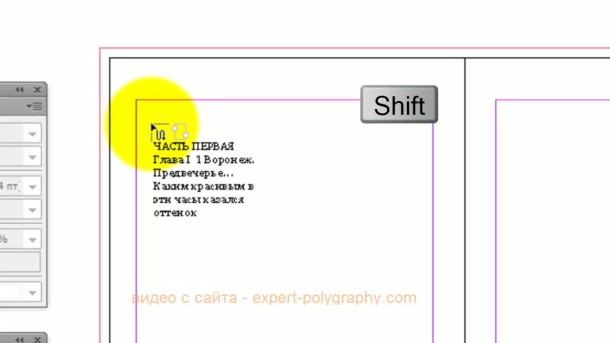
- Нарисуйте текстовый фрейм нужной ширины, обязательно на первой странице документа или на любой правой странице разворота. Визуально позиционируйте его на странице. Включите отображение сетки из базовых линий и привязку к ней (View > Grids and Guides > Snap to Guides), затем подтяните нижний край текстового фрейма, чтоб он совпал с базовой линией.
2. Запустите скрипт
Скрипт Snap Margins to Text Frame так изменит поля всех страниц в документе, включая мастер-страницы, чтобы они совпадали с выбранным текстовым фреймом.
Скрипт можно применять для изменения полей и в сверстанной работе. Но перед запуском скрипта в диалоге Margins and Columns надо включить параметр Enable Layout Adjustment (внизу диалога). Например, можно поднять вверх весь текст по всему документу.
Скрипт бесплатный, работает под Windows и MAC, с версиями Индизайна CS6-CC2017, а возможно, и с более ранними версиями.
Скачать скрипт Snap Margins to Text Frame (Zip)
Мы описали два подхода к расчету параметров страницы, и каким из них вам пользоваться — определяйте сами.
InDesign margins

InDesign Margin can be explained as a distance from any side of the edge of the document page to the content of the layout design and these contents may have text, text frame, images, and other content design or Margin can also understand as an area which defines typing area with content for a proper layout design. We generally use a margin area for all four sides of the document page that is from the left side edge of the page, the right side edge of the page, from the top of the page, and from the bottom of the page. Left side distance from the edge of page defines as Inside margin in this software and right side distance from the edge of page define as Outside margin. So let us analyze these things of Margin for getting more knowledge about it. In this topic, we are going to learn about InDesign margins.
How to use Margin in InDesign?
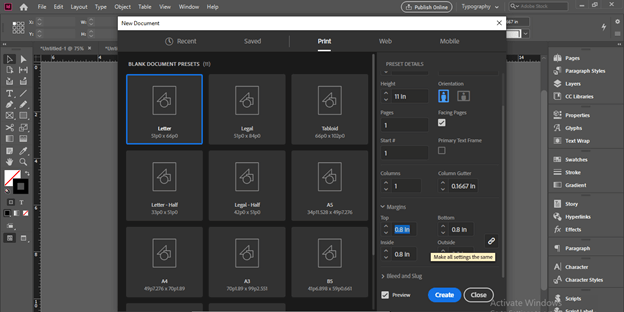
We use margins according to the requirement of our layout design and it may be different for all four sides or may be the same for all sides. The very first thing which I will do is to create a new document and for that, I will click on Create New button on the welcome screen of this software or you can simply press Ctrl + N as its shortcut key.
3D animation, modelling, simulation, game development & others
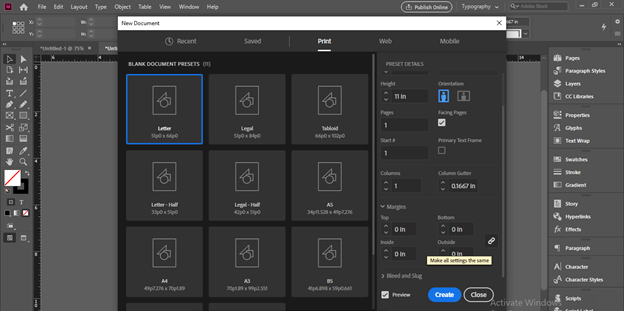
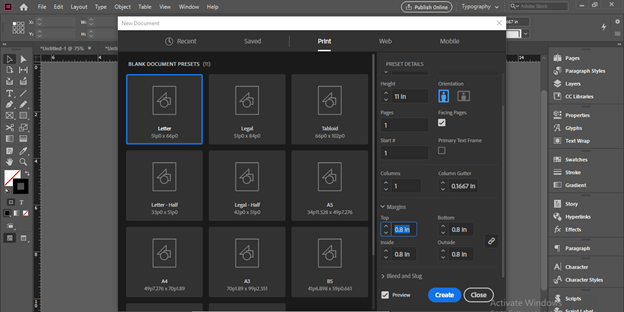
Once we click on this button we will have this dialog box for a new document. Here I will click on the Print preset option and choose the Letter size of the document page. You chose anyone as per your design.
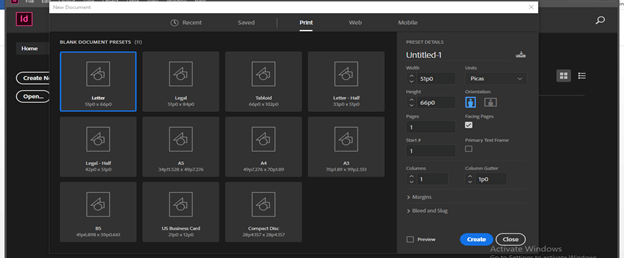
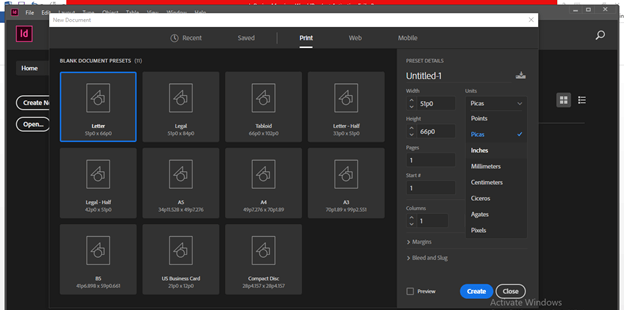
I will change units in Inches from this units list because I want to work in inches. It is in picas by default.
Here in this dialog box we have Margins tab so click on the down arrow button of this tab and you can see there are boxes for different margins such as top, bottom, left (inside), and right (outside). I will change margins values like 0 for this time so that I can explain it to us clearly.
Here is the chain button if it is linked then all four values of margin will change proportionally. Now I will click on Create button without disturbing this chain button because we will discuss it later.
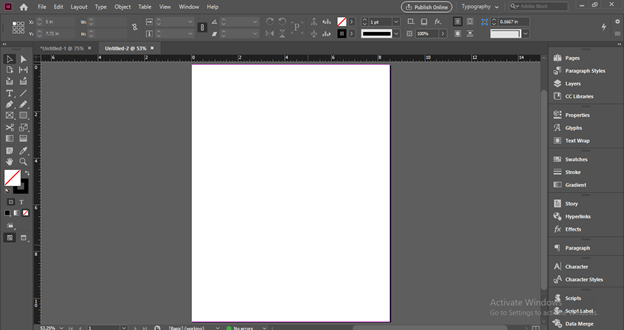
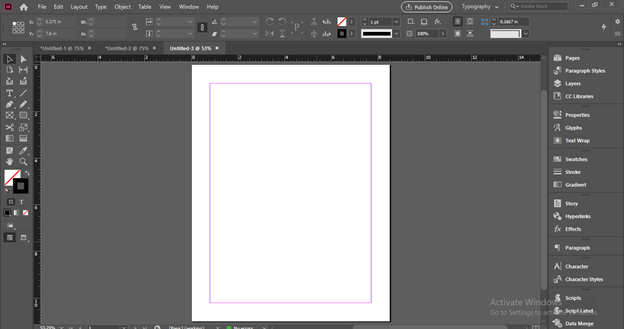
Now you can see there are no margins on the document page area.
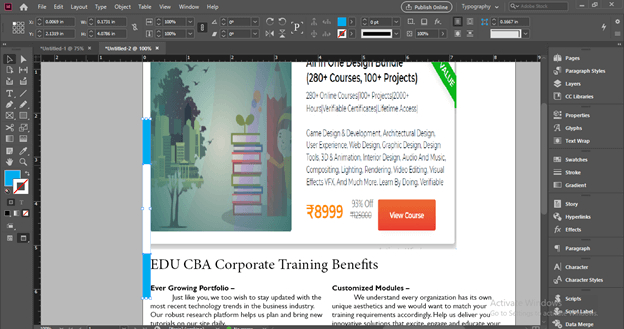
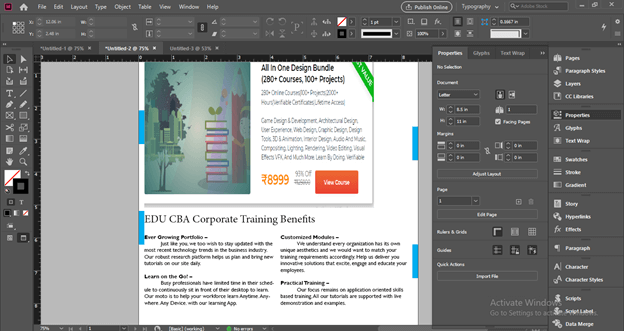
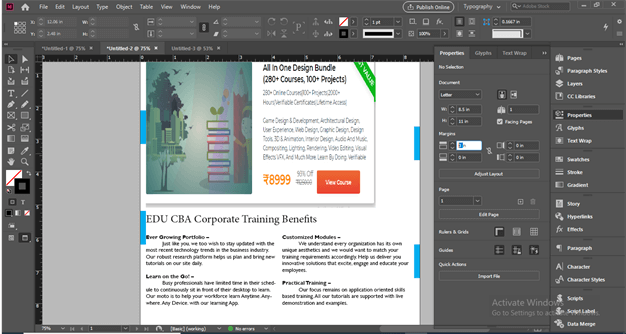
First, I will take this image and for having this image in the document are we can use the Place option of the File menu.
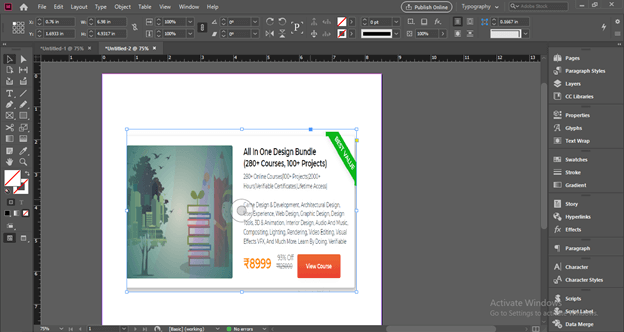
And place it like this from the edge of this document page. I don’t know what distance it is from the edge of the page document where I am placing my image.
I will take some text and adjust them in a good manner then place them at the same distance from the edge of the page as we placed the image before.

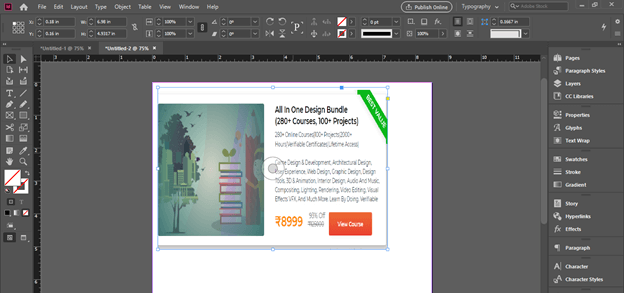
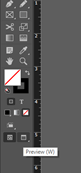
Now let us switch to Preview mode which will show us how our document will look finally. So you can simply press W for it or click on this button on the tool panel.
And this distance from the edge of the document page to the content of the document can understand as the margin of the page. The blue marked distance on the left side of the page defines as the Inside margin.
And same as a left side we can mark the same distance on the right side of the page or change this distance according to layout design. The right side distance defines as the Outside Margin. You can do the same for top and bottom margins.
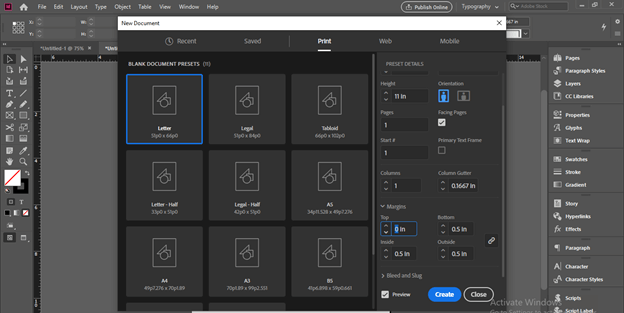
But in place of marking margins manually we can set it with the help of the margins panel. So let us create a new document again and for having a new document go to the New option of drop-down list of File menu and then click on the Document option of the new drop-down list.

And now I will set some margin here before creating my document in the margins box of this dialog box. You can set these margins at the time of taking a new document or set it later too.
We can break this link button and change all fours margins separately as per our requirement. I will give the same values to all four sides’ margins that is 0.8.
Now you can see we have pink and purple lines around this document and this is called margin. Pink lines are used for top and bottom margins and Purple lines are used for top and bottom margins.
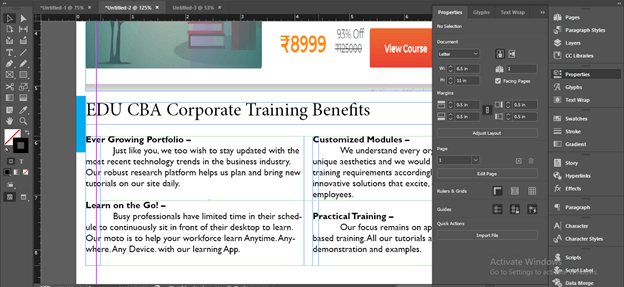
What if you want to have margins in an already opened document or want to make change the distance of margins? So you can do it in two ways. First, you can go to the Properties panel of this software which you can find in the left side panels section or in Windows menu of the menu bar.
And this is the Margins values box from where you can change its value or enter any desired value.
If I will add margins value in values boxes then you can see a preview of margins on the document area.

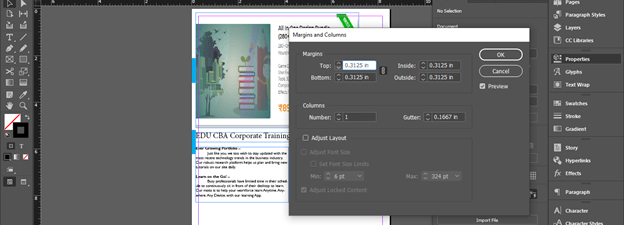
The second way through which you can do this is to go to the Layout menu of the menu bar and click on it. In the drop-down list of it you will find the Margins and Columns option. So click on it.

Once you click on this option you will have a dialog box of Margins and Column and from this box, we can change values of margins the same as we changed from the properties panel. You can see there is also the name of margins given that are Top, Bottom, Inside, and Outside.
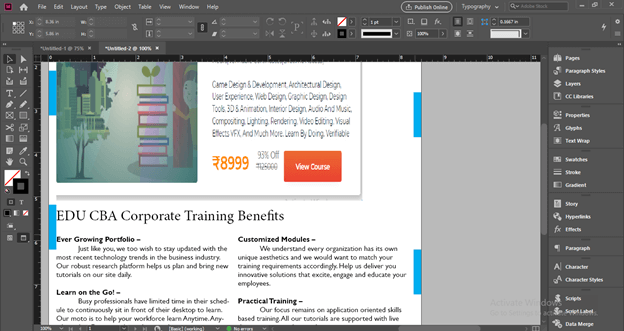
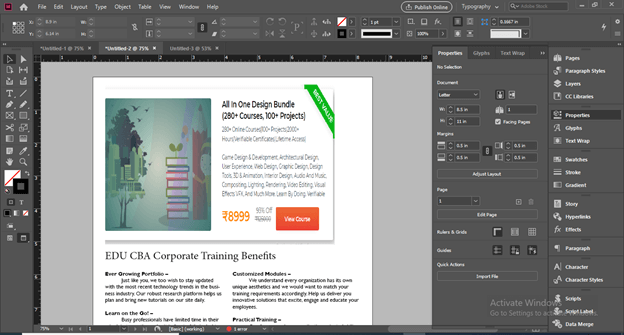
Now I will move my text and align it with the margin so that during printing this layout print will not disturb text content as well as other content of this design.
I will do the same for both text and image. You can see it is nice looking design layout now.
Conclusion – InDesign margins
So this way margins can be very helpful for you during designing layout design for different purposes in this software and margins also give you an idea for making your layout printable without losing the content of that design. Thes best part of using margins is that there are no restrictions for using the same margins to all sides.
Recommended Articles
This is a guide to InDesign margins. Here we discuss How to use Margin in InDesign and analyze the things of Margin for getting more knowledge about it. You may also have a look at the following articles to learn more