How To Insert A Section Break In Microsoft Word
In this article, you’ll learn how to use section breaks to rearrange your Word pages and improve the readability of your document. We’ll also go through several types of section breaks and show you how to remove them.
What Is a Section Break?#
As the name suggests, the section breaks are formatting elements that divide a document into sections.
There are different types of section breaks; each will give you better control over your document, making it easy to read and more attractive. For example, they can help you structure your document, leave space, or divide a page into columns.
Difference Between Section and Page Break#
When you insert a page break on your Word document, the succeeding text will always start on the next page. Page Break is a fantastic tool for starting new chapters in a book or a new section in an article. Section breaks are different from page breaks. The succeeding text doesn’t necessarily start on the new page. Instead, the text can continue on the same page, making it look neat and well organized.
Types of Section Breaks#
There are four types of section breaks in Microsoft Word.
1. Next Page Section Break#
All the text that is right of the cursor (which you position wherever you see fit) will be forced into a new section on the next page. All the formatting you performed on the text that has been transferred will be carried through to the new section.
2. Continuous Section Break#
A Continuous Section Break will create a new section on the same page. This means you can have two different texts, with other formatting, on the same page.
3. Odd Page Section Break#
Similar to the Next Page, the Odd Page will move the text right of the cursor, but this time to the next odd-numbered page. This means that if you’re working on a text on page 5 and you insert the Odd Page Section Break, your text will be moved to the top of page 7, leaving page 6 blank. This is very convenient for creating new book chapters, as they usually begin on odd-numbered pages.
4. Even Page Section Break#
The Even Page Section Break does the same as the previous section break, but with even-numbered pages. If you are working on page 6, you can automatically continue the document on page 8, leaving page 7 blank.
Types of Page Breaks#
It’s essential to understand the difference between section and page breaks and when to use them. There are only two Page Break types in Microsoft Word, but they will give you very different formatting results.
1. Simple Page Break#
A simple page break will move all the text right of the cursor to the next immediate page. It doesn’t matter if it’s an odd or even-numbered page.
2. Column Break#
A column break breaks your document into columns. Word will move all the text right of the cursor to the top of the next column. You can have any number of columns, but you may want your document to look nice and orderly. More than three columns can be very awkward to read.
How to Insert Section Breaks in a Word Document#
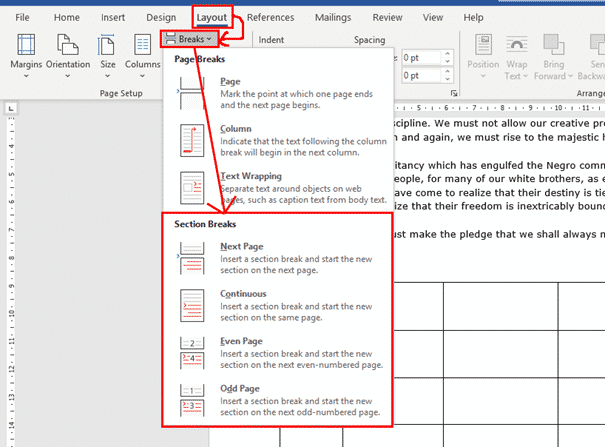
Once you know what type of a section break you need, inserting it into an MS Word document is very simple. Place your cursor exactly where you plan to divide the document, then go to Layout, click on Breaks, and choose which type of section or page break you want from the drop-down menu. There is also a keyboard shortcut for quickly inserting a page break into your document. Once your cursor is in the position where you want to add a page break, simply press Ctrl + Enter.
How to View Existing Section Breaks#
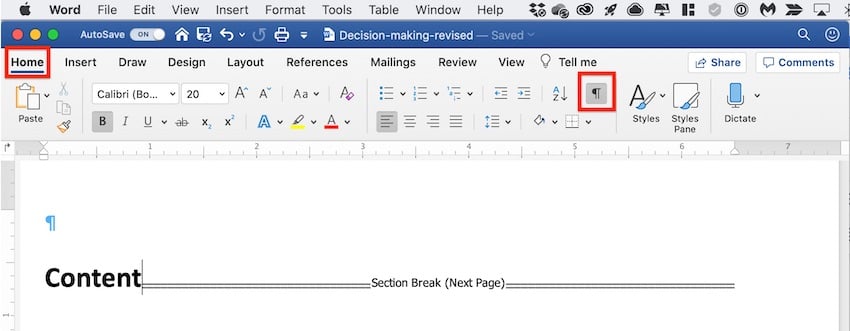
The section and page breaks are invisible in Word documents. You can see their effect, but you cannot see them by default as symbols. This is because the default view displays only what will be printed. When you’re writing, editing, and formatting your document, you will want to see the different elements such as paragraph marks, space marks, sections, and page breaks. To see all these elements go to the Home tab and click on the Paragraph button to show all paragraph marks.
How to Delete Section and Page Breaks#
Displaying all section and page breaks is one step toward removing them too. However, to delete them, you will need to see them. Removing section breaks is as simple as selecting them and hitting the backspace or delete key on your keyboard. To select, click directly on the page or section break three times, or position your cursor now after it. Keep in mind that once you delete a section or a page break, the text of that section will also lose its formatting and adopt the formatting of the next section.
Insert Section Breaks and Page Breaks into Word Documents in C#
![]()
Section breaks and page breaks are two kinds of document breaks in Microsoft Word. Section breaks allow you to divide a long document into sections and format each section differently. Page breaks can help you end a page at a desired place and start a new page immediately instead of hitting the Enter key a bunch of times. In this article, I will introduce how to insert section breaks and page breaks in a Word document using C#.
Installation
In order to insert section breaks and page breaks, I will be using Free Spire.Doc for .NET which is a free and multifunctional API for creating, manipulating, converting and printing Word documents.
You can either download Free Spire.Doc for .NET API from the official website or install it via NuGet by selecting Tools > NuGet Package Manager > Package Manager Console and then adding the following code:
PM> Install-Package FreeSpire.Doc
Insert Section Breaks
The following are the steps to insert a section break into a Word document:
Section Breaks in Microsoft Word
Section breaks are probably one of the most useful features in Word when you are formatting complicated documents. They allow you to change formatting aspects that would otherwise be the same throughout a document, such as page orientation, margins, columns, headers and footers.
Column changes (2, 3 or more columns) need Section Breaks before and after. A document in portrait orientation can have a Section Break to switch to landscape.
Inserting a Section Break
To insert a section break, click where you want the break to occur, and go to Layout | Page Setup |Breaks. You will see that there are four different types of break to choose from.
Continuous Section Break
Possibly the most common section break is the continuous or invisible section break.

A continuous break will start your new section on the same page. This allows you to do things like:
- Have different numbers of text columns on the one page. Word will normally add continuous section breaks automatically when setting columns.
- Have different margins on different sections of the same page.
In the example below, I have kept the regular page margins for the text part of the document, but added a continuous section break so I can reduce the margins on the lower part of the page to give my table a bit more room. (After the table, I would then need to add another continuous break to go back to the regular margins for the next part of the document.)

Continuous Section Breaks are useful to add invisible dividers within a document.
Next Page Break

The Next Page break does exactly what it says on the box – starts your next section on a new page. It’s very similar to a regular page break, except that it allows you to change other page layout and formatting options in the new section.
Even and Odd Page Section Breaks

These options allow you to format your text for printing in book format, and choose whether your section will start on the left or right page of the book. In a standard book format, odd numbers are usually on the right-hand side, so if you want your new section to start on the right-hand page, select an Odd Page section break.
Page Numbering and Section Breaks
When starting a new section on a new page, there are two options for how you want the page numbering to work:
- Start the page numbering again in the new section.
- Continue the page numbering from the previous section.
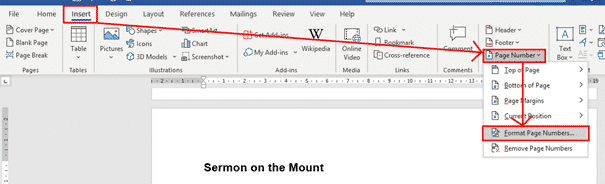
To set this, put your cursor somewhere after the section break, and go to Insert | Header & Footer | Page Number | Format Page Numbers.
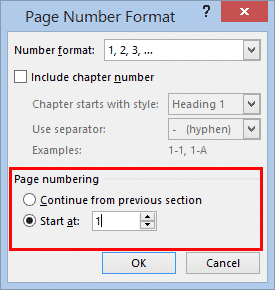
In the bottom part of the Page Number Format dialog, select whether you want to continue the numbering from the previous section or start the numbering again. The default for restarting the numbering is to start back at 1, but you can also choose to start your section page numbering at any number you wish by using the spinner or typing a number in.
Headers & Footers with Section Breaks
By default, when you set up a header or footer for your document, it will display the same on every page of the document. We don’t always want this though; we may want different information in each chapter, or we may want no header or footer on the title page or contents pages, for example.
When setting different headers and footers, the thing to remember is that you are setting what happens to this header/footer compared to the one in the previous section. So again, we need to put our cursor somewhere after a section break. Then double-click within the header or footer to select it, and you will see the Link to Previous button under Header & Footer | Navigation.

This button is usually selected, as the default is to have the same headers and footers throughout. If you want your new section to have a different header/footer, just click the Link to Previous button to deselect it. Then you can make any changes you want to the header/footer, and they will only apply from that point onwards. Any header or footer before the section break will not be affected by changes you make here.

Once you have unlinked each of your sections’ headers and footers from the previous section, you can then edit them independently in each section. If you already have a header/footer throughout your document and you want it removed from the title and contents pages at the beginning, you would:
- Put a section break at the beginning of the first page that you want to retain the header/footer.
- Unlink the header/footer from the previous section.
- Go back to the first section and delete the header and footer. As you have unlinked the sections, the deletion will only apply to the first section.
Deleting a Section Break
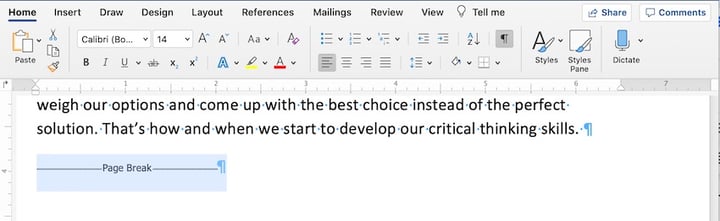
It’s easiest to delete a section break if you can see it, and to see it you need to turn on Show Hidden Characters under Home | Paragraph.

Now you can see the section break, just click at the beginning of the section break line and click Delete.
How to Insert, View, or Delete Section (& Page) Breaks in Microsoft Word (+Video)

Alexis (Lexi) Rodrigo Last updated Oct 25, 2021
When you’re working on a long document, separating it into different parts makes it much easier to navigate. Microsoft Word eases your workflow by letting you insert document breaks, namely section and page breaks.


 Understanding page breaks and sections breaks is an important part of learning MS Word (Image source: Envato Elements)
As you’ll see in this article by defining section and page breaks you can apply specific formatting elements in different parts of your document. You’ll also have better control over pagination.
Read on to learn how to use section and page breaks in Word to make your document more visually appealing and easier for readers to make their way around. Finally, we’ll show you some great sources for professionally designed Word templates.
How to Add Breaks in MS Word (Quick Start Video)
Are you ready to learn how how to insert breaks in MS Word? The short video below will give you a head start on inserting, viewing, and deleting MS Word section and page breaks:
To learn even more about breaks in Word (including the difference betwen section breaks and page breaks), study the written tutorial below.
Understanding Section and Page Breaks
Section and page breaks are types of breaks or partitions in a Word document. In this section, you’ll learn some basics:
1. Microsoft Word Section Break vs Page Break
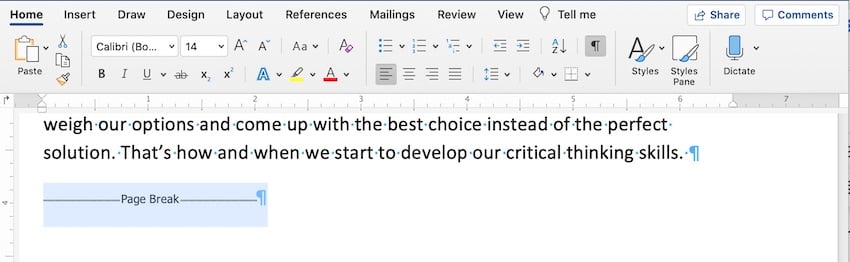
A page break is a partition in the text of the document. At a page break, the succeeding text is automatically placed on top of a new page.
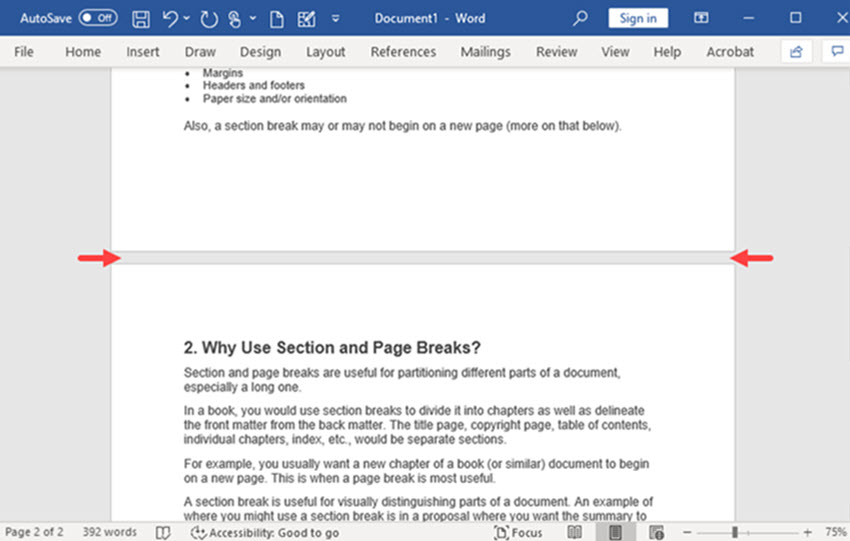

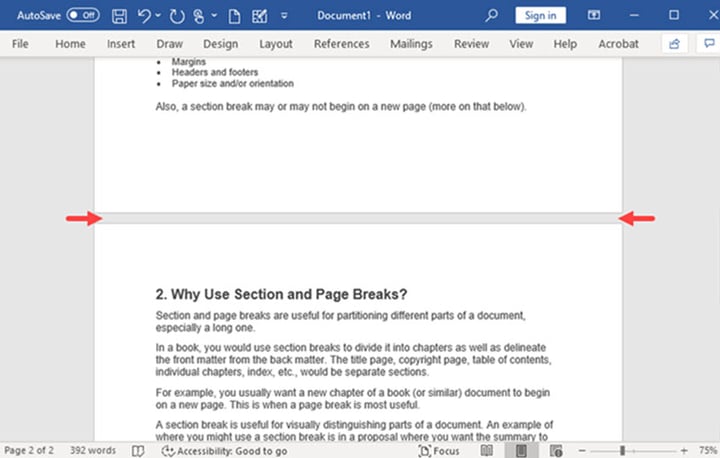 The text after a Microsoft Word page break is automatically placed at the top of the next page.
But, with a section break for Word the text is partitioned — along with the formatting associated with it:
- page numbers
- margins
- headers and footers
- paper size and/or orientation
Also, a Microsoft Word section break may or may not begin on a new page (more on that below).
2. Why Use Microsoft Section and Page Breaks?
Section and page breaks are useful for partitioning different parts of a document, especially a long one.
In a book, you’d use section breaks to divide it into chapters as well as delineate the front matter from the back matter. The title page, copyright page, table of contents, individual chapters, index, etc., would be separate sections.
For example, you usually want a new chapter of a book (or similar) document to begin on a new page. This is when a page break is most useful.
A section break for MS Word is useful for visually distinguishing parts of a document. An example of where you might use a section break is in a proposal where you want the summary to have a different layout. In this case, the summary section could have its own header, footer, and margins that are different from the rest of the document.
By using section breaks, each chapter can have a different running header, including the chapter title.
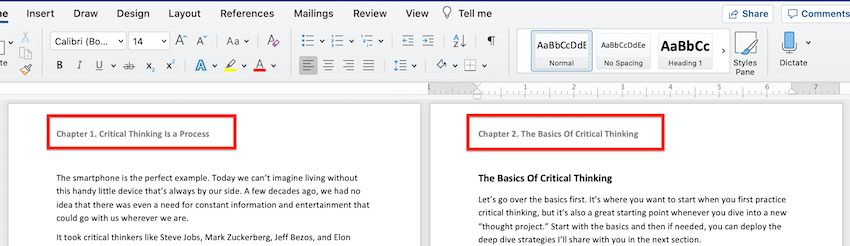

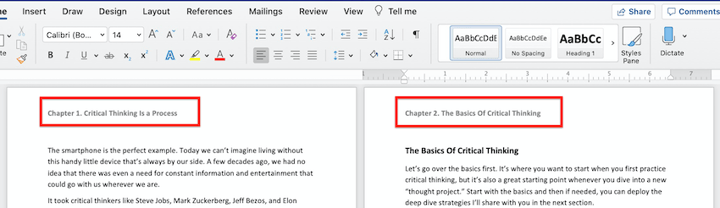 Create different running headers for each chapter by using section breaks.
Microsoft Word Section breaks also let you use lower case numbers for page numbers on the introduction of the book and Arabic numerals on the rest of the pages.
Similarly, a section break in Microsoft Word lets you use a two-column format in the index section and a single column everywhere else.
You’ll also want to use section and page breaks when you want to control the pagination of your document. For example, the first page of your document may be a cover page. But you don’t want the cover page to be page 1 of your document. By inserting a section break after the cover page, you can make the next page be page 1.
You accomplish these results by inserting different types of section and page breaks in Word.
3. Types of Microsoft Word Section Breaks
There are four types of section breaks in MS Word:
- Next Page. This type of section break forces the text to the right of the cursor to a new section on the following page. All the formatting associated with the text is carried through to the new section as well.
- Continuous. A continuous section break creates a new section but keeps the text on the same page. This means two different sections can have their own formatting yet remain on the same page.
- Odd Page. This kind of section break moves the text to the right of the cursor to the top of the next odd-numbered page. If you’re on page 3, for example, and you insert an Odd Page Section Break, the next section will start on top of page 5 (page 4 will be blank). Book chapters usually begin on the next odd page of the book.
- Even Page. An Even Page section break moves the text to the right of the cursor to the top of the next even-numbered page. So, if you’re on page 6 and you insert an Even Page Section Break, the new section will begin on page 8 (leaving page 7 blank).
4. Types of Page Breaks
As for Microsoft Word page breaks, there are two kinds:
- Simple Page Breaks. A simple page break moves text to the right of the cursor to the top of the next page.
- Column Breaks. If your document is broken up into columns, a column break moves text to the right of the cursor to the top of the next column.
How to View Existing Breaks in an MS Word Doc
By default, section and page breaks are invisible in Word. You can only see their effects. You’ll see changes in formatting and pagination for each section. That’s because these breaks don’t appear when the document is printed.
As you’re editing and formatting your document, you may need to see page and section breaks. To view existing page and section breaks in Word, on the Home tab, then click on the Paragraph button.

 The Paragraph button allows you to see formatting.
How to Insert Section Breaks in Your Word Docs
To insert a page or section break, place the cursor where you want one section/page to end and the next section/page to begin.
Go to Insert > Break, then choose the specific type of page break or section break you want to insert.
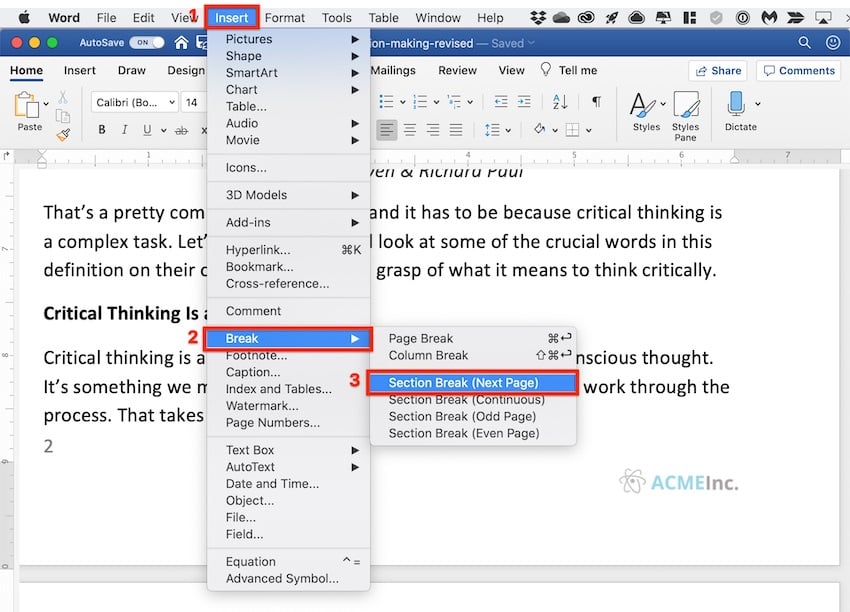

 The image above shows how to insert section break in Word.
Or, click on the Layout tab. Then click on the Breaks button on the ribbon and select the type of page or section break you wish to insert.
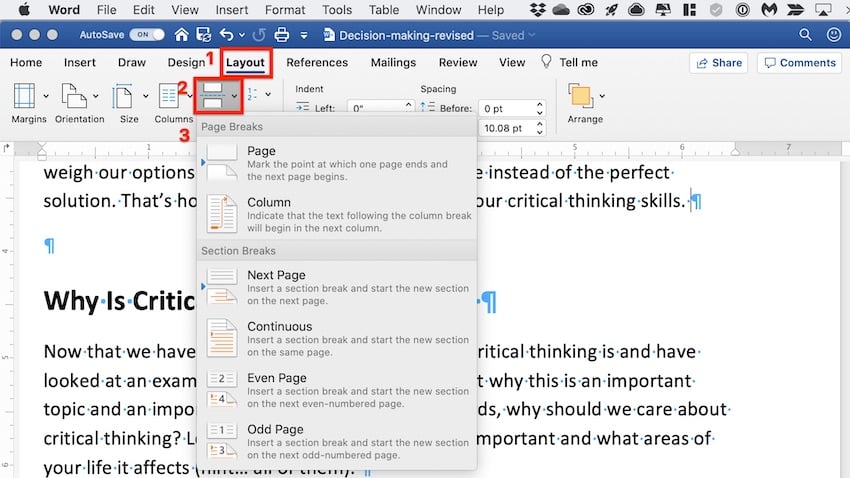

 You can also insert section breaks in Word through the Layout tab.
How to Remove/Delete Section and Page Breaks in Word
To remove a section or page break in Word, first display all the breaks.
Select the section or page break you want to remove by highlighting it. Click on either the Delete or Backspace key on your keyboard.

 How to delete section break in Word
When you delete a section break, the text in the section adopts the formatting of the next section.
Tips for Using Section and Page Breaks in MS Word
Are you just getting comfortable with using Microsoft Word section and page breaks? Here are some extra tips to help you use them effectively:
1. Keep Your Section Breaks to a Minimum
Insert a section break in Word only when you have to (see above for when it’s a good idea to do so). Having more sections than necessary makes it more difficult to make global changes to your document, because you’d have to manually make those changes in each section.
2. Pay Attention to Which Section You’re In
If you’ve divided your document into sections, always be aware of what section you’re in when you make formatting changes. That’s because these changes will apply only to the section you’re currently in — that’s the section where your cursor is. If you want to make a formatting change to apply to the whole document, select the entire document first before making your changes.
3. Microsoft Word May Change a Continuous Section Break to the Other Section Break Types
You may be surprised that your continuous section break has been converted into a different type of section break. This happens when you’ve got a continuous section break. Then, in the next section, you try to apply a different header/footer, pagination, margins, or page size and orientation. Those formatting changes require a page break. And so, Word will automatically change the section break type to one that results in a page break.
Streamline Your Microsoft Word Workflow With Templates

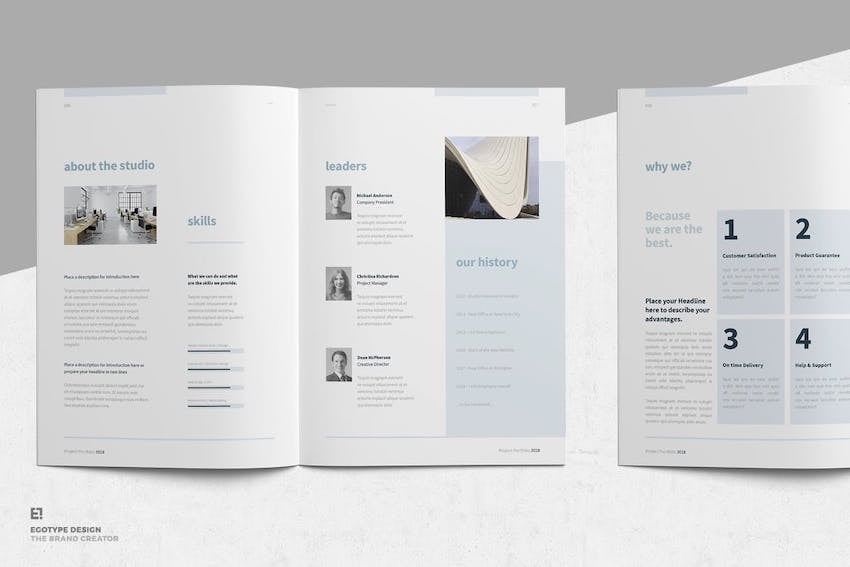
 Word templates like this proposal template help you create impressive-looking documents.
There are other ways to streamline your MS Word workflow. One of them is using premium Word templates, like the ones you’ll find at Envato. Premium templates for Microsoft Word are created by professional designers to provide impressive layouts. These templates are customizable with your content, images, and branding. You can also adjust the design and layout as you please.
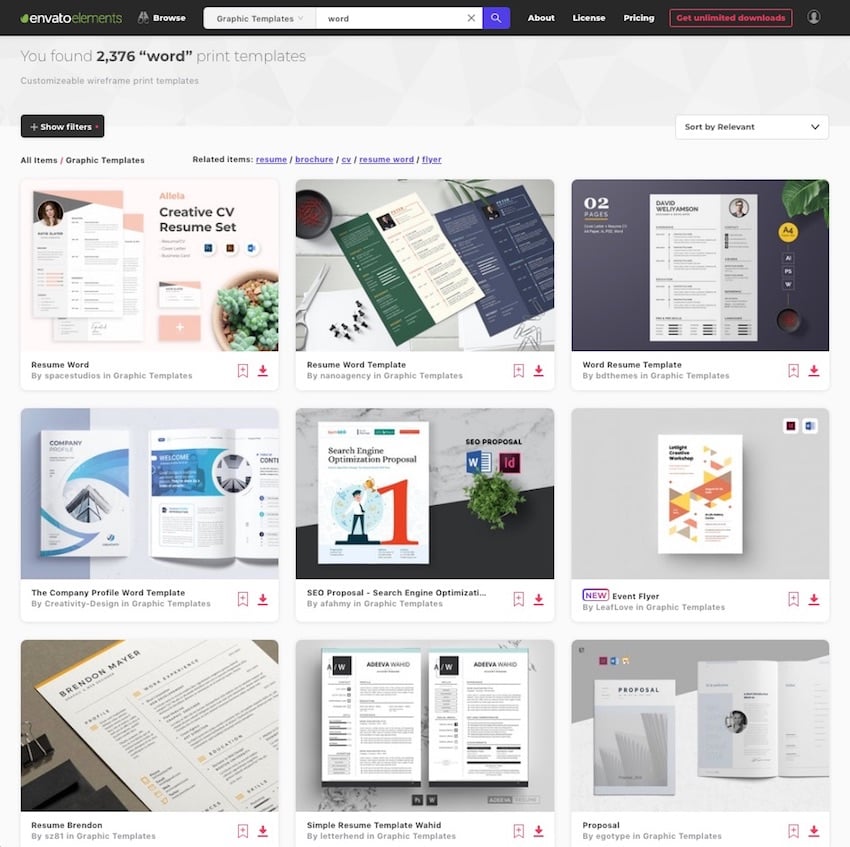
Envato Elements gives you unlimited downloads of Word templates as well as other inputs you need to complete your projects — fonts, graphics, stock photos, and more — all for one flat monthly subscription fee.

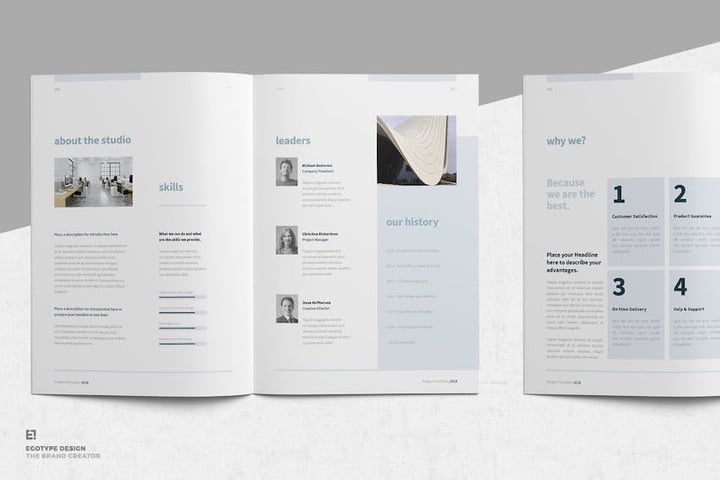
 Starting with a Microsoft Word template is another great way to streamline your workflow in Word.
Or, go to GraphicRiver for Microsoft Word templates and other creative elements on a pay-per-use basis. It’s a terrific source for one-off projects.
Make Your Document Easier to Read and Navigate
Now you know how to use section and page breaks in Microsoft Word to better organize your document. Section breaks also let you have more granular control over the formatting of specific parts of your document. These make your document look better as well as easier to read and navigate through.
Use the steps you learned in this article to properly use section and page breaks. Also, use Word templates to make it much easier and faster to create impressive documents. Envato Elements provides unlimited downloads of templates for Word for one monthly subscription. For occasional projects, GraphicRiver is an excellent source of Word templates where you pay for each use.
Editorial Note: This tutorial has been updated to add a video by Andrew Childress.