Install LineageOS on
Xiaomi Redmi Note 7
You can also boot into fastboot mode via a key combination:
- With the device powered off, hold Volume Down + Power . Keep holding both buttons until the word “FASTBOOT” appears on the screen, then release.
If you don’t get any output or an error:
- on Windows: make sure the device appears in the device manager without a triangle. Try other drivers until the command above works!
- on Linux or macOS: If you see no permissions fastboot try running fastboot as root. When the output is empty, check your USB cable and port!
With the device powered off, hold Volume Up + Power . Keep holding both buttons until the “MI” logo appears on the screen, then release.
, you accidentally booted into the wrong recovery. Please start at the top of this section!
Installing LineageOS from recovery
-
a LineageOS installation package.
- (Optionally): If you want to install an application package add-on such as Google Apps (use the arm64 architecture), please read and follow the instructions on Google Apps page
- If you are not in recovery, reboot into recovery:
- With the device powered off, hold Volume Up + Power . Keep holding both buttons until the “MI” logo appears on the screen, then release.
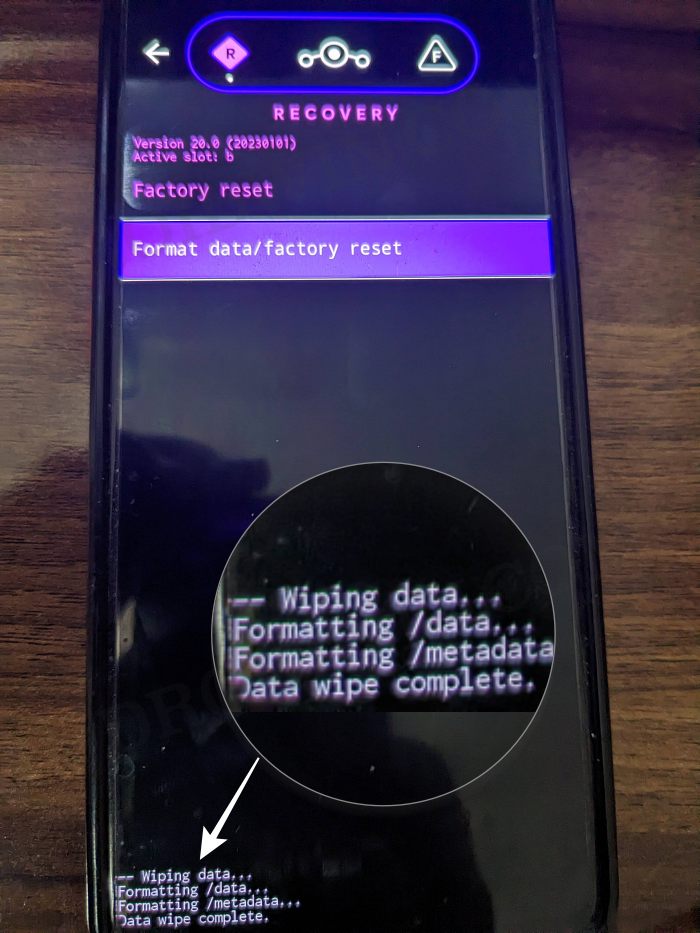
- Now tap Factory Reset, then Format data / factory reset and continue with the formatting process. This will remove encryption and delete all files stored in the internal storage, as well as format your cache partition (if you have one).
- Return to the main menu.
- Sideload the LineageOS .zip package but do not reboot before you read/followed the rest of the instructions!
- On the device, select “Apply Update”, then “Apply from ADB” to begin sideload.
- On the host machine, sideload the package using: adb sideload filename.zip .
Installing Add-Ons
Repeat the sideload steps above for all desired packages in sequence.
All set!
Once you have installed everything successfully, you can now reboot your device into the OS for the first time!
Install LineageOS 20 Android 13 on Redmi Note 9
In this guide, we will show you the steps to install the latest LineageOS 20 based on Android 13 onto your Redmi Note 9. Offering all the required feature set data price that wouldn’t burn a hole in your pockets, the reason why the Note series from Xiaomi has always been the preferred choice for the masses is there for everyone to see. If we talk about the ninth iteration in this series, then it is still quite decent in the custom development.
So if you were looking to break free from the shackles of the bloated MIUI and welcome abode a clean stock OS experience, then now is just the right time to do so as one of the most popular ROMs has just made its way over to this device. You could now install the latest LineageOS 20 based on Android 13 onto your Redmi Note 9. And in this guide, we will show you how to do just that. Follow along.
Table of Contents
What is LineageOS ROM?
One of the oldest players in this domain, you could trace back the lineage of this ROM back to the days of CyanogenMod. Right from its inception to this date, it has stuck with its USP of providing just the required bit of crucial apps and services, without incorporating any additional bloatware apps. So while you wouldn’t get a plethora of features baked into the ROM, you are guaranteed a fluid and smooth usage experience.
To further cement this statement, the ROM doesn’t even come with any preinstalled Google Apps, Services, and Framework [although you could easily install them later on using the GApps package]. With this, you would have got a decent idea regarding this ROM, let’s now get started with the instructions to install the LineageOS 20 ROM based on Android 13 onto your Redmi Note 9.
How to Install LineageOS Android 13 on Redmi Note 9

Before starting with the process, make sure to take a complete device backup beforehand. Droidwin and its members wouldn’t be held responsible in case of a thermonuclear war, your alarm doesn’t wake you up, or if anything happens to your device and data by performing the below steps. NOTE: Your Redmi Note 9 should be on the latest Android 11 firmware to install LineageOS 20 ROM.
STEP 1: Install Android SDK
First and foremost, you will have to install the Android SDK Platform Tools on your PC. This is the official ADB and Fastboot binary provided by Google and is the only recommended one. So download it and then extract it to any convenient location on your PC. Doing so will give you the platform-tools folder, which will be used throughout this guide.

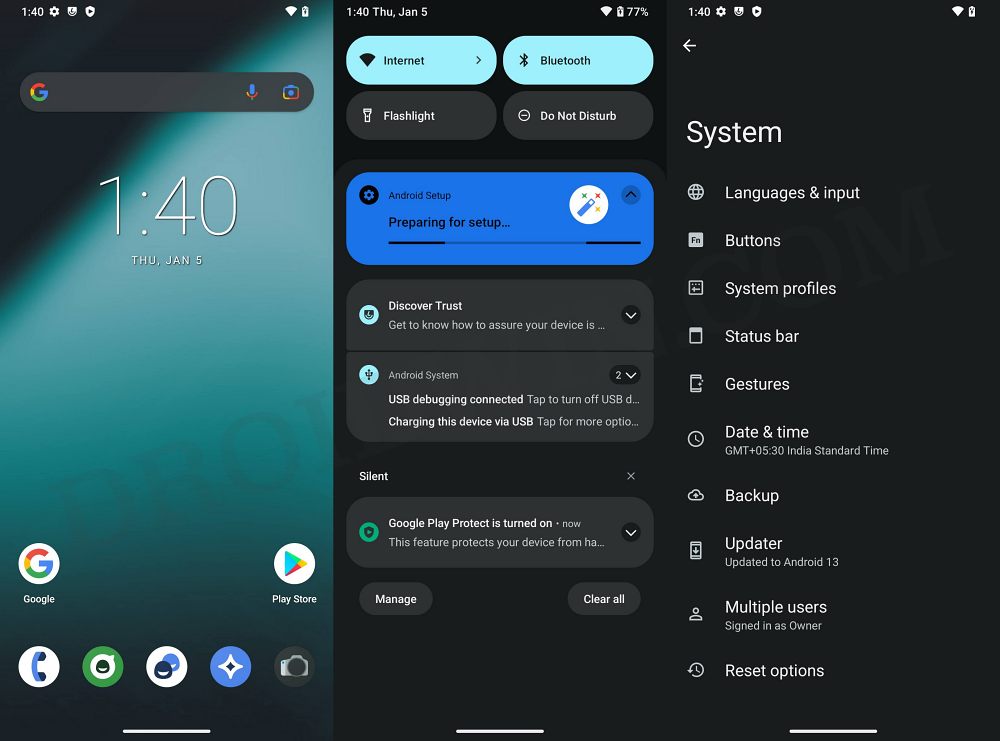
STEP 2: Enable USB Debugging and OEM Unlocking
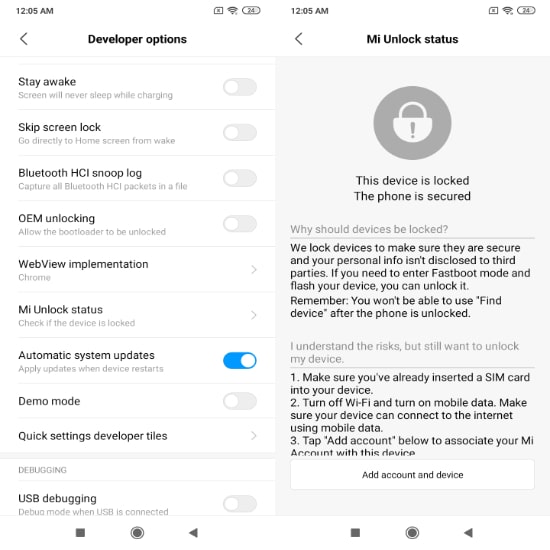
Next up, you will have to enable USB Debugging and OEM Unlocking on your device. The former will make your device recognizable by the PC in ADB mode. This will then allow you to boot your device to Fastboot Mode. On the other hand, OEM Unlocking is required to carry out bootloader unlocking. So head over to Settings > About Phone > Tap on Build Number 7 times > Go back to Settings > System > Developer Options > Enable USB Debugging and OEM Unlocking.
STEP 3: Unlock Bootloader
Next up, you will also have to unlock the device’s bootloader. Do keep in mind that doing so will wipe off all the data from your device and could nullify its warranty as well. So if that’s all well and good, then please refer to our detailed guide on How to Unlock Bootloader on any Xiaomi Device
STEP 4: Download ROM, Recovery, GApps
- Now, get hold of all the required from below [GApps is optional]
- The ROM and GApps files will be present as a ZIP whereas the recovery will be an IMG file.
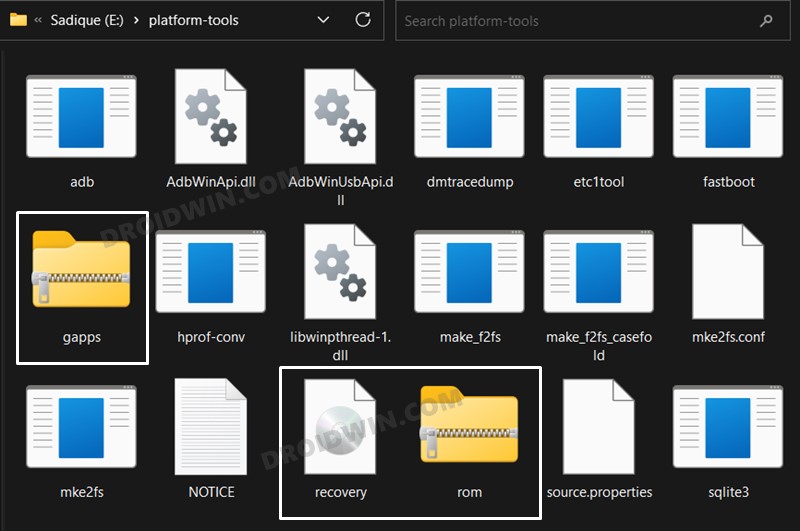
- Once you have downloaded all these files, transfer them to the platform-tools folder on your PC.
- Next up, rename the recovery file to recovery.img, ROM to rom.zip, and GApps to gapps.zip
STEP 5: Boot to Fastboot Mode
- Connect your device to the PC via a USB cable. Make sure USB Debugging is enabled.
- Then head over to the platform-tools folder, type in CMD in the address bar, and hit Enter. This will launch the Command Prompt.
- After that, type in the following command in the CMD window to boot your device to Fastboot Mode
STEP 6: Flash LineageOS 20 Recovery on Redmi Note 9
- You will now have to flash the LineageOS recovery onto your device. So execute the below command for the same:
STEP 8: Factory Reset Device
- From the LineageOS Recovery, go to Factory Reset.
- Then select Format Data/Factory Reset > Format Data.
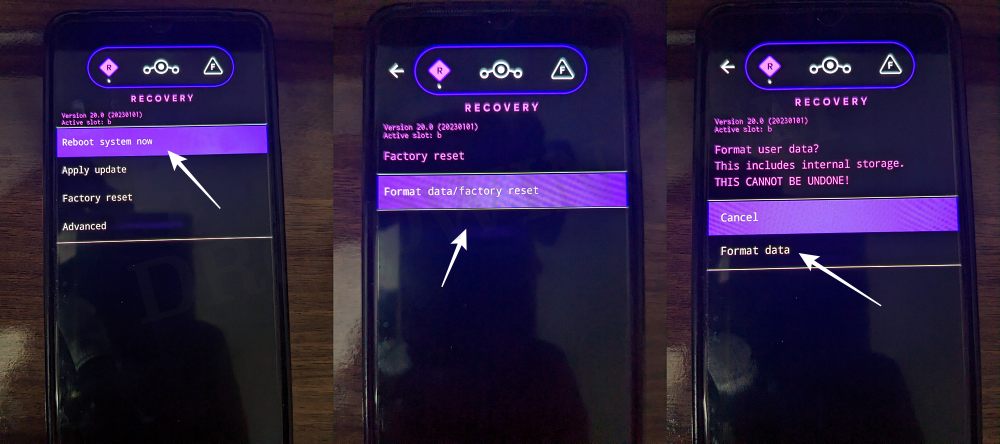
- Your device will now undergo a reset.
- Once done, you shall get the “Data wipe complete” message.
STEP 9: Install LineageOS Android 13 ROM on Redmi Note 9
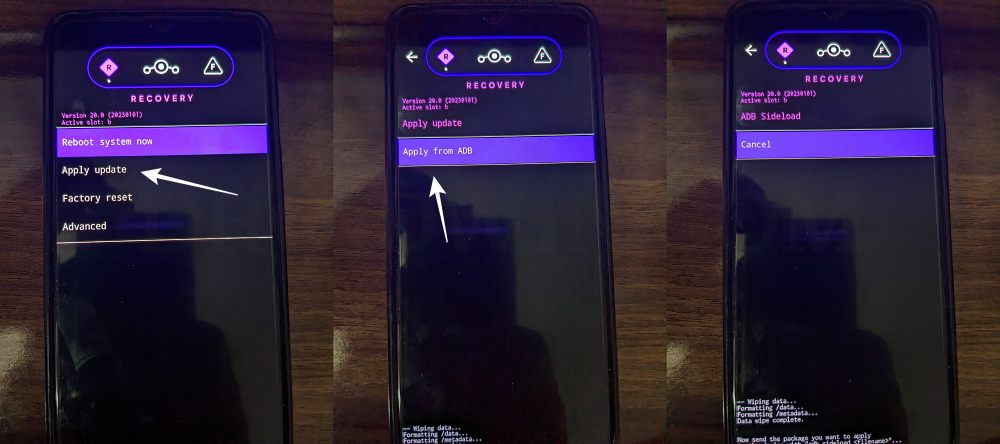
- From the LineageOS Recovery, go to Apply Update > Apply from ADB.
- Then head over to the platform-tools folder, type in CMD in the address bar, and hit Enter.
- This will launch the Command Prompt. So type in the below command to flash the ROM file via Sideload:
STEP 10: Install GApps
- Go to Advanced > Reboot to Recovery. Your device will reboot to LineageOS Recovery.
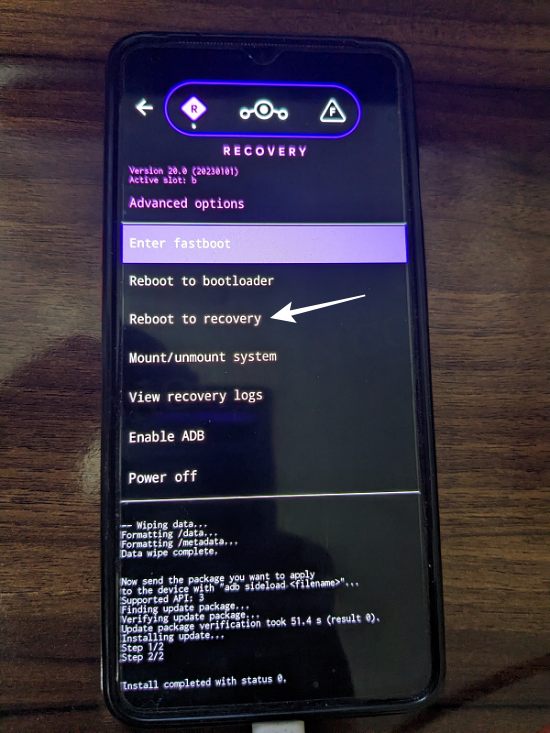
- Once done, go to Apply Update > Apply from ADB.
- Now type in the below command to flash the GApps file via Sideload:
That’s it. These were the steps to install the LineageOS ROM based on Android 13 onto your Redmi Note 9. If you have any queries concerning the aforementioned steps, do let us know your doubt and the device that you are using in the comments. We will get back to you with a solution at the earliest.
Fix: Error During ADB Sideload
If you get one of the below error messages, then it signifies a successful installation and you could reboot the device to the OS without any issues:
- Total xfer: 1.00x
- adb: failed to read command: Success/No error
- adb: failed to read command: No error
- (
About Chief Editor
Sadique Hassan
A technical geek by birth, he always has a keen interest in the Android platform right since the birth of the HTC Dream. The open-source environment always seems to intrigue him with the plethora of options available at his fingertips. “MBA by profession, blogger by choice!”
How To Install LineageOS On Xiaomi And Redmi Devices?

I n the custom ROM ecosystem, if there is one ROM that is respected by all — it is the LineageOS. It breathes new life into otherwise monotonous and gloomy Xiaomi and Redmi devices.
Lineage OS, the successor to widely known CyanogenMod, offers a complete stock Android look with hundreds of customization options.
If you are infuriated over the bloatware, intrusive ads and the crowded interface of the MIUI Android-skin, then here is how you can install LineageOS in your Xiaomi device —
Installing LineageOS on Xiaomi and Redmi
Installing LineageOS is no different from installing a custom ROM on an Android device; it involves three major steps — unlocking the bootloader, installing a custom recovery, and finally flashing the custom ROM.
Also Read: How To Install Custom ROM On Any Xiaomi/Redm Device?
Prerequisites:
- ADB and Fastboot installed on your PC (Here is how)
- USB Debugging turned on (Here is how)
1. Unlock the Bootloader
Bookmark this page because it will take you days before you can cross this step. Unfortunately, Xiaomi makes users go through an agonizing wait before allowing them to unlock their devices. Here are the steps –
Also Read: How To Unlock Bootloader On Xiaomi Device?
- Link your Xiaomi device to an Mi account — Settings > Additional settings > Developer options > Mi Unlock status.
- Download and open the Mi Unlock tool on your PC
- Go into Fastboot mode on your device — Switch off and press power+volume down button for few seconds

- Connect the device to your PC using a USB cable
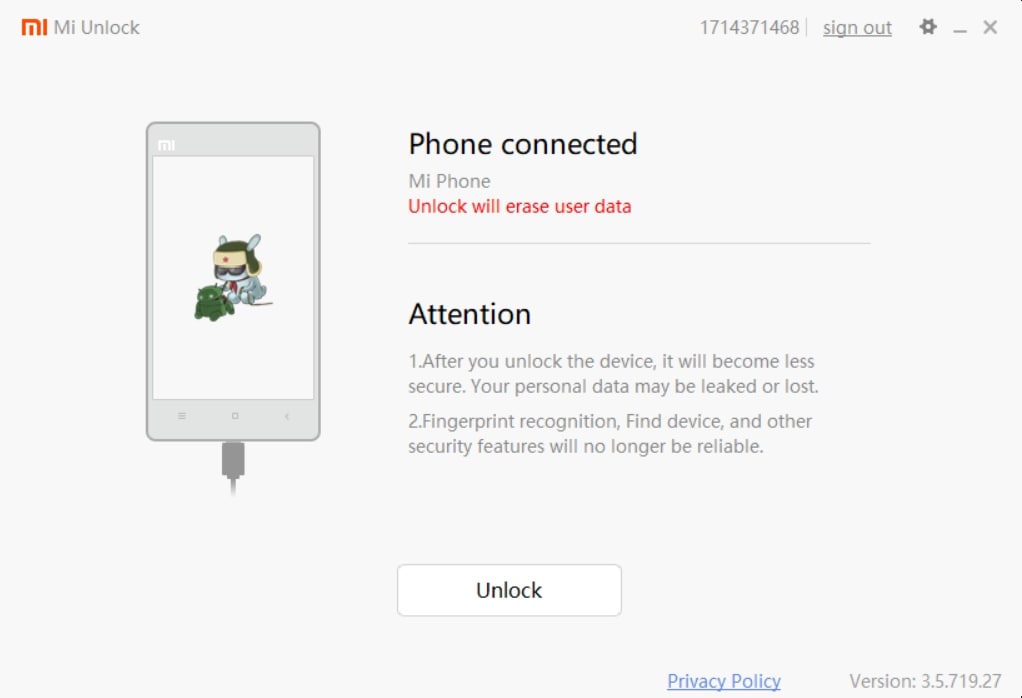
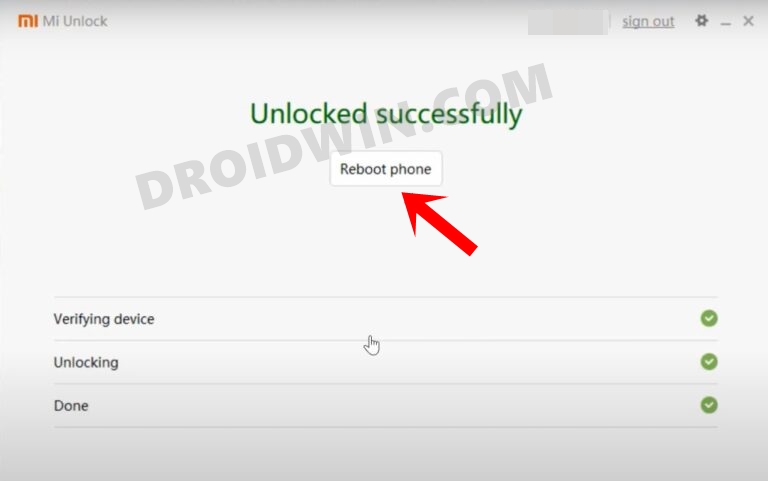
- Click on Unlock on the Mi Unlock app
While it says 360 hours, users end up getting their phones unlocked within a week.
2. Install a custom recovery
Custom recovery enables users to install third-party firmware often unsupported by Android stock recovery. Here I have used Orange Fox recovery, users can also use the widely known TWRP custom recovery.
- Download the recovery image file for the Xiaomi device and move it to the ADB source folder in C Drive.
- Open Fastboot mode on your device and connect your device to PC
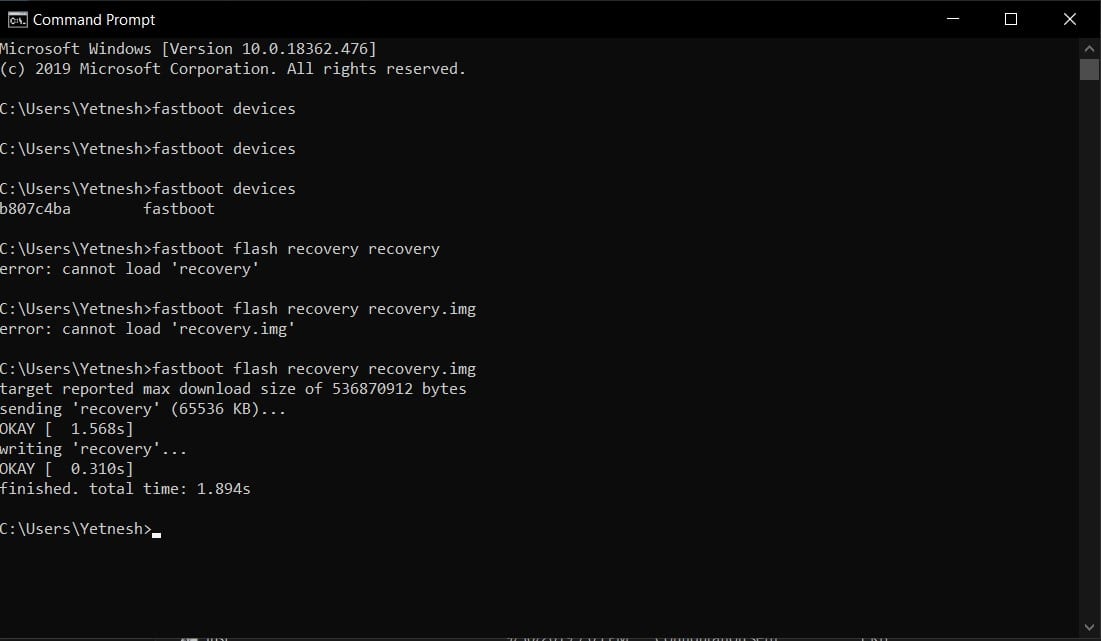
- Open command prompt (on Windows) or Terminal (on Linux or macOS)
- Type fastboot devices. Press Enter
- Type fastboot flash recovery (name of the downloaded file).img. Press Enter
- Boot into recovery — Hold Power Button+ Volume Up
Avoid rebooting the device after installing the custom recovery, otherwise, Xiaomi might remove it.
3. Flashing the LineageOS ROM
Before moving ahead, download the latest LineageOS for your device. Other than installing a custom ROM, users will also need to flash the Google Apps (GApps) zip file. Move both the files on the device Internal Storage.
- Wipe Data/factory reset, Cache and Dalvik cache
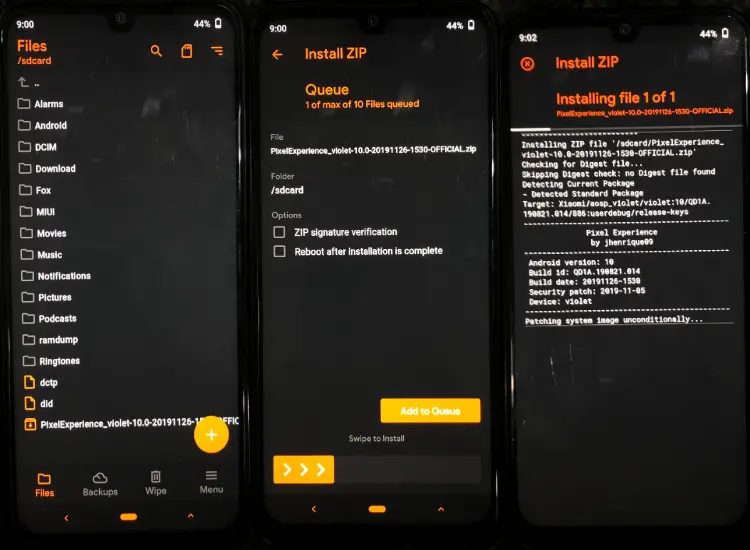
- Select the LineageOS zip file and install it.
- Install the GApps zip file after flashing the ROM.
- Reboot
Congratulations Xiaomi users upon the successful installation of Lineage OS on your device. Although, I would highly doubt that you would have managed to get it right the first time.
Since there are too many unknown variables, it is normal to be stuck at certain steps. However, there is nothing you can do to your device that cannot be reversed. Even if you have bricked the device (worst of all), you will have multiple guides all over the Internet at your disposal.
Как установить LineageOS на любой Android смартфон

В данном руководстве мы расскажем, как установить LineageOS на любой Android смартфон.
Новая операционная система LineageOS стала доступна для большинства Android устройств. Если вы большой любитель пользовательских прошивок, тогда вы обязательно должны попробовать LineageOS. Все, что вам нужно для установки LineageOS на Android смартфон, это устройство с Root правами (как открыть root права) и пользовательский режим восстановления TWRP.
Процесс установки очень простой. Вам нужно будет установить два файла на мобильное устройства. Внимательно следуйте инструкции шаг за шагом.
Перед выполнением, я рекомендую создать резервную копию данных. Также убедитесь, что на смартфоне включена откладка по USB. Прочитайте в нашей статье, как включить отладку по USB на Android смартфоне.
Как установить LineageOS на Android устройство
Шаг 1. Скачайте LineageOS для вашего смартфона.
По этой ссылке вы найдете все доступные версии LineageOS для разных смартфонов. Скачайте LineageOS для своего Android устройства. Скопируйте скачанный zip файл прошивки на смартфон. Запомните точное расположение LineageOS на устройстве.
Если вашего смартфона в данном списке нет, тогда вы не можете установить LineageOS. Однако, список поддерживаемых устройств LineageOS пополняется с каждым днем, поэтому следите за обновлениями.
Шаг 2. Скачайте GAPPS для LineageOS.
Чтобы запустить приложения Google на прошивке LineageOS, вам нужно установить пакет GAPPS. Вы можете скачать пакет GAPPS для LineageOS на этом сайте. Скопируйте пакет GAPPS на смартфон.
Шаг 3. Установите пользовательский режим восстановления TWRP.
Для того, чтобы установить LineageOS на Android смартфон, вам нужен пользовательский режим восстановления (recovery) под названием TWRP. Наша статья поможет вам с этим — как установить Recovery на Android.
Шаг 4. Установка LineageOS на Android смартфон
Предупреждение: гаратия мобильного устройства будет аннулирована. Внутренняя память будет полностью очищена.
- Скачайте zip файл LineageOS и zip файл GAPPS по ссылкам выше. Скопируйте эти два файла на внутреннюю память смартфона.
- Перезагрузите Android устройство в режим восстановления. Для этого выключите смартфон, после чего зажмите кнопку Громкость Вверх (или Громкость Вниз) и Включения.
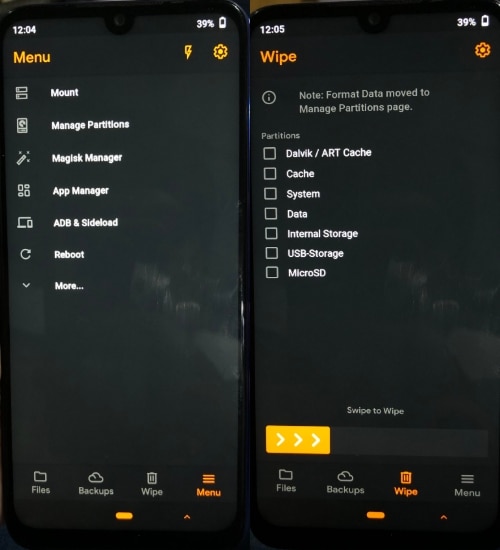
- В режиме восстановления выберите «Wipe» и нажмите на «Swipe to factory reset» внизу экрана.
- Затем вернитесь в главное меню TWRP, нажмите кнопку «Install», выберите zip файл Lineage OS, который вы скопировали на смартфон в 1 пункте.
- Нажмите на «Swipe to confirm flash» в нижней части экрана, чтобы начать установку.
- Повторите пункты 4-5, чтобы установить zip файл GAPPS.
- После того, как вы установите эти два файла, перейдите к опции «Wipe cache/Dalvik» и выберите «Swipe to wipe».
- Дальше перезагрузите смартфон из главного меню.
Перезагрузка устройства может занять немного больше времени, чем обычно. Не стоит волноваться, дождитесь полной загрузки. На этом все! Теперь ваш Android смартфон работает новой прошивке LineageOS.