font-weight
The font-weight property specifies the weight or boldness of the font (their degree of blackness or stroke thickness). Note that some fonts are not available in all weights; some are available only on normal and bold.
Overview table
Syntax
- font-weight: 100, 200, 300, 400, 500, 600, 700, 800, 900
- font-weight: bold
- font-weight: bolder
- font-weight: lighter
- font-weight: normal
Values
Examples
A selection of examples showing some typical uses of the font-weight property. In practise, you most probably won’t see much difference when using any values except for normal and bold .
Usage
600-900 use the closest available darker weight (or, if there is none, the closest available lighter weight).
100-500 use the closest available lighter weight (or, if there is none, the closest available darker weight).
This means that for fonts that provide only normal and bold, 100-500 are normal, and 600-900 are bold.
Although the practice — also called “Faux bold” — is not well-loved by typographers, bold faces are often synthesized by user agents for faces that lack actual bold faces.
100 to 900
These values form an ordered sequence, where each number indicates a weight that is at least as dark as its predecessor. These roughly correspond to the commonly used weight names below:
font-weight
The font-weight CSS property sets the weight (or boldness) of the font. The weights available depend on the font-family that is currently set.
Try it
Syntax
The font-weight property is specified using any one of the values listed below.
Values
Normal font weight. Same as 400 .
Bold font weight. Same as 700 .
One relative font weight lighter than the parent element. Note that only four font weights are considered for relative weight calculation; see the Meaning of relative weights section below.
One relative font weight heavier than the parent element. Note that only four font weights are considered for relative weight calculation; see the Meaning of relative weights section below.
A <number> value between 1 and 1000, inclusive. Higher numbers represent weights that are bolder than (or as bold as) lower numbers. Certain commonly used values correspond to common weight names, as described in the Common weight name mapping section below.
In earlier versions of the font-weight specification, the property accepts only keyword values and the numeric values 100, 200, 300, 400, 500, 600, 700, 800, and 900; non-variable fonts can only really make use of these set values, although fine-grained values (e.g. 451) will be translated to one of these values for non-variable fonts using the Fallback weights system.
CSS Fonts Level 4 extends the syntax to accept any number between 1 and 1000 and introduces Variable fonts, which can make use of this much finer-grained range of font weights.
Fallback weights
If the exact weight given is unavailable, then the following rule is used to determine the weight actually rendered:
- If the target weight given is between 400 and 500 inclusive:
- Look for available weights between the target and 500 , in ascending order.
- If no match is found, look for available weights less than the target, in descending order.
- If no match is found, look for available weights greater than 500 , in ascending order.
Meaning of relative weights
When lighter or bolder is specified, the below chart shows how the absolute font weight of the element is determined.
Note that when using relative weights, only four font weights are considered — thin (100), normal (400), bold (700), and heavy (900). If a font-family has more weights available, they are ignored for the purposes of relative weight calculation.
Inherited value bolder lighter 100 400 100 200 400 100 300 400 100 400 700 100 500 700 100 600 900 400 700 900 400 800 900 700 900 900 700 Common weight name mapping
The numerical values 100 to 900 roughly correspond to the following common weight names (see the OpenType specification):
Value Common weight name 100 Thin (Hairline) 200 Extra Light (Ultra Light) 300 Light 400 Normal (Regular) 500 Medium 600 Semi Bold (Demi Bold) 700 Bold 800 Extra Bold (Ultra Bold) 900 Black (Heavy) 950 Extra Black (Ultra Black) Variable fonts
Most fonts have a particular weight which corresponds to one of the numbers in Common weight name mapping. However some fonts, called variable fonts, can support a range of weights with a more or less fine granularity, and this can give the designer a much closer degree of control over the chosen weight.
For TrueType or OpenType variable fonts, the «wght» variation is used to implement varying widths.
Note: For the example below to work, you’ll need a browser that supports the CSS Fonts Level 4 syntax in which font-weight can be any number between 1 and 1000 . The demo loads with font-weight: 500; . Change the value to see the weight of the text change.
Accessibility concerns
People experiencing low vision conditions may have difficulty reading text set with a font-weight value of 100 (Thin/Hairline) or 200 (Extra Light), especially if the font has a low contrast color ratio.
CSS Basics for Typography

In 2020 there are a lot of developers and designers who want to learn the basics of CSS. In this series of articles, I will teach you those main topics. In this specific article, I will review the essential CSS properties of typography while using many visual examples.
font-family
This font-family property is used to declare what font we want to use. It can receive an array of fonts. This can be useful to us for two reasons:
- If the first font isn’t working in a specific operating system, the browser will use the next font until something matches it.
- If the font has missed some of the characters, it will fill in the missing characters from the next font at the list.
font-weight
This property, like his name, is for declaring the font-weight of the text. The default value of this property is normal , and the second common value of it is bold .
In more advanced fonts there are more than two states. Instead of using names in the values, these fonts are using numeric values: 100 / 200 / 300 / 400 / 500 / 600 / 700 / 800 / 900 and 950 . Which are equal to the common mapping names (in design apps), see table:
The normal keyword is equal to 400 value, and the bold keyword is equal to 700 value. Examples:
font-size
This property, like his name, is for declaring the font-size of the text. Even today, the most common sizing unit is pixels. Example:
From my perspective, it is better to control the font-size with rem units. If you want to know more about how to work with rem units, you can read my article “Update your font-size to REM units”.
line-height
This property is telling the browser the height of the line in ratio to the text-size . This property can get fixed value like pixel, but the most common way is to give it a value of ratio without any unit.
The line-height property, is a type of inherited property, which usually means you declare it one time in the root element, and it will affect all the elements on our website. This way if we have different font-size in inner elements, the line-height will stay with the same ratio, and we won’t need to declare it multiple times. Example:
font-style
We use it to update the text font into an italic variant state.
Text color property
The color property is used to color the text. It can receive color keywords, for example, red , magenta . It can receive a HEX color code and color functions like RGB and HSL. If you want to know more about CSS colors, you can read my article “Why CSS HSL Colors are Better!”.
text-align
This property, like his name, is to control the alignment of text in its reading axis(inline-axis). Besides the possibilities to align left and right , we have the center value and the less known justify value, which aligns the text in both ways.
Besides, there is an extensive property, text-align-last , which allows you to differentiate the last line from all the other lines. For more info: text-align-last in MDN.
direction
The direction property sets the direction of text, table columns, flexbox, grids, and more. It has two values:
- ltr value — for Latin languages that are read from left to right.
- rtl value — for Semitic languages that are read from right to left.
When using the direction property the text-align property is being updated automatically as well in the same direction unless it is defined otherwise. Example:
vertical-align
This property is used mainly for vertical inline text content. The main common values are baseline (default value), text-top , and text-bottom which are relative to the line-height of the text in the container.
There are more values like top and bottom that can act differently only if the line-height of to row is different from the line-height of the inline elements.
This property can be used even unit values which are positioned according to the baseline value, which means 0px = baseline , with this, you can play with negative & positive values, for example -2px or 2px .
Note: this vertical alignment is good for text elements. For vertical alignment of boxes, it is better to use CSS flexbox.
text-decoration
This property’s most used case is for adding underline to links, and it could also be used for creating overline and line-through . Example:
But in the last years, this property has been given a lot of extensions, and now you can use all the values together, for example:
Another possibility we now have is to play with the style of the lines and with their color.
text-transform
The text-transform property specifies how to capitalize on texts. We use it to make text appear in all-uppercase or all-lowercase, or to make each word capitalized.
letter-spacing
The letter-spacing property, as his name is, decreases or increases the spacing between the letters of the words. When using this property with px units, you can use fragments of pixels for example 0.1px . To decrease the spacing, this property can get negative values as well, like -1.5px , for example.
word-spacing
The letter-spacing property, as his name, allows us to define the space between the words.
text-indent
The indent property is used to indent the first line in a paragraph. Inside with a positive value or outside with a negative value.
::first-letter
The ::first-letter pseudo-element selector allows us to style the first letter in different styles from the regular text in paragraphs, for example.
Besides the ::first-letter pseudo-element, there is the ::first-line pseudo-element, which allows you to style the first-line of a paragraph differently. Because I haven’t seen a common use for it, I have decided not to give it a big stage in my article, but just to notify you that it exists.
text-shadow
The text-shadow property allows us to add shadow to text. For it to work, we need to provide it with at least the offset-x and the offset-y of the shadow. If we provide only these two values, the shadow will be left without a spread and with the same color of the text.
The third numeric value will be the spread of the shadow. We can also give it a different color value, in the beginning, or the end of the value.
Besides, we can add multiple text-shadows, using a comma in the value.
text-stroke
The text-stroke property is a non-standard property that works in all main browsers. It works with the -webkit prefix, even on Firefox & old Edge. The property receives two values, stroke-width and stroke-color.
More and More and More!
There are more properties of CSS for typography and big new topics like Variable Fonts, which are dynamic. But in this article, I have tried to show the main basic elements to control typography with CSS.
If this topic interests you, you can continue and explore this vast topic in CSS. Here some more properties and topics we haven’t talked about: Variable Fonts, font-variant , text-justify , unicode-bidi , all the ways of breaking words in CSS, and I may have missed several more��.
To Summarize
In this article, my primary purpose was to show the most useful properties for CSS typography and to provide you with this knowledge.
Final Words
I hope I inspired you and showed you some new possibilities.
If you like this post, I would appreciate applause and sharing ��.I create lots of content on CSS. Be sure to follow me via Twitter, Linkedin, and Medium.
Also, you can see all of my content on my website: eladsc.dev.
Who Am I?
I am Elad Shechter, a Web Developer specializing in CSS & HTML design and architecture.
Жирный текст с помощью HTML и CSS
Сегодняшней публикацией начинаю цикл статей про жирные шрифты. Изначально думал разместить все нюансы и вопросы по теме в одном месте, но информации оказалось слишком много. Лучше воспринимать ее постепенно. Поэтому перед тем, как перейти к разным обзорам шрифтов для создания фотошоп иллюстраций рассмотрю вопросы, связанные с версткой. Подборки фонтов найдете тут: интересные жирные, разные bold и русские толстые шрифты.
Сегодня расскажу как сделать слова жирным шрифтом на сайте с помощью HTML и CSS. Такое оформление используется когда вам нужно выделить определенную информацию на странице. Причем речь идет не только о заголовках, но и о простых словах, фразах в тексте. Реализовывается это достаточно просто.
Жирный текст на HTML
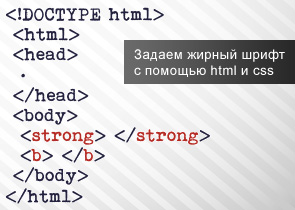
Для выделения определенного текста жирным используются специальные HTML теги — <b> и <strong>. Например следующий код:
На выходе дает такую картинку:
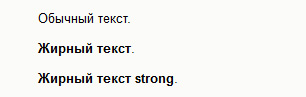
Последние два варианта визуально выглядят одинаково, однако они между собой немного отличаются. Тег <b> задает простое стилистическое выделение слова жирным шрифтом, тогда как <strong> добавляет при этом некое семантическое «усиленное» (важное) значение. То есть последняя строка — это не просто жирный текст, а какая-то важная информация. В принципе, для поисковиков рекомендуют использовать именно <strong>.
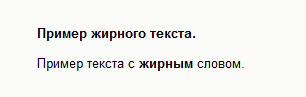
Вы также можете встретить прописанный в HTML жирный шрифт с помощью стилей:
<p style="font-weight:bold">Пример жирного текста.</p> <p>Пример текста с <span style="font-weight:bold">жирным</span> словом.</p>
На сайте это отображается так:
Не смотря на то, что код жирного текста для HTML работает корректно, так делать не следует. Все стили оформления должны быть вынесены в CSS файл. Поэтому в примере выше вы должны были для тегов <p> и <span> указать соответствующий класс, а затем прописать его оформление в таблице стилей. Такие вот правила оформления кода. Поэтому для жирного шрифта в HTML используйте тег <strong>.
Жирный текст на CSS
Дабы сделать в CSS жирный шрифт используется свойство font-weight. С его помощью указывается «насыщенность» фрагмента текста. Значения могут быть от 100 до 900, но наиболее часто используемые это:
- bold (жирный) — 700 по умолчанию;
- normal (обычный) — 400 по умолчанию.
Есть также варианты значений bolder и lighter, которые меняют шрифт в зависимости от родителя на более или менее жирный соответственно.
Чтобы задать жирный текст в CSS нужно тому или иному элементу задать какой-то стиль, например:
<p>Обычный текст с <span выделением</span> по центру.</p>
Далее в CSS стилях вы определяете для него жирность вместе с другими свойствами по типу подчеркивания текста и т.п.:
Либо можно написать:
Разницы нет никакой. Кстати, если говорить о HTML теге <strong>, то для него по умолчанию прописан такой стиль:
Тут хотелось отметить один небольшой нюанс, который мне рассказали на курсах верстки — если вы создаете для какого-то элемента новый класс, то желательно использовать более-менее «понятное название». Например, в примере выше стиль выглядит логичнее чем т.к. можно отчасти понять его назначение. Это плюс для тех, кто будет смотреть и использовать вашу верстку в дальнейшем.
В следующей статье расскажу про интересные жирные шрифты, которые мне удалось найти.