How to Test Internet Speed and Show it on Taskbar in Windows 11
Test the internet speed and even show real-time download and upload speed right in the Taskbar on your Windows 11 PC.
Raj Kumar
Whether you are trying to download some files, stream movies, remotely work, play games online, or just surf, knowing your Internet Speed is important because it controls what kind of activities you can do on the internet. Also, testing the internet speed can help you determine whether your router or network adapter working properly as well as help you fix internet-related problems.
There are several ways to test internet speed in Windows 11. You can use the control panel, settings, or PowerShell to find the connection link speed of all your network adapters. Or, you can use a dedicated third-party app or online tools to measure real-time download and upload speed as well as network latency. In this article, we will show you how to check the link speed, and display real-time download and upload speed in Windows 11.
Use “Net Speed Meter” App from Microsoft Store
The Internet Speed monitors allow you to measure your real-time download and upload speed as well as network latency or delay (among other information). There are numerous speed monitors available online (free and paid) that be used to test your network speed. They can also help you track internet usage on your PC.
Microsoft has a free Universal Windows Platform (UWP) app available in Microsoft Store that can be added to the taskbar to monitor your network speed.
First, you need to download and install the Net Speed Meter app from the Microsoft Store.
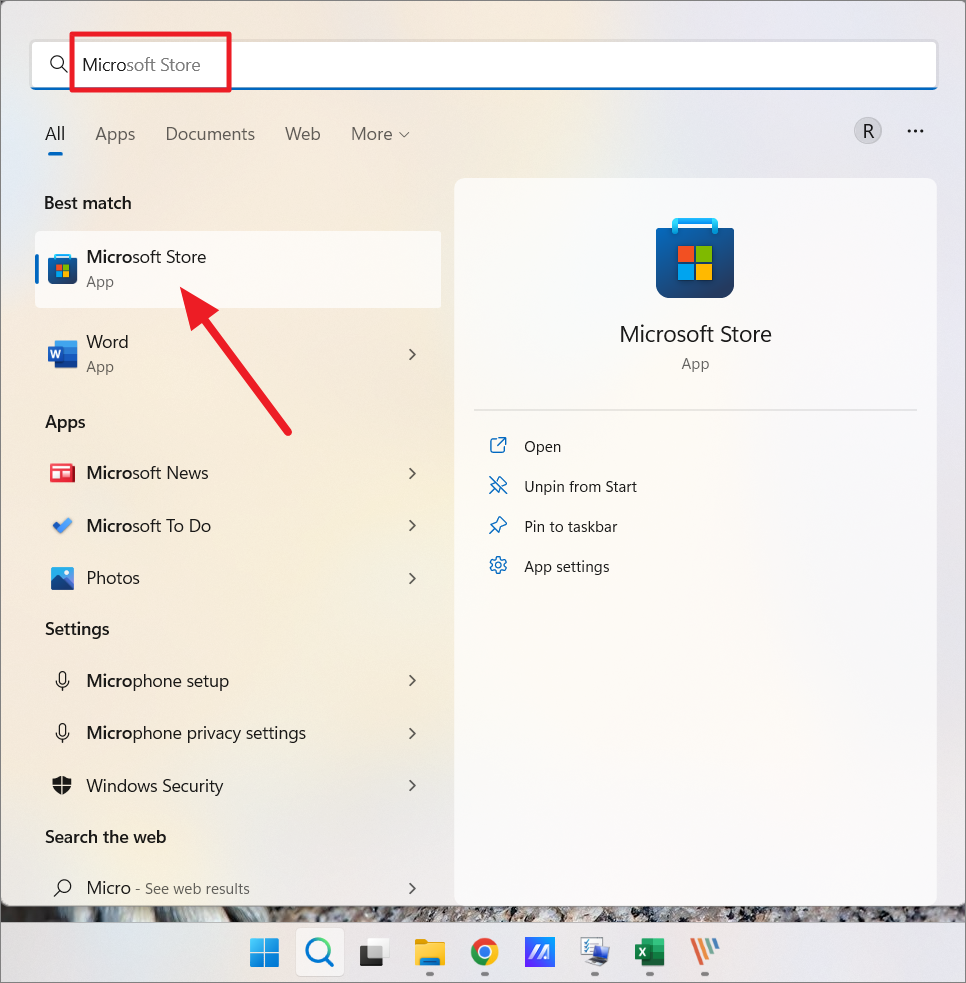
To do that, click the Start button and select ‘Microsoft Store’ from the Start menu. Or search for ‘Microsoft Store’ in the Windows search and select the top result.
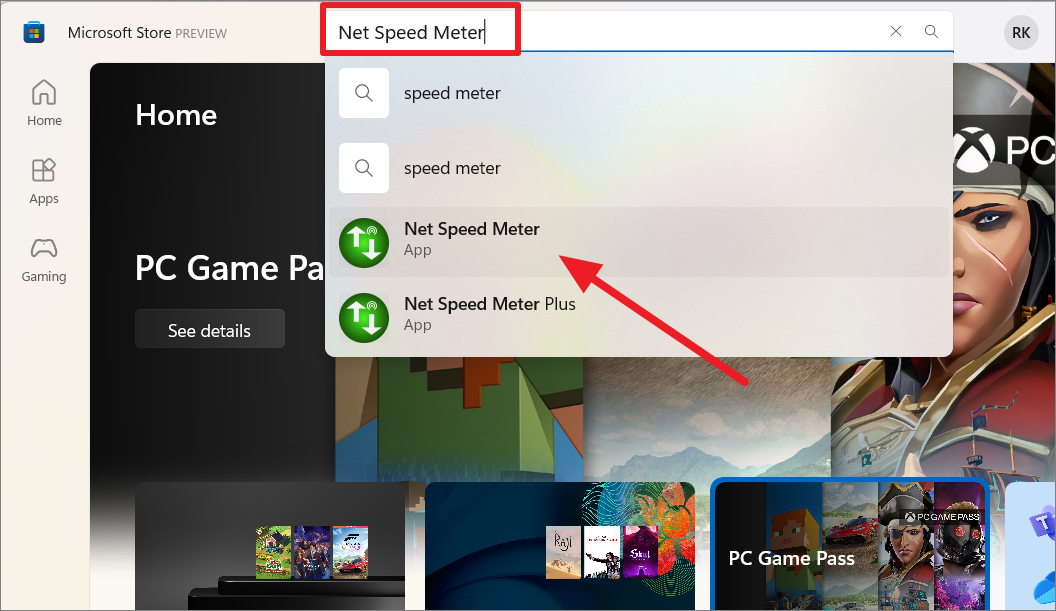
When the Microsoft Store app opens, search for ‘Net Speed Meter’ in the search bar at the top and then select the ‘Net Speed Meter’ app in the search results.
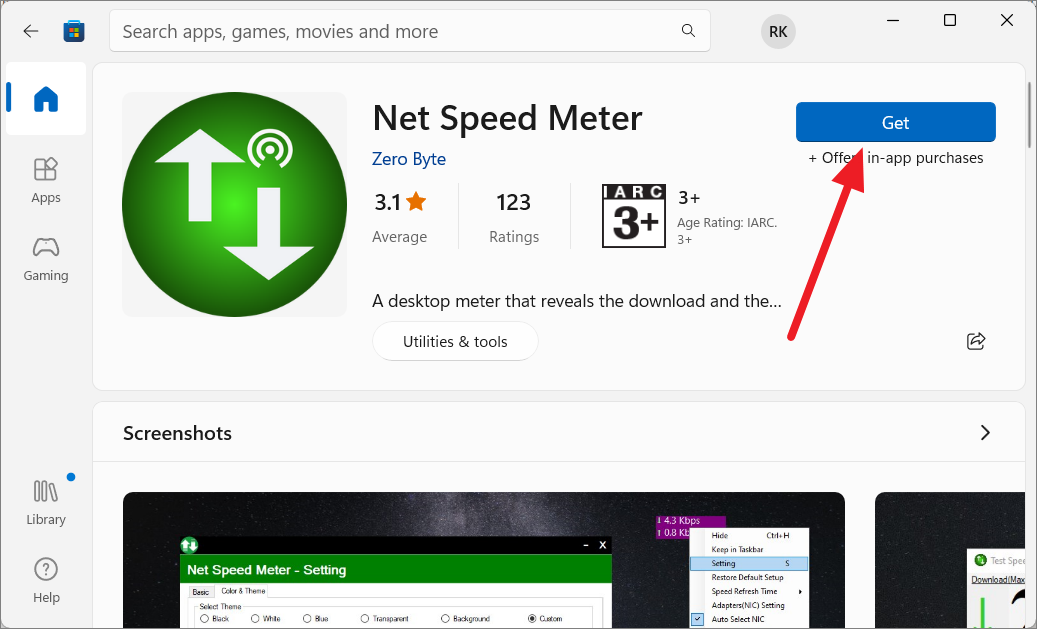
Then, click on the ‘Get’ button on the Net Speed Meter page to install it.
Once the app is downloaded and installed, click the ‘Open’ button to launch it.
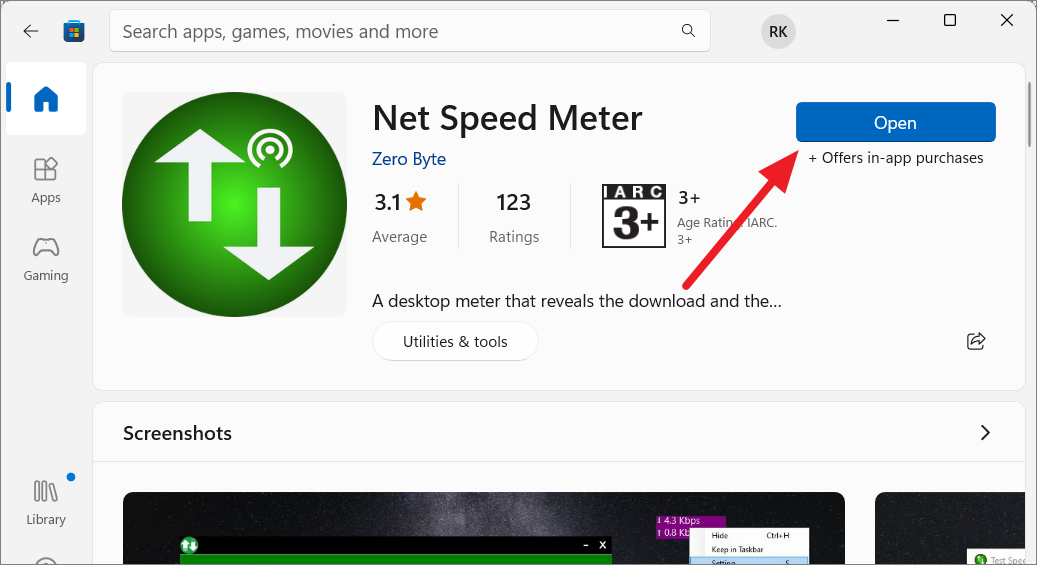
If you are asked to keep the ‘Net Speed Meter’ app running on the taskbar, click ‘Yes’. Then, you’ll see Net Speed Meter on the desktop top right corner as shown below. The Speed meter will show you the live download and upload speed.
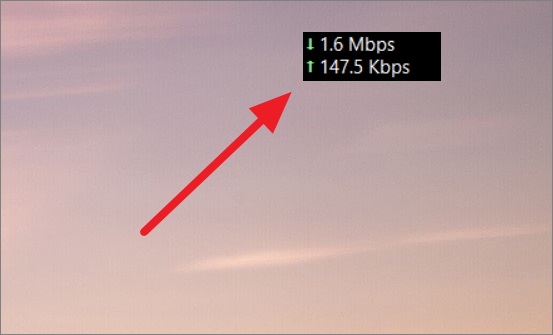
You can also drag and drop the Network Speed meter wherever you want on your desktop.
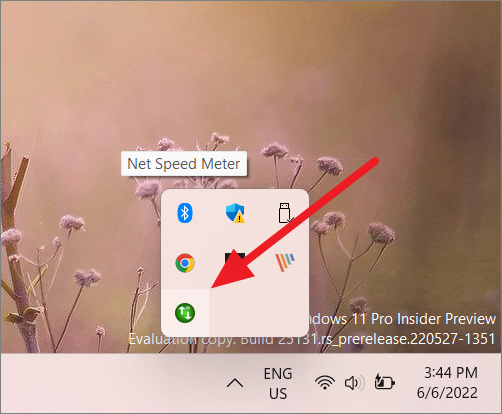
You can also find the Network Speed meter app running in the taskbar corner overflow (System tray).
You can move the Network Speed meter to the taskbar by right-clicking on it and selecting ‘Keep in Taskbar’.
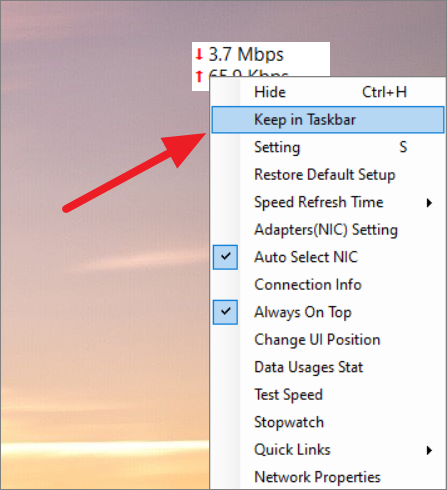
The Network Speed Meter UI on the desktop will show you the real-time upload and download speed but not your internet connection’s maximum speed. If you are not actively using the internet or any of your apps are using the internet, the speed meter UI will just show you ‘0.0 kbps’ for download and upload speed.
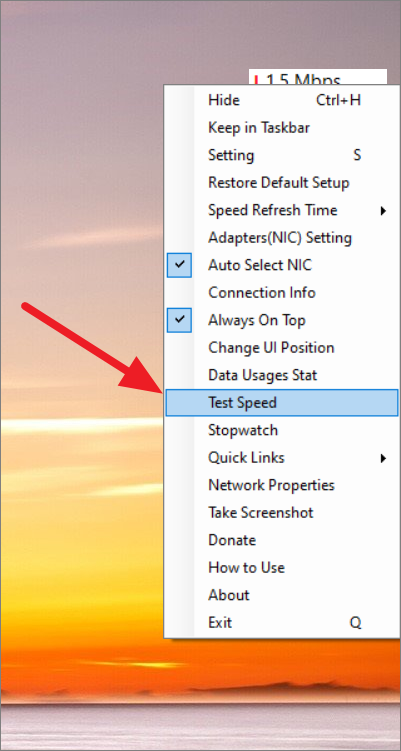
To fully test your maximum internet speed, right the Network speed meter UI or the icon in the system tray and select the ‘Test Speed’ option.
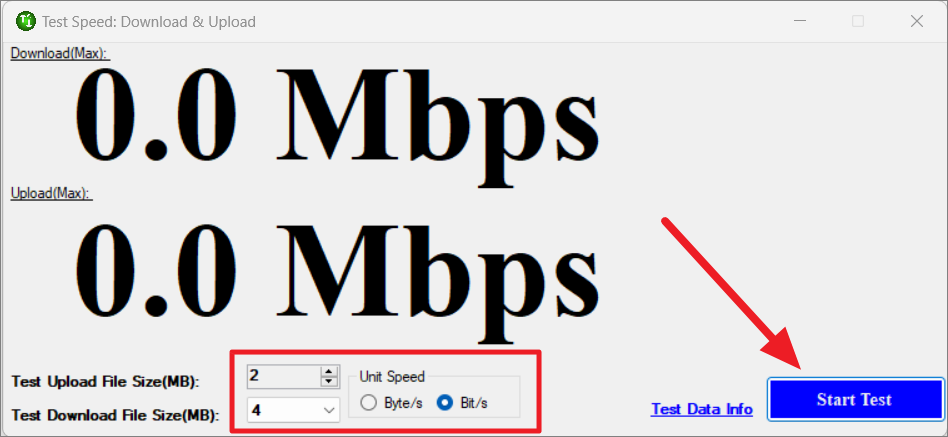
In the Test Speed dialog window, choose the upload file and download file size with which you want to test the speed. You can also choose the Unit Speed: ‘Byte/s’ or ‘Bit/s’. Then, click the ‘Start Test’ button.
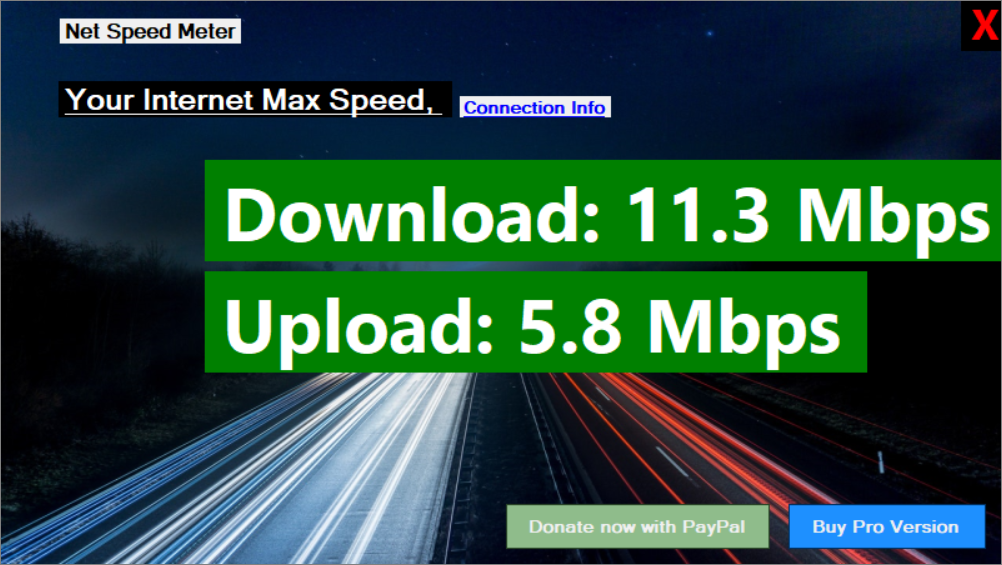
It will take a few seconds to finish the scan and another window will popup to show you the maximum download and upload speed.
Test Your Network Connection Speed Using Windows PowerShell
Windows PowerShell is one of the ways to test your network connection’s link speed. To do that, follow these steps:
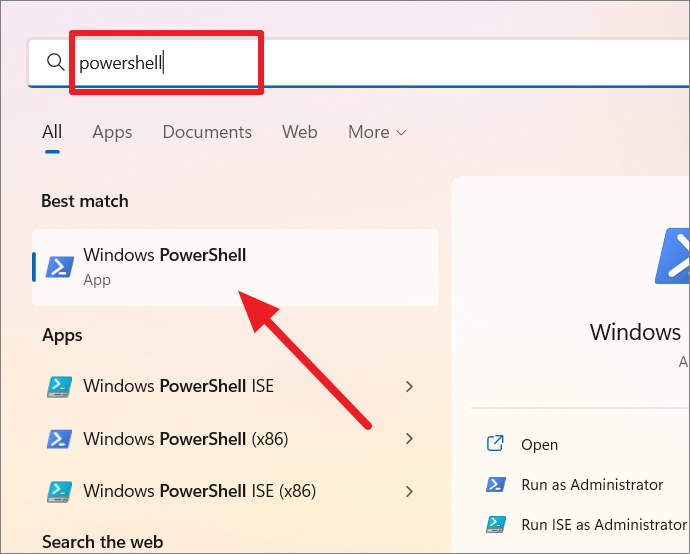
Open the Start menu, search for ‘PowerShell’ and open the top result.
When the PowerShell window opens, type the below command or copy-paste the below command and hit Enter :
Once the command is executed, check the ‘LinkSpeed’ column for the speed of different network adapters. If you are connected through WiFi check the Wireless LAN’s link speed or if you are using a wired connection, check the Local Area Network. You can also identify the active network adaptor by the checking Status column which would be ‘UP’.
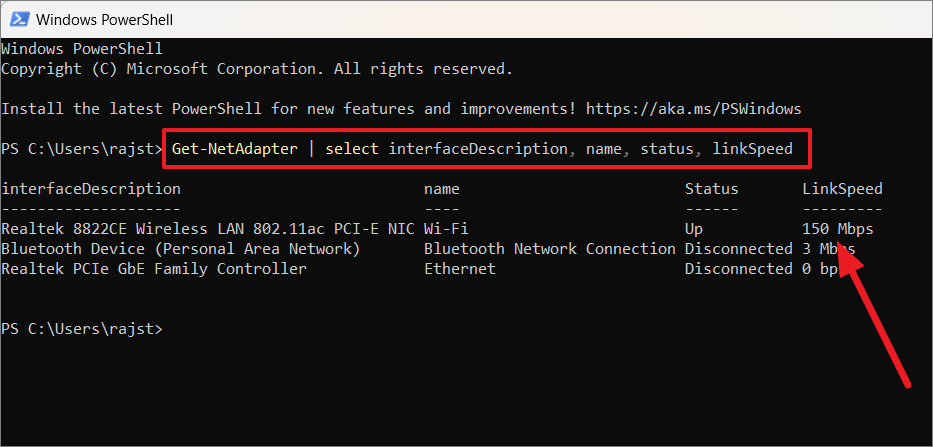
The link speed is usually the maximum theoretical speed between your device and your local Wi-Fi router but it is not the actual download or upload speed you can get when downloading a file or browsing the internet.
Check Network Adaptor Connection Speed Using Control Panel
You can also check your network adaptor connection speed using Network and Sharing Center.
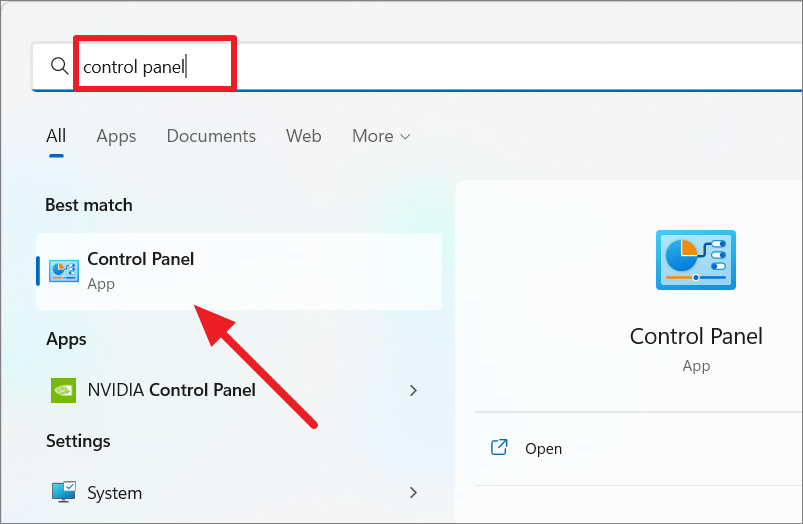
First, open the ‘Control Panel’ by searching for it in the Windows Search.
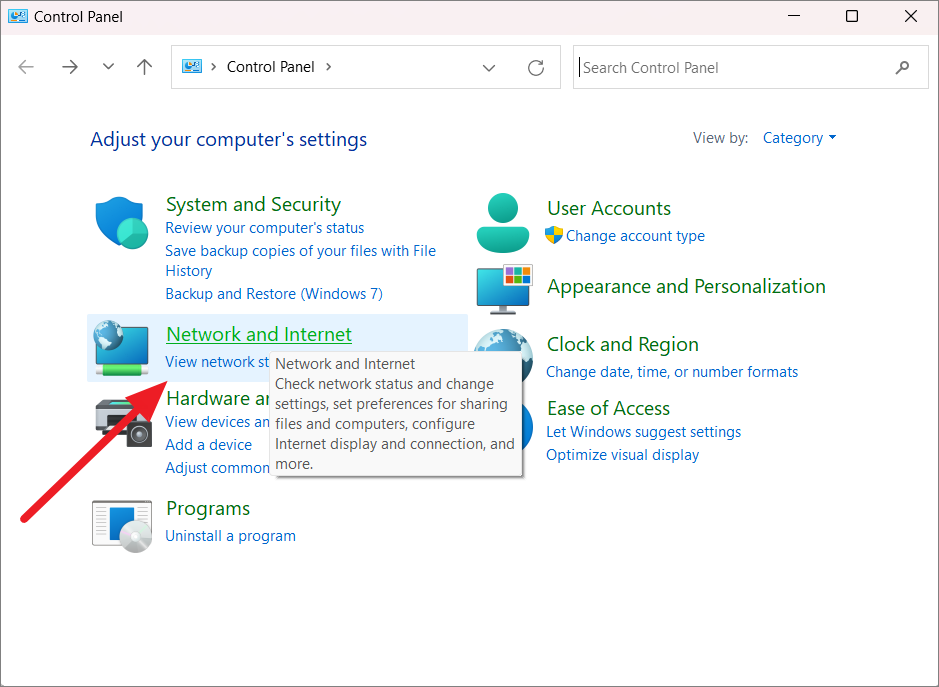
In the Control Panel (Category View), select ‘Network and Internet’ settings.
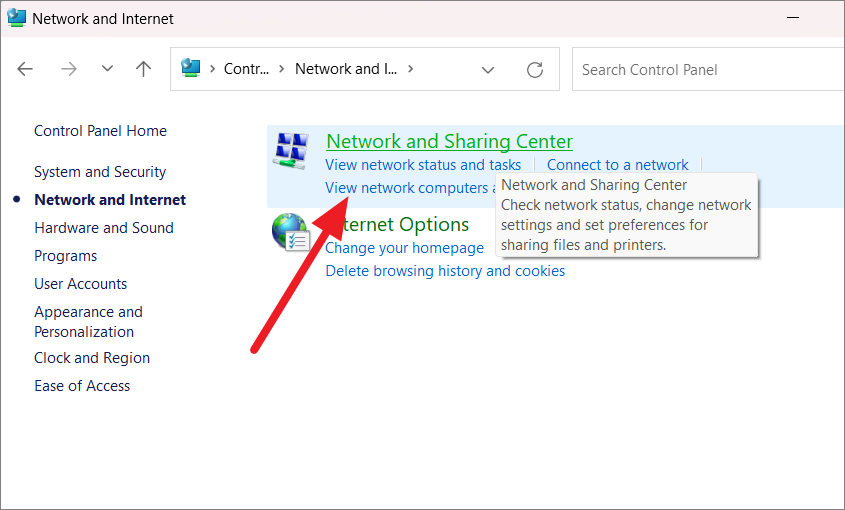
Then, click the ‘Network and Sharing Center’ option.
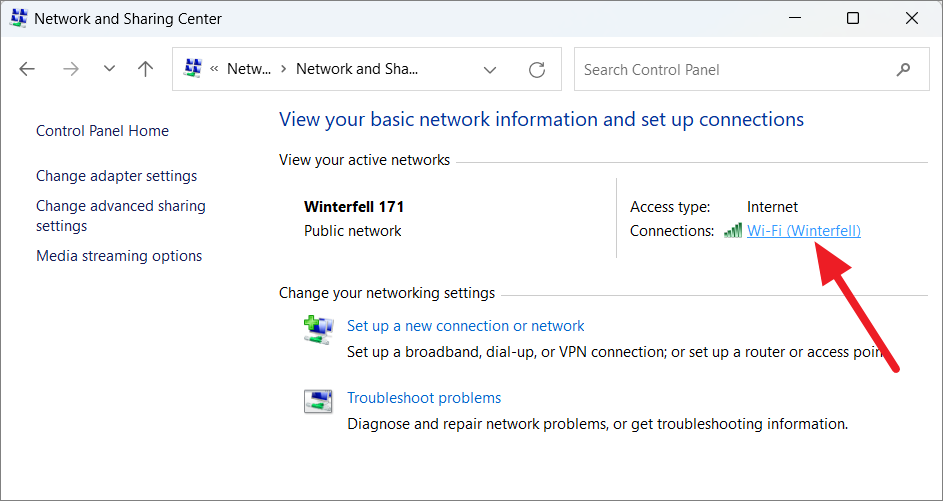
In the Network and Sharing Center, click on the network connection setting link next to ‘Connections’ you want to see its speed.
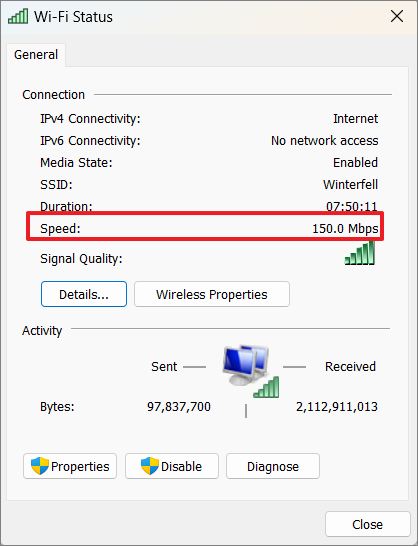
Now, you will see the link speed in the network properties window.
Check Network Adapter Speed using Settings
Another way to check your network link speed is through Windows Settings.
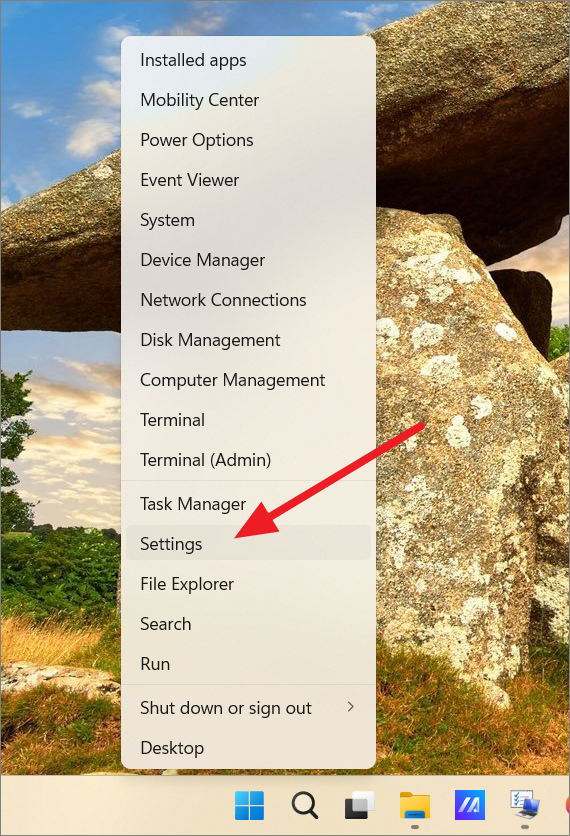
First, open Windows Settings by right-clicking the Start button and selecting ‘Settings’.
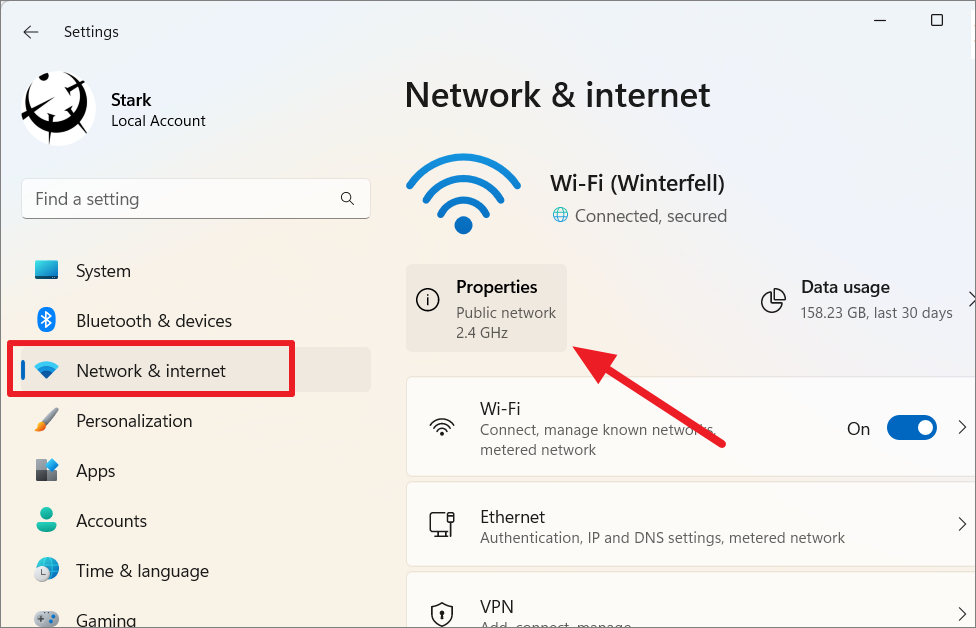
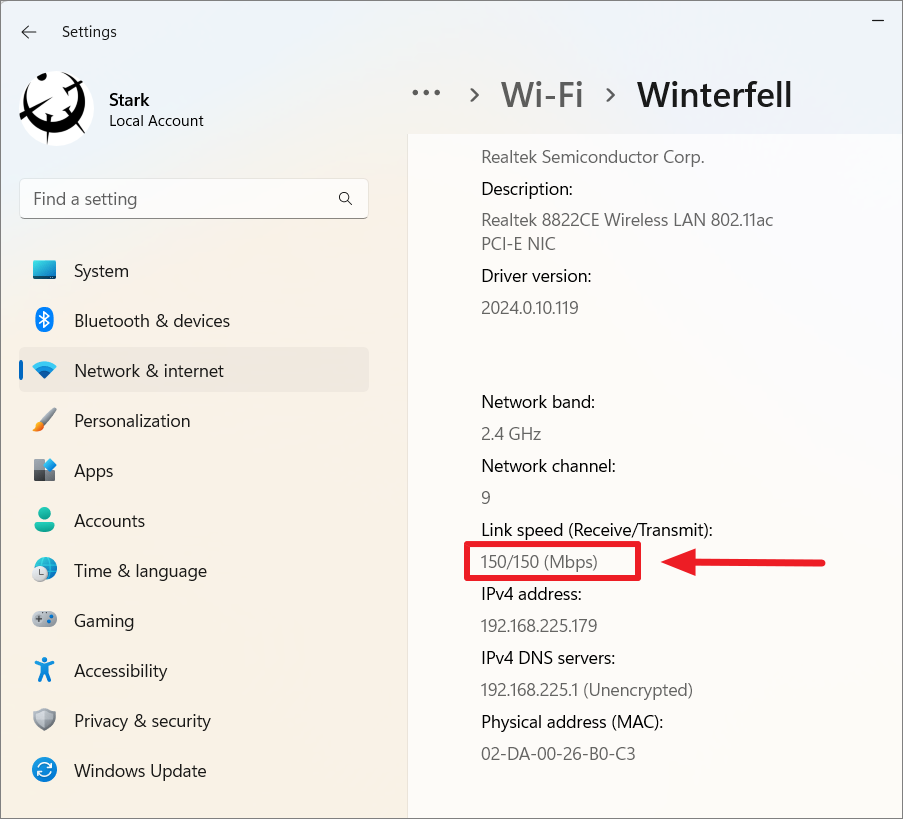
On the Settings page, go to the ‘Network & Internet’ tab on the left panel and click on the ‘Properties’ option under the connected network on the right side.
On the network page, scroll down to the ‘Link Speed (Receive/Transmit)’ to check the network connection/link speed.
Check Your Internet Speed Using 8GadgetPack
The above PowerShell, Settings, and Control Panel methods will only show your network link speed which will remain the same throughout the connection even if your internet is slow. The link/connection speed is not the same as the download speed/ bandwidth. For example, your broadband provider may tell you that your connection speed is 1 Mbps but the actual speed you will get when downloading a file or browsing is around 100 – 120 Kbps.
The link speed is usually the measure of speed from your computer to the core nodes and your ISP in your region. But the actual internet speed is affected by various factors such as the route the data takes across the internet to reach a particular server/website, the speed of the server, the number of users the server can handle, and low-performing nodes in between, traffic, and others.
The bandwidth (download and upload speed) of the internet is not fixed, it changes throughout the day. Like Network Speed Meter, you can also use the 8GadgetPack widget to test your download and upload speed. Here’s how you can do that:
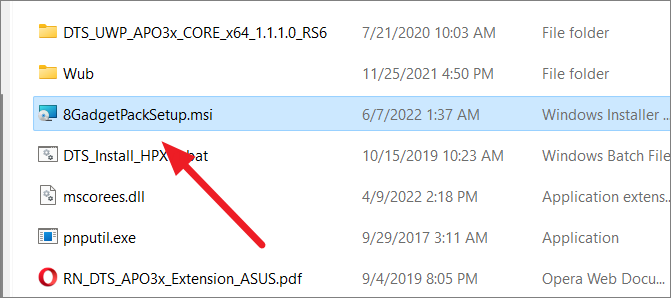
First, download the 8GadgetPack program from the website. After it’s downloaded, double-click on the ‘8GadgetPackSetup to start the installation.
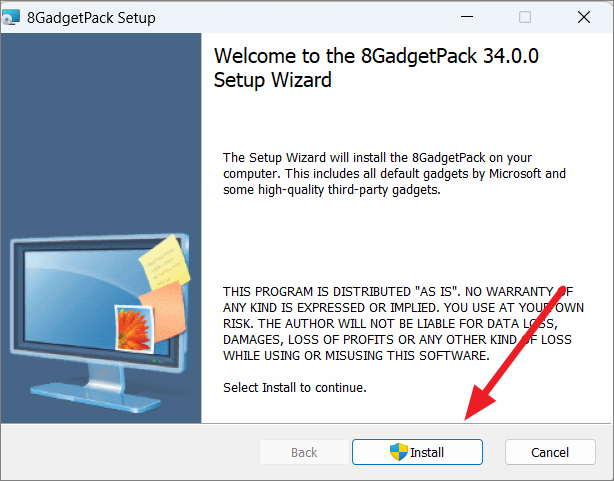
When the installer opens, click the ‘Install’ button.
If you are prompted by User Account Control, click ‘Yes’ to continue.
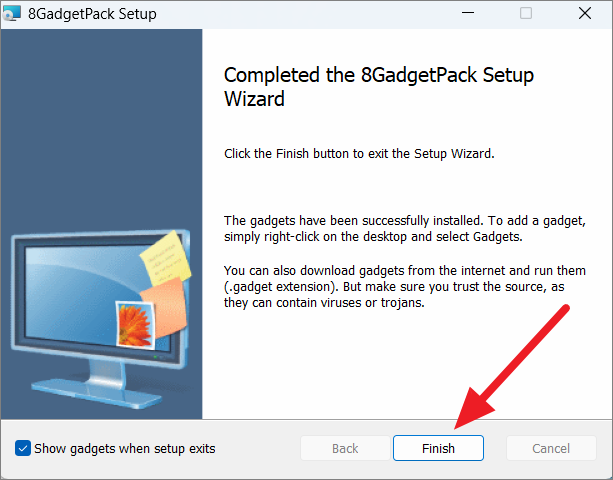
After the installation is complete, make sure the ‘Show gadgets when setup exits’ box is checked, and click ‘Finish’.
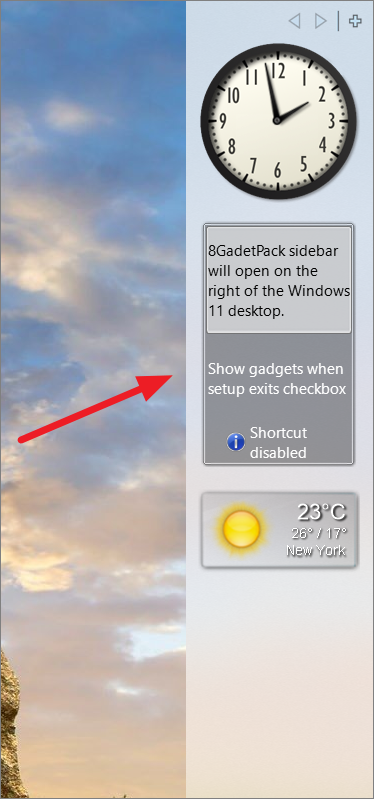
This will open the 8GadetPack sidebar on the right of the Windows 11 desktop.
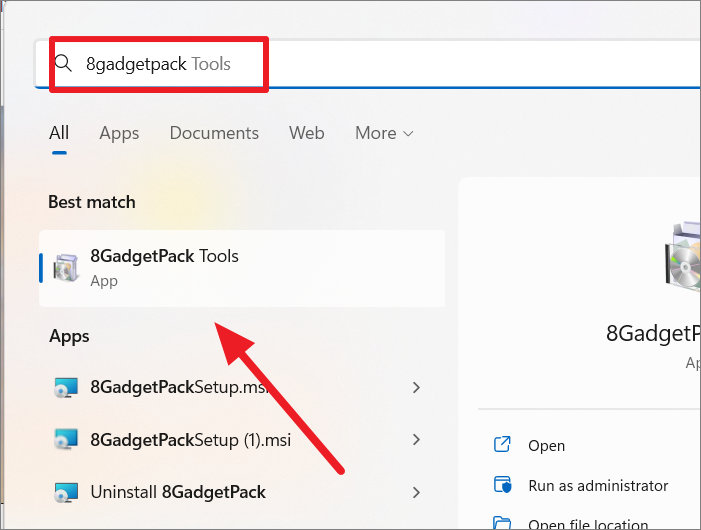
If it doesn’t open automatically, open Windows Search, type ‘8GadetPack’, and select the ‘8GadetPack Tools’ app from the result.
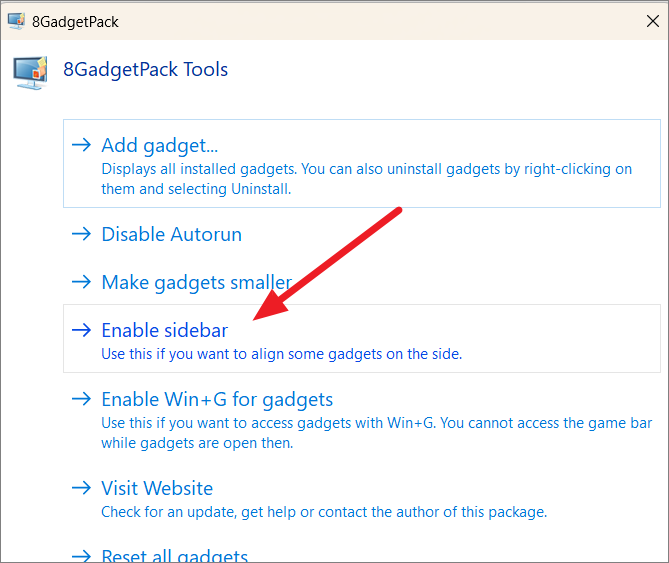
Then, select ‘Enable Sidebar’.
Add Network Meter Gadget to the Sidebar
Now, you can add any gadget (network meter) you want to your desktop from the pack.
To do that, right-click the sidebar and select the ‘Add gadgets…’ option or click the plus button at the top left corner of the sidebar.
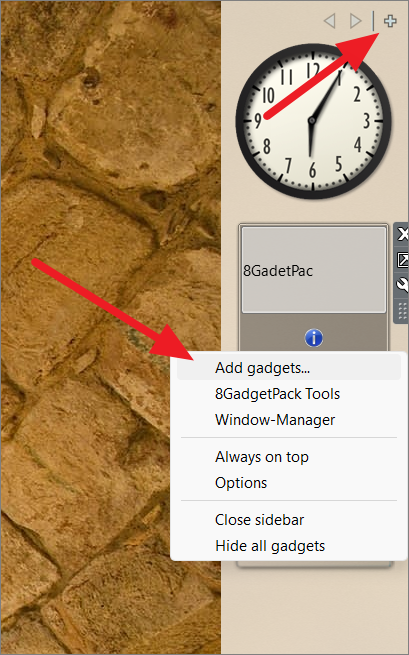
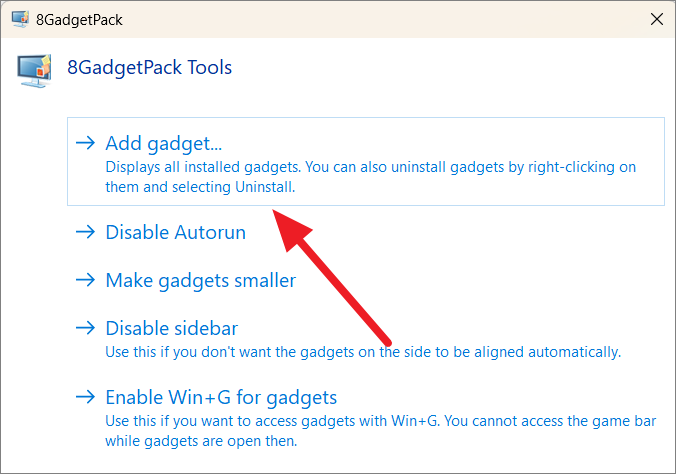
Alternatively, you can also open the 8GadgetPack Tools app and select the ‘Add gadget’ option.
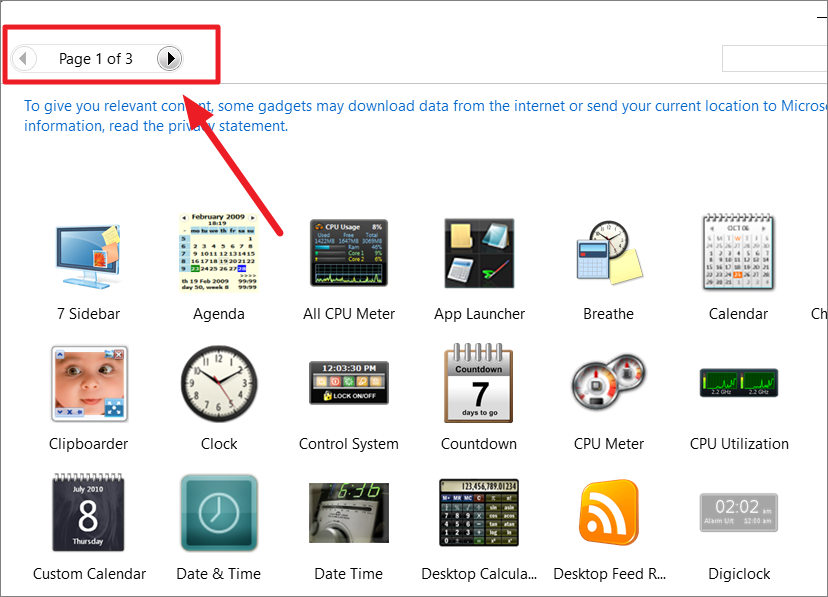
When the gadget pack opens up, use the arrow buttons at the top left corner to scroll through the pages and find the Network meter gadget.
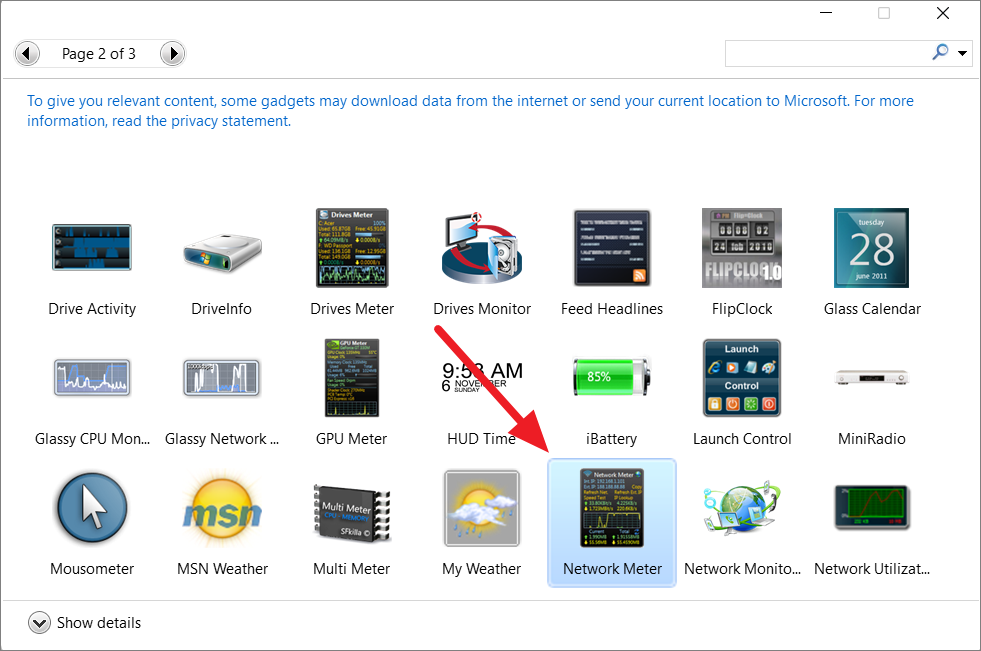
Then, double-click the ‘Network Meter’ gadget from the list to add it to the sidebar.
The network meter will show you the current download and upload speed of the connected network.
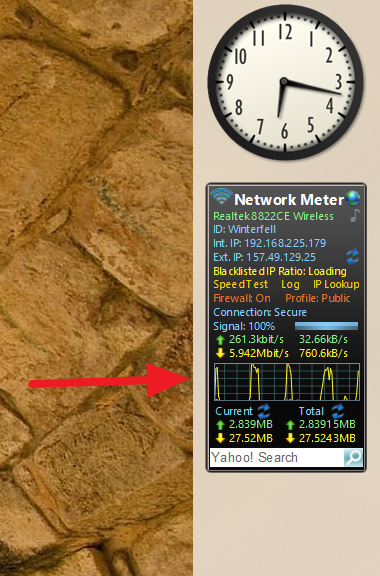
You don’t have to keep the gadget in the sidebar, you can click and drag the gadget to any place on your desktop.
Besides these apps, numerous third-party tools can help you test your internet speed and monitor your data usage such as NetSpeedMonitor, NetWorx, DU Meter, etc.
Test Your Internet Speed Online
If you don’t want to install yet another piece of software on your computer, you can one of the various online tools to test your internet speed. You can measure your internet speed in any browser using these online tools.
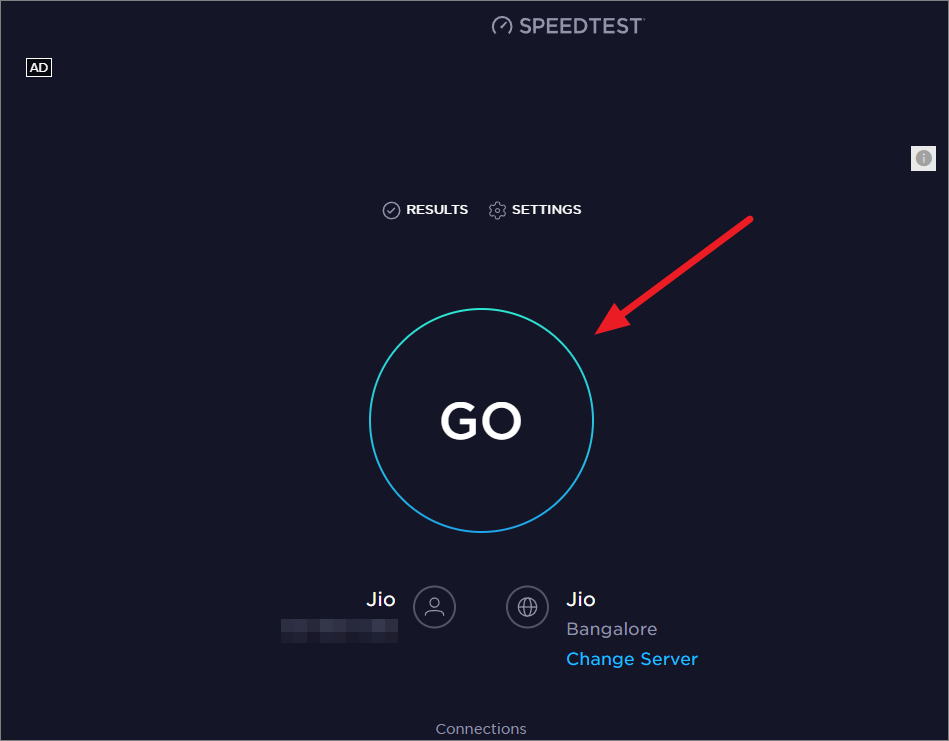
Speedtest by Ookla is one of the most popular speed test you can use online. Go to the Ookla speedtest website and click the ‘Go’ button.
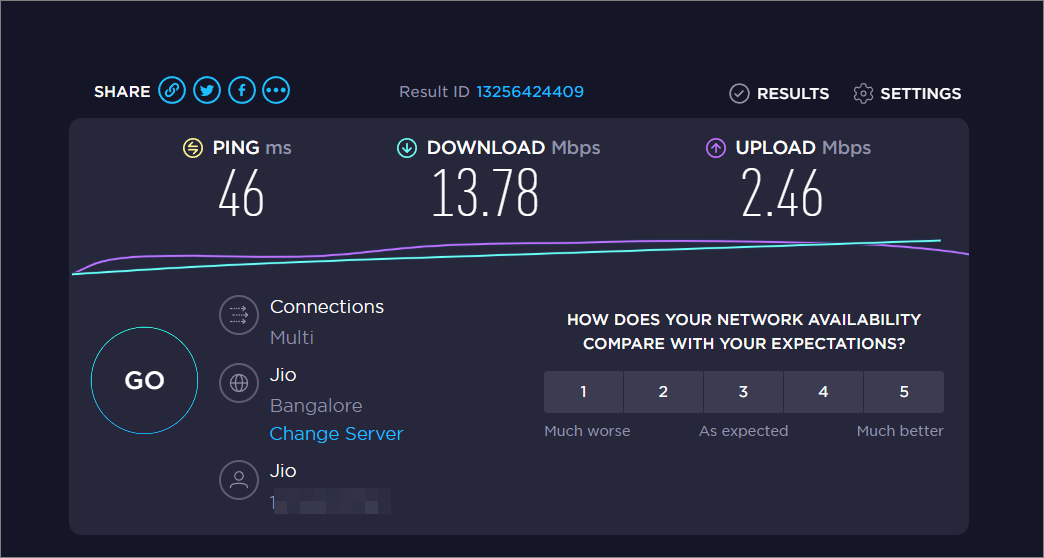
And in a few seconds the online tool will gauge your upload and download speed and show it to you.
You can also google ‘Internet speed test’ and use their built-in tool to run speed test.
Включить измеритель скорости Интернета в системе Windows 11
Что бы вы ни делали в Интернете, скорость Интернета стала основной и необходимой информацией для вашей проверки и мониторинга производительности и поиска решений для ее оптимизации. Хотя многие сторонние инструменты могут отлично работать в Windows 11, чтобы помочь проверить скорость интернета, и мы хотели бы вам сказать как включить интернет-счетчик скорости в Windows 11 после прохождения через несколько инструментов.
Поскольку в системе Windows нет встроенного инструмента для отслеживания скорости загрузки и загрузки вашего интернет-соединения. Измеритель чистой скорости был разработан как настольный счетчик, который проверяет скорость загрузки и выгрузки вашего интернет-соединения в режиме реального времени. И он также может работать в системном трее Windows.
Как включить счетчик скорости интернета в Windows 11?
Всего 4 простых шага, необходимых для установки и настройки Internet Speed Meter на Windows 11, чтобы получить всю необходимую информацию в Интернете.
Шаг 1: Получить Измеритель чистой скорости из Microsoft Store, нажав синюю кнопку «Получить»; то он будет установлен.
Шаг 2. Откройте его после завершения установки и оставьте Net Speed Meter на панели задач Windows 11, когда вас спросят, следует ли оставить Net Speed Meter на панели задач.

Шаг 3: Net Speed Meter будет успешно установлен в Windows 11;
Шаг 4: Щелкните правой кнопкой мыши на значке, а затем выберите Сохранить на панели задач;

Затем информация о скорости интернета будет отображаться на панели задач Windows 11.
Если вам нужны дополнительные настройки, щелкните правой кнопкой мыши значок и выберите «Настройка». Если у вас низкая скорость интернета, вы можете узнать как ускорить виндовс 11 or как ускорить интернет на виндовс 11.
Как отобразить счетчик скорости интернета в Windows 11? — Техспайт
 Хусайни 0 1 минута чтения
  В этой статье вы узнаете, как отобразить счетчик скорости интернета в Windows 11? Проверяя скорость интернета мы хорошо получаем информацию о скорости интернета. Если вы знаете, какова скорость вашего интернета, вы можете знать, что приложение или что-то еще будет загружаться быстро. Когда вы хотите проверить скорость своего интернета, вы не знаете, как вы можете проверить скорость интернета. Более того, этот метод будет выполняться программно. Если вы загрузите программное обеспечение после этого, вы проверите скорость своего интернета в реальном времени. Если вы хотите включить скорость интернета на панели задач, вам необходимо прочитать эту статью.
- Как отобразить измеритель скорости Интернета в Windows 11?
- Итог
Как отобразить счетчик скорости Интернета в Windows 11?
Вы сделаете этот метод с помощью стороннего программного обеспечения. Итак, следуйте приведенным ниже инструкциям.
Шаг 1. Прежде всего, вам нужно открыть свой Магазин Microsoft.
Шаг 2. Когда Microsoft Магазин запущен, затем перейдите в строку поиска после этого введите Счетчик скорости сети.
Шаг 3. После этого вы получите измеритель скорости, просто нажав на него.
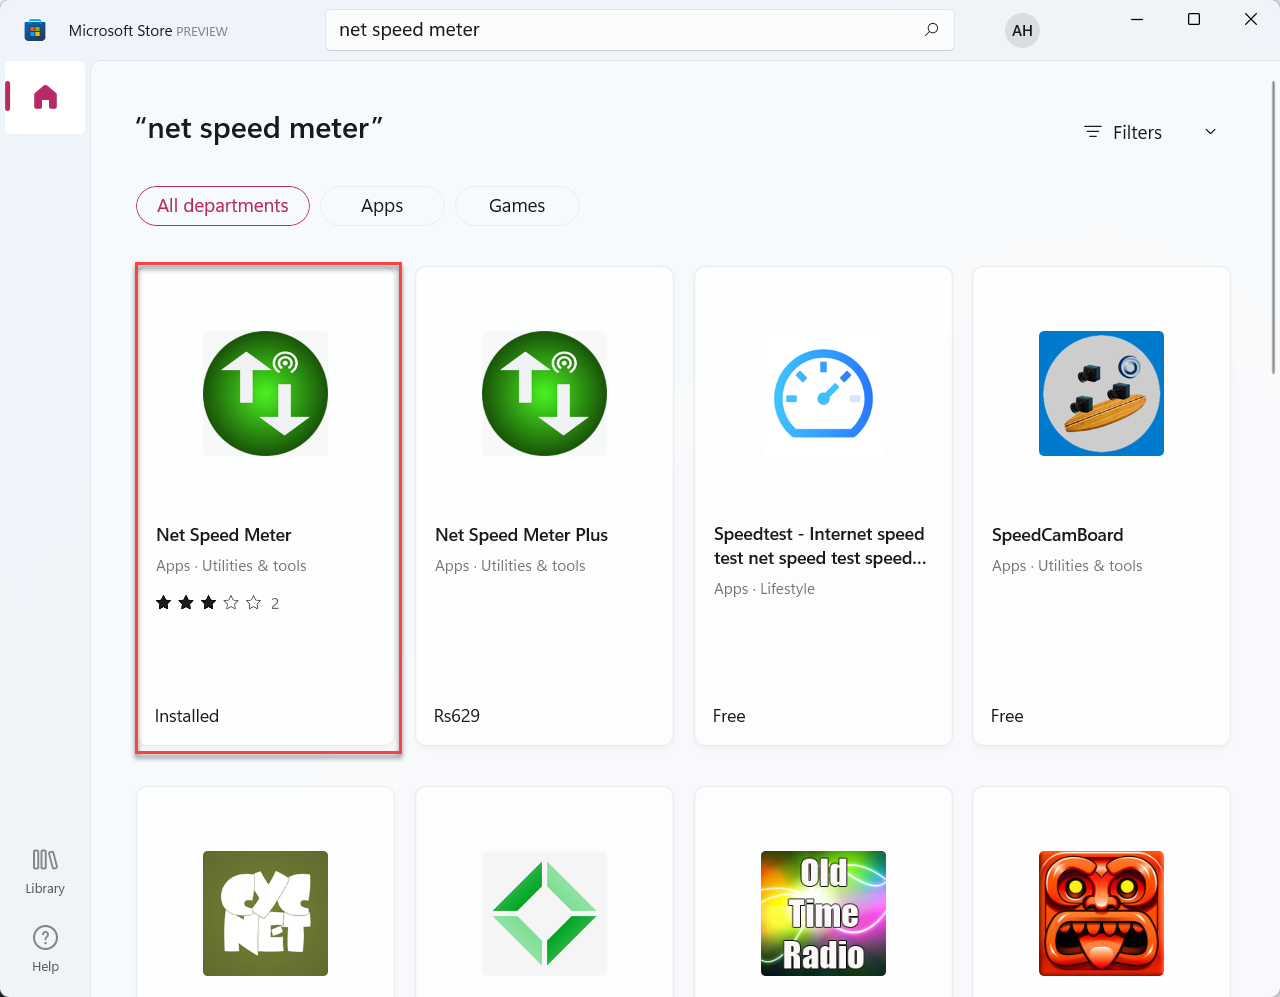
Шаг 4. Нажмите Установить.
Шаг 5. Когда вы нажмете на «get», то, если вы войдете в свою учетную запись Microsoft, вы сможете загрузить это приложение. .
Шаг 6. После того, как вы войдете в свою учетную запись Microsoft, начнется загрузка.
Шаг 7. Кроме того, после завершения загрузки откройте Net Speed Meter.
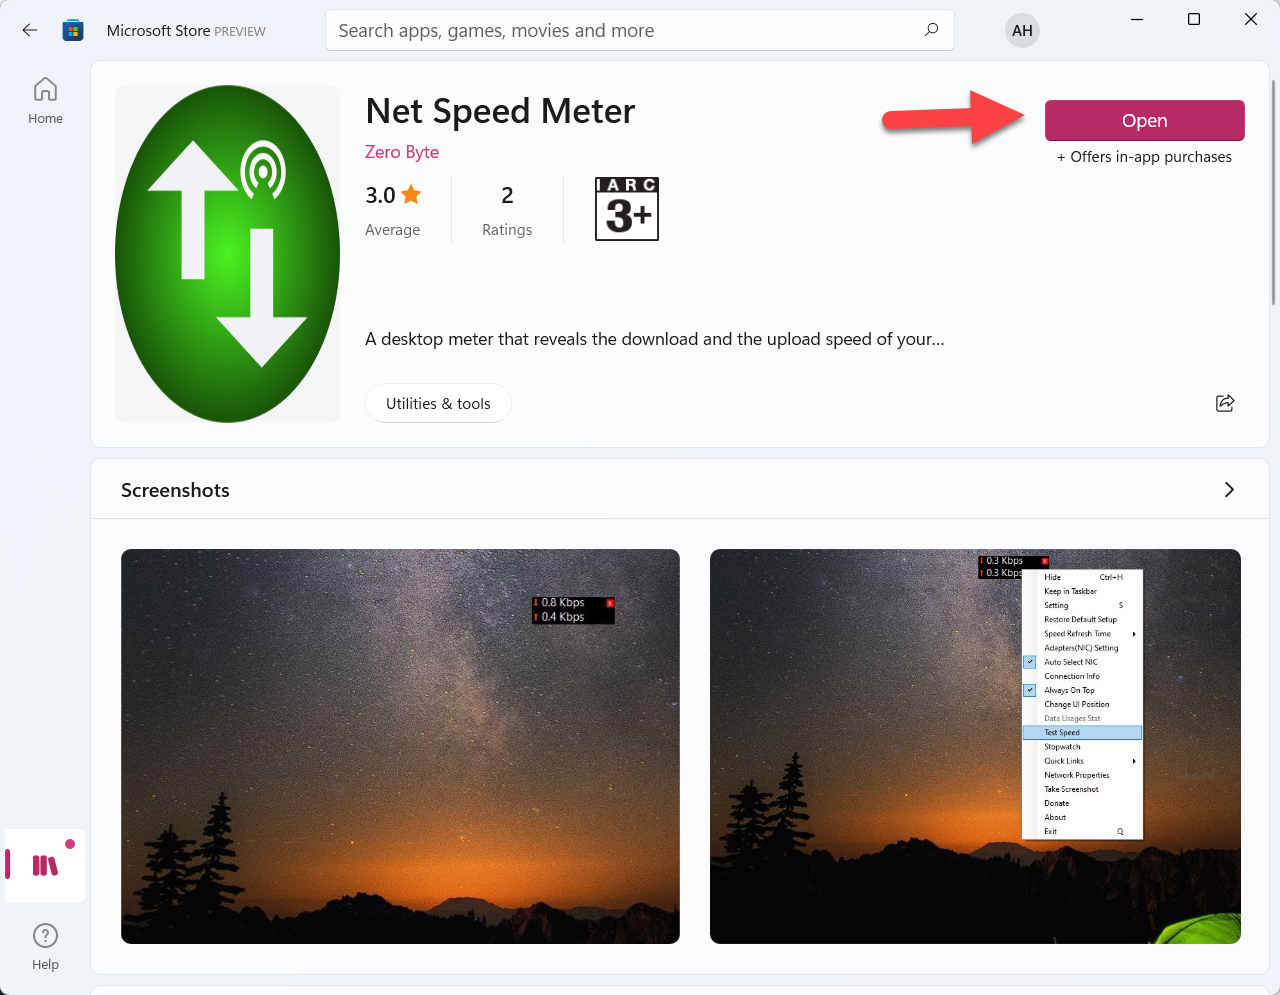
Откройте измеритель скорости сети
Шаг 8. Затем появится всплывающее сообщение о том, что вы хотите, чтобы измеритель скорости отображался на панели задач, просто нажмите Да.
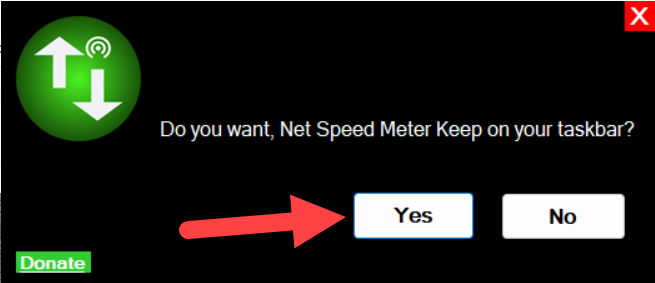
Нажмите Да
Шаг 9. Наконец, как видите, измеритель скорости сети находится на панели задач.
Это было все о том, как отображать интернет-счетчик скорости в Windows 11? Я надеюсь, что эта статья будет очень полезна для вас, чтобы включить скорость интернета. Из этой статьи вы получите что-то хорошее. Это правильное место, где вы можете легко решить свою проблему. После выполнения этих шагов, я надеюсь, вы не столкнетесь с какими-либо проблемами. Если вы столкнулись с какой-либо проблемой и если у вас есть какие-либо предложения, оставьте комментарий.
Публикация по теме:
- Как включить Internet Explorer в Windows 11
- Как опубликовать более длинное видео в истории Instagram

Хусайни 0 1 минута чтения Facebook Twitter LinkedIn Tumblr Pinterest Reddit ВКонтакте Поделиться по электронной почте Печать
How to Show network speed in windows 11
How to Show network speed in windows 11. Computer running slow ? Want to know if it’s an Internet problem or a computer problem? Background programs slowing things down or slow Internet speed? You want to test your Internet speed quickly, but Windows does not provide a native application to monitor the speed. Fortunately, there is a solution to help you do this.
You can monitor upload and download speeds on the Taskbar by installing a small, simple tool called NetSpeedMonitor. This is an old but still effective program and it’s free.

Table of Contents:
Features of NetSpeedMonitor
To use NetSpeedMonitor, you need to be running Windows XP or later. The program was developed for an earlier version of Windows, but if you use Windows 10, you can run the program in compatibility mode if you don’t have it installed.
You must make sure to download the correct program. The filename will end with x64_setup. If you use a file ending in x86_setup, it will not run on Windows 10 even if you have used compatibility mode.
NetSpeedMonitor doesn’t have many extra features so it’s very easy to use. It also has no ads.
How to Install NetSpeedMonitor
Step 1 . Download and install NetSpeedMonitor. If the settings are correct, you can skip and go to Step 8.
Step 2 . If you see the message Operating system not supported error , you need to run the application in compatibility mode.
Step 3 . To run it in compatibility mode, find the downloaded file in File Explorer and right click, select Properties .
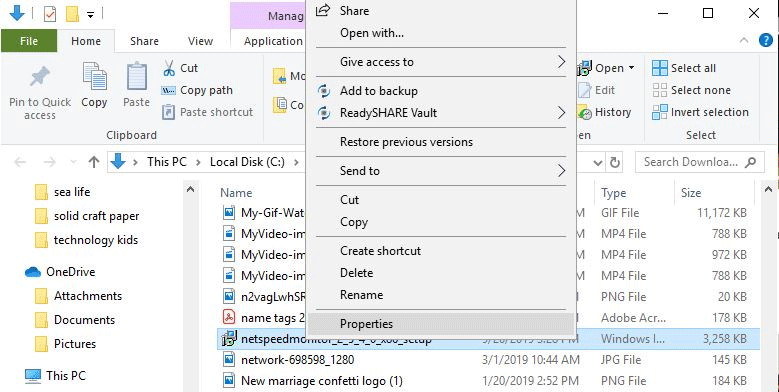
Step 4 . Click the Compatibility tab.
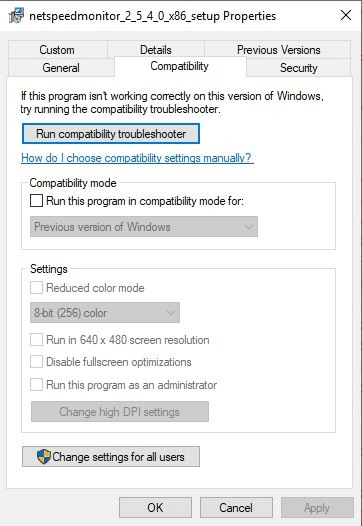
Step 5. Check the box Run this program in compatibility mode for and make sure the option below is Previous Versions of Windows .
Step 6 . Click Apply and OK to save the changes.
Step 7 . Reinstall the program.
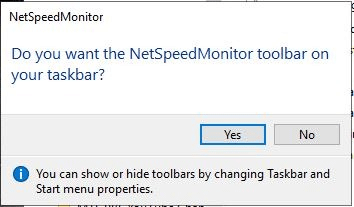
Step 8. When installing the program, a message appears asking if you want to add the bandwidth monitoring toolbar to the Taskbar. Click Yes .
Step 9 . The configuration window appears so you can change the language, the network adapter. If the settings are correct, click Save .
Step 10 . When you press the Save button, the upload and download speed bar will appear to the right of the Taskbar.
How to Show network speed in windows 11 using NetSpeedMonitor
By default, NetSpeedMonitor measures Internet speed using Kbit (Kilobit). You can change it to Mbit (Megabit) because most Internet service providers announce the speed in Megabit/sec. To change this setting, right-click on the speed screen, select Configuration , then click the drop-down menu next to Bitrate and select Mbit/s . Click Apply to apply the changes.
When you open the configuration window, you can adjust other things like font, size, and toolbar alignment.
NetSpeedMonitor is very simple and easy to use to monitor upload and download speeds right on the Taskbar. You can test them at any time to make sure the Internet is working correctly.