Getting started with Jupyter
This page is the second post in a series of introductory python tutorials:
1. Installing Python using Conda
2. Getting started with Jupyter — this tutorial
3. Using Python packages
4. Working with data
5. Making figures in Python
Jupyter is an open-source web application allowing you to run “notebooks” in your browser. These notebooks can contain code, equations, and visualizations in one, interactive, and shareable place.
If you want to quickly demo the notebooks online you can go to https://try.jupyter.org/
In this post, we will discuss installing Jupyter and demo some of the useful features of this technology. A Jupyter notebook with the below examples can be downloaded here: intro-to-jupyter.ipynb
1. Installing Jupyter
Installing Jupyter and Jupyter Lab
Open your command prompt or Git BASH (Windows) or a terminal (OS X, linux)
- Install Jupyter by running conda install jupyter notebook
- Install Jupyter Lab by running conda install -c conda-forge jupyterlab
2. Running the Jupyter application
Navigate to the directory you’d like to work in
Run the following in your command prompt or terminal to create a directory in your Documents folder for this tutorial.
Note: the cd command means change directory and mkdir makes a directory
Opening Jupyter Lab
To open the application simply run the command jupyter lab
A few seconds after executing the above code, your default browser should open and you should see:

3. Creating a new notebook
To create a new notebook, click on “Python 3” under the notebook header:
which will create a blank notebook document titled “Untitled.ipynb” that is now displayed as a tab:

4. Overview of notebook components
Before we start writing code, let’s take a second to explore the notebook itself:

- To change the filename, simply right-click on the title and rename the file
- We can see that the kernal here is a Python 3 kernal and that it is currently not executing anything (dot is unfilled)
- We will put the cell type selection into good use below to switch between code and markdown
5. Let’s execute some code!
Let’s start by typing some example Python code into the cell:
To execute this cell we can press shift + enter
6. Modularity makes it easy to develop code in bite size chunks
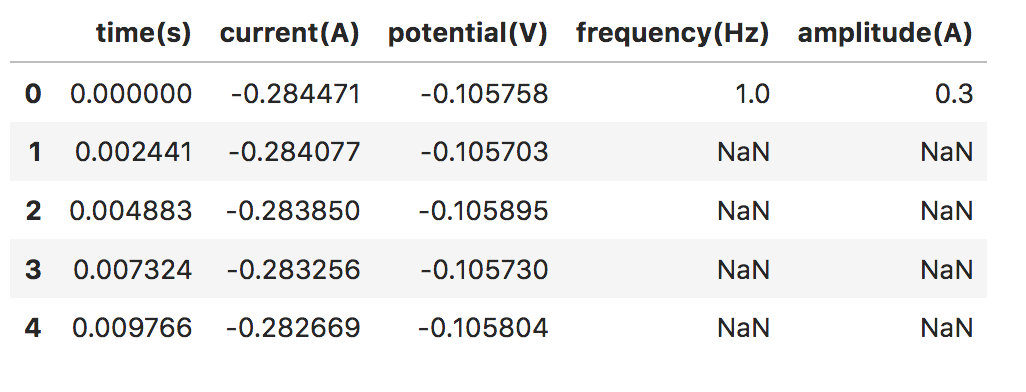
Step 1. Data intensive operation
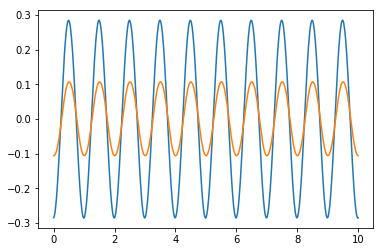
Step 2. Visualization or exploratory data analysis
7. Other cool features:
In addition to running code snippets in cells, Jupyter also has several other handy features.
Markdown
Jupyter cells can also be used to display equations, documentation, and tables using Markdown.
To demonstrate this, click on a new cell and select ‘Markdown’ from the cell type dropdown menu at the top of the notebook.
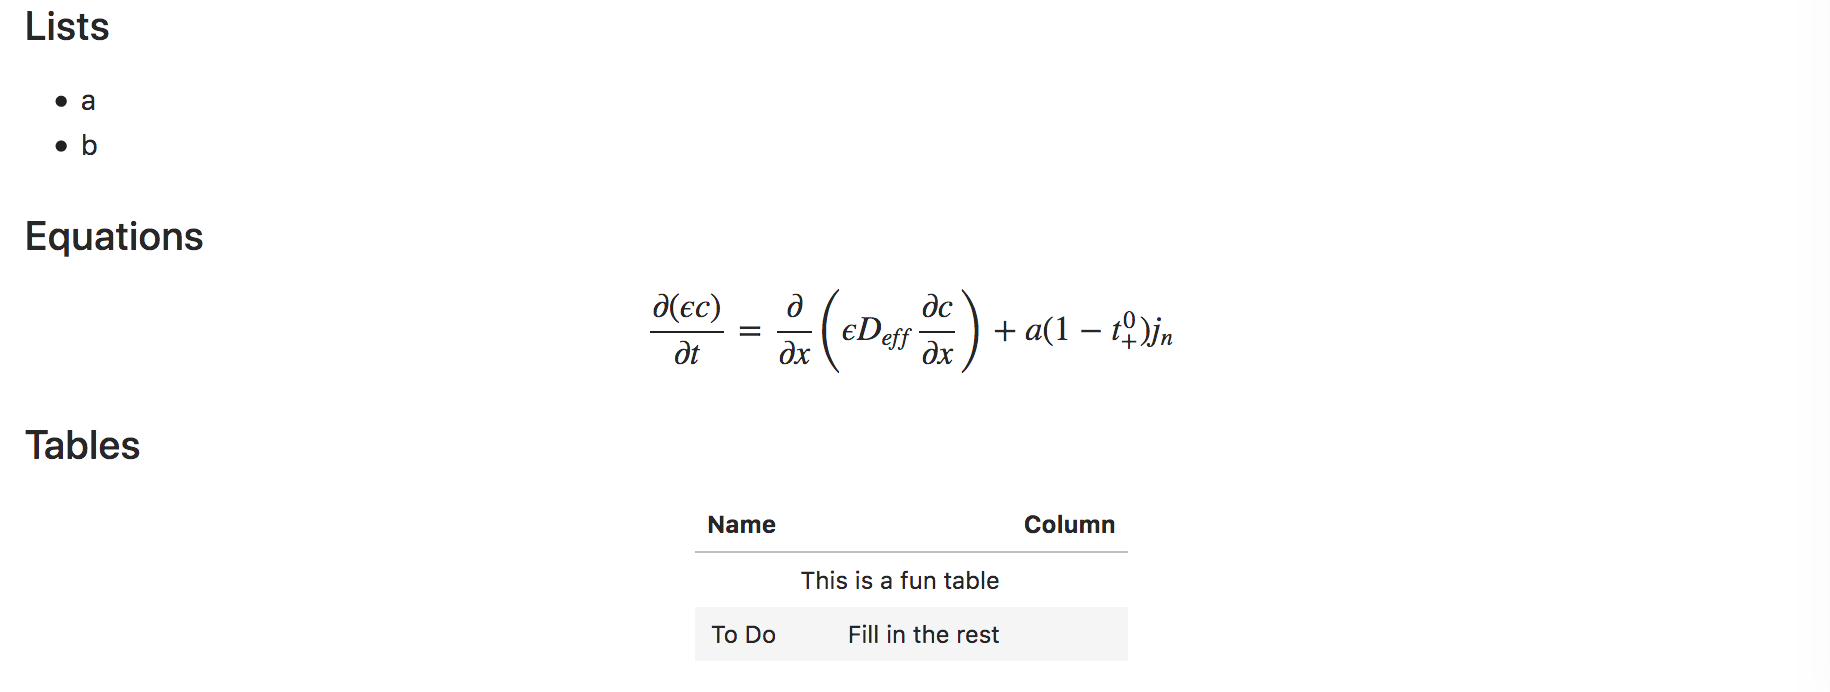
Type some Markdown:
and click shift + enter again to execute the cell. This time instead of executing code, you should see the following display:
Markdown is a powerful tool to display images/equations/code/notes easily (all the tutorial posts here are written in Markdown for example). For additional information on Markdown syntax, there are several ‘Markdown Cheatsheets’ (e.g. here or here) or an interactive markdown editor to explore with.
Keyboard shortcuts
Just like we used the shift + enter shortcut to execute a cell, there are lots of other shortcuts which make it even easier to work within Jupyter notebooks.
There are two different ‘modes’ you can be in when using the notebook (Command mode and Edit mode). You can tell which mode based off of the color of the cell outline (blue = Command mode, green = Edit mode) and you can switch between the two using the esc and enter keys.
- Click on a cell so you can type code (you’re now in edit mode)
- Push esc (to switch to Command mode)
- Push b (this is the shortcut to create a new cell below your current location)
- Push m (to switch this cell type to Markdown)
- Push enter (to enter Edit mode)
- Type some Markdown code
- Use shift + enter to execute
Here are a few useful shortcuts (you can see all of them by hitting h in command mode):
Useful command mode shortcuts
| Command | Action |
|---|---|
| a | Create new cell above |
| b | Create new cell below |
| d d | Delete current cell |
| z | Undo delete cell |
| m | Change cell to markdown |
| y | Change cell to code |
| h | Bring up the list of shortcuts |
Useful editing shortcuts
| Command | Action |
|---|---|
| Ctrl-a | Select all |
| Ctrl-c | Copy |
| Ctrl-v | Paste |
| Ctrl-s | Save |
| Tab | Autocomplete |
| Shift-tab | Tooltips |
Support for lot’s of different languages
While Jupyter grew out of IPython and stands for Ju (Julia) + py (Python) + r ( R ), the Jupyter environment supports kernals for many many (
75) other languages
Image from Fernando Perez PLOTCON talk
If you’ve made it this far, congratulations!
You now have Jupyter installed and know your basic way around using notebooks for executing code and displaying Markdown. In the next tutorial, we’ll introduce several useful Python packages and start performing some more useful analysis. Part 3. Using Python packages.
Как установить jupiter notebook python
Jupyter Notebook is an open-source web application that allows you to create and share documents that contain live code, equations, visualizations, and narrative text. Uses include data cleaning and transformation, numerical simulation, statistical modeling, data visualization, machine learning, and much more.
Jupyter has support for over 40 different programming languages and Python is one of them. Python is a requirement (Python 3.3 or greater, or Python 2.7) for installing the Jupyter Notebook itself.
Jupyter Notebook can be installed by using either of the two ways described below:
-
Using Anaconda:
Install Python and Jupyter using the Anaconda Distribution, which includes Python, the Jupyter Notebook, and other commonly used packages for scientific computing and data science. To install Anaconda, go through How to install Anaconda on windows? and follow the instructions provided.
Installing Jupyter Notebook using Anaconda:
Anaconda is an open-source software that contains Jupyter, spyder, etc that are used for large data processing, data analytics, heavy scientific computing. Anaconda works for R and python programming language. Spyder(sub-application of Anaconda) is used for python. Opencv for python will work in spyder. Package versions are managed by the package management system called conda.
To install Jupyter using Anaconda, just go through the following instructions:
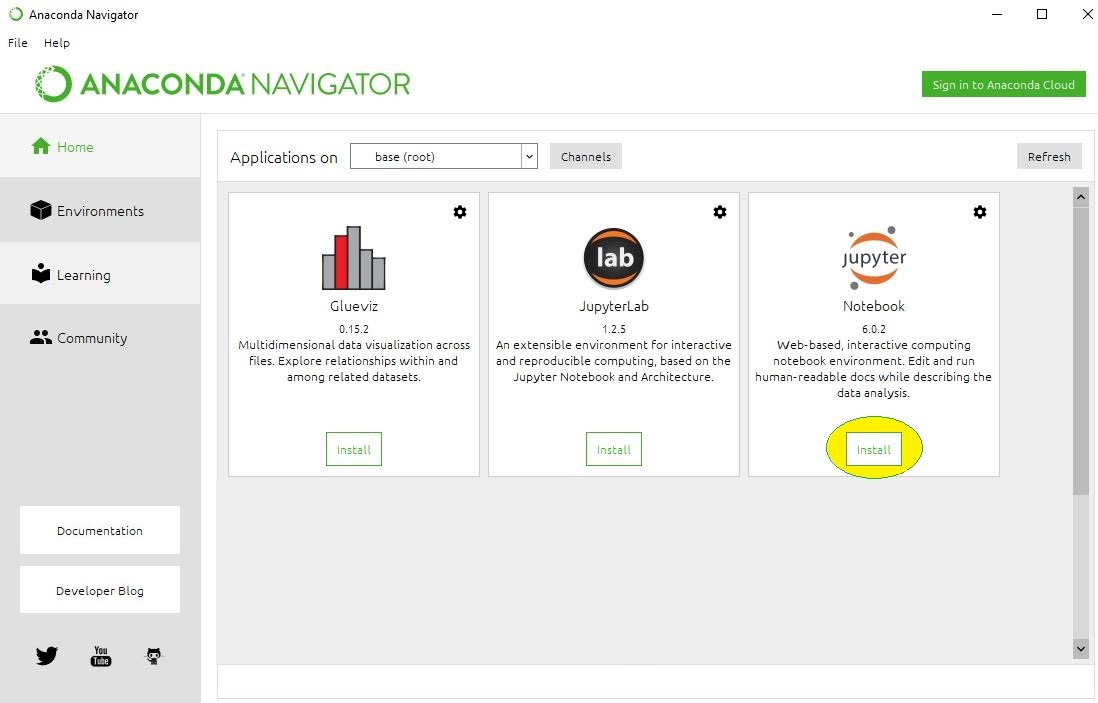
- Launch Anaconda Navigator:

- Click on the Install Jupyter Notebook Button:
- Beginning the Installation:

- Loading Packages:

- Finished Installation:

Launching Jupyter: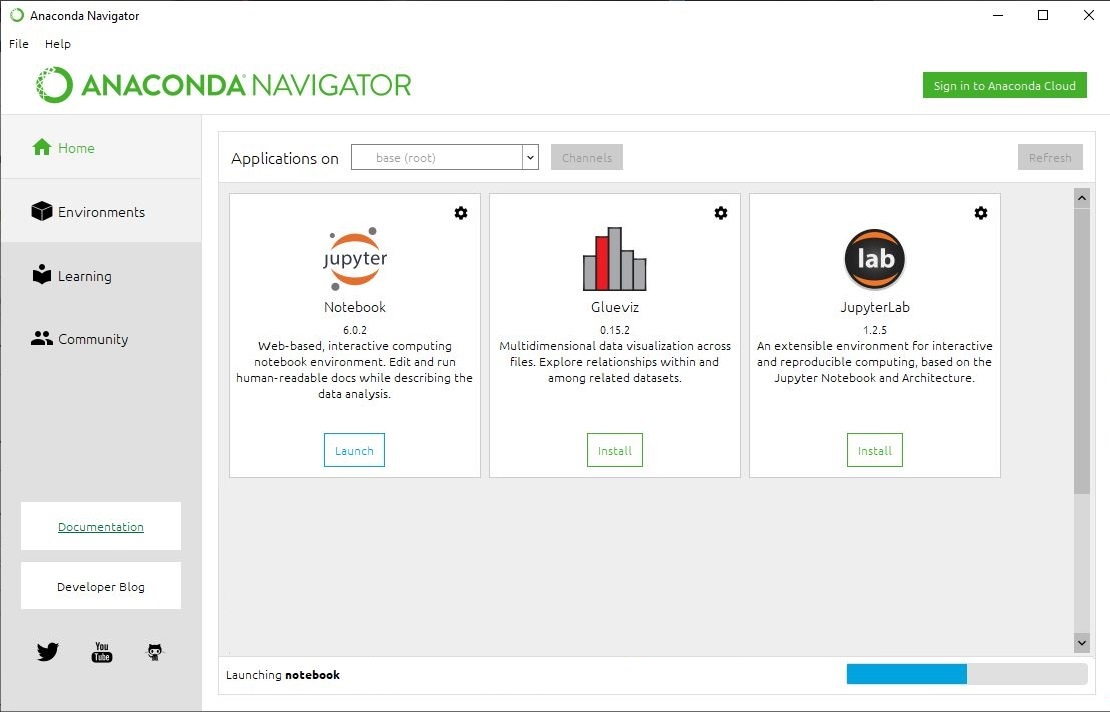

Installing Jupyter Notebook using pip:
PIP is a package management system used to install and manage software packages/libraries written in Python. These files are stored in a large “on-line repository” termed as Python Package Index (PyPI).
pip uses PyPI as the default source for packages and their dependencies.
To install Jupyter using pip, we need to first check if pip is updated in our system. Use the following command to update pip:

After updating the pip version, follow the instructions provided below to install Jupyter:
- Command to install Jupyter:
- Beginning Installation:

- Downloading Files and Data:
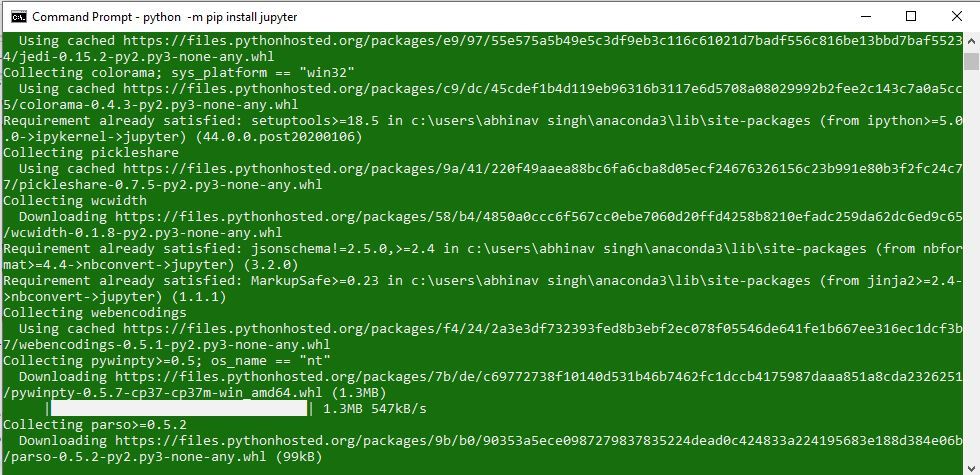
- Installing Packages:

- Finished Installation:

Launching Jupyter:
Use the following command to launch Jupyter using command-line:
Installing Jupyter Notebook
This information explains how to install the Jupyter Notebook and the IPython kernel.
Prerequisite: Python
While Jupyter runs code in many programming languages, Python is a requirement (Python 3.3 or greater, or Python 2.7) for installing the Jupyter Notebook.
We recommend using the Anaconda distribution to install Python and Jupyter. We’ll go through its installation in the next section.
Installing Jupyter using Anaconda and conda
For new users, we highly recommend installing Anaconda. Anaconda conveniently installs Python, the Jupyter Notebook, and other commonly used packages for scientific computing and data science.
Use the following installation steps:
Download Anaconda. We recommend downloading Anaconda’s latest Python 3 version (currently Python 3.5).
Install the version of Anaconda which you downloaded, following the instructions on the download page.
Congratulations, you have installed Jupyter Notebook. To run the notebook:
Alternative for experienced Python users: Installing Jupyter with pip
Jupyter installation requires Python 3.3 or greater, or Python 2.7. IPython 1.x, which included the parts that later became Jupyter, was the last version to support Python 3.2 and 2.6.
As an existing Python user, you may wish to install Jupyter using Python’s package manager, pip , instead of Anaconda.
First, ensure that you have the latest pip; older versions may have trouble with some dependencies:
Then install the Jupyter Notebook using:
(Use pip if using legacy Python 2.)
Congratulations. You have installed Jupyter Notebook. See Running the Notebook for more details.
Installing Jupyter
Project Jupyter’s tools are available for installation via the Python Package Index, the leading repository of software created for the Python programming language.
This page uses instructions with pip, the recommended installation tool for Python. If you require environment management as opposed to just installation, look into conda, mamba, and pipenv.
JupyterLab
Install JupyterLab with pip :
Note: If you install JupyterLab with conda or mamba, we recommend using the conda-forge channel.