Images in HTML
This article provides an introduction to using images in an HTML document with the <img> tag.
Introduction
In this article we will discuss one of the things that makes web design “pretty” — images. You’ll learn how to add images to web documents in an accessible way so that people with visual impairments can still use the information on your site, how and when to use inline images to deliver information, and how to use background images to improve page layout.
A picture says more than a thousand words — or does it?
It is tempting to use a lot of imagery on your web sites. Images are a great way to set the mood for the visitor, and illustrations help make complex information easier to take in for visual learners.
The drawback of images on the web is that not everybody can see them. Back in the days when images were first supported by browsers, web connections were slow, and you’d pay a lot of money for each minute you were online. Many site visitors had images turned off to save on download costs and get a faster surfing experience. While this is not very common these days, there are still other problems to consider:
- People surfing on mobile devices might still have images turned off due to small screen size or the cost of downloading data.
- Visitors to your site might be visually impaired such that they cannot see your images properly or at all.
- Other visitors might be from a different culture and not understand the icons or diagrams you use.
- Search engines only index text — they don’t analyze images, which means that information stored in images cannot be found and indexed. (At least, not yet: try searching “image indexing” or “search by image” for additional information regarding the latest on image indexing.)
It is therefore very important to choose images wisely and use them appropriately. It is even more important to always offer a fallback for users who cannot see your images. Let’s see what technologies are available to add images to an HTML document.
Content and background images
There are two main ways to add images to a document: content images using the <img> element, and background images applied to elements using CSS. Which method you use depends on your intent:
- If the image is crucial to the content of the document, such as a photo of the author or a data graph, it should be added as an <img> element with proper alternative text.
- If the image is there strictly for aesthetic purposes, you should use a CSS background image. These images should not have any alternative text (what use is the description “round green corner with a twinkle” to a blind person?) and you have more options for image styling in CSS.
The <img> element and its attributes
Adding an image to an HTML document is very easy using the <img> element: you specify the location of the image you want to display as the value of the src (source) attribute, and away you go. The following HTML document displays the photo balconyview.jpg in a browser (provided that the image is in the same folder as the HTML file).
If you run this code in a browser, you’ll get output like this:
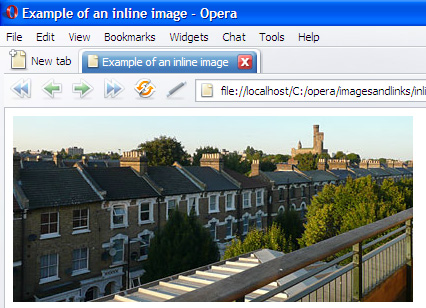
Figure 1: The image as it is shown in a browser.
Note: The <img> element is what is known as an empty tag; that is, it does not require an end tag (like </img> ). In HTML5, it need not even be closed with an internal slash (like <img src="balconyview.jpg"/>), although many web page authors do so as a matter of consistency.
Providing a text alternative with the alt attribute
Although the image is displayed correctly, the HTML is invalid because the <img> element lacks an alt attribute. This attribute contains text to be displayed if the image is not available for some reason. The image may not be available because it could not be found, failed to load, or because the user agent (normally a browser) does not support images. In addition, people with visual impairments use assistive technologies to read web pages aloud; these technologies look for the contents of the alt attribute to describe the image. It is therefore important to write good alternative text to describe the contents of the image and put it in the image’s alt attribute for reasons of accessibility and search engine optimization.
A quick note: Many web pages — and web authors — use the term "alt tags". This is factually incorrect, as there is no tag (or element) with that name. Remember that alt is an attribute of the <img> element, not a tag.
Thus, in order to make the image understandable for everyone, you must always include proper alternative text, as in this example, "View from my balcony, showing a row of houses, trees and a castle":
Adding “nice-to-have” information using the title attribute
The alt attribute contains the text that should be displayed when the image is not available. The information in the alt attribute should not be displayed when the image is successfully loaded; Internet Explorer gets this wrong, and shows it as a tooltip when you hover your mouse pointer over the image. Unfortunately, many authors consider this the default, which leads them to put additional information about the image into the alt attribute. Please don’t do this; if you want to add extra information about the image, use the title attribute instead.
Most browsers display the value of an <img> element’s title attribute as a tooltip when you hover your mouse cursor over it (see Figure 2). This can help a visitor learn more about the image, but you cannot rely on every visitor to use a mouse. The title attribute can be very useful, but it is not a foolproof way of providing crucial information. Instead, it offers a good way to provide non-essential information, such as the mood of the image, or what it means in context:
This code will display like this:
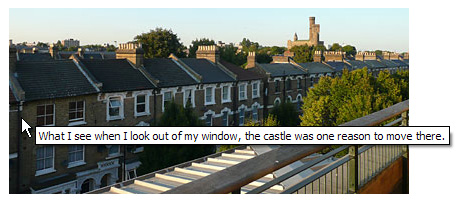
Figure 2: title attributes are shown as tool tips in many browsers.
Using longdesc to provide an alternative for complex images
If the image is very complex, such as a chart or diagram, you can offer a more lengthy description of it using the longdesc attribute, so that people using screen readers or browsing with images turned off can still access the information conveyed by the image.
This attribute contains a URL that points to an HTML document containing the same information. For example, if you have a chart showing a set of data, you can link it to a page with the same information using <longdesc> :
The data file “fruitconsumption.html” contains a table that represents the same data as the chart:
The two different data representations side-by-side look like this:

Figure 3: A document with complex data linked to an image using the longdesc attribute.
Note that there is no visual clue that there is a long description file connected with this image. Most assistive technologies, however, will let their users know there is an alternative available. Some people think that longdesc is pointless, and that you should just provide an alternative page linked via a normal link. This may be appropriate sometimes, as it is often useful to give all users a choice of how they consume your information. There are situations, however, where you’ll want to not show the text link by default.
Faster image display by defining the dimensions using width and height
When the user agent finds an <img> element in the HTML, it starts loading the image the src attribute points to. By default, it doesn’t know the image dimensions, so it will just display all the loaded text lumped together, and then shift it around when the images finally load and appear. This can slow down page loading, and looks unsightly (to say the least) to page visitors. To prevent this, just tell the browser to allocate the right amount of space for the images before they load by providing the image dimensions using the width and height attributes:
This will display a placeholder the same size as the image until the image actually loads and takes its place, therefore avoiding the unsightly and unprofessional page shift. Always include the width and height attributes on your images.
You can also resize images using these attributes (try halving the attribute values in the above example), but this is not good practice, as image resizing quality is not smooth in all browsers. It is especially bad to resize images to represent thumbnails, because the idea of thumbnails is to not only have a smaller image in physical size, but also in file size. Nobody wants to load a 300K photo just to see a small image that could have been sent as a 5K file.
Containing images properly using HTML5 <figure>
One problem that has always existed with HTML images is the choice of what container element to put them in. After all, images are inline elements by default: they don’t force line breaks before and after themselves. This is fine for cases where you want to put a small icon next to a piece of text, but you’ll more often want an image to sit on its own line in the page. You could describe this usage as making the image into a separate figure.
In HTML4, the most common way to achieve this is to put the image inside a <p> or <div> , but neither of these is ideal — an image isn’t a paragraph, and a division is semantically ambiguous. Realizing this, the creators of HTML5 introduced a new element that solves the problem: <figure> . This element is specifically designed to contain a figure, which could be an image, two images, or a combination of several multimedia elements, text, or other content. Let’s look at an example:
Proper captions using HTML5 <figcaption>
Another new addition to HTML5 is an element for containing figure captions. Previously this was done using <p> or some other not-wholly-appropriate element, but now we have the <figcaption> element. Nested inside a <figure> , it says “this is the caption to go along with the contents of this figure.” For example:
Note that the contents of the figure caption do not necessarily act as a replacement for the contents of the alt attribute or the title attribute: it depends on whether the caption accurately describes everything in the image, or provides the same supplementary information that the title attribute does. In this case, we need an alt attribute as well, as sighted users can see what is in the image by looking at it. The alt attribute says exactly what the image contains for the benefit of users who can’t see it, while the caption gives some more context.
Background images with CSS
It is pretty safe to say that web design became a lot more fun when browsers started supporting CSS. Instead of hacking around in the HTML using table cells for positioning items on the page, non-breaking spaces ( ) to force alignment, and spacer GIFs (transparent 1×1 pixel GIF images resized to create margins), we can now use padding, margin, dimensions, and positioning in CSS and leave the HTML free to just worry about the content structure.
CSS also means you can use background images in a very versatile way — you can position them behind and around your text any way you want, and also repeat images in regular patterns to create backgrounds. Before closing, we’ll cover CSS images briefly.
How to apply backgrounds with CSS
The CSS to apply images as backgrounds is fairly straightforward. Before you look at the CSS code below, have a look at this multiple example to get an idea of the different things that are possible with background images in CSS:
Figure 4: Backgrounds with CSS.
The boxes are actually styled <h2> elements with some padding and borders applied with CSS to allow space for the background image. The CSS for the first example is:
You add the image with the background-image property and give it a URL in parentheses to specify the image to be included. By default, background images are repeated both horizontally and vertically to fill up the whole element space, as in the first example. But you can define various repetition schemes with the background-repeat property:
- Don’t repeat the image at all: background-repeat:no-repeat;
- Only repeat the image horizontally: background-repeat:repeat-x;
- Only repeat the image vertically: background-repeat:repeat-y;
By default, the background image (if not repeated) will be positioned at the top left corner of the element. You can, however, use background-position to move the background image around. The easiest values to use are top , center , and bottom for vertical alignment, and left , center , and right for horizontal alignment. For example, to position the image on the bottom right, use background-position:right bottom; , while to center the image vertically on the right use background-position:right center; .
By controlling the repetition and the position of background images and using clever images you can create stunning effects that were not possible before CSS, and by keeping the background definitions in a separate CSS file you make it very easy to change the look and feel of a whole site by changing a few lines of code.
Conclusion
HTML images are a powerful and flexible way to provide non-textual information, enhance the value of other content, and improve the visual attractiveness of your pages. Combining tried-and-true techniques with new HTML5 elements and attributes can help ensure that your web pages are useful, interesting, and accessible.
How to Insert an Image in HTML in 6 Easy Steps
When creating websites using an easy-to-use CMS like WordPress, there might be limitations to where you can add images.
This can be frustrating as it might be necessary to insert more than just a background image on a web page. For example, one might wish to add a website logo to the header and footer.
One solution is to add images into the site’s theme HTML file. While inserting images on a website using HTML does require some basic HTML knowledge, beginners can still follow along as it’s not a complicated process.
This article will show how to insert an image in HTML into your website without hassle. We will be breaking the tutorial down into six steps with detailed explanations and easy-to-follow procedures.

6 Simple Steps to Insert an Image or a Logo in HTML
There are three ways to upload and insert images in an HTML document: via an FTP client like FileZilla, via hPanel’s file manager, and through the WordPress dashboard. For this tutorial, we will be using the second option.
We will also break down the image HTML code and explain the attributes needed to insert an image on your site. All of the HTML tags and syntax mentioned below are included in our HTML Cheat Sheet as well.
1. Upload the Image File
For this step, we will be uploading an image file into a WordPress website’s public_html directory via Hostinger’s file manager. However, this tutorial can still be implemented through any control panel and type of website.
- Access your hPanel, navigate to the Files section, and click on File Manager.
- Open the public_html directory and double-click the wp-admin – images folder.
- Click on the Upload Files button at the top-right corner of the menu bar and select File.
- Select the image files you want to upload. Ensure that the file names are easy to read and descriptive, as they will be the title attribute of the HTML images. Plus, remember to add dashes to separate the words. Clear image file names also help search engines understand their content, improving the site’s SEO.
- Press UPLOAD and wait until the process is finished.
- On the WordPress dashboard, navigate to Media – Add New.
- Select the images you want to add and wait for them to finish uploading.
When it comes to the best image formats, there are two categories to choose from, raster and vector. JPEG/JPG, PNG, and GIF are some examples of raster image file formats, while vectors include PDF, SVG, and EPS.
2. Access the Theme Folder
Pro Tip
Since we’ll be editing an HTML document, download a backup of your site before making any changes. This ensures that no data is lost if, by any chance, an error occurs during the process.
For this step, first access the WordPress theme editor and the HTML file where you want to insert images:
- From the WordPress dashboard, go to Appearance – Theme Editor.
- Select the theme your site is using – for example, Twenty-Twenty.
- Scroll through the Theme Files section and click on the HTML file you want to add an image to. For example, if you want to add a logo to the header, click the header.php file.
- Find the line where the body HTML tag or <body> starts. Under the first <div> tag, insert the image tag: <img> .
The image tag is what embeds images into HTML files. It’s an empty tag that includes HTML attributes such as img src and alt and doesn’t require a closing tag.
Now, we’ll break down the other HTML elements required after the img tag.
3. Add the img src Attribute to the Image
Short for image source, img src is a must-have HTML attribute of an image element as it determines the file path of the image in HTML. If the img src is not specified correctly, the image will not load.
There are two ways to write an img src attribute, using a relative or absolute path. In the relative path option, the image source is based on the image’s current directory or folder.
This option is used when the image is uploaded to the same directory as the HTML file you want to edit.
A relative path syntax looks like so:
On the other hand, the absolute path specifies the image URL as its source. Use this path when the images are uploaded via WordPress Media or located in a different folder as the HTML file you’re editing.
An absolute path syntax has the following structure:
img src=”your website’s URL/folder-name/image-file-name.jpg”
For this tutorial, we’ll be using the absolute path. In this case, the example img src for the image we uploaded in the images folder would look like this:
If uploading the image through WordPress media, follow these instructions to find the image source:
- From the WordPress dashboard, navigate to Media – Library.
- Click on the image you’re planning to add, then scroll the sidebar until you find the File URL field.
- Press the Copy URL to Clipboard button and simply paste it as the image source.
4. Set Width and Height
The width and height attributes specify the size of the image, usually in pixels. It’s essential to always set the image’s width and height. They determine how much space is needed for the image when the browser loads the web page.
If they are not set, the browser won’t be able to determine the image size and will use its original measurements. This can change the layout of the web page and cause errors when the browser loads the image.
Below is the syntax for the width attribute with an example measurement:
While the length attribute syntax looks like so:
Change 50px to the desired size, depending on where you’re planning to put the image and the design of the web page.
5. Add an Alt Attribute
The HTML alt attribute lets you add alternative text or information to the image. A descriptive text is essential when the image fails to load due to an error or slow connection. It also helps screen-readers explain the image to visually impaired visitors.
Other than that, alt text allows search engines to understand what the image is about during the crawling process. It increases the chance of the images appearing in image search results and helps your web page rank better.
Remember to be specific when describing the image and provide context to it. It’s also important to insert target keywords if possible.
An alt attribute syntax looks like this:
img alt=”insert text here”
6. Save Changes
Once you have input all the essential attributes and information to the HTML file, the image code will look something like this:
img src=»https://yoursite.com/wp-admin/images/website-logo.png» height=»50px» width=»50px» alt=”site’s logo”

Check the code once more before clicking the Update File button to save the changes. Then, reload the website to see if the changes are successful.
Bonus Step: Add a Link to the Image
When uploading original photos and images to your website, it’s important to add custom URLs or links to them. You don’t want other websites to take and use the images without permission, credit, or backlinks.
If you haven’t implemented measures to stop people from hotlinking your images yet, it’s possible to track the embedded files through the image URL. Paste the URL on Google Image Search, and it will display a list of sites using that same image.
Simply wrap the anchor element on the image code if you want to link an image in HTML. An anchor is a text that marks the start and the end of a hypertext link. It includes the opening tag a and the closing tag /a .
An image code with an anchor tag syntax will look like so:
a href=”www.yourwebsite.com/image-name.html”img src=”file-name.jpg” height=”50px” width=”50px” alt=”about image”/a
However, if you upload images via WordPress Media, there’s no need to create a custom URL. An image URL is automatically generated when the file is uploaded.
Conclusion
When customizing a website, you might encounter some limitations when adding images to a page. Content management systems and website themes usually provide fixed options for inserting images, which might not suit everyone’s needs.
To get around that, it’s necessary to add images using HTML. In this article, you’ve learned how to insert an image in HTML by following six steps. Here’s a recap:
- Upload the image file to a folder in the site’s public_html directory via the file manager provided by the web host or WordPress Media.
- Access the HTML file where you want to insert the image, and add the img tag.
- Include the img src attribute to define the source of the image.
- Add the width and height attributes to define how the browser should display the image.
- Insert the alt attribute to describe the image.
- Save the changes.
Adding a custom image URL for the files may also be necessary. However, links are already automatically generated for WordPress media images.
Go and give the methods described in this tutorial a try and, if you have further questions, leave them in the comment section below.
Linas started as a customer success agent and is now a full-stack web developer and Technical Team Lead at Hostinger. He is passionate about presenting people with top-notch technical solutions, but as much as he enjoys coding, he secretly dreams of becoming a rock star.
<img> HTML – Image Tag Tutorial

Kolade Chris

In HTML, you use the <img> tag to add images to websites. It is an inline and empty element, which means that it doesn’t start on a new line and doesn’t take a closing tag (unlike the paragraph ( <p> ) tag, for instance).
The <img> tag takes several attributes, of which src , height , width , and alt are the most important.
Knowing the ins and outs along with some best practices of the <img> tag is crucial because images can negatively affect your site’s load time and SEO.
So in this tutorial, we will take a look at how to add images to websites using the <img> tag, how to use its attributes, some best practices, and modern approaches to using <img> .
Basic HTML <img> Tag Syntax
Here’s the basic syntax for adding an <img> tag to your HTML:
Now let’s talk about its attributes and how they work.
HTML <img> Tag Attributes
The src Attribute
The src attribute signifies the image source. Without it, the tag itself wouldn’t be functional in the real world.
It indicates to the browser where to find the image. So it takes a relative path if the image is hosted locally, or an absolute URL if the image is hosted online.
The alt Attribute
The alt attribute specifies an alternative text for the image. This could be the text that shows during a network failure, for example. Or it could display something when the image source is wrongly specified, so users know what the image is about.
In the code snippet below, the image source is wrongly specified, showing you the role that the alt attribute plays:
This is the CSS that centers the image horizontally and vertically:
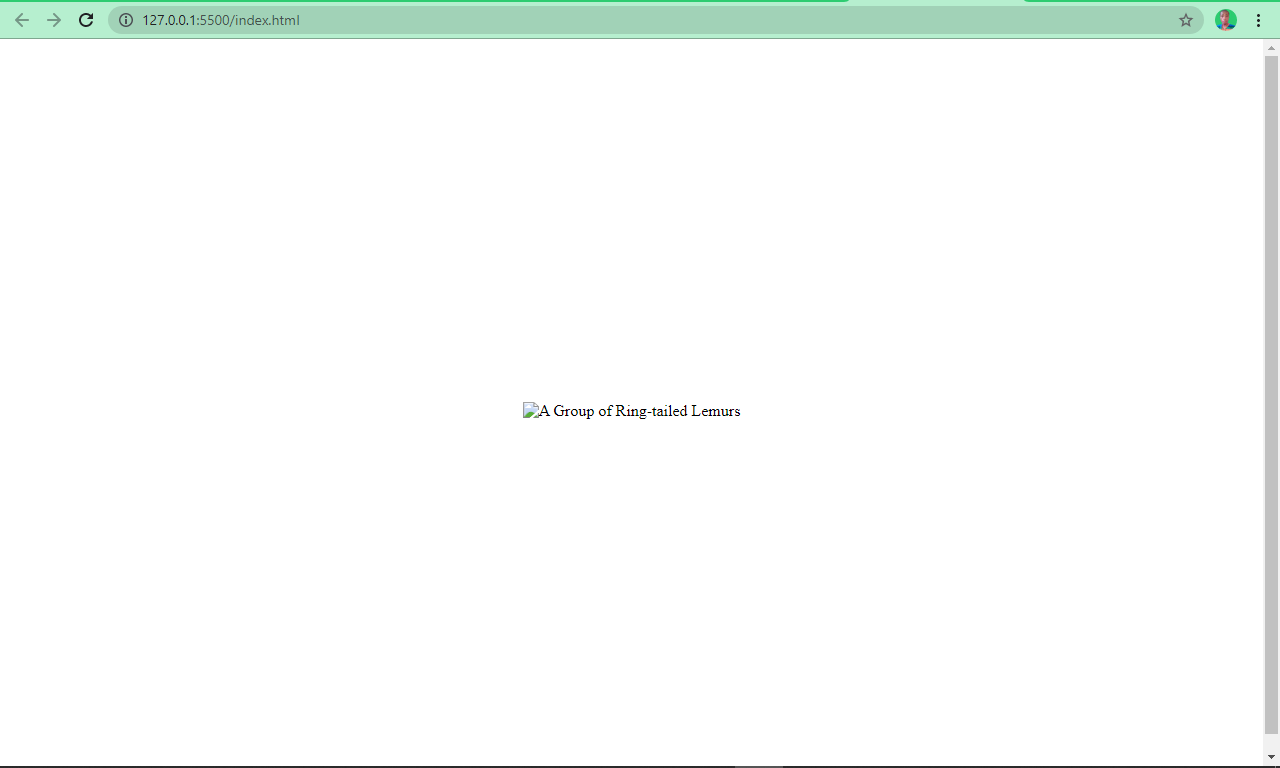
And it looks like this:
The alt attribute is very important for 2 other reasons:
- SEO: it indicates to web crawlers what the image is about
- Accessibility: it helps screen readers know what the image is about so they can report that to visually impaired people. In addition, it lets users with low bandwidth know what the image is about.
The width and height Attributes
You can use these attributes to specify a certain width and height for your images. With these attributes, you can resize the image down or up.
Ideally, though, you shouldn’t resize an image with these attributes. We’ll touch on this more under best practices.
HTML <img> Tag Best Practices
Do not resize an image with the width and height attributes.
This is a bad practice because it can make the image appear distorted and can affect the quality.
Instead, you can optimize the image to your desired dimensions with photo editing software such as Photoshop.
In the code snippet below, I specify a width and height for the image – a bad practice:
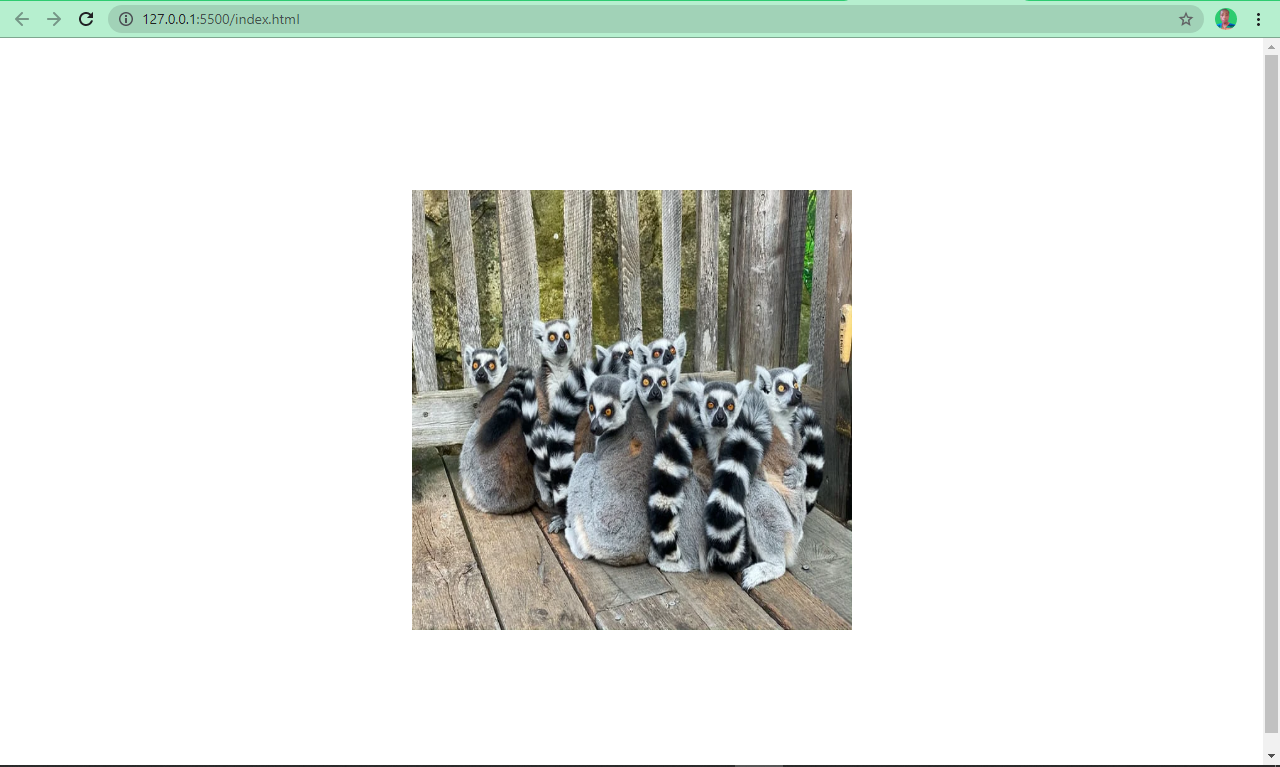
The image looks like this:
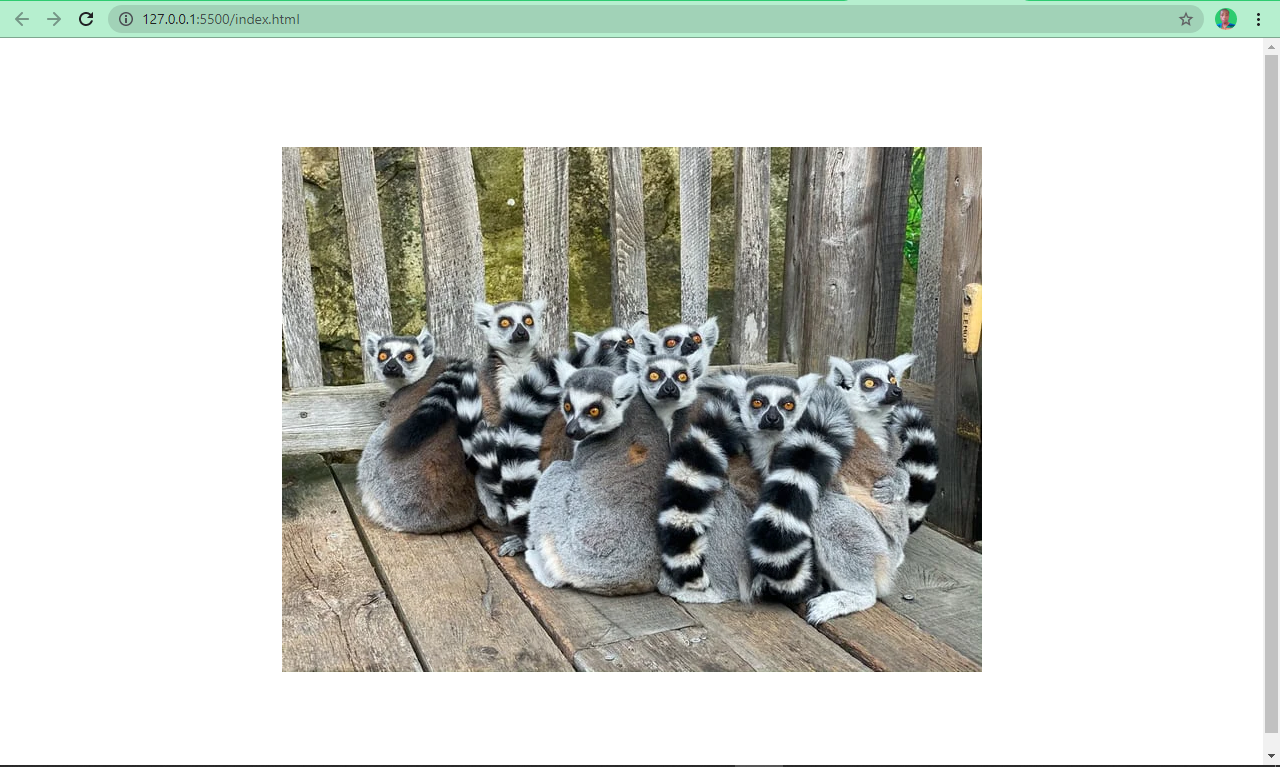
Without using the width and height attributes, the image looks like this:
Looks better? Yes!
Name Your Images Appropriately
Naming images appropriately can help search engines understand what the image is about. For example, name an image ring-tailed-lemurs.webp instead of photo-1580855733764-084b90737008.webp . The latter is not enough for search engine optimization (SEO).
Reduce Image File Size
The image’s file size is crucial when it comes to page speed. A smaller image size (that preserves the image’s quality) reduces load time while larger images take forever to load.
There are several tools and various software that can help you do this. Some examples are imageOptim, jStrip, and PNGGauntet. And if you’re concerned about SEO, you’ll want to look into these – as page speed is an important ranking factor.
Host Images with a CDN
Imagine if a website is hosted in the United States but a user in Africa wants to accessed it. Assets such as images and icons would have to travel from The States to Africa, which in turn slows download time.
Using a CDN (Content Delivery Network) will allow the website’s images to be cached across several locations around the world. The CDN can then serve them from locations closest to the user, improving load time and providing a better user experience.
Cloudflare is a popular CDN that a lot of developers use to host their images.
Use Descriptive Alternative Text
Using descriptive alternative text helps search engines understand what the image is about. But it doesn’t end there – the alt text must also be relevant to the image.
For example, use this:
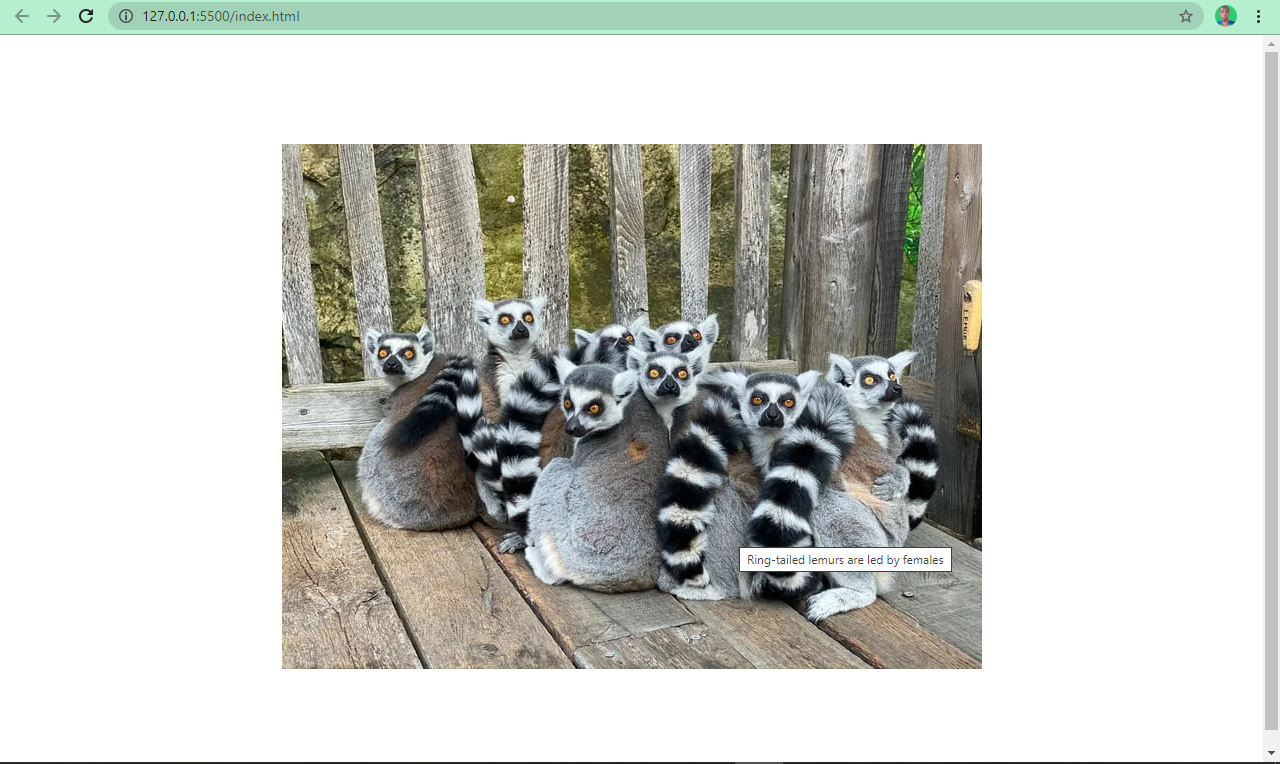
Use the title Attribute to Show Tooltips
Just like the alt attribute, you can use the title attribute to show additional information about the image. Browsers display this as a tooltip when the user hovers over the image.
<img> Tag Modern Approaches
There are various ways you can use the <img> tag that are a bit more up to date and modern. Let’s look at some of them now.
Lazy Load Images
Lazy loading is a newish «load what is needed» concept. With lazy loading, the image is loaded only when the user scrolls to its viewport.
This is in contrast to eager loading, which loads every image immediately after the page is rendered by the browser.
To apply lazy loading, add the loading attribute to the <img> tag and set the value to “lazy”.
Images are often quite high quality and large these days, but this can negatively impact user experience and SEO – hence the introduction of lazy loading.
Use the <figure> and <figcaption> Tags
Often, you might need to specify to the user the caption of an image. A lot of developers do this by placing a <p> tag right after the <img> .
This might not be wrong, but it defies best practices and does not associate the caption with the image, so search engines won’t understand what it is.
Its is clear that there is no association between the image and the caption in the above example.
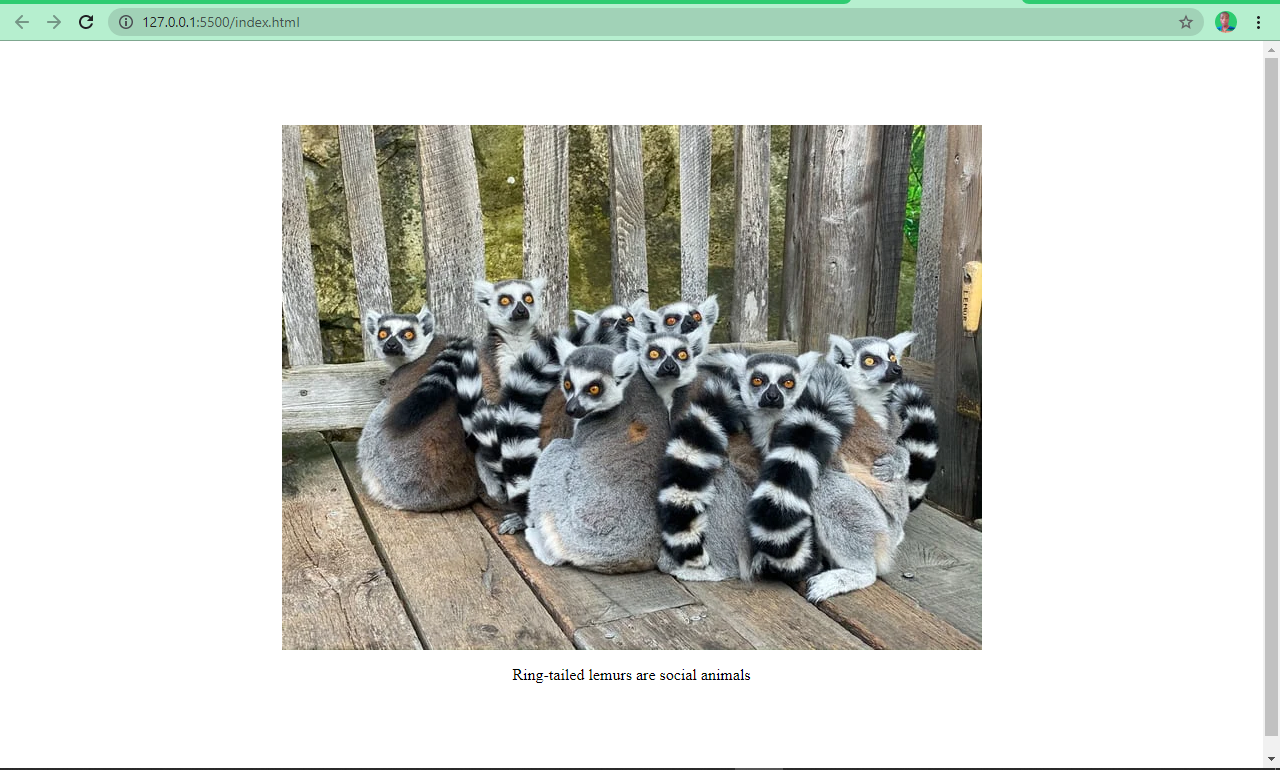
HTML5 introduced the <figure> and <figcaption> elements to help with this. You wrap the <img> tag inside a <figure> element, and you specify a caption within the <figcaption> element.
This helps search engines associate the caption with the image, leading to better performance and SEO.
The snippets of code below and the screenshots show you an image with and without the <figure> and <figcaption> elements:

You can see now that the image and the caption are beautifully associated.
Use the .webP Image Format
.webP is an image format created by Google. According to the creator, it’s an image format lower in size than its counterparts — JPG, JPEG, PNG, but with the same quality.
This format has been getting more and more widely accepted and is considered the nextgen image format for the web.
Conclusion
I hope this article helps you understand how the <img> tag works in HTML so you can use it properly in your projects. If you do so, it’ll help improve your user experience and SEO.
Изображения HTML, как вставить картинку
Изображения могут улучшить дизайн и внешний вид веб-страницы.
Пример
Пример
Пример
Синтаксис изображений в формате HTML
В HTML изображения определяются тегом <img> .
Тег <img> пуст, он содержит только атрибуты и не имеет закрывающего тега.
Атрибут src задает URL-адрес (веб-адрес) изображения:
Атрибут ALT
Атрибут alt предоставляет альтернативный текст для изображения, если пользователь по какой-либо причине не может его просмотреть (из-за медленного соединения, ошибки в атрибуте src или если пользователь использует средство чтения с экрана).
Значение атрибута alt должно описывать изображение:
Пример
Если обозреватель не может найти изображение, будет отображено значение атрибута alt :
Пример
Примечание: Атрибут alt является обязательным. Веб-страница не будет корректно проверяться без нее.
Размер изображения-ширина и высота
Для указания ширины и высоты изображения можно использовать атрибут style .
Пример
Кроме того, можно использовать атрибуты width и height :
Пример
Атрибуты width и height всегда определяют ширину и высоту изображения в пикселях.
Примечание: Всегда указывайте ширину и высоту изображения. Если ширина и высота не указаны, страница может мерцать во время загрузки изображения.
Ширина и высота, или стиль?
Атрибуты width , height и style действительны в HTML5.
Однако рекомендуется использовать атрибут style . Это предотвращает изменение размера изображений в таблицах стилей:
Пример
Изображения в другой папке
Если не указано, обозреватель ожидает найти изображение в той же папке, что и веб-страница.
Тем не менее, он является общим для хранения изображений в вложенной папке. Затем необходимо включить имя папки в атрибут src :
Пример
Изображения на другом сервере
Некоторые веб-узлы хранят свои изображения на серверах образов.
На самом деле, вы можете получить доступ к изображениям с любого веб-адреса в мире:
Пример
Дополнительные сведения о путях к файлам можно прочитать в разделе пути к файлам HTML.
Анимированные изображения
HTML позволяет анимированные GIF:
Пример
Изображение как ссылка
Чтобы использовать изображение в качестве ссылки, поместите тег <img> внутрь тега <a> :
Пример
Примечание: border:0; добавляется для предотвращения IE9 (и более ранних) от отображения границы вокруг изображения (когда изображение является ссылкой).
Плавающее изображение
Используйте свойство CSS float , чтобы изображение поплыло вправо или влево от текста:
Пример
<p><img src="smiley.gif" alt="Smiley face" style="float:right;width:42px;height:42px;">
The image will float to the right of the text.</p>
<p><img src="smiley.gif" alt="Smiley face" style="float:left;width:42px;height:42px;">
The image will float to the left of the text.</p>
Совет: Чтобы узнать больше о CSS float, прочитайте наш Справочник по CSS float.
Графические карты
Тег <map> определяет изображение-карту. Изображение-карта представляет собой изображение с щелчком области.
На картинке ниже, нажмите на компьютер, Телефон, или чашку кофе:

Пример
Атрибут name тега <map> связан с атрибутом usemap <img> и создает связь между изображением и картой.
Элемент <map> содержит несколько тегов <area> , определяющих области, на которые вы щелкнули на карте изображения.
Фоновое изображение
Чтобы добавить фоновое изображение в элемент HTML, используйте свойство CSS background-image :
Пример
Чтобы добавить фоновое изображение на веб-страницу, укажите свойство Background-Image элементу Body:
Примере
Чтобы добавить фоновое изображение для абзаца, укажите свойство Background-Image в элементе P:
Чтобы узнать больше о фоновых изображениях, изучите наши CSS Background Справочник.
Элемент <picture>
HTML5 ввел элемент <picture> , чтобы добавить больше гибкости при указании ресурсов изображения.
Элемент <picture> содержит ряд элементов <source>, каждый из которых ссылается на различные источники изображения. Таким образом, обозреватель может выбрать изображение, которое наилучшим образом соответствует текущему виду и/или устройству.
Каждый элемент <source> имеет атрибуты, описывающие, когда их изображение является наиболее подходящим.
Обозреватель будет использовать первый элемент <source> с совпадающими значениями атрибутов и игнорировать любые следующие элементы <source> .
Пример
Показать одно изображение, если окно обозревателя (видовой экран) не менее 650 пикселей, а другое изображение, если нет, но больше, чем 465 пикселей.
Примечание: Всегда указывайте элемент <img> в качестве последнего дочернего элемента элемента <picture> . Элемент <img> используется обозревателями, которые не поддерживают элемент <picture> , или если ни один из тегов <source> не соответствует.
Читатели экрана HTML
Программа чтения с экрана — это программное обеспечение, которое читает HTML-код, преобразует текст и позволяет пользователю прослушивать содержимое. Читатели экрана полезны для людей, которые слепы, слабовидящих или обучения инвалидов.
Справка
- Используйте элемент HTML <img> для определения изображения
- Используйте атрибут HTML src для определения URL-адреса изображения
- Используйте атрибут HTML alt для определения альтернативного текста для изображения, если он не может быть отображен
- Используйте атрибуты HTML width и height для определения размера изображения
- Используйте свойства CSS width и height для определения размера изображения (в качестве альтернативы)
- Используйте свойство CSS float , чтобы позволить изображению поплавок
- Используйте элемент HTML <map> для определения изображения-карты
- Используйте элемент HTML <area> для определения областей щелчка на карте изображения
- Используйте атрибут usemap элемента HTML <img> , чтобы указать на карту изображения
- Используйте элемент HTML <picture> для отображения различных изображений для различных устройств
Примечание: Загрузка изображений занимает время. Большие изображения могут замедлить вашу страницу. Используйте изображения тщательно.