Add WYSIWYG HTML Editor to Textarea on Your Website
The full form of WYSIWYG is What You See Is What You Get, it lets users see what the end result will look like when the document is printed. Basically, the WYSIWYG editor is driven by JavaScript which lets users enter the formatted text. The WYSIWYG editor is converting the formatted text to HTML when the web form is submitted to the server.
When you need to accept formatted text content or HTML content from the users on your website, using the WYSIWYG editor to textarea is required. There are many jQuery plugins are available for adding WYSIWYG editor to textarea. In this article, we’ll provide information about the best WYSIWYG HTML editor and show how to add an HTML editor to textarea on the web page.
TinyMCE is a web-based WYSIWYG editor that enables you to convert HTML textarea fields or other HTML elements to an editor. You can easily embed a rich text editor in the web page using the TinyMCE plugin. In this tutorial, we will show you the simple steps to add a TinyMCE editor to your website by writing minimal JavaScript Code.
Install TinyMCE Plugin
Before getting started to integrate the TinyMCE editor in HTML, download the latest version of the TinyMCE jQuery plugin from the official TinyMCE site. Extract it and placed it into the web application directory.
Note that: You don’t need to download the plugin file separately, all the required files exist in our source code package.
Include TinyMCE JS Library
Load the tinymce.min.js file from the TinyMCE plugin directory to include the TinyMCE library in HTML page.
Add WYSIWYG HTML Editor to Textarea
Now, we will show you how to attach the TinyMCE editor to an HTML element and convert textarea to a rich text HTML editor on the webpage.
HTML Code:
Define a Textarea input HTML where the WYSIWYG HTML Editor will be added.
JavaScript Code:
Initialize TinyMCE plugin: Use the tinymce.init() method to initialize the TinyMCE plugin and attach it to the HTML element on the webpage. The element needs to be specified in the selector option and passed as an object in tinymce.init() .
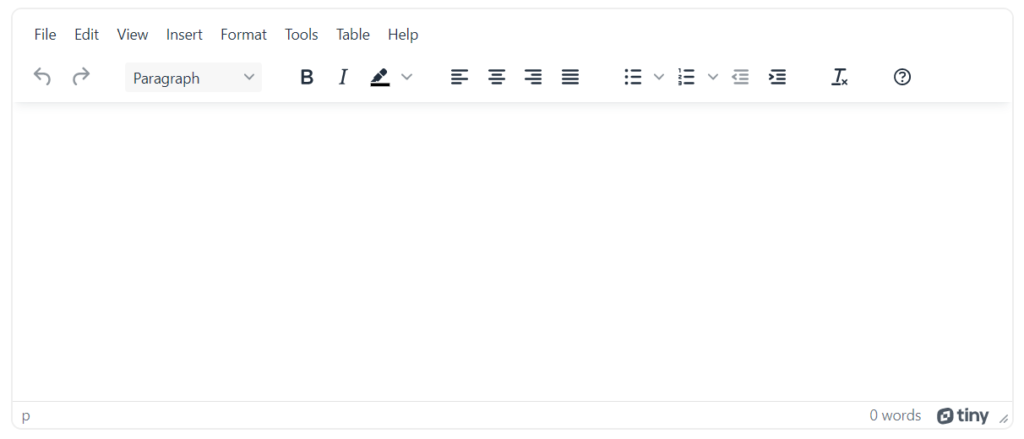
The following example code will replace the Textarea field with the TinyMCE editor instance using the selector #myTextarea . This code provides some default features of the TinyMCE editor for basic uses.
Now, the textarea element will replace with an HTML editor and display like the following screen.
Configuration Options
Some useful configuration options of the TinyMCE plugin are given below.
height:
Use the height option to set the height of the editor including the menu and toolbars.
width:
Use the width option to set the width of the editor.
placeholder:
If you want to set the placeholder text from JavaScript, use the placeholder option in tinymce.init() object.
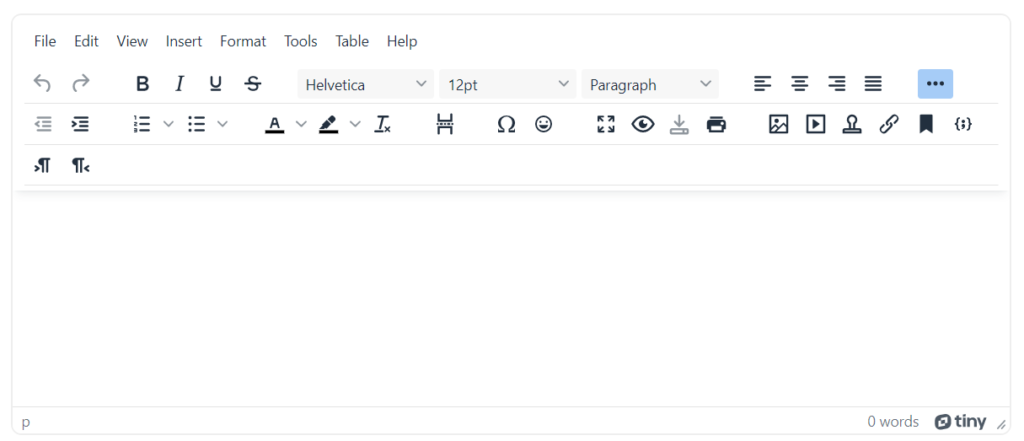
Full featured TinyMCE editor
The following example code displays all features available in TinyMCE for advanced uses.
Get TinyMCE Editor Content using PHP
Use < form > element to submit editor HTML content to the server-side script.
- Add name attribute in < textarea > element to submit input value to PHP script.
- TinyMCE editor content will be submitted to the form action URL as HTML.
In the server-side script ( submit.php ), you can get the HTML content from TinyMCE using the $_POST method in PHP.
Are you want to get implementation help, or modify or enhance the functionality of this script? Click Here to Submit Service Request
If you have any questions about this script, submit it to our QA community — Ask Question
HTML <textarea> Tag
The <textarea> tag defines a form field where user can input a multi-line text. Unlike the <input> tag, text wrapping inside <textarea> is allowed when the form is submitted.
A text area can have an unlimited number of characters. The text within this tag is rendered in a fixed-width font (usually Courier).
The <textarea> is used inside the <form> tag.
Syntax
The <textarea> tag comes in pairs. The content is written between the opening (<textarea>) and closing (</textarea>) tags.
Example of the HTML <textarea> tag:
Result
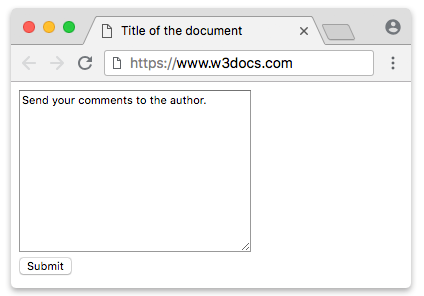
In this example we use the <textarea> to define the text field, the name attribute to assign a name to this field (“comment”), the rows attribute to set its height (12 symbols) and the cols attribute to set its width (35 symbols).
Styling the <textarea> element with CSS
The <textarea> tag is considered to be a replaced element, as it has some intrinsic dimensions. Styling this tag is relatively easy with regular CSS.
Its valid and invalid values can be highlighted with the :valid and :invalid pseudo-classes. Valid and invalid values of a <textarea> element can be highlighted using the :valid and :invalid pseudo-classes.
Example of the HTML <textarea> tag with CSS properties:
In this example we use CSS styles to customize the look of the text field.
Attributes
| Attribute | Value | Description |
|---|---|---|
| autocomplete | on off |
Specifies whether or not a text field should have autocomplete enabled. |
| autofocus | autofocus | Defines that a text area should automatically get focus when the page loads. |
| cols | number | Defines the visible width of a text area. Default value is 20 symbols. |
| dirname | textareaname.dir | Defines the text direction of the textarea when submitted. |
| disabled | disabled | Defines that a text area should be disabled. |
| form | form_id | Defines one or more forms the text area belongs to (via id). |
| maxlenght | number | Defines the maximum number of characters allowed in the text area. |
| minlength | number | Defines the minimum number of characters allowed in the text area. |
| name | text | Defines a name for a text area. |
| placeholder | text | Defines a short hint that describes the expected value of a text area. The hint is shown when the field is empty, and disappears when it gets focus. |
| readonly | readonly | Defines that a text area is read-only. |
| required | required | Defines that a text area must be filled out before the form is sent. |
| rows | number | Defines a visible number of rows in a text area. Default value is 2. |
| spellcheck | true false default |
Specifies whether the text in the <textarea> tag should be spell checked by the underlying browser/OS. |
| wrap | Defines how the text in a text area is to be wrapped when the form is submitted. | |
| soft | -(default value) the text is sent without any additional line breaks inserted. | |
| hard | -the browser automatically inserts line breaks so that each line has no more than the width of the control; for this to take effect the cols attribute must be specified. |
The <textarea> tag also supports the Global Attributes and the Event Attributes.
Тег <textarea> HTML текстовая область, многострочное поле ввода
![]()
![]()
![]()
![]()
![]()
Тег <textarea> в HTML используется для создания многострочного поля для ввода, другими словами, текстовой области.
Текстовое поле для ввода, созданное с помощью тега <textarea> , не имеет ограничений по количеству вводимых символов.
Размеры textarea HTML регулируются с помощью атрибутов rows и cols . Атрибут тега <textarea> rows регулирует высоту области, задавая количество строк, выводимых на экран без прокрутки (скроллинга). Атрибут тега <textarea> cols регулирует ширину текстовой области, рассчитывается в пикселях, как средняя ширина символа, умноженная на значение атрибута.
По умолчанию изменять размер textarea можно растягивая текстовую область за правый нижний край. Если нужно сделать <textarea> фиксированного размера, следует использовать CSS-правило resize: none; . Это отключит возможность растягивать область ввода.
Тег <textarea> HTML является элементом формы. Подробно о создании форм описано в статье: Все про формы и поля в HTML. Создание и работа с формами.
Синтаксис
Примеры использования <textarea> в HTML коде
HTML код текстовой области <textarea>
<textarea> с фиксированным размером (no resize textarea)
По умолчанию пользователь может изменять размер текстовой области <textarea> (растягивать область ввода за край).
Для того, чтобы запретить изменение размера <textarea> используйте CSS свойство resize . Значение none поставит запрет на изменение размеров текстовой области, как ширины, так и высоты.
Если необходимо, чтобы у textarea была фиксированная ширина, установите значение у CSS свойства resize в vertical, при этом высоту области можно будет изменить. Если нужно иметь возможность изменять ширину <textarea> при фиксированной высоте, используйте значения horizontal.
Отображение в браузере:
HTML код <textarea> с фиксированной шириной и высотой
Поддержка браузерами
| Тег | |||||
| <textarea> | Да | Да | Да | Да | Да |
Атрибуты тега textarea
Логический атрибут. Если указан, при загрузке документа фокус будет переведен на текстовую область.
Определяет ширину текстовой области. Ширина области рассчитывается в пикселях как ширина символа, умноженная на значение этого атрибута. Значение приблизительно равняется количеству символов моноширинного шрифта, которые должны занимать полную строку в текстовой области.
Логический атрибут. Если указан, делает текстовую область неактивной.
Данные текстовой области, отмеченной этим атрибутом, не будут переданы на сервер при отправке формы. Также отключает возможность ввода текста в текстовую область.
Указывает на форму, к которой относится текстовая область. Используется, если <textarea> находится вне HTML кода формы.
Если текстовая область находится внутри тега <form>, то использовать атрибут form не нужно, текстовая область по умолчанию привязана к форме, внутри которой находится.
Определяет максимальное количество символов, которые пользователь может ввести в текстовую область. По умолчанию объем текста в текстовой области не ограничен.
Имя текстовой области. Используется при передаче данных формы на сервер. Значение (текст) текстовой области будет передано в переменной, имеющей имя, указанное в этом атрибуте.
Текст, который будет отображаться внутри текстовой области, когда она не заполнена текстом. Обычно это описание того, что должен ввести пользователь, либо пример заполнения.
Логический атрибут. Если указан, пользователь не сможет изменить значение (текст) в текстовой области. Используется для создания текстовых областей, доступных только для чтения.
Логический атрибут. Если указан, текстовая область будет определена как обязательная для заполнения. Форма не будет отправлена на сервер, если текстовая область не будет заполнена.
Заполнение контролируется браузером. При попытке отправить форму с незаполненной обязательной текстовой областью, браузеры обычно выводят на экран ошибку заполнения.
Определяет высоту текстовой области. В качестве значения необходимо указать количество строк, которые должны быть видны без прокрутки (скроллинга).
Определяет правила переноса строк:
Значение hard: символы переноса строки будут добавлены в конце каждой строки в текстовой области. Таким образом, введенный текст из текстовой области переданный на сервер будет иметь ширину не больше, чем ширина <textarea>. Для использования этого значения необходимо указать атрибут cols.
Значение soft: символы переноса ставятся там, где их ставил пользователь. Таким образом текст из текстовой области, переданный на сервер в дальнейшем сможет растягиваться под ширину тега-контейнера. Значение по умолчанию.
Поле textarea, вставка html? — Общие вопросы веб разработки
JBZoo — это надстройка над некогда популярном CCK Joomla Zoo, который позволял реализовать магазин на данном компоненте. Изначально надстройка была коммерческой, после того, как автор (Денис Сметанников) прекратил поддержку, он стал бесплатным.
Создание плагинов с учётом новой структуры Joomla 4.
С момента выхода Joomla 4 прошло уже почти 2 года, поэтому слово «новой» будем понимать в контексте сравнения с Joomla 3. В Joomla 4 «под капотом» произошло немало изменений. Кодовая база движка постепенно отбрасывает legacy (старый код), встретившись с которым мы могли бы как на машине времени вернуться в середину 2000-х или начало 2010-х ��
Virtuemart v.4.0.20
Один из старейших компонентов для создания интернет-магазина 3 мая 2023г. получил новую версию. Заявлена совместимость с Joomla 4.3, PHP8.2 и MySQL 8. Исправлен ряд ошибок, связанных с постепенной адаптацией компонента кJoomla 4.